Soaring
Gliding or soaring is a recreational activity and competitive air sport in which pilots fly unpowered aircraft known as gliders or sailplanes using naturally occurring currents of rising air in the atmosphere to remain airborne.[1]
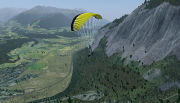
In a broader sense, this article covers how to enjoy flights with gliders, motorgliders, hanggliders and paragliders by understanding how to plan unpowered flights, how to set up weather conditions for reasonable lift, how to launch gliders and how to make use of lifting airmasses.
Note on units: In many areas of the world, glider pilots use metric units and instruments show altitude in meters (m), airspeed in kilometers per hour (km/h), and wind speed as well as climb/sink rate in meters per second (m/s) as recommended by ICAO - we will in this article follow this convention.
Basics of glider flight
Any aircraft in flight at constant airspeed must balance thrust against drag and lift against gravity. Usually, the engine supplies the required energy. A glider instead uses its altitude (i.e. potential energy) to overcome drag and gravity. Thus, from any given altitude, a glider can only get so far. The glide ratio determines how far a glider gets for losing altitude. A high-performance plane with a glide ratio of 1:50 for instance can cover 50 m for every meter altitude lost.
The glide ratio isn't a constant however but depends on the airspeed. Each glider has an optimum airspeed at which the glide ratio is maximal (usually between 90 and 120 km/h). The glider can fly faster, but this increases the sinkrate. The glider can also fly slower, and this decreases the sinkrate, but since the airspeed also drops, the glide ratio can still deviate from the optimum. In still air, a glider must thus be flown at its best glide ratio for best performance.
Influence of wind
Wind has a crucial influence on the glide ratio that can be achieved. Usually a glider pilot is interested if he will reach a certain location on the ground (a good airfield to land, a mountain pass to cross a range,...). Suppose we have 1000 m altitude to spare and an optimum glide ratio of 1:40 at 110 km/h - this means we would reach an airfield 40 km away. However, with a 40 km/h headwind our groundspeed will just be 70 km/h and thus the effective glide ratio will be reduced by 70/110 to about 1:25 even maintaining the optimum airspeed.
This can have dramatic consequences for hanggliders with much lower optimum speeds - a hangglider flying at 35 km/h against a 35 km/h headwind remains stationary in the air and has an effective glide ratio of zero - in order to get anywhere, it must fly faster. For slow gliders, it is crucial to factor in the wind direction and strength into any decision.
In general, in order to have the best effective glide ratio, one must fly somewhat above optimum speed against the wind and below optimum speed with the wind.
Influence of lift and sink
The vertical motion of air has likewise a pronounced influence on the effective glide ratio. Assume we're in an airmass rising at 0.5 m/s flying again at 110 km/h. This increases the glide ratio by 1/0.5 to 1:80 because we're actually sinking only 0.5 m/s. However, we can do better - suppose we reduce the airspeed to 70 km/h to get the sinkrate to 0.7 m/s. In still air, this would correspond to a glide ratio of 1:36, i.e. not worth doing. But since the air rises, efectively we sink only 0.2 m/s now, and so the glide ratio goes to about 1:125. The opposite is true in sinking air.
Choosing the right airspeed
The rules derived from these examples are: Fly slower than optimum speed in rising air, faster than optimum speed in sinking air. If your minimum sinkrate is equal to the lift, you do not lose any energy at all. Consequently, in any airmass providing net lift, the glider is flown at the velocity of minimum sinkrate (which is always lower than the optimum speed) to maximize the altitude gain. This makes it also easier to fly tight turns in small thermals.
In practice, wind and lift tend to be variable and one doesn't calculate the glide ratio but just estimates based on experience.
To help in choosing the right speed, you can also read up on the McCready theory[2]. He also developed a ring, often attached to the VSI. When adjusting the ring mark to the anticipated lift rate of the next thermal (a good starting point is the average lift rate of the current thermal), the VSI needle will point roughly to the speed you should aim for between thermals (but don't hunt the needle!). Leave the current thermal already at good speed - don't speed up when you are leaving, but before, in order to cross the zone with downdraft around the thermal quickly.
Learn the theory
For those wishing to gain a more in-depth knowledge of correct glider operation, the FAA glider handbook makes good reading.
Also there is plenty of material on the internet, and also YouTube has some good videos:
- YouTube: Choosing the right glider speed
- German extensive HowTo's and Tips&Tricks from a seasoned real glider pilot
- Thermaling technique
Tips for beginners
To be able to stay in the air longer, it is crucial, that you have a basic understanding of the theory. After that, practice, practice, practice. Start to try to fly near the cloud caps (let you be towed, or use Ctrl+U to get a quick cheaty lift), so its more easy: the thermals usually are wasp tailled. You can also try to master ridge-lift first, its much more easy to fly, but needs decent wind (>10kt) perpendicular to slopes.
- It is important that you can control the glider effectively: fly exact and don't let the bank or speed drift away. Also be sure to do coordinated flight to minimize energy loss from drag. Don't go overboard with bank angles.
- Be sure to control your speed, always fly around the "best glide speed" mark. Especially watch out for underspeed, which will be costly in lost altitude and also prevents you from utilizing that thermal. Remember that if you bank, you need to add a bit speed.
- Learn to fly exact circles and control your ground position by temporarily altering your bank angle a bit. Try to keep the airspeed stable around the best-glide-mark.
- Fly gently, don't make aprupt control inputs.
- If you hit a thermal and then bank into a circle, it is a common thing that you will get into the downsink region around the updrift. Don't be afraid: keep flying the circle, it will lead back to the core. Then try to bank a bit less to reposition yourself better into the core. If you get in the area with decreasing lift, make the circle slightly narrower. Rinse and repeat :)
- When loosing the thermal it may help to try again a little more downwind. Note that not every thermal is usable (like in reality; but don't give up too soon).
- Thermals are easier to stay in the higher you get.
- What also helped me alot was using the insim moving Map, which showed me my flight path. They helped in remembering where the thermal was spotted, and also to centre it with my circles.
- The VSI is late in reporting the lift (as in reality), so monitoring the property
/environment/local-weather-lift-fpscan also help (ridge lift is reported in/environment/ridge-lift-fps).
Sources of lift
There are three main sources of lift for gliders: Thermals, ridge lift and wave lift. All of them are (in principle) available in FlightGear, when using the advanced weather system (previously called "local weather").
Thermals
Convective clouds form when the sun heats up a thin layer of air in contact with the ground. As warm air is lighter than cold air, eventually the situation becomes unstable and pockets of air start rising, creating a column of lifting air, a thermal. If this column reaches above the condensation level, a Cumulus cap cloud forms, marking its position.
The likelihood for development of thermals depend on the moisture of the ground, its type and also the angle of the sunshine. For example, lakes or rivers are not so good, but rock and concrete is. A mountain slope has a higher chance for developing a thermal if it is hit directly from the Sun, and not so if it’s on the shady side.
Glider pilots can enter the thermals and circle in them to gain altitude. A good thermal might have a radius of about 1000 m and provide 1 - 3 m/s of lift. However, where there is lift, there is also sink: thermals are usually surrounded by a region of sinking airmass, and the convective upward motion of air also creates turbulence.
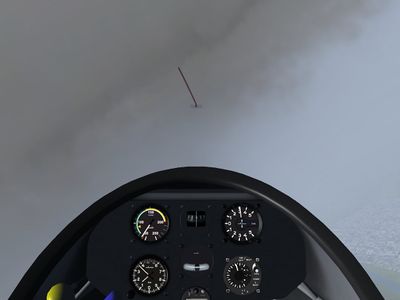
While the lift column reaches deep inside the cap cloud, a glider can usually only climb to the cloudbase. Entering the cap cloud is quite dangerous, as the visibility deteriorates rapidly and orientation can be completely lost. The Cumulonimbus clouds characteristic for thunderstorms have very powerful updrafts of air, but for obvious reasons (strong turbulence, possibility of hail and icing,...) they should not be used by glider pilots.
Ridge lift
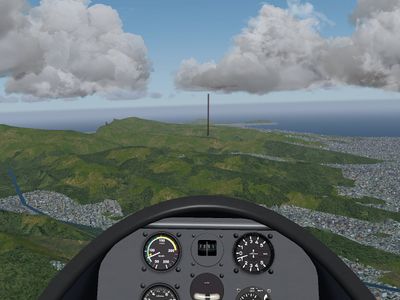
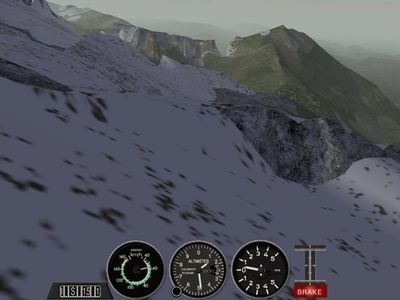
When a sufficiently strong wind meets rising terrain, the airstream is forced upward and thus a lift component is created at the windward slopes of a range. However, behind the ridge, the airstream turns down into the valley, and thus at the leeward side of a range a strong sink appears. For sufficient ridge lift conditions, winds stronger than 5 m/s (10 kt; 18.5 km/h) need to be perpendicular to a slope. Stronger winds create stronger lift, but make flight planning in general more difficult (see above).
The region of lift is usually very close to the ground, so one has to stay dangerously close to possibly rugged terrain in order to get good ridge lift conditions.
Wave lift
When, in strong winds, the air descends behind a mountain range, it can 'bounce back' from the ground and form a pattern of rising and falling waves in the lee of a mountain range. These waves provide lift with almost no turbulence which can reach very high - more than 10 km altitude have been reached in waves.
Typically waves form well behind a significant mountain range in winds of 15 m/s (30 kt; 55 km/h) and above when the wind is roughly perpendicular to the mountain range. At the leading edge of the wave is a very turbulent 'rotor' region, and lense-shaped Lenticularis clouds indicate often the top region of the wave (the region of maximum lift is found before the Lenticularis).
Wave lift is difficult to find, but easy to fly - the region of lift is huge, there is no turbulence and one can simply hold the glider almost stationary against the wind while rising far above terrain and clouds.
Setting up a glider flight
With a glider, it is a good idea to have a firm idea what you want to do before starting FlightGear, since you have to make some choices in the commandline. It's also not a bad idea to think about what type of lift you want to utilize - ridge lift is only available in mountain regions, you need to be able to reach it from your starting location and thermal lift is strongest in the afternoon and not available over open water.
Choosing the glider
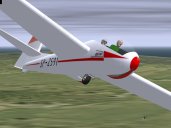
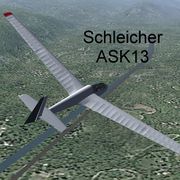
FlightGear has several glider models
and in addition with the Scheibe "Falke" 25b also a motorglider.
See also the Category:Glider for a full list.
Starting location
Not every glider can be started from a runway, so you may need to add extra statements to the commandline. One possibility is to start the glider in the air by adding altitude and airspeed like
--altitude=3000 --vc=70 --heading=180
to the commandline (this will initialize the glider at 3000 ft (914 m) with a velocity of 70 kt (36 m/s; 129 km/h) with a heading of 180 degrees - note that the altitude is absolute altitude rather than above ground level and adjust as needed!).
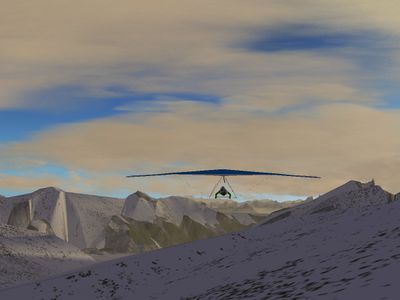
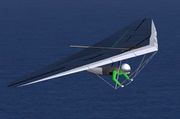
Hanggliders and paragliders launch from mountains by running down a steep mountain slope till enough lift is generated. This means that you need to scout the terrain before and find a good loaction. A typical starting position may then be defined like
--lon=-122.4942234 --lat=37.6980674 --heading=270 –on-ground
(this is close to Half Moon Bay in the default scenery around San Francisco).
Launch methods
Most available gliders do not need to be initialized in the air but can be launched as in reality by either winch or aerotow.
Winch launches
Winch launches are currently available with the Bocian, the ASK21, the ASK-13 and the DG-101G. With the Bocian, it is possible to click in the scenery on a point where you would like to place a winch; with both, you can use Ctrl-w to place a winch directly in front of the glider. Press w to start the launch (in the ASK you need to hold it down) and, once at the top of the tow, release the cable with W. Refer to the aircraft-specific help for details.
Aerotows
For aerotows, two types are possible - AI or human pilot (via multiplayer).
- For a multiplayer aerotow, you obviously need to arrange a tow with a human pilot - full instructions are available at doing aerotow over the net.
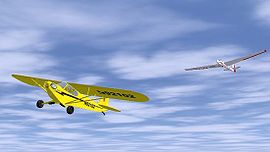
- To get an AI aerotow, select either the ASK, Bocian or DG-101G, choose KRHV as your airport and select the KRHV_towing_demo in the "Scenario" list box in FGRun. You should see a J3 Cub wobble its way towards you from a nearby taxiway, and pause close to your aircraft. Press control-o to hook on to it, and hold tight... the O key releases the cable.
- The DG-101G implements a "third" type for aerotowing: a drag robot which can aerotow you from any airport without loading a scenario first. To setup the drag robot press D. Then use the key sequenze as for AI aerotowing to attach to the drag robot. Then press d to start the robot.
- The ASK-21 also has a drag-robot, accessible from the ASK aircraft menu.
- You can also use the Aerotow_Everywhere_Add-on
From the ground
The JSBSim version of the airwaveXtreme is launched from the ground by running down a steep slope. Refer to the aircraft documentation and help for details.
In air
Gliders that use the UIUC FDM are not (yet) capable of winch or aerotow launches. For such gliders it is necessary to start in the air.
Setting the weather
The next step is to configure weather. In reality, you would take a look at the weather and decide what is possible to do with a glider. In Flightgear, it is possible to choose the weather based on what you would like to do. Dependent on the weather system used, the steps are a bit different. In general, it is recommended to use Advanced Weather for glider flights.
Basic Weather
| Note You should consider the more realistic Advanced Weather engine instead |
In Basic Weather, thermals and sinks can be used but must be defined individually in a thermal scenario file. To see how this is done it would be best to examine the file called $FG ROOT/AI/thermal_demo.xml, which sets up 11 thermals and 6 sinks around San Francisco Bay. To learn more about AI scenarios in general, see the related article called AI Systems. Note that the thermals and sinks exist independently of FlightGear's Basic Weather system, so it's possible to have cloud layers that don't match your thermal heights or thermals which do not move with the wind. To prevent this you may want to manually set the cloud layers to match your thermals and match AI-defined winds with the winds set in the weather. Also, cap clouds do not match the default clouds in shape. If you'd like to discover the Austrian alpine region with AI thermals, you might want to read Pinzgauer Spaziergang.
Ridge lift works well with Basic Weather. Typically winds should be chosen to be perpendicular to a slope between 10–20 kt (5–10 m/s; 18–37 km/h) for good ridge lift conditions. When using the wind layer interface, it is important to set not only the aloft winds but also the boundary layer winds to this value. This makes for a nasty landing, as the winds even close to touchdown in the valleys blow at full strength, but since ridge lift is only strong close to the terrain, a glider using ridge lift is almost always in the boundary layer zone, and if the boundary layer winds are reduced to get the landing conditions in the valleys right, ridge lift on the slopes collapses as well.
Advanced Weather
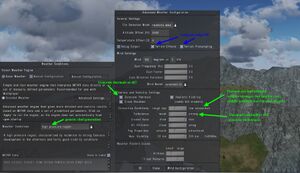
The Advanced weather[3] has the option to automatically generate thermals along with the convective clouds[4]. For this, the checkbox generate thermals has to be selected. The sliders in Convective conditions in the Advanced Settings dialog modifies the behaviour of the thermals: for 'low convection' it will generate thermals with a large radius and only modest lift, for 'rough day' it will generate strong lift in narrow thermals. To add realism, move the Turbolence slider in the stronger direction, but this will make finding and using the thermals harder.
If you want it easy, dial turbulence to zero and the convective slider somewhere in the middle - very broad thermals are too weak to carry most gliders, but strong narrow thermals are really hard to find and fly, so you want them somewhat broad for starters.[5]
The convective cloud system generates rather realistic results:
- the number of thermals is maximal around noon and the strength of thermals is maximal in the early afternoon
- the probability to find a thermal depends on terrain - elevated points and surfaces which heat up well are more likely to generate thermals than ice or open water
- not every cloud has a thermal associated, not every thermal is usable
- sometimes blue thermals (i.e. without a cap cloud) are created
As a result, you will almost never find good soaring conditions early in the morning or strong thermals over the sea. Any 'high pressure' weather situation will generate at least some amount of convective clouds, low pressure situations usually do not.
In order to set up ridge lift, select wind model 'constant' and set the wind perpendicular to the slope with 10–20 kt (5–10 m/s; 18–37 km/h). Advanced Weather computes the boundary layer dynamically dependent on terrain, as a result there will be a realistic reduction of windspeed for a landing in the valley but not at mountain slopes. You need to activate the terrain effects and also the terrain presampling to activate generation of ridge lift.
Advanced Weather has a working model for wave lift, but so far no way of automatically detecting the conditions which lead to a lee wave, thus in order to use it, some Nasal coding is required.
Related content
References
|
