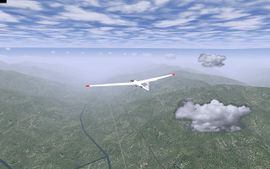
Pinzgauer Spaziergang

The Pinzgauer Spaziergang is a famous cross country flight located in the austrian alpine region of the Pinzgau valley, just north of the main ridge of the alps with austrians highest peaks of the Grossglockner and the Grossvenediger group.
Thanks to the AI subsystem, FlightGear pilots now may enjoy the impressive nature of the alps using one of the gliders provided for FlightGear.
Preflight preparation
Current situation
Due to the massive improvements to the weather engine of flightgear, pilots should be able to do the "Pinzgauer Spaziergang" without having to set up an AI scenario, but just by using the "Detailed Weather" engine. Before starting your flight, open Environment -> Weather, pick "Detailed Weather" and select Weather Conditions: "High Pressure Region" (for the best chance to find thermals). Also make sure Terrain Effects and Generate Thermals are checked in the "Advanced Settings". Inside that dialog you may also want to set Airmass and Cloud Patterns to large so it is easier to get a good thermal lift. When finished, make sure to click ok on both dialogs, if the weather (clouds) change after the dialog closed it should be correct ;).
What you need
| Note This section is probably outdated and everything you need should be available in FlightGear already! |
You need:
- the scenery for the alpine region. Almost all is covered by the e010n40-chunk. Get it here.
- a glider of course - snatch your favorite from the FlightGear website. The ASK21 or the Bocian are perfect ones.
- the magic file that gives you some thermals over some prominent mountain peaks can be found here: File:Pinzgauer.xml
Copy the file pinzgauer.xml into you $FG ROOT/AI subdirectory.
Finally you have to tell FlightGear to use the new file. Open $FG ROOT/preferences.xml with your favorite text editor and look for the
<ai>
	<enabled type="bool">true</enabled>
	<!-- scenario>nimitz_demo</scenario -->
	... some other stuff here ...
</ai>
append a line with the content
<scenario>pinzgauer</scenario>
after the line <enabled type="bool"> so it looks like this
<ai>
	<enabled type="bool">true</enabled>
	<scenario>pinzgauer</scenario>
	<!-- scenario>nimitz_demo</scenario -->
	... some other stuff here ...
</ai>
and save your work.
Ready to have some fun!
A perfect airport for the entry into this area is Zell am See. Start your FlightGear with
fgfs --airport=LOWZ --runway=26 --aircraft=ask21 --timeofday=noon
When sitting in your cockpit, hitting Ctrl-w on your keyboard places a winch ahead of your glider. When read for takeoff, hit and hold 'w' on the keyboard and the winch tows you quickly into the air. Shift-w releases you from the wire. Quickly turn right and look for the nearest ridge, just west of the lake. This is your entry thermal leading you to the Schmittenhoehe. You have to get pretty close to the ridge to enter it. When you are close to the cloudbase, continue the next thermal over the Schmittenhoehe peak.
Enroute
After your entry at the Schmittenhoehe (west of the lake), follow the chain of mountain peaks to the west. You should be able to enter the next thermal easily. Be careful when at the Paß Thurn summit. Don't leave your lift to early, because your next chance is far away (but it can be done). You can go west until you reach Gerlos and the Krimml waterfalls. From here on, look for you next thermal in the south - your entry to the Großvenediger followed by Großglockner in the east. Here you might go up to more than 11,000ft and you might want to wear your oxygen mask there. Finish your route at the Kitzsteinhorn and make your final landing at Zell am See airport again.
A one minute HOWTO for flying thermals
This is a very short introduction to gaining altitude using a thermal lift. More details can be found in the Soaring Article.
Search the sky! Thermals are usually invisible but sometimes they have a nice cumulus cloud as a cap. Fly with the speed of best glide straight to that cloud and check your vertical speed indicator (VSI). When you hit the thermal lift, your VSI slowly moves from negative values to zero and probably indicates climb. Maintain your airspeed and monitor the VSI. Fly straight, as long as the rate of climb (ROC) increases. When the ROC decreases, make a shallow turn to the left or right (your choice) keeping a constant airspeed and monitor the VSI while turning.
- When your ROC decreases, turn steeper (higher bank angle).
- When your ROC increases, turn shallower (lower bank angle).
- When your ROC is constant, maintain your bank angle.
You might slow down to the airspeed of the minimum sink rate.
Once you can't gain any more altitude or reach the cloud base, proceed to the next cloud.
- Enjoy -