Boeing 777
| Note The 777 is undergoing restructuring with new JSBSim flight dynamics. |
 | |
|---|---|
 | |
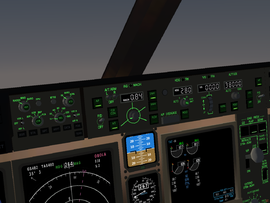
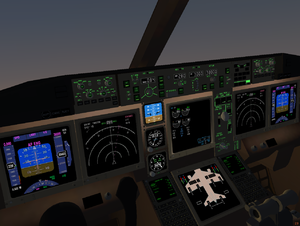 The 3D cockpit of a 777-300 | |
| Type | Airliner |
| Configuration | Wide-body aircraft, Monoplane aircraft, Low wing aircraft, Retractable gear aircraft, Tricycle landing gear aircraft |
| Propulsion | Twinjet (Jet aircraft, Twin-engine aircraft) |
| Manufacturer | Boeing |
| Author(s) |
|
| FDM | YASim |
| --aircraft= |
777-200 777-200-fo 777-200ER 777-200ER-fo 777-200F 777-200F-fo 777-200LR 777-200LR-fo 777-300 777-300-fo 777-300ER |
| Status | Production |
| FDM |
|
| Systems |
|
| Cockpit |
|
| Model |
|
| Development | |
| Website |
|
| Repository |
|
| Download |
|
| Forum |
|
| License | GPLv2+ |
|
| |
| There is a category with screenshots of the Boeing 777. |
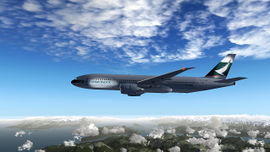
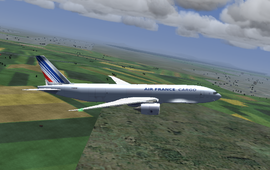
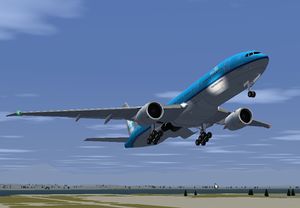
The Boeing 777 is a long-range, wide-body twin-engine airliner built by Boeing Commercial Airplanes. The world's largest twinjet and commonly referred to as the "Triple Seven", it can carry between 283 and 368 passengers in a three-class configuration and has a range from 5,235 to 9,450 nautical miles (9,695 to 17,500 km). Distinguishing features of the 777 include the six wheels on each main landing gear, its circular fuselage cross section, the largest diameter turbofan engines of any aircraft, the pronounced "neck" aft of the flight deck, and the blade-like tail cone.
As of February 2026, more than 60 customers have placed orders for 2,457 777s across all variants, of which 1,781 have been delivered. The main competitors were initially the Airbus A340 and the MD-11, and since 2015 the Airbus A350. First-generation 777-200 variants are to be supplanted by Boeing 787.
Systems
The Boeing 777 is an advanced fly-by-wire aircraft, and the systems are moderately complicated.
Brief Overview
The video below is a brief introduction of the Boeing 777's new system of the new Seattle Project working with FlightGear Version 3.2 Test Release.
From the forum :
"For anyone who might be interested, our discord server for 777 development is now open to everyone - both developers and flyers! You're welcomed to discuss everything about this craft in this server, including posting screenshots, reporting bugs, posting suggestions for development, or contributing directly to this plane here." Discord Channel
Controls
The Boeing 777 series are fly-by-wire aircraft and like all Boeing aircraft have yokes. The signals are sent electrically to the hydraulic actuators which move the control surfaces. The fly-by-wire system has been simulated within the limitations of YAsim.
- Roll Control Law with attitude holding and bank angle protection
- C*U Pitch Law and Trim Ref function with Flare Mode and Autotrim
- Rudder Ratio, Yaw Damper and Turn Coordinator
Engines
| Note The engines listed are not simulated properly, which will be corrected in the JSBSim rework |
| This section is a stub. You can help the wiki by expanding it. |
| Model | 777-200 | 777-200ER | 777-200LR | 777F | 777-300 | 777-300ER |
|---|---|---|---|---|---|---|
| Engines (Turbofans) | GE90-76B or PW4077 or RR Trent 877 | GE90-90B or PW4090 or RR Trent 895 | GE90-110B1 | GE90-110B1 | PW4090 or RR Trent 892 | GE90-115B |
| Max Thrust | 81,070 lbf (361 kN) | 94,000 lbf (418 kN) | 110,760 lbf (493 kN) | 110,760 lbf (493 kN) | 91,450lbf (407 kN) | 115,300 lbf (513 kN) |
Electrical
The Boeing 777 has a basic electrical system implemented. There are plans to improve it in 2026. Enable the battery to gain access to the flight displays. Use ground power or the APU to have sufficient power to start the engines. The engines provide electrical power in flight. The APU can provide backup electrical power in case of an engine failure. The Ram Air Turbine (RAT) has yet to be implemented.
Hydraulic
The current Boeing 777 hydraulics systems have been implemented to a high level. Most functions are working as per the Flight Crew Operational Manual (FCOM) as of December 2025.
The hydraulic systems can (and must) be fully controlled via the 3D cockpit switches on the overhead panel. As in real life, the following behavior should be expected:
- The Left hydraulic system is powered by a primary engine driven pump (EDP) and supplemented by an on-demand Electric motor pump (ACMP). It operates the wing & tail flight controls (ailerons, elevators, rudder) and left thrust reverser operation.
- The Right system is similary powered by by a primary EDP from the right engine and supplemented by a demand ACMP. It operates flight controls, right thrust reverser operation and the normal brakes system.
- The Center system is powered by two primary ACMP's and supplemented by two demand air turbine-driven pumps (ADP). It operates the landing gear actuation, nose & main gear steering, flaps & slats, flight controls and the reserve brake system.
The lower EICAS (Multi Functional Display - MFD) provides a good insight in the hydraulics systems and is fully animated. Enable it by pressing the "HYD" switch on the right hand EFIS panel on the glareshield.
When no engine is running, the APU (if running) and/or Ground Power (if connected and activated) can provide power to the electric pumps. When a single source of electric power is available, some pumps will be load shed.
During normal operation, the primary pumps of each system will be running and providing hydraulic power to the different systems. When a higher demand is requested (e.g. landing gear retraction, flaps or reverser deployment...) the demand pump(s) of the associated system might come on and provide additional pressure to the system. When the aircraft detects a takeoff (thrust setting >=40% N1), the pumps will enter takeoff mode: next to the primary pumps, all demand pumps will be turned on to anticipate high demand for gear and flaps retraction and/or high brake and reverser demand in the case of a rejected takeoff. Similarly, when the plane detects a final approach (gear down or flaps >= 15), the hydraulics systems will enter Landing mode: both engine demand pumps and the C1 demand pump will be switched on until the plane has landed and two minutes have passed or hydraulics demand (flaps retraction...) is low, whichever is later. It will also deactivate in case of a go around and be armed again when detecting a potential landing again.
Three hydraulic fluid reservoirs are providing fluid to the respective hydraulics systems. If the user wants, they can enable fluid depletion in the 777 > "Aircraft settings" menu. If fluid depletion is enabled, a slow amount of fluid will disappear whenever the system is under high demand and/or certain conditions are met, to simulate small leaks by wear and tear as in real life. The fluid levels can be checked in the 777 > "Ground services" menu and can be replenished again when the aircraft is on the ground. On the MFD a scale of the current fluid is shown for each reservoir. Be aware that this shows the fluid level compared to the standpipe level that provides fluid to some of the pumps. If the scale reads 0.00, there might still be fluid left in the system that is available to some of the pumps (left/right system: engine demand pumps, center system: primary C1 pump), to provide emergency power to the system. When actively running a pump for more than 10 seconds without fluid, it will overheat and become inoperational. When fluid is replenished, it can be reactivated after it has cooled down again (in real operations replenishing fluid is done during the preflight ground procedures, and an empty reservoir will always trigger an extended revision to check for leaks). Hydraulic leaks can be simulated by setting the property "consumables/hydraulics/reservoir[x]/Leak" to anything above 0. The higher the number and the more pressure in the system, the faster the hydraulic fluid will leak. These properties will be activated automatically when a fault system is implemented on the aircraft at a later time.
During normal operations, always make sure that the right hydraulics system is pressured first and depressured last before enabling the center system hydraulic pumps, otherwise hydraulic fluid might transfer between the right and center system via the brakes, resulting in a potential overfill or unwanted drainage of any of these systems. When no hydraulic pressure is available in the right (normal brakes) or center (alternate/reserve brakes) system, the brake accumulator will provide brake pressure when it is sufficiently charged. Its charge can be seen below the PFD of the captain. When parking the plane for an extended period of time, the brake accumulator will very slowly lose pressure to maintain the parking brakes. After about 8-10 hours, the brakes might release because the pressure has dropped too low. When the parking brake is released because of lack of accumulator pressure, this will not be clear to the flight crew: the "Parking Brake Set" indication will remain lit but the brakes will not be operational. If storing the plane for a long time, make sure to use wheel chocks to secure the plane. The brake accumulator pressure is stored between FlightGear sessions if the "store fuel levels" option has been ticked in the 777 > "Aircraft settings" menu.
The hydraulic system will be further improved after a few other systems have been improved, these improvements are still in planning as of December 2025:
- Ram Air Turbine is not implemented yet: backbones are in place, but actual RAT model and deployment need further development (requires new 3D model, requires improved electrical system)
- Implement main gear passive steering during pushback (current implementation uses active steering)
- Implement fault system to the 777, so random leaks/issues can occur
- Implement auto control failure (requires fault system)
- Improve air driven pumps simulation (requires functional Air System)
- Improve pump overheat simulation (requires fault system)
- Improve primary C2 pump load shedding (requires improved electrical system)
- Improve L/R shutoff valve operation (requires fault + engine fire system)
- Apply hydraulic power to individual flight control surfaces and model flight dynamics effects (requires new 3D model and FDM)
Autopilot
The 777 autopilot can be fully controlled using the 3D cockpit switches. You can use the mouse scroll wheel on all cockpit knobs. An Autoland system is available.
You can also use the 777's built-in autopilot tutorial to learn about the different switches.
Autopilot controls, from left to right, top to bottom:
- A/P - Autopilot engage/disengage button
- F/D - Flight director (the pink lines that show up on your attitude indicator)
- A/T ARM (L/R) - Arm/disarm autothrottle for left/right engines. Must be armed to enable autothrottle for the respective engine.
- CLB CON - Continue climbing using the vertical speed the plane was at, when this setting was first engaged
- A/T - Autothrottle engage/disengage button. Like the real 777, the autothrottle is independent from the main autopilot, so autothrottle also also works when the autopilot is disabled (Note: this was different for FG2.0 and earlier!).
- IAS <> MACH - Switch between IAS speed mode and Mach number speed mode
- IAS window - Set your desired IAS speed or Mach speed here
- LNAV - Tells the autopilot to follow the Route Manager settings laterally (control the heading).
- VNAV - Same as LNAV, except vertically (control the altitude). The autopilot will climb to the flight level you set in the Route Manager (in the input field or at a specified waypoint).
- FLCH - Flight Level Change, set the altitude and press FLCH to climb or descent to designated flight level. Thrust is set to a fixed value, speed is controled with pitch.
- A/P DISENGAGE - Dedicated autopilot disengage button (click twice). It serves as an easy to reach "emergency disengage" button.
- HDG <> TRK - Switch between heading bug and course track
- HDG window - Set your desired heading or course track here.
- HDG select - Engage/disengage heading or course hold mode and maintain SELECTED heading (FG2.5.0 and newer).
- Bank limits (AUTO/5/10/15/20/25) - Define banking limits for turning, i.e. 5 for gentle turns at cruising altitude, 25 for good maneuverability at lower speeds; auto will be fine in most cases.
- HOLD - Engage/disengage heading or course hold mode and maintain CURRENT aircraft heading.
- V/S <> FPA - Switch between Vertical Speed and Flight Path Angle
- V/S window - Set your desired Vertical Speed or Flight Path Angle
- VS/FPA - Engage/disengage Vertical Speed/Flight Path Angle hold mode
- ALTITUDE window - Set your desired altitude here
- Altitude selection (AUTO/1000) - Switch between automatic incrementing (AUTO) and incrementing by the thousands (1000)- this setting only helps when selecting the altitude via the knobs, this won't apply if using the Autopilot Settings dialog
- HOLD - Engage/disengage altitude hold mode
- LOC - Track LOCALIZER, flying by the heading given by the localizer
- APP - Arm the ILS localizer and glideslope (laterally and vertically). Any current AP mode (HDG and ALTITUDE HOLD) remains active, until the NAV receiver captures the localizer or glideslope.
- A/P - Engage/disengage autopilot
- F/D - Flight director
How to use
- Default mode of when autopilot engage
HDG HOLD mode: Maintain heading when engage. ATT mode: If bank angle exceeds 5deg when engaged, keep that bank angle. (there's bug, will be fixed) VS mode: using vs value when engaged. If FD mode was engaged, mode is inherited.
- Mode
Lateral control
HDG HOLD: keep set heading. HDG SEL: follow the heading set on counter. Change value when HDG HOLD or press SEL button when other mode such as VNAV, LOC mode. Once reach to setting heading change to HDG HOLD. LNAV: follow the activated route. LOC: when arming, keep previous mode and then capture LOCALIZER, follow that course.
Vertical control
VS : keep targeted vertical speed to reach selected altitude. FLCH : keep fixed climb thrust or flight idle and control the pitch to maintain speed thus vertical speed varies. VNAV : Follow the FMS target altitude and thrust. ALT HOLD : When you press HOLD button, keep altitude when button pressed. Counter value does not change. Once VS of FLCH reaches targeted altitude, it holds that altitude.
Flight Management Computer
| This section is a stub. You can help the wiki by expanding it. |
Aircraft Help
The developers recommend using the in-sim checklists (accessible via the menu: Help > Aircraft Checklists) instead of the checklist below.
Start Procedure (Fast)
- Go to Equipment > Fuel and Payload and set your fuel amounts and make sure your tanks are selected
- Right-click twice to get into the move view mode and look at the overhead panel then click all the electrical buttons until they are all lit up
- Hold the 's' button for 10 seconds or until the engines are running at idle.
Start Procedure (Extended Version)
0. remember to
a) set the correct QNH (pressure) when below transition level
b) set the fuel to a proper level in each tank (so you dont mess with the sliders when airborne)
c) you can use ctrl+c to reveal all usable buttons and knobs
1. prepare systems
a) turn on the battery, taxi lights and panel lights if you need it (button is placed)
to tle left, left from the BCN light button.
b) turn the APU knob clockwise (the knob next to the APU GEN), wait 1min for it to start-up
b1) set APU knob to the middle position
c) turn on all 4 hydraulic pumps/valves. 2 in the center are for the flaps and spoilers (both
pumps MUST be enabled), the same with the other two, they are for landing gear. the
buttons are between electrical and fuel part of the panel.
2. prepare engines
a) start fuel pumps. there are 6: 2 for each tank. to enable fuel flow from a tank, you have
to enable BOTH (just like with the hydraulics) pumps.
b) enable the engine starters (you can turn on both one after another, but thats not really realistic)
c) after N1 reach ~45, engine should be running on its own, self sustaining, fuel cutoff valves open
automatically. eicas shows up a message that L(R) ENG STARTER is on.
d) turn on both engine generators
e), turn off APU (knob position 1) and BAT
Landing
From the Forum thanks to Tdammers
Landing speeds: with a large airliner like the 777, the landing reference speed (Vref) depends hugely on weight. Between operating empty and max landing weight, there is a 50% difference, and clearly a landing speed that works well for a 140-ton aircraft is going to have you drop out of the sky when you weigh 210 tons; and conversely, the right landing weight at 210 tons is going to make your float or nosewheel-strike when you're landing empty.
So what you need to do is find a resource for those landing speeds. Real-life pilots get a preliminary calculation from their dispatchers, who use dedicated software to calculate all the landing parameters; but it can also be done using tables from the FCOM, and in most modern airliners, the FMS can do the calculation as well.
The same goes for the takeoff. Here, the crucial speeds are V1, Vr, and V2. V1 is the "safe rejection speed": until V1 is reached, the aircraft can be brought to a full stop safely within the available remaining takeoff distance; once you're faster than V1, rejecting the takeoff may lead to an accident, and you are committed to the takeoff except for very severe problems (like losing both engines, loss of control, or a fire). Vr is the "rotation speed": this is the ideal speed to pull up the nose to initiate the liftoff. V2 is the "safe single-engine climb speed": after liftoff, your goal is to attain this speed ASAP, so that loss of one engine does not compromise the aircraft's ability to meet the minimum climb requirements for this takeoff.
In the FG 777, all these speeds are calculated automatically, and displayed on the PFD speed tape; Vref is shown as REF.
For the landing: Use the initial approach segment to slow down to your initial approach speed; typically, this would be your "minimum clean" speed (the slowest speed you can safely fly with no flaps deployed), something around 200-220 knots usually. The approach procedure will have you descend to a suitable ILS intercept altitude, typically about 2000-3000 ft AGL. Make sure you have the correct ILS frequency set, that the ground spoilers are armed, and that you have selected a suitable autobrake setting. As you turn onto your intercept heading, slow down to your initial approach speed (160-180 knots should work fine), and set flaps accordingly, and arm APP on the autopilot. Watch the aircraft intercept first the localizer, and then the glideslope. Once established on the glideslope, deploy landing gear. As you approach the outer marker (5 miles out), slow down to final approach speed (usually Vref + 10 knots), and deploy landing flaps.
Now you have the choice between autoland and landing manually.
Autoland
For autoland, I believe all you have to do is watch the aircraft fly itself down to minimums, flare, align, retard, and touch down. Once on the ground, select reversers and set reverse thrust, verify that the ground spoilers and brakes are deploying, and use rudder to maintain centerline. At 60 knots, retard the throttles to reverse idle, and take over manual braking (the autobrakes should automatically disengage as soon as you touch the brakes). At 40 knots ground speed, disable thrust reversers; you may now take a high-speed exit while slowing down to taxi speed, or slow down further on the runway before taking a sharp exit. While vacating the runway, retract flaps, and switch off landing lights.
Manual Landing
For a manual landing, the procedure is the same, except you disengage autopilot and autothrottle at some point during the approach - 1000 ft AGL is a good moment, but you can do it earlier if you want. Use pitch to control speed, throttle to control descent rate; keep airspeed at Vref + 10, and sink rate such that you stay on the ILS glideslope. Once you have a good visual of the runway, transition to a visual approach, using PAPI lights as your descent reference (two red, two white means you're on the glideslope). You should cross the runway threshold some 100-200 ft AGL, with some residual thrust on the engines (say 40-60% or so), a slight nose-up attitude, and a sink rate around 1000 fpm or so. At a suitable altitude (typically 50-100 ft AGL), retard the throttles; use pitch to arrest the descent - down to zero if you want a "butter" landing, or keep a little bit of sink rate if you want a safer, firmer landing. The aircraft should now just sink into the runway, main landing gear first. From here, the procedure is the same as above.
TakeOff
From the Forum thanks to Tdammers
For the takeoff: Configure autobrake (RTO, "rejected takeoff"), flaps and trim, line up, arm A/T (the flip switches next to the speed selection on the glare-shield panel), and rotate the speed selector to a suitable departure speed - at least V2, but typically something like 200-250 knots. This is to make sure that when the autothrottle kicks in, it keeps setting takeoff thrust at least until you have achieved V2. Set a suitable lateral mode on the autopilot: LNAV if you're flying an FMS flight plan, otherwise probably HDG. Revv up the engines to 40%, wait until they stabilize, then set takeoff thrust. At the "rotate" callout, pitch up; watch the vertical speed, as soon as it's consistently positive for 1 second, gear up. Maintain center-line and an attitude that keeps you speeding up to V2. Engage autopilot a couple hundred feet AGL, or later if you prefer hand-flying the aircraft a bit longer.
Fuel Controls
Jettisonning fuel
Select the "Fuel" display on the MFD to monitor the fuel jettisoning. Use the in-sim checklists (found under "Non-normal in Air") to configure the fuel jettison system. In Auto mode, fuel will be jettisoned until the plane is weighing less than the maximum landing weight (MLW). When pulling the "Fuel to remain" selector, the pilot can increase or decrease the amount of fuel to remain. This can be handy to e.g. further reduce the amount of fuel to minimize the risk of a fire during a crash landing, or keep more fuel available to be able to reach the diversion airport. The jettison system will always ensure a minimum amount of fuel remains available in the left and right wing tanks, so jettisoning until the tanks are empty is not possible.
Crossfeed
In case of a fuel imbalance (e.g. due to a leak or extensive use of one engine), the "cross feed" system can be used to equalize the fuel levels in both wing tanks. Fuel cannot be crossfed from/to the center fuel tank. Before attempting to crossfeed fuel, always ensure that no leak is present in the affected tank to prevent an unwanted loss of extra fuel (see e.g. Air Transat flight 236[1]). To start the crossfeed process, select the "Fuel" display on the MFD to monitor fuel levels. Use the in-sim checklists (found under "Non-normal in Air") to configure fuel transfer between left and right fuel tanks. Enable both crossfeed switches on the overhead panel. Once they are fully open (green on the Fuel page on the MFD), disable the fuel pumps of the tank with the least amount of fuel. The associated engine will now use fuel from the other fuel tank. Once the levels are close to equal, enable the fuel pumps of the disabled tank again and once they are running, close the crossfeed valves. Keep monitoring fuel levels to detect a potential fuel leak and divert to an alternate airport if insufficient fuel remains to reach the destination safely.
Autopilot
Bank Angle
a) position 0 activates the automatic bank limiter (limit based on airspeed)
b) any other position sets a constant bank limit, 5, 10, 15, 20, 25
c) for speeds below V2+15 use 15 degree bank limit
During normal operations, this switch should be kept in its "auto" setting.
Tiller
Important notice: as of FlightGear 2.4.0, the 777 has tiller steering, just like the real aircraft where the pedals only turn the nose wheel by a few degrees - to achieve optimal precision during takeoffs and landings. Use the tiller (777-200ER > Tiller Steering) dialog to steer during taxiing.
- You can also connect a separate joystick axis to the tiller control - just like in the real aircraft, where there is a separate control wheel.
- Finally, you can also disable the separate tiller control and revert to the unrealistic behaviour of using pedals only to completely control the nose wheel (see 777-200ER > Tiller Steering dialog).
Walker
Walker implementation
Tutorials
Flights
VATSIM Cross the pond 2020 - preflight, takeoff and climbout
Outdated/Not Maintained
You can see a guide on how to fly this plane for Flightgear 2.0 at Boeing 777 Tutorial: Version 2.0..
Liveries
All FlightGear liveries are available at FlightGear Liveries.
Variants
Boeing 777-200
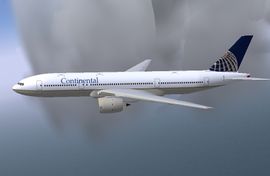
The Boeing 777-200 (772A) was the initial A-market model of the Boeing 777. The first customer delivery was to United Airlines in May 1995. It is available with a maximum take-off weight (MTOW) from 505,000 to 545,000 pounds (229 to 247 tonnes) and range capability between 3,780 and 5,235 nautical miles (7,000 to 9,695 km).
Boeing 777-200LR
The Boeing 777-200LR ("LR" for Longer Range), a variant of the Boeing 777, became the world's longest-range commercial airliner when it entered service in 2006. Boeing named this aircraft the Worldliner, highlighting its ability to connect almost any two airports in the world. It holds the world record for the longest nonstop flight by a commercial airliner, and has a maximum range of 9,380 nautical miles (17,370 km). The 777.200LR was intended for ultra-long-haul routes such as Los Angeles to Singapore.[2]
Boeing 777-300
The -300 features a 33.3 ft (10.1 m) fuselage stretch over the baseline -200, allowing seating for up to 550 passengers in a single class high-density configuration. The 777-300ER ("ER" for Extended Range) is the B-market version of the -300. It features raked and extended wingtips, a new main landing gear, reinforced nose gear, and extra fuel tanks.
Boeing 777-F
The 777 Freighter (777F) is an all-cargo version of the twinjet, and shares features with the -200LR; these include its airframe, engines, and fuel capacity. With a maximum payload of 226,000 lb (103,000 kg), cargo capacity is similar to the 243,000 lb (110,000 kg) of the 747-200F. The freighter has a range of 4,900 nmi (9,070 km) at maximum payload, although greater range is possible if less cargo weight is carried. As the aircraft promises improved operating economics compared to existing freighters, airlines have targeted the 777F as a replacement for older freighters including the 747-200F and MD-11F. The 777 for Flightgear is based on 777-200 developed by Justin Smithies, Syd Adams.
External links
- Boeing 777 aircraft systems simulator (not too relevant, X-Plane only support, last updated in 2007, AND: written in LISP!!!)
- Airline Pilots 777 forum Detailled info on procedures, manuals and documents
- Smart cockpît Boeing 777 manuals and procedures
- Flight manual
| |||||||||||
