Flying the Shuttle - Launch
| Note You will have the opportunity in this topic to learn the basics to Launch a Space Shuttle and what happens physically to the Orbiter during the Ascent Phase
Once you feel confident, you can move on more advanced tutorial with more steps to do with Very Close to real operations and Checklists |
| Note This article refers to the SpaceShuttle in the FGAddon repository. |
| Space Shuttle |
|---|
| Main article |
| Technical |
| Checklists |
| Nominal Operations |
| Nominal Operations Advanced Tutorials |
| Intact Aborts |
| The other space shuttle |
This mission phase can directly be started using --aircraft=SpaceShuttle-launch on the command line.
What are we trying to do?
The launch phase of the Shuttle lasts from ignition of the main engines until the shuttle reaches orbit. This is a surprisingly short time, all in all just about eight minutes. During this time, an enormous amount of propellant is spent accelerating the orbiter to Mach 26 at an altitude of 150 km. The complete launch stack consists of the orbiter, mounted on the external tank (ET) which supplies propellant for the Space Shuttle Main Engines (SSMEs), assisted by two solid rocket boosters (SRBs).
The first two minutes of the flight pass through the atmosphere, during this time the SRBs provide most of the thrust. The SRBs can not be throttled, once on, they burn till they are spent. At an altitude of about 150,000 ft the SRBs are disconnected and the shuttle accelerates only using the main engines fed from the ET which is disconnected just before reaching orbit.
The tasks are hence:
- Bring the orbiter safely through the atmosphere
- Steer towards a launch course corresponding to an orbit with the desired inclination
- Accelerate to orbital speed outside the atmosphere
Some theory
While Earth's gravitational force decreases with distance, the Shuttle doesn't reach even remotely high enough to experience weightlessness due to this effect. Rather, for low orbit spaceflight, weightlessness can be understood as gravitational force being balanced by centrifugal pseudo-force. The upshot is that in order to reach a stable orbit, the Shuttle needs to be moving fast - about 27.000 ft/sec, roughly 8 km/sec or Mach 27.
This velocity is something almost never referred to in aerodynamical flight - an inertial velocity with respect to the center of Earth. Since the planet rotates, this is not the same as a groundspeed. In fact, the planet rotates eastward fairly fast. The precise speed depends on latitude and is highest at the equator where it reaches a value of over 450 m/sec or 1450 ft/sec. The groundtrack of an orbit (i.e. the projection of the path of a spacecraft onto a globe) does hence not close even if the orbit itself is closed and is distorted by this effect.
The important implication is that launching close to the equator due east, we gain 1450 ft/s of inertial speed for free, whereas launching due west from the same location, we have to accelerate an extra 1450 ft/s. For this reason, launch courses always point eastward.
The next thing to consider is the inclination (i.e. under which angle will the desired orbit intersect with the equator). Trying to wrap a circle (the orbit) around a sphere (Earth), it is fairly easy to convince oneself that the only way to reach a zero inclination orbit is to launch from the equator and that no launch site at higher or lower latitude can lead to an inclination lower than that latitude in a straight launch.
If we aim to rendezvous with an object in orbit, we need to launch into the same orbital plane, and (short of long computations, see the linked website) that usually means launching into the same inclination when the target passes over the launch site. This is the reason we need control over the launch course.
Now, on an airless world, we could reach orbit a few hundered meters above the highest surface feature and get the same balance of centrifugal and gravitational force - there is no bonus for altitude. However, on Earth we can not reach Mach 27 at sea level - there is no material capable of withstanding the stresses and no thruster powerful enough to overcome the friction. Hence the acceleration to orbital speed needs to be above the atmosphere.
For this reason, a launch trajectory always has two parts. The first part is near-vertical and lifts the spacecraft out of the atmosphere, the second part is near horizontal and accelerates to orbital speed.
From an energetic perspective, the vertical part is wasteful and should be over as soon as possible. Imagine you have one g of thrust - it just allows you to overcome gravity and hover, but once your propellant is spent, you will fall down. This is the reason the SRBs are part of the launch stack - they generate a lot of thrust to get the shuttle out of the atmosphere as quickly as possible. It follows that it is wasteful if you want to reach an orbit of 600 km altitude to fly upwards to 600 km altitude and accelerate to orbital speed there - it costs far less energy to fly to 150 km altitude, accelerate to orbital speed there and later raise the orbit so that no energy is wasted fighting against gravity. For this reason, good launch tracks go out of the atmosphere but then stay low above it (of course, the spacecraft should not drop back into the atmosphere...).
As the acceleration depends both on thrust and the remaining mass of the stack (once the propellant is spent, the acceleration grows), the shuttle is initially highly maneuverable as long as the SRBs are burning, then thrust reduces dramatically and slowly grows towards the end as the ET depletes. Vertical launch trajectory management hence utilizes the enormous upward push of the SRBs to bridge the time till the main engine acceleration is strong enough to stabilize the trajectory vertically. In other words, after SRB separation vertical speed is initially high, then reduces due to gravity to even below zero (i.e. the tranjectory falls slightly) till the SSME and the centrifugal force push it up again, at which point it should be managed to near zero once injecting into orbit.
Finally, somewhat counter-intuitively, the spacecraft gains most of its kinetic energy in the last stages of the ascent. This can be understood in many different ways. One is to realize that initially propellant only has chemical energy, whereas in the late stages it has been accelerated, and so it has in addition kinetic energy which is released once it is used.
The implication is that during the first part of a launch, it is not necessary to keep the launch course very precisely, the inclination is mainly fixed in the last part of the launch. It is thus sufficient to correct launch course outside the atmosphere if the initial course is wrong.
How it feels in FG
The launch dynamics in FG is, if we neglect the noise and the shaking of the real thing (which is described as 'driving down a rough gravel road without any suspension, a shaking so hard the eyes cannot properly focus' as long as the SRBs are burning) probably fairly realistic.
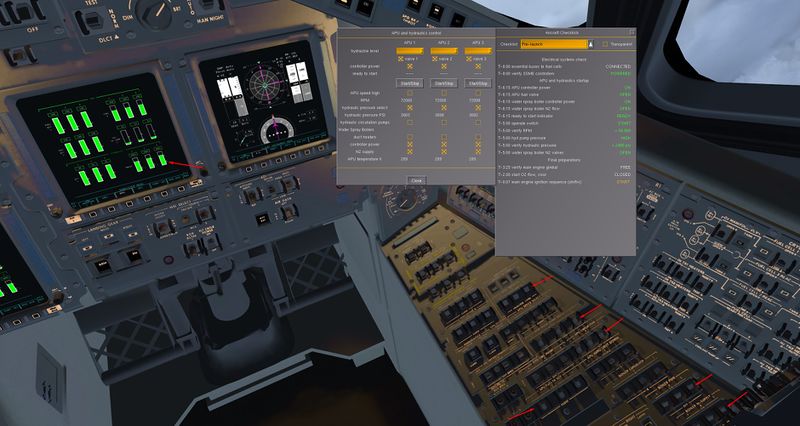
As part of the pre-launch preparations, the APU and hydraulics subsystems has to be started to enable thrust vector control of the main engines during ascent. If this is not done, the Shuttle will cease to be maneuverable after SRB separation. The procedure is outlined in a checklist:
As soon as the throttle is moved to 65%, the main engines ignite. This is the starting signal for SRB ignition, the SRBs will follow three seconds later, and once they burn, there is no going back. The SRBs can not be throttled and will burn till exhausted, and they have enough thrust to lift the stack even if the main engine is switched off.
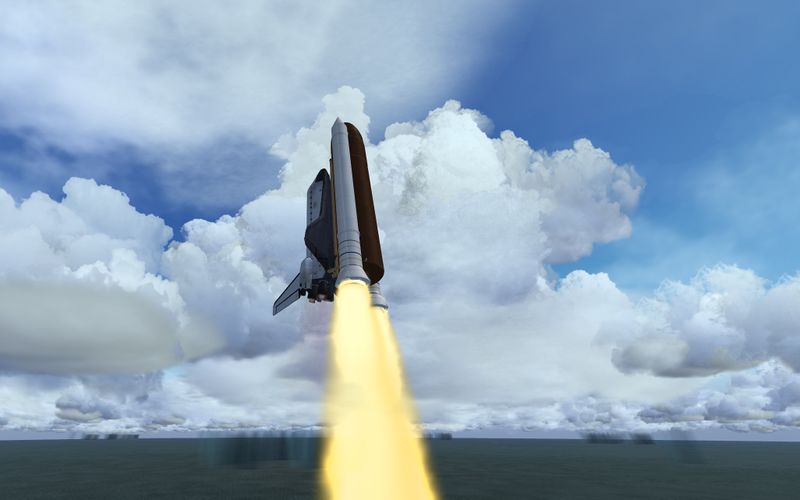
Upon ascent, the shuttle is controlled by thrust vectoring of both the SRBs and the SSME. About ten seconds after liftoff while the dynamical pressure is still small, roll the shuttle to the desired launch course, then pull slightly down to a pitch of 80-85 degrees of inverted flight (the journey into orbit is flown with the head hanging down). You should now verify that you are approximately (within 10-20 degrees) on your launch course. Don't worry about details, they can be fixed later.
At about 35 seconds into the flight, dynamical pressure (qbar) will rise rapidly as the stack goes supersonic. This is a dangerous phase of the flight. The stack is very top-heavy (as the heavy oxygen is stored in the tip of the ET and the light hydrogen in the bottom), so once it starts toppling, it won't come back. In addition, aerodynamical forces are very strong. In fact the very reason we do this phase in inverted flight is to reduce the wing loading. At the callout, reduce throttle of the main engines to 65% to minimize the pressure spike.
If you ascent is too flat in this phase, maximum qbar will be violated, or you may lose control of the stack beyond the point the thrust vectoring can recover. If the orbiter is not in inverted flight at this point, the wing bending moment will grow too large, ripping the wings of the orbiter, resulting in a catastrophic loss of vehicle. Do not attempt to cross max. qbar with positive AoA!
About 20 seconds later, max. qbar is over and the stack becomes much more controllable. Throttle up to full and gradually reduce pitch to about 60 degrees (still inverted) and keep rising.
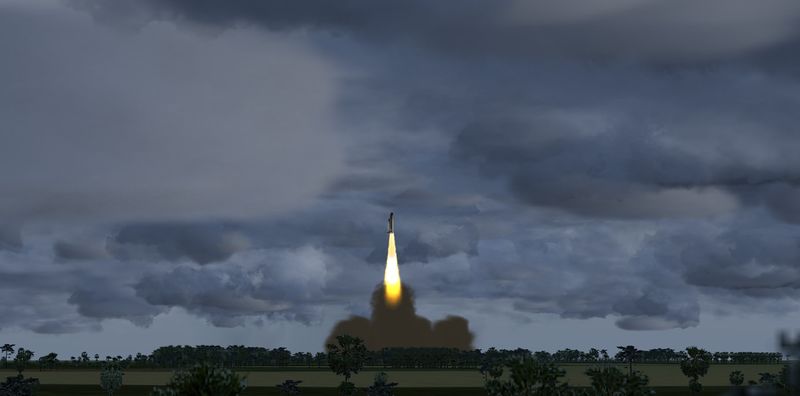
Seen from the ground, the smoke trail of the launch shows clearly the point at which the shuttle departs from vertical ascent and reduces pitch.
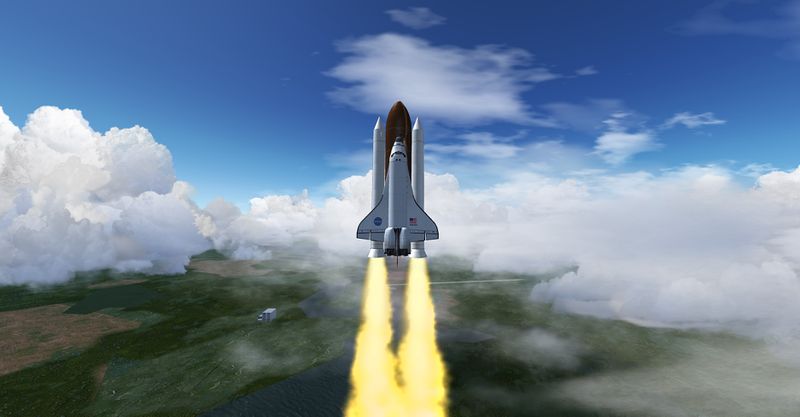
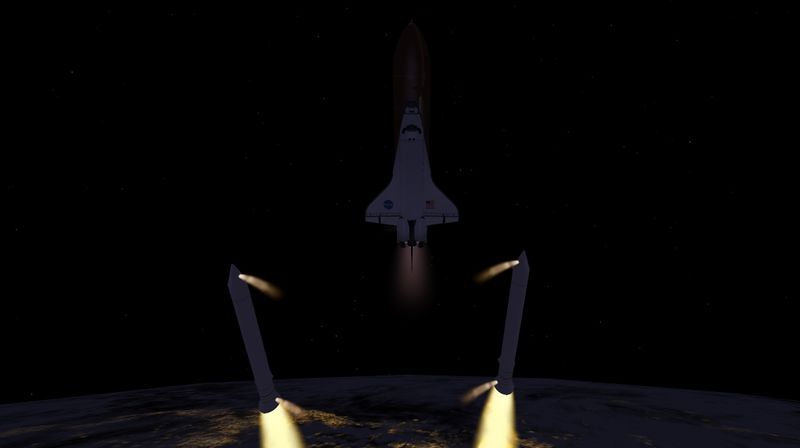
At around 150,000 ft altitude, the SRBs separate. They're still burning for a while, but they won't generate any thrust. While they seem to fall back, they actually continue to rise - just the shuttle accelerates away from them at a faster pace.
With the SRBs gone and most of the fuel still in the tank, thrust is down from abut 2.5 g to less than 1 g - which means that the stack no longer gains vertical velocity. Nevertheless, there's still a tremendous vertical velocity left, so the shuttle will continue to rise until this is depleted.
Outside of the atmosphere, handling characteristics are much improved, but there's now no friction, so every motion has to be explicitly canceled. Time to fine-tune the launch course - watch inclination in the HUD to insert into an orbit at a given inclination now.
Pitch should be gradually reduced to about 30 deg, still in inverted flight. The reason for this is communication (not implemented in FG) – at this point the Shuttle has contact to ground stations in the Caribbean for a proper launch trajectory. Watch vertical velocity and adjust pitch to get it to zero out at about 150 km altitude. Watch launch course and don't allow large deviations any more – they will reduce your reserves to make orbit.
You will almost inevitably drop in altitude for a bit from there – that's normal, and it'll recover once the ET gets light when all the fuel is spent and thrust increases. Roll out of inverted flight about 5 minutes into the launch to be realistic (the shuttle makes now communication via the satellite network and no longer directly with the ground).
What should not happen is that the trajectory drops below 265.000 ft – the reason is ET heat load. The ET is equipped with an ablator to take care of the worst of friction heat, but if you go too fast too low, the heat shield will fail and the ET will explode.
At this stage, the thrust vector is not very aligned with the shuttle axis – note how the SSME pointed out of the axis push through the ETs top-heavy CoG:
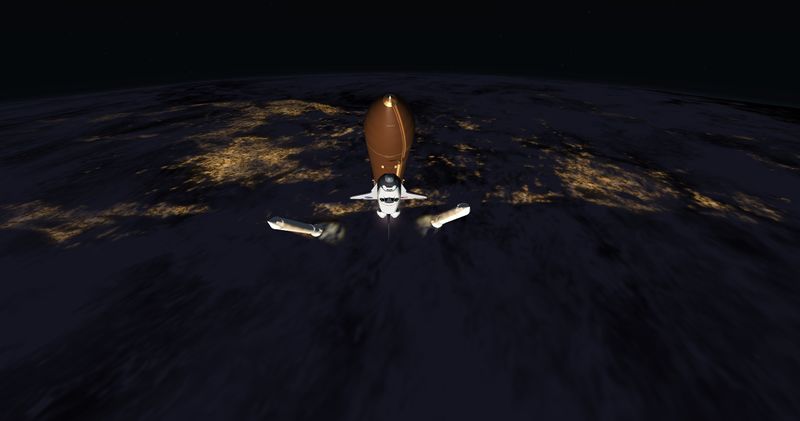
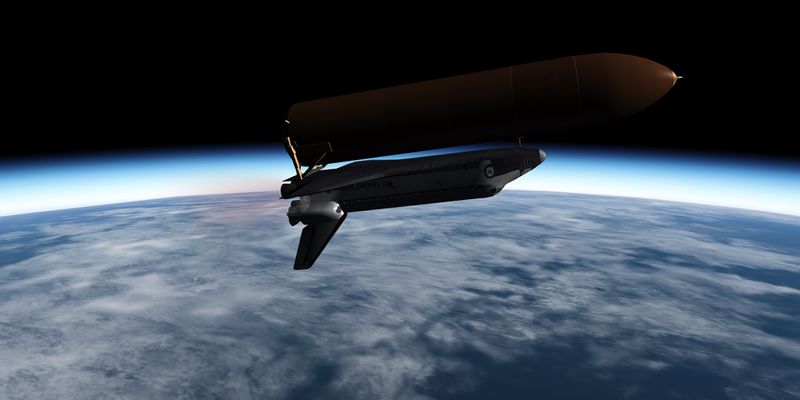
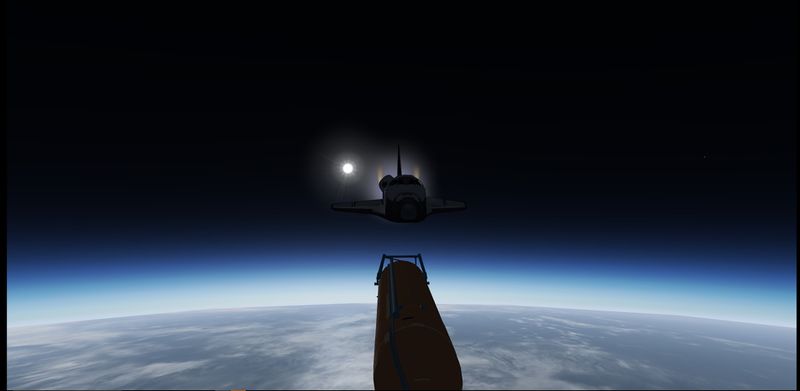
Once the ET depletes, thrust builds up. Watch acceleration and throttle back to keep it below 3 g (which is the structural limit of the stack on ascent). Manging vertical velocity should be easy at this point, there's plenty of thrust so that pitch has an immediate and strong effect on vertical speed. Keep it close to zero and maintain 150 km altitude. Keep an eye on the perigee counter now - once you are close to orbital velocity, it moves fast. Reduce thrust as soon as it comes above zero, cut thrust once the apogee reaches the desired value and drop the external tank. The RCS will fire automatically in translational mode to separate the orbiter from the tank.
The final push into orbit is done by the orbital maneuvering system (OMS). The reaction control system (RCS) will come on automatically, enabling you to null any remaining rotation of the orbiter.
In reality, propellant is calculated rather closely to the needs. In FG, without a payload, especially launching due east, you may arrive in orbit with some leftover propellant, potentially enabling to reach a rather high orbit. Take on a heavy payload and launch on a high inclination, and that may change.
Good luck, you're ready to do orbital maneuvering.
Trajectory Data
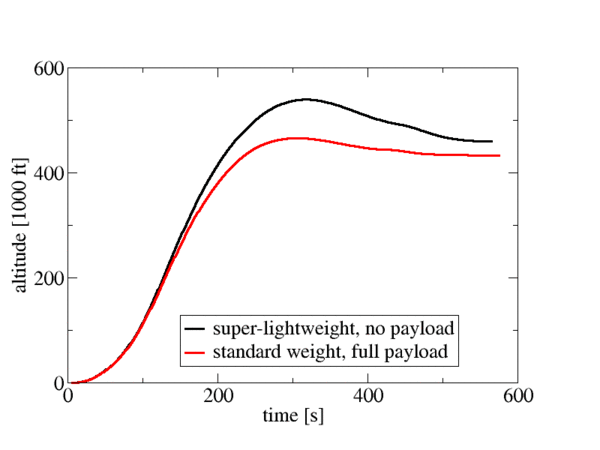
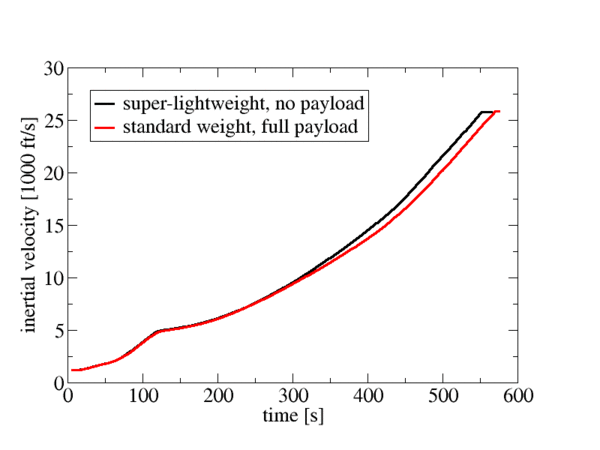
The following data has been recorded from the FG Space Shuttle simulation, i.e. they reflect the capabilities of the simulated craft (including piloting errors) and are actually flyable. They may serve as orientation for a viable launch trajectory with and without payload.
In each case, the launch was from Vandenberg AFB with an initial launch course due East (this is reflected in a non-zero initial inertial velocity, representing the Eastward turning of Earth). In all cases, the launch targeted an apogee of 250 km with a perigee below 100 km to make sure the ET would re-enter the atmosphere.
Altitude vs. time shows a clear transition from vertical motion to get out of the atmosphere to horizontal motion to accelerate to orbital speed at an altitude of about 450.000 ft (135 km) at about 250 s into the flight. This transition is lagging behind the commanded trajectory, the transition to a near-horizontal attitude happens in fact much earlier shortly after SRB separation at around 120 s. Note that a modest trajectory droop back from a peak altitude is perfectly acceptable and completely unproblematic for reaching orbit as long as the trajectory does not enter the dense atmosphere below 300.000 ft (100 km).
The most prominent structure in the intertial velocity development over time is the sudden drop in acceleration at SRB separation (about 120 s into the flight). The presence/absence of a payload is chiefly visible in the late stages of the flight and leads to about 10 seconds difference in MECO time. For the heavy launch, the remaining propellant after MECO was ~33.000 lb, i.e. the tanks do not need to be flown dry and the Shuttle is quite capable of lifting a payload into a higher inclination orbit.
Three, two one... ignition and... liftoff - a launch tutorial
You will have the opportunity here to learn the basics to Launch a Space Shuttle. Once you feel confident, you can move on more advanced tutorial with more steps to do with Close to real operations and Checklists
Flying the Shuttle - Launch And Post Insertion Advanced#Prelaunch procedure
(written for the devel version of October. 2017)
| Note This tutorial is up to date with latest Flight Manual Flightgear Space Shuttle Flight Manual. |
In this tutorial, you'll learn how to program a launch into the Shuttle's guidance system, what happens during a launch and how to monitor ascent into orbit.
- Start Flightgear with the commandline options
--aircraft=SpaceShuttle-launch --lat=28.6206 --lon=-80.6133 --heading=270 --timeofday=morning
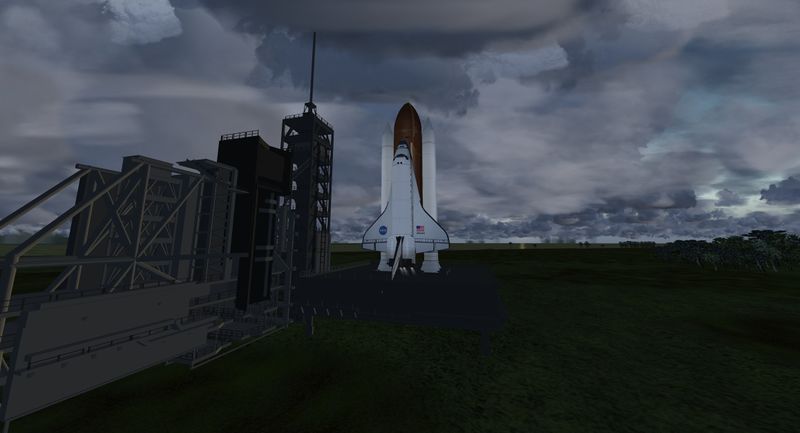
You'll find yourself on a pad in launch complex 39 at the cape, on a hot Florida morning. You have in fact just a few minutes to liftoff. (There's no launch gantry, flame trench, access road,... because no 3d modeler has put it there yet).
If you toy with the idea that specifying a heading is silly, be warned - it's crucial for the launch guidance to find a viable solution that the tail fin of the Shuttle points into the Eastern hemisphere - keep this in mind if you want to launch from somewhere else in the world.
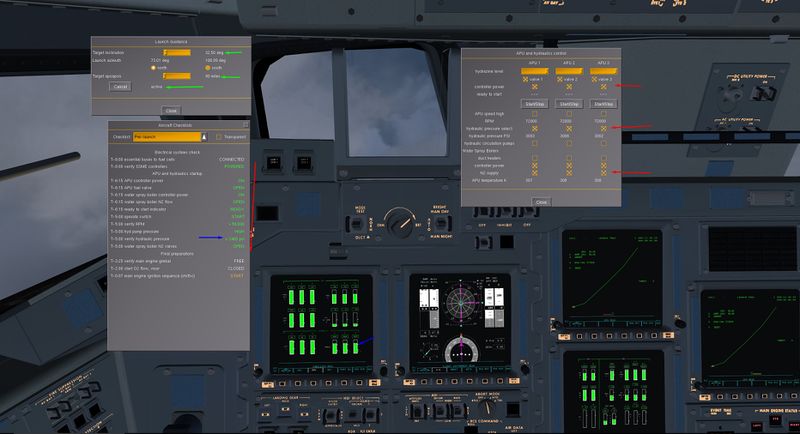
- Now, in reality the launch has been in planning for months if not years, and all guidance information is already loaded and cross checked at this point. FG doesn't (yet) support mission files or similar, so we need to tell the computer where we want to go. Open SpaceShuttle -> Launch guidance, select a target inclination of 51.5 degrees or so (that'd be required for a launch to ISS), leave the branch and target apoapsis as they are (you'll go to a 320 km orbit) and press Activate. The guidance now knows where to go.
Next, tell the Shuttle that you want the flight on autopilot by selecting the PITCH AUTO and ROLL/YAW AUTO pushbuttons on the forward panel (circled in red, underneath the transparent checklist).
Flying the Shuttle manually into orbit isn't actually difficult at all - if you know what you have to do, because you need to anticipate a few things and that's what we're out to learn here. But if you want to take over from the automatic guidance at any point, push the CSS pushbutton for the channel (you can just take control of pitch and let the DAP handle yaw/roll for instance). After activating CSS in-flight, do not attempt to hand control back to the AP - this will not work!.
- There's also real-world stuff you need to do in cockpit. Open Help -> Aircraft Checklists and study what we have to do for launch. Engine controllers need to be powered (obviously) - they should already be. APUs need to be running and supplying hydraulic power to gimbal the engines. That we still need to do. Open Space Shuttle -> APU and hydraulics and follow the items in the checklist to start all three APUs and bring hydraulic pressure to 3000 psi (hint: the sequence in which you work actually matters).
Okay, there's a few other items which you can't yet perform on the list (it's the original from the Shuttle's Crew manual), so we're good to launch as soon as engines ignite.
- While you wait, take a look at the FG-native HUD layer:
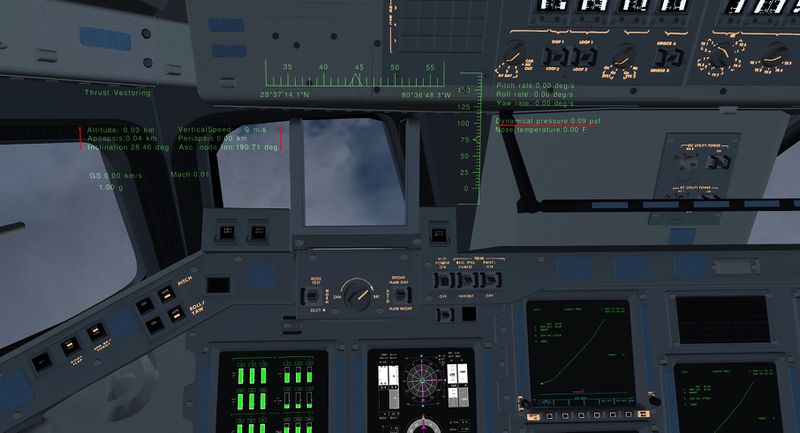
There's plenty of useful information displayed here, all items worth monitoring during ascent marked with red dots. While the Shuttle displays velocities in ft/sec and orbital altitudes in miles, you may find the option of getting some parameters displayed in metric units helpful (if you have a science background for instance).
In particular, this layer is the only way you can currently monitor orbital inclination, apoapsis, periapsis and dynamical pressure at the moment, so if you're launching manually into a particular orbit, you need this information.
- Okay, we're good to go. When you feel ready, move throttle to full. In real life, the Shuttle's engines would be ignited by remote command from mission control, but we have to work this in a different way. Make sure you really move throttle to full - if the engine controllers do not detect > 90% thrust three seconds after ignition for all engines, there will be a launchpad abort.
You can actually watch the show from outside by using tower view. If you've done everything according to plan, the SRBs ignite three seconds after the main engine, and at that point Atlantis lifts off.
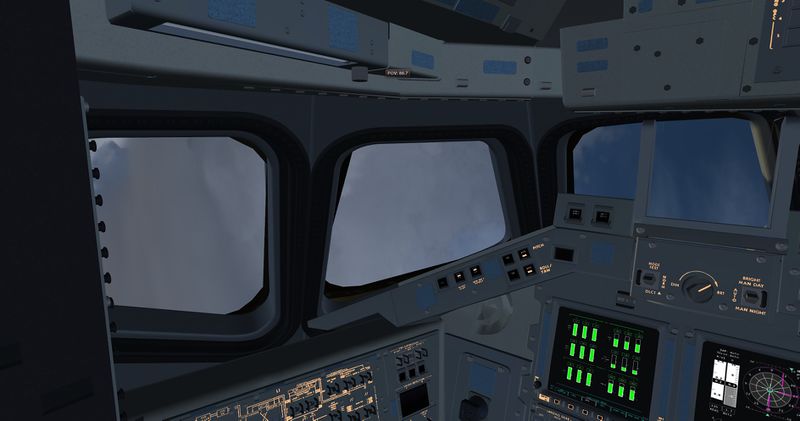
- If you stay in-cockpit view, what happens next feels and looks decidedly weird - as soon as the (currently not modeled, you remember?) launch gantry is cleared, the orbiter rotates and yaws to get onto the launch course, and then pitches down into inverted flight. That's right, you ride into orbit head-down.
One of the main reasons is the wing bending moment. While in terms of thermal stresses, entry is far more dangerous than launch, in terms of forces acting on the frame, launch is a good factor two more serious. If we would launch in upright position, the wings would be ripped off cleanly. The lowest stress on the wings occurs for negative AoA, so we pass the region of max. qbar (i.e. highest aerodynamical stresses) at the optimum alpha for the wings.
There are other reasons to keep the attitude later - one of them is in the event of a PFD failure, you have visuals of Earth early on in inverted flight but not in upright attitude. Another reason is keeping a direct com connection to mission control for as long as possible.
- Okay, enough with sightseeing. Some 30 seconds into the flight there should be a callout to throttle down (that's as qbar peaks somewhere close to 700 psi - you can monitor it on the native HUD layer). The engines get throttled down to relieve the stress.
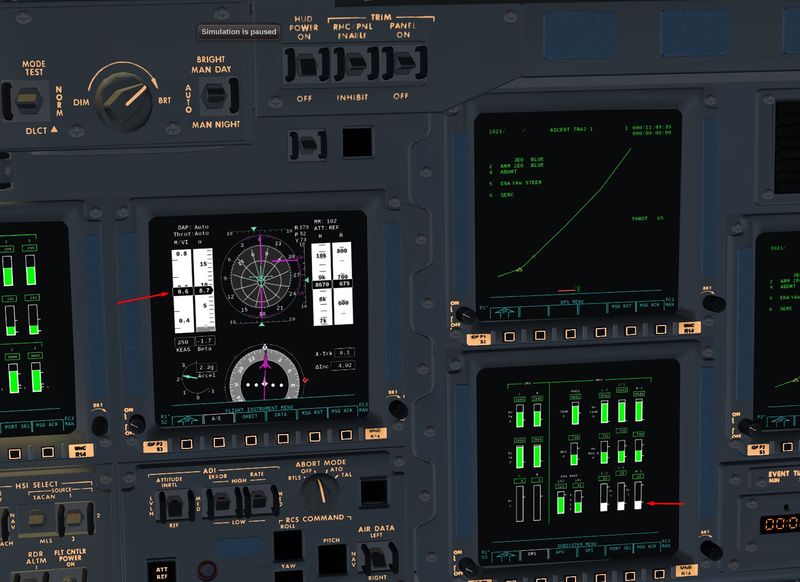
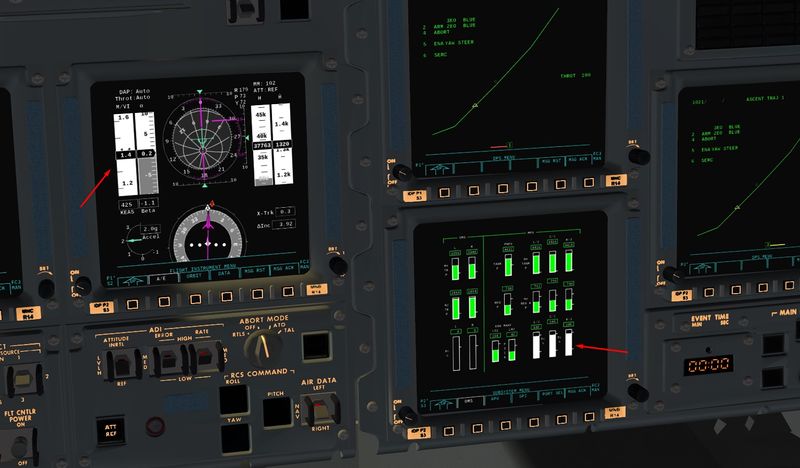
Look at the engine status.
Throttle Down
Throttle up
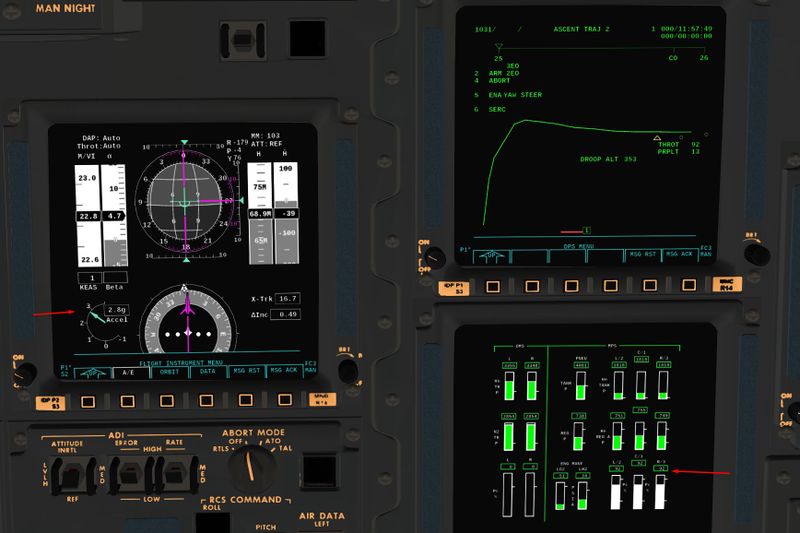
The lower right shows chamber pressure of all three main engines. During max. qbar they get throttled back, otherwise they should show (at least) 100% of rated power. In the case of an engine loss, it's possible to throttle the remaining ones up to 109% of rated power via the override display, but perhaps let's just not try this right now. Above are helium regulator and storage tank pressures. What's that for?
The Shuttle's main engines use a pre-burner to drive the turbo-pumps which bring the fuel into the combustion chamber. But that means that liquid oxygen and hydrogen are on the same turbine shaft at some point - if they ever get in contact, the engine explodes. To avoid that, the gap is purged with high-pressure helium while the engine is running. So the depletion of helium tells how long the engine has been running, and if the regulator pressure ever drops into the red, the engine needs to be off immediately or you might lose all three.
Right now, everything should be nominal, and you should see the engines throttling up to full rated power just after max. qbar is over, and then slowly pitch down further.
- Let's take a look at the ascent trajectory:
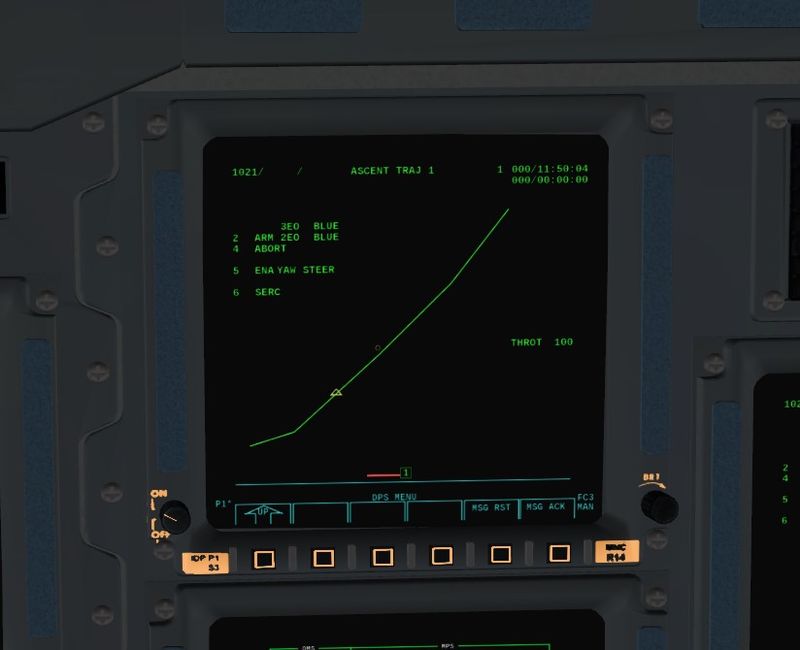
This is a plot of ground-relative velocity vs. altitude. The Shuttle is the yellow triangle climbing along the line, and there's a predictor which tells us where the Shuttle is expected to be 20 seconds from now - if there's no change in attitude or thrust.
That's important when flying manually. The Shuttle reacts very different from an airplane, which responds to changes almost instantaneously. Launch is a near-ballistic trajectory - if you have a large velocity component, say, upward, you'll go upward no matter how you maneuver for a minute or two, and anything you do right now will be felt afterward. So you need to know what the Shuttle will do if you do nothing for the next minute to know what you should be doing.
It'll become clearer in a minute. As the triangle climbs to the upper edge of the line, you can switch to outside view and watch the SRBs separating. If you can't run 300+ km visibility in FG, this would also be a good altitude to switch to Earthview orbital rendering.
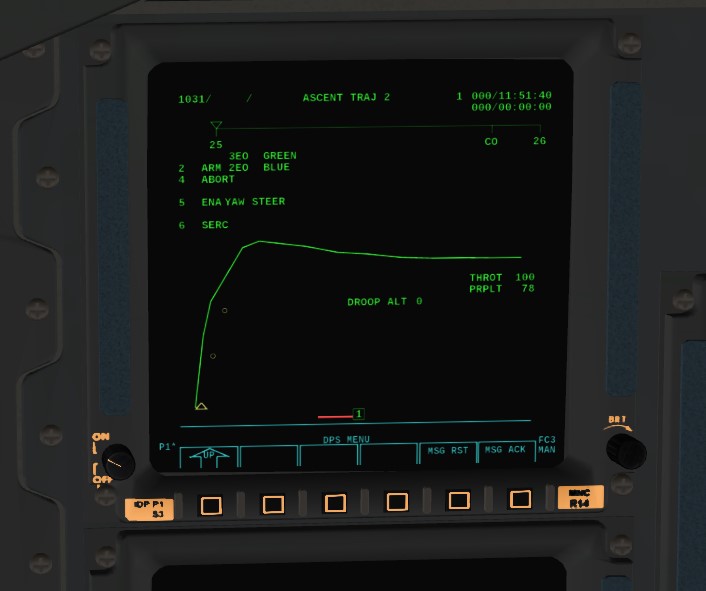
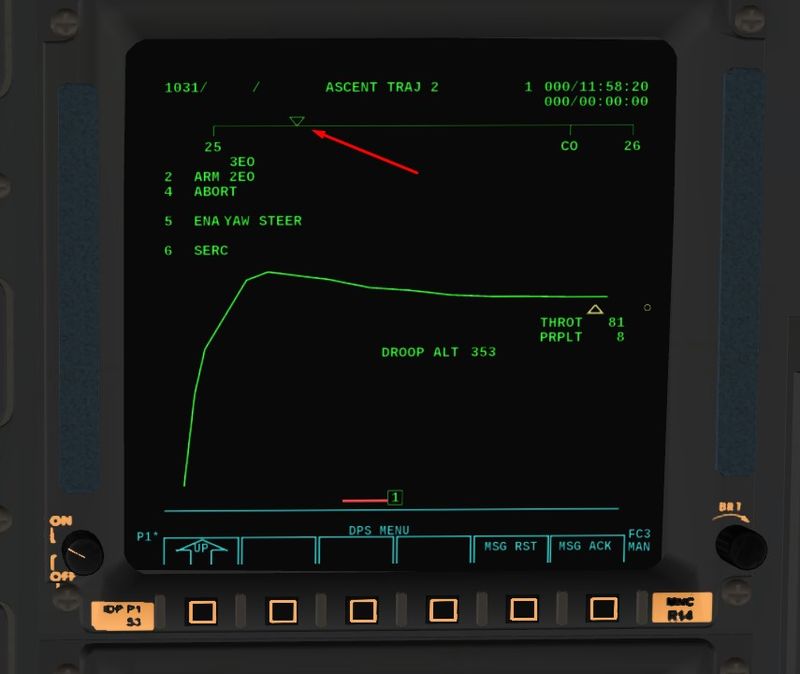
- After SRB separation, the ascent trajectory display changes to this:
What's the state of the spacecraft now? The SRBs are very powerful devices, we've been rising with close to 3 g for two minutes. Now they're gone, and the remaining thrust is not even enough to hold the Shuttle with the near-full ET against gravity. But it doesn't need to, we're climbing with almost a kilometer per second vertically. Even if we had no thrust, we'd go above 100 km altitude now.
We don't want to be much higher, but we need to be much faster - so the Shuttle needs to pitch down and start building horizontal velocity now, and it needs to do it such that when gravity has finally depleted the push from the SRBs, we fall right into the desired trajectory at 130 km altitude. For such a maneuver, you absolutely need the predictor dots.
It's even a bit more complicated, because unlike the previous display, this shows inertial speed. The difference is the effect of the velocity of Earth's rotation, which depends on launch latitude and azimuth. So to capture the desired trajectory, we need to pitch down just the right amount accounting for the rotation effect as well as for any payload. Luckily guidance does this automatically.
So you should watch the predictors indicate the drop into the trajectory while the Shuttle gets faster and the triangle eventually reach close to the horizontal part of the trajectory.
Actually, the symbol will not always be spot on the trajectory, but it should remain reasonably close. If it ever diverges a lot, guidance has failed and you need to take over manually.
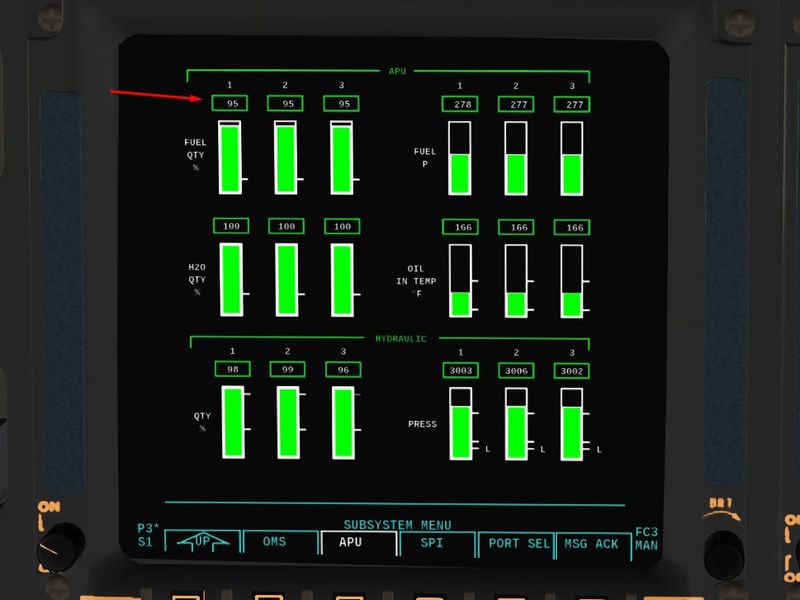
- Okay, time to take a breath and scan the status of the APUs. There should be plenty of fuel left (we run them for a few minutes now, during entry they must run for close to an hour). Cooling water should still be full - they don't get hot until we are in orbit. And hydraulic pressure should be a good 3000 psi.
If an APU fails, it means we have an engine that can no longer be gimbaled and throttled ('hydraulic lockup'). That's not as bad as a failed engine, but it does mean we will have to switch it off manually some 30 second before the others.
- The late part of the launch is a waiting game. As the tank depletes, acceleration increases back towards 3 g, and the DAP will gradually throttle the engines back when this happens.
But wait - what's that? Why do the predictors move upward? Remember that they tell what will happen if we do nothing? As the Shuttle accelerates, finally the centrifugal force which will keep us in orbit starts building to significant strength, and that means we'll start to rise unless we constantly gradually pitch down to keep altitude, So it's not worrisome at all because the DAP will do something like an altitude hold.
- Very close to MECO, also the horizontal velocity scale will see movement. As inertial speed reaches above 25.000 ft/s, the indicator will move towards the CO point. Once the indicator is there and the Shuttle is at the end of the trajectory, all engines will be cut automatically and you are in orbit. Verify that you're going to a 320 km apoapsis. Then you can disconnect the ET and start preparing your ride for orbital operations.
Note that the Shuttle under automatic launch guidance does not rotate into upright attitude. That was indeed the case for the early missions, in the later Shuttle missions a rotation would be performed in the late stages to get an uplink to the TDRS com network.
- Now that you've seen how it should be performed, you can start to practice doing it manually.
If you need a real challenge, try switching the DAP via m to 'Thrust Vectoring (gimbal)' on the launch pad. This changes your stick input from a bias to the rate controllers flying the Shuttle to direct control of the engine gimbal angles. It is possible to fly the Shuttle into orbit this way, though really a tough job, which will make you appreciate the work done by the ascent DAP.
Further reading
NASA human space flight page on Shuttle First Stage
