Extra EA-500
 | |
|---|---|
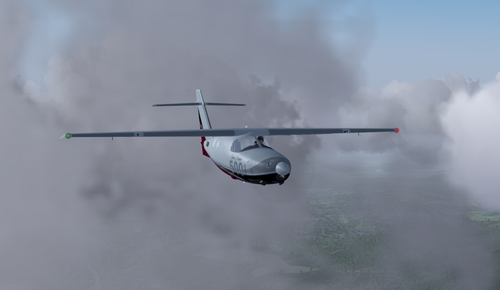
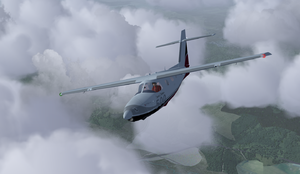 Extra 500 flying in clouds | |
| Type | Civil aircraft, Business aircraft, Civil utility aircraft |
| Configuration | High wing aircraft |
| Propulsion | Turboprop aircraft, Single-engine aircraft |
| Manufacturer | Extra |
| Author(s) |
|
| FDM | JSBSim |
| --aircraft= | extra500 |
| Status | Production |
| FDM |
|
| Systems |
|
| Cockpit |
|
| Model |
|
| Supports |
|
| Development | |
| Website |
|
| Repository |
|
| Download |
|
| License | GPLv2+ |
|
| |
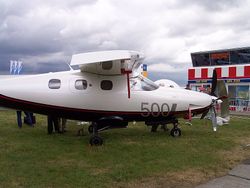
The Extra500 is a six-seat single-engined turboprop aircraft produced by the Extra Aircraft company (based at EDLD).
Status
- Flightgear 2019.1.1 and later
- Current stable release is 5.3.0 (01.02.2021) and can be downloaded here and can be found at the FGAddon repository.
- Flightgear 2018.3.1 and later
- Current stable release is 5.1.0 (07.09.2018) and can be downloaded here and can be found at the FGAddon repository.
- Flightgear 2018.1.1 and later
- Current stable release is 5.0.0 (04.02.2018) and can be downloaded here and can be found at the FGAddon repository.
- Flightgear 2017.3.1 and later
- Current stable release is 4.4.0 (13.08.2017) and can be downloaded here and can be found at the FGAddon repository.
- Flightgear 3.6 (only)
- Current stable release is 3.2.0 (20.03.2016) and can be downloaded here.
- Flightgear 3.4 and later
- Current stable release is 2.2.0 (17.07.2015) and and can be found on GitLab. The first stable release (2.0.0) for FG 3.4 can be found on the flightgear 3.4 download page
- Flightgear 3.2 and earlier
- The last stable release is 1.2.0 and can be found on GitLab.
Alternatively: Download
For the (latest) stable release make sure you are on the FG/2019.1 branch!
Since March 2013 D-EKEW, D-LEON, D-STHO are working on this model. They are making use of original data from the Pilot's Operation Handbook. People who have experienced the aircraft in real life help calibrating the FDM as well as tuning the systems behavior.
About the airplane
Extra EA-Series
The Extra Aircraft company designed several aerobatic aircraft based on the early experimental EA-230 and EA-260, followed by the FAR-23 certified EA-300 series (EA-300, EA-300/S, EA-300/L, EA-300/200, EA-300/LT, EA-330/LC, EA-330/SC). The company introduced the Extra EA-400 in 2001. This is a cross-country airplane with many exclusive features including carbon fiber construction, pressurized cabin, high strut-less wing, and a seating for six. The EA 400-500 was introduced as a derivative of the EA-400 replacing the piston engine with a Rolls-Royce Model 250-B17F/2 turboprop producing 450 horsepower (340 kW) and driving a MT-propeller 5 bladed propeller. Walter Extra flew the first Extra500 from Germany to Oshkosh, Wisconsin to illustrate its range and capabilities. The most recent changes to the aircraft come from Avidyne with their latest glass avionics: Avidyne Entegra R9.
General characteristics
| General | |
|---|---|
| Min. Crew | 1 |
| Capacity | 5 PAX or 525 kg payload |
| Length | 10.1 m |
| Span | 11.7 m |
| Height | 3.4 m |
| Empty weight | 1,420 kg |
| Max takeoff weight | 2,130 kg |
| Powerplant | |
| Engine type | Turboprop |
| Engine | Rolls-Royce Model 250-B17F/2 |
| Performance | |
| Cruise speed | 210 kts |
| Stall speed (MTOW, Full flaps) | 61 kts |
| Max. Range | 2,963 km |
| Endurance | 7.9 hours at cruise speed |
| Ceiling | 25,000 ft |
| Climb rate (S.L.) | 1,335 ft/min |
Download
Download the current stable versions for your Flightgear version:
Extra500 for Flightgear version 2019.1 and later
Extra500 for Flightgear version 2018.3
Extra500 for Flightgear version 2018.1
Extra500 for Flightgear version 2017.3
Extra500 for Flightgear version 2017.1 and later
Extra500 for Flightgear version 2016.3 and later
Extra500 for Flightgear version 2016.1 and later
Extra500 for Flightgear version 3.6.0
Extra500 for Flightgear version 3.4.0
Extra500 for Flightgear version 3.2.0
We recommend Flightgear version 3.1 or later, to benefit from the performance improvements in the canvas system.
Development takes place on GitLab: https://gitlab.com/extra500/extra500.
The latest stable release is also available on the the Flightgear SVN aircraft repository:
svn co https://svn.code.sf.net/p/flightgear/fgaddon/trunk/Aircraft/extra500
And of course the Flightgear aircraft download page has the stable release of the point where the latest Flightgear version was released.
Stable releases are available for Flightgear versions 3.2.0, 3.4.0, 3.6.0, 2016.1 (use for 2016.2 as well), 2016.3 (use for 2016.4 as well), 2017.1 (use for 2017.2 as well), 2017.3, 2018.1, 2018.3 and 2019.1. You can get them using GIT:
git clone https://gitlab.com/extra500/extra500.git
cd extra500
git checkout FG/VERSION
With VERSION = 3.2.0, 3.4.0, 3.6.0, 2016.1, 2016.3, 2017.1, 2017.3, 2018.1, 2018.3, 2019.1, 2020.3
The current development takes place in the next branch
git clone https://gitlab.com/extra500/extra500.git
cd extra500
git checkout next
Other Extra500 wiki pages
Comfortable pitch control for mouse and joystick
Smooth weather system
Am I going to get there?
Icing is not your friend
Howto operate your avionics system
For Autopilot know it all
Make sure you tread your engine well
Breaking things
What is this button for???
The Extra 500 menu
Operation
For full operation instructions, see the official Extra500 POH. It can be downloaded from the manufacturers homepage: [1], right at the bottom.
Below is just a quick start and some selected topics. See here for the panel reference page.
WARNING: Below reflects the current development version (next). If you are using the stable version, some functionality may not be available!
General Remarks
All switches are thrown by rotating the mouse wheel in the appropriate direction. Push buttons are pressed by clicking with the LH Mouse button. Rotary knobs are turned by the mouse wheel as well. Hold ⇧ Shift for small steps.
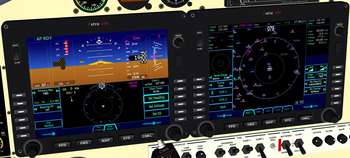
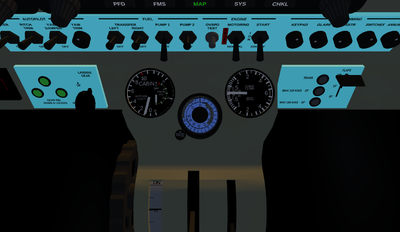
The IFD buttons on the left, right and lower bezel are always double buttons. Meaning they always have a left and right side. The lower buttons (PFD - FMS - MAP - SYS - CHKL) navigate between the main pages. Once on the selected page the same button will let you navigate through the tabs. The side knobs do not always have a function, but if they have, they are lighted and the function is shown next to them.
There are a few special Extra500 shortcuts:
| Key | Function |
|---|---|
| Ctrl+e | Connect / disconnect External power cart |
| Ctrl+f | Toggle pitch control modes (direct and force) |
| Ctrl+g | Put the aircraft on Jacks (for testing the gear on the ground) |
| w | Gear Warn Mute (you'll need it, alternatively press the switch on the throttle lever) |
| r | Put the propeller in reverse (beta range) |
| s | Condition lever fuel on/cut-off (alternatively click on the condition lever) |
| d | Autopilot disconnect (alternatively click on the red button on the yoke) |
| c | Engage Control Wheel Steering (CWS, see below) |
| o | Over power autopilot servos. Need to keep o pressed and be very careful! |
| < | Toggle quick view |
| > | Define quick view: define your view you are using often and press > |
Checklist dialog
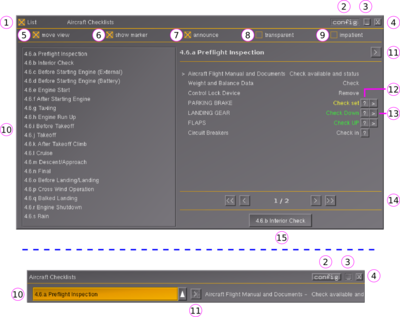
The checklists going along with the manufacturers POH. The Extra500 provide a dialog to read, view and perform the necessary task for each flight phase. Checklists can performed manually and automated just let the dialog do the work.
- Show/hide the checklist.
- Show/hide the config options.
- Minimize the dialog. For automated in flight usage.
- Close the dialog and its action.
- Allow the dialog to move the view to the action.
- The dialog will show a pink circle at the action.
- Write message on screen, nice for text to speech(festival).
- Make the dialog transparent.
- Faster work through the automated checklist.
- Pick a required checklist and load it.
- Plays and stops the checklist. All actions will be done in an automated sequence.
- Moves the view to the action and shows the pink circle.
- Perform the action.
- Sub-page navigation of the checklist
- Next checklist for the next flight phase.
Messages
There are several types of messages that may appear on your screen:
- Failure (red): a failure has occurred
- Warnings (red): an aircraft limit has been exceeded, immediate action required
- Cautions (yellow): a limit has been exceeded, action needed within 5 minutes
- Info (blue): some general information on why something does not work or some other peculiarity
- Trim: shows if the pilot (you) needs to pull or push the yoke. You will need to use the elevator trim (mouse wheel) accordingly.
All these messages are on by default, but can be switched off in the Extra500 - Configuration menu.
The messages by far do not cover all situations, but are there to help the pilot learn the most basic behavior/limits. Typically there is no special message when it already is in the aircraft warning panel.
Flight Planning
By clicking on 'Equipment - Fuel and Payload' (on the ground) you can access a comprehensive flight planning tool.
There are four tabs, of which the 2 upper ones deal with loading the aircraft. It won't be a surprise that they are called 'Fuel' and 'Payload'. By clicking and dragging you can add passengers, baggage, dogs and fuel on the individual seats or tanks respectively. Of course while loading you must adhere to the aircraft weight and center of gravity limits. This is graphically displayed in the lower tab 'weight'. The other lower tab is a Trip Calculator. You can input your trip distance, cruise altitude, airport altitude and alternate distance to calculate your required fuel load. These values may be imported from your flight plan ('Autopilot - Route Manager') with a single click. You can also put the exact calculated fuel into your tanks by clicking on the 'Order Fuel' button.
Engine starting
See also the engine operation page
- Parking Brake: Set ( ⇧ Shift+b or pull out middle Bowden cable in middle console AND press b )
- Battery: Switch ON
- Fuel Pump 1 or 2: Switch ON
- Engine Start: START
- at 12-15% N1: Press s ( or click on condition lever, its the red one )
CAUTION: TOT limit for starting is max. 10sec above 810 °C and below 927 °C
If the engine does not light-off:
- Engine Motoring: ABORT and back to NORMAL
- Condition Lever: Press s Fuel off
Wait until N1 drops below 3% and TOT below 100 °C, then start again.
After engine has started:
- Standby alternator: Switch ON
- Generator: Switch ON
- Engine start: IGN OFF (only if N1 >= 65%)
Take-off
- Flaps: 15 degrees ( ] or use the flap switch )
- Power lever: TRQ 111%
CAUTION: for Take-off (5 minutes) maximum TRQ limit is 111%, TOT 810degC
- Parking Brake: Release ( ⇧ Shift+b or push in middle Bowden cable in middle console )
NOTE: For strong side wind, turn the ailerons against the wind
- At 71KIAS: Rotate
- Gear: Retract ( g or click the gear switch )
- Flaps: 0 degrees ( [ or use the flap switch )
CAUTION: Flaps need to be retracted before reaching 120KIAS, gear 140KIAS
- Power lever: TRQ 92%
CAUTION: For continuous operation the TRQ limit is 92%, TOT 752degC, watch the TOT while climbing!
Climb
Climb with MCP (maximum continuous Power, 92%TRQ or 752degC) at 110 KIAS.
Descent
Descent with 50% TRQ and 2000ft/min. Max airspeed is 207 KIAS.
Landing
Do not come in too high, too fast.
- At 140 KIAS, gear: Extend (⇧ Shift+g or click the gear switch )
- At 120 KIAS, flaps: 15 degrees ( ] or use the flap switch )
- When you are sure you will land and below 109 KIAS, flaps: 30 degrees ( ] or use the flap switch )
- Power for a 3deg descent, 80KIAS and landing configuration is ~30% TRQ
- Dont forget to brake. For reverse press r, will only toggle when power lever is in aft position!
Engine shut-off
- Parking Brake: Set ( ⇧ Shift+b or pull out middle Bowden cable in middle console AND press b )
- Fuel Pump 1 and 2: Switch OFF
- Standby alternator: Switch OFF
- Generator: Switch OFF
- Press s ( or click on condition lever )
- Battery: Switch OFF
Principle Autopilot functionality
- HDG Follows the heading bug (set HDG bug using the keypad, press to sync)
- NAV Intercepts and tracks VORs, LOCs or your Flight Plan (set course with LH lower rotary knob on IFD)
- NAV/GPSS Intercepts and tracks your Flight Plan and cuts the corners ( press NAV twice)
- HDG+NAV Intercept the course or active flightplan leg with your set heading
- NAV+REV Intercepts and tracks the LOC back course
- GS Is armed and activated automatically when captured on the LOC. You can switch it off by pressing APR, ALT mode will become active. To arm the GS again, press APR for a second time
- VS Follows the VS bug (limited to +/-1600fpm, set with AP rotary knob)
- ALT Holds the current altitude (rounded to 100ft)
- ALT+VS Brings and holds the aircraft to the selected altitude (set ALT bug using the keypad, press to sync) with the selected vertical speed.
- CWS Control Wheel Steering. Follows the turn rate and vertical speed set by controlling the aircraft.
To disconnect press: d
General remarks to autopilot operation:
A roll mode (HDG, NAV/GPSS, APR/REV) must be engaged for a pitch mode (ALT, VS, GS) can engage.
A roll mode (HDG, NAV/GPSS, APR/REV) must be engaged for the yaw trim to work
If pitch trim is switched off, autotrim is not available, but the AP will indicate where to (manually) trim to.
For CWS, a roll and pitch mode must be engaged. Press and Hold c (caution: AP servos will disengage!) and with your controls bring the aircraft at your wished turn and climb rate. Release c and the AP will engage and keep those rates.
You can overpower the servos by keeping o pressed and use the normal controls. When o is released the autopilot will resume its work. Be very careful and make only small movements.
The AP will disengage when:
- the disconnect switch is pressed (d)
- the stall warner is on (stall warn horn and light)
- absolute g-force (disregarding 1-g gravity) exceeds 0.6g
- manual electric pitch trim is used.
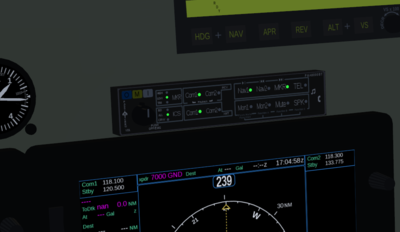
The COM unit (1 or 2 ) is selected on the audiopanel. Just hit the appropriate "XMT" button. Note that FGCOM only works on COM1! If you want to hear the NAV station morse code or the marker tones, press the appropriate button on the audiopanel also. The volume can be adjusted using the inner volume knob.
The active COM standby frequency can be inputted on the keypad. The first "1" is not needed and any trailing "0" neither. Just type in the frequency and switch active/standby with the button just left of the frequencies.
Not-active-COM and NAV standby frequencies are similar, just press the NAV1 / NAV2 button first.
FMS, Nav 1 or Nav 2 may be selected on the IFD or in the NAV dialog (F12) The DME source can be set using the AUX button on the keypad. Select with the FMS knob. The DME hold switch next to the DME indicator overrides all NAV frequency switching and holds the frequency to which the DME was tuned when the HOLD button is pressed.
The FMS (Flight Management System) can be used with or without the autopilot. You can put your flightplan in the autopilot - route manager (don't forget to press activate). The autopilot will intercept the active leg.
While flying a flightplan (FMS is the Nav source and NAV is selected on the autopilot), you can do some special stuff without touching the autopilot:
- Vectors mode: Press V with arrow or "Fly Vectors" knob on IFD to follow the heading bug while still in nav mode. Deselecting will return normal FMS functionality. Handy for making a brief excursion from the flightplan for weather or ATC.
- Direct-To mode: In the route manager select the waypoint and on the keypad press the D with arrow button.
- Close to the waypoint direct-to mode will be de-selected automatically or you can do that manually by pressing the same button again.
- FMS-OBS: Rotate the LH lower knob on the IFD. Press to cancel. Very similar to VOR functionality, except it will work on all waypoints of your flightplan. Very handy for making an approach on an airport without ILS.
If your flightplan has a VOR or ILS, the FMS will automatically tune NAV1 to the respective frequency and set the radial accordingly. So there is no need to look up any NAV frequency anymore! In addition when you line up with the selected runway, The NAV source will automatically change to NAV1, thus the ILS interception will be fully automatic. You do need to be lined up to the runway pretty accurately: the Flightgear "DEFAULT" approaches are ideal for this! For this kind of approach it is recommended that you slow down, get the gear out and set the flaps to 15deg before the GS is intercepted. Depending on the aircraft weight and wind conditions set 20-30% TRQ when on the GS to match 80 KIAS.
XPDR squawk can be set on the keypad (press XPDR and squawk code) and in the NAV dialog (F12). Default is 7000 (Europe VFR). XPDR modes are selected automatically (GND or ALT), but automatic selection may be switched off Manual mode selection is then possible. The MODE button on the keypad will set the mode manually also.
Pressurization system
The extra500 is certified to 25000ft, where the air is pretty thin. So there is pressurization system that keeps the cabin altitude below 8000ft which corresponds to a cabin differential pressure of 5.5psid at 25000ft. So if you are planning to fly above 10000ft, you need to make sure that the ENV AIR and PRESS switches (left lower corner) on the side switch panel are on. In addition, before take-off you should set the cabin controller (center console) to the airport altitude and just after take-off to your target altitude. Before descending from cruise, set the controller to your target airport altitude. You can monitor the cabin altitude, differential pressure and cabin climb rate on the instruments next to the controller.
Above a cabin altitude of 8000ft, it can end up in a abnormal low level of oxygen in your blood. If this happen you will feel a blackout and it's necessary to bring immediate the cabin altitude below 8000ft by descend or pressurize the cabin.
Night Flying
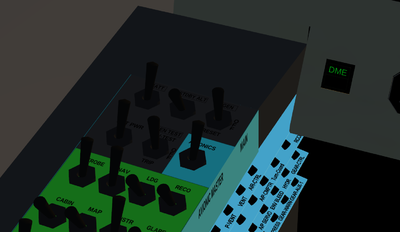
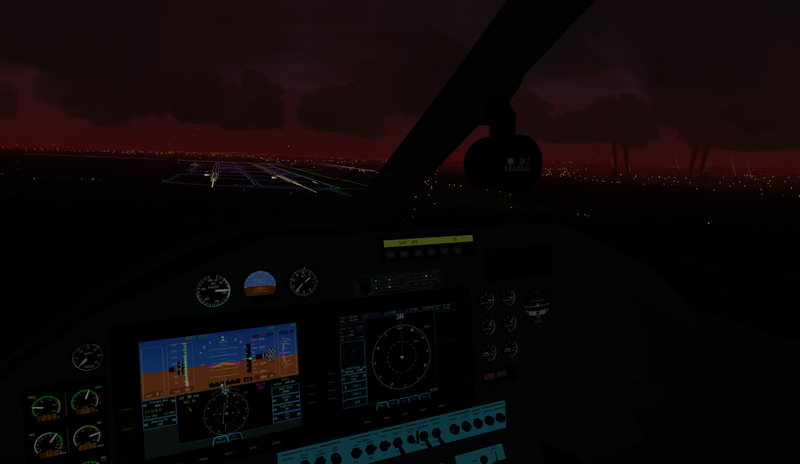
For lighted instruments switch on the INSTR switch on the side switch panel. On the same panel you can switch the DAY/NIGHT switch to NIGHT for dimming. The 5 round turn knobs on the panel now can be used to set your dimming level. The IFD-s have their own dimming switch on the left upper side of the bezel. For taxiing use the RECO lights. For landing the LDG light.
