Howto:Regional texturing
The FlightGear terrain is created in a largely automated process from a large amount of geodata. The outcome may not necessarily always look like a region appears in reality. Regional texturing is one of the most powerful tools available to improve the terrain visuals and get a result much closer to reality.
Background
Terrain data structures
Internally, the terrain is a dense mesh of triangles which determine the elevation at each given point. However, the mesh also encodes what a patch of terrain is supposed to represent by assigning a so-called landclass to a triangle. Landclasses are a concept that is directly inherited from geo databases like CORINE. For instance, the database may tell that a certain patch of terrain is 'Shrubcover'. This information is stored with the terrain mesh.
Flightgear then uses it in-sim in several ways: First, the landclass of a triangle determines how it appears - and how it changes appearance with season or environment conditions, i.e. what texture and/or effect are assigned. Second, it also determines FDM-relevant properties, for instance whether it will yield when you try to land on it (for instance water), whether you can roll across it, how bumpy rolling will be, and so on. The Advanced Weather system uses the landclass to determine the likelihood of convective cloud formation when the sun heats the terrain. Finally, also the distribution of random overlay objects (such as the density of lights at night, or the number of trees or buildings appearing, or the random placement of icebergs, ships, or bird flocks) is also determined by the landclass.
A separate layer for the terrain are static objects which are placed on definite positions onto the mesh by other means - for their placement, no landclass information is used and while they can be placed 'onto' the mesh automatically, they can also be placed to absolute altitudes.
Regional texturing specifically changes the appearance of a landclass and also the placement of overlay objects - it is not a technique capable of altering the outlines of landclasses in the mesh. In other words, using the technique you can make an existing patch of shrubland look more realistic, but you can not change part of a lake that has the wrong shape to be shrubland.
What do you actually have to do to change the appearance in a region? The way you define appearance of landclass(es) is just by using a text file to set the properties. The properties are just things like the name of a terrain effect - e.g. 'Agriculture' or 'Rock', the names of a few texture files usually from the data/textures/Terrain [1] folder, and numbers which are values you can tweak for each effect until they look right - these values are called parameters. The idea is to find out how a landclass looks in a region by looking at some photo references, sites like instanstreetview, or from experience - then tweak some values and pick some existing textures or create a few new textures. You can start by copying an existing definition from another region that looks close. You can also add or tweak some numbers which set how auto-generated objects like trees or buildings appear. Very simple.
Control files
The central file responsible for the assignment of textures etc. to landclasses is /Materials/regions/materials.xml [2] (for historical reasons, there are two alternative schemes under /Materials/default/materials.xml and /Materials/dds/materials.xml which are not supposed to be modified by regional definitions). They can be selected in-sim in the rendering dialog.
materials.xml largely serves as an index to include the actual regional definitions. However, hierarchy is important and needs to be considered: Later valid definitions always override earlier definitions. So for instance in texturing Honolulu, Hawaii, first global-summer.xml is considered (which is the world-wide default for summer textures), then the content of hawaii.xml overwrites the global definitions and finally the content of oahu.xml overwrites part of the Hawaii-specific definitions. The wrong order of files can lead to definitions not being used.
Each specific region file has to contain a name, at least one (possible more) area definitions and may contain a condition. The header of the Hawaii region for instance is
  <name>Hawaii</name>
  <area>
    <lon1>-179.0</lon1>
    <lon2>-154.0</lon2>
    <lat1>18.8</lat1>
    <lat2>28.5</lat2>
  </area>

  <condition>
    <equals>
      <property>sim/startup/season</property>
      <value>summer</value>
    </equals>
  </condition>
The area tags define rectangles in coordinates - if FG requests a scenery tile to load, and the coordinates of the tile are within the area defined and the condition is met, the landclass definitions of the file are used for the scenery. It follows that regional areas have the minimum size of a scenery tile (dependent on the location in the world, typically a few tens of kilometers).
In practice the condition is used to switch between the summer and winter texture schemes - whether it makes sense to allow the user to select winter textures for Hawaii is in the eye of the beholder.
In each definition file, what follows are the assignments of landclasses to materials, and condition and area holds for all of those in the rest of the file.
Material definitions
Let's take a look at a single block of material definitions:
  <material>
    <name>BarrenCover</name>
    <name>Dirt</name>
    <name>OpenMining</name>
    <name>Rock</name>
    <name>Dump</name>
    <texture-set>
      <texture>Terrain/rocks-lava.png</texture>
      <texture n="12">Terrain/rocks-desert.png</texture>
      <texture n="14">Terrain/rock_grain01.png</texture>
      <texture n="13">Terrain/void.png</texture>
    </texture-set>
    <parameters>
      <grain_strength>0.7</grain_strength>
      <transition_model>0.0</transition_model>
    </parameters>
    <xsize>1000</xsize>
    <ysize>1000</ysize>
    <solid>1</solid>
    <friction-factor>0.9</friction-factor>
    <rolling-friction>0.1</rolling-friction>
    <bumpiness>0.3</bumpiness>
  </material>
The first tags are name - they contain a list of landclasses the material refers to (remember that the landclass is stored with the terrain mesh, i.e. the mesh contains the information that a certain triangle is 'Rock').
The next block is the texture set assigned to the landclass - it contains the name of the files to be used for the visuals (to make use of Procedural Texturing techniques, usually multiple textures are assigned). The parameters block allows to configure procedural techniques by passing control parameters to the Shader generating the composite texture. These parameters are just numbers - often 1 or 0 for turning things on/off, integers, or floating point numbers.
<xsize> and <ysize> are important because they determine how large a patch the base texture file is supposed to cover (in the above example, 1000 m x 1000 m is covered by one texture sheet, if the sheet is 1024x1024 pixels, the base resolution is about 1 m). Terrain effects often use additional overlay textures on smaller scales, and these use a magnification factor to the base resolution you set.
The final set of parameters is passed to the FDM for ground interactions - we learn that 'Dirt' and 'Rock' are to be treated as solid surfaces and what their rolling friction and bumpiness is supposed to be. Using blocks like this, every landclass as stored in the terrain mesh is assigned characteristics that determine how it looks and behaves in FG when the scenery tile is loaded.
Note that using material definitions it is possible to merge different landclasses - in the above example triangles classified as 'Dirt' and 'Rock' will look and feel the same - but making two separate definitions instead, they could also be made to look differently. Again, a single landclass can not be made two different materials in the same region - later definitions will overwrite earlier ones.
Basic workflow
To make a regional texture definition for a region then, you need to
- define a region by creating a file with a name, area and condition header
- include this file in materials.xml
- fill it with individual material definitions which are supposed to apply to the region
For the latter task, you may or may not have to
- acquire suitable textures for the region
- configure the procedural texturing parameters to generate good composite textures
- assign random trees, buildings, materials, lights,...
- assign surface properties
Creating good regional definitions
Good terrain texturing is more of an art than of a science, because there are many different factors to consider.
What makes a good texture sheet?
To get visuals of a region close to reality, you might want to start with aerial imagery of the regions and extract textures from there - but that is not without pitfalls.
The texture needs to be GPL compatible. While there are some public-domain aerial imagery data bases, the most popular (Google Earth) is not. I've also made surprisingly good experience in looking for aerial imagery from local photographers and asking their permission to extract a texture from their work.
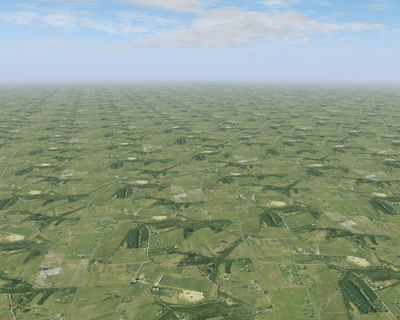
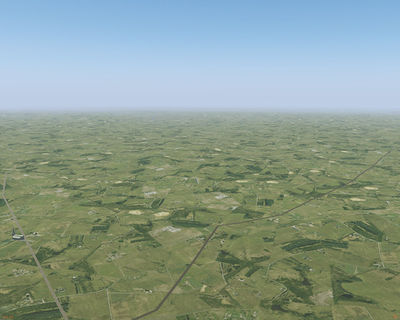
The biggest problems of textures are too much structure and lack of structure. If there is lots of structure in a texture, once you map the same sheet to a large area you get pronounced tiling:
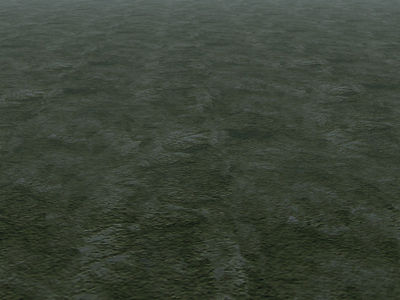
Tiling like this is very prominent from high altitude, it is one of the visually least appealing features and should be avoided at all cost. If the base texture layer has much less structure, tiling is also much less apparent:
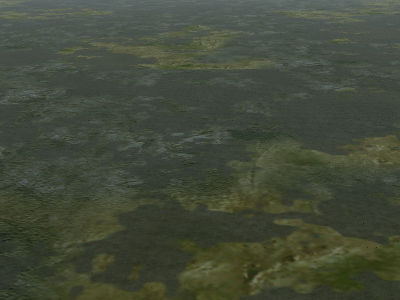
On the other hand, the more the structure inside a texture sheet is de-emphasized, the more prominent is also the appearance of the landclass boundaries where the texture sheets change:
The ideal texture sheet is a compromise between these two extremes - structured enough to de-emphasize landclass boundaries, not so structured as to lead to bad tiling.
Another thing to consider when extracting a texture from aerial photography is that the land may be often dusty on the photograph. That is problematic because in FGs texturing scheme we want to be able to add dust procedurally which only works if the base texture is sufficiently clean.
So you may have to work with an image processing software to adjust hue and contrast of a texture sheet after taking it from a photograph, and run a mapping algorithm to make sure it does not generate seams when repeated.
To keep memory occupancy of the graphics card reasonably low (users can not easily opt out of terrain textures), there's a guideline that texture sheet size should not be larger than 1024x1024 for the terrain. In practice, using procedural techniques effectively much higher resolutions can be achieved anyway, so this is not much of a restriction.
Understanding the toolkit
Procedural Texturing is the primary tool to counter texture tiling. It works by generating structures from a non-repeating noise function and gives compelling results for both natural landclasses
and agriculture
and in addition allows to generate a very high resolution in the centimeter range close to the ground. Basically if you understand and use procedural techniques, even for textures with lots of structure tiling ceases to be a problem and you can focus on dealing with the landclass seams.
One factor to consider is hue blending. If you look at real aerial photographs of a region, you'll notice that soil has the same color everywhere. For instance, North Carolina has a fairly reddish soil. You see that color on bare patches of grass, but also on forest clearings, in gardens - everywhere. Because it's the same soil everywhere. Similarly, vegetation tends to have the same hue in a region, regardless of whether it is in a suburban garden or in the countryside.
Now consider texturing the shrubland of a region with olive green vegetation on reddish patches of soil - and then the suburban regions with ochre soil and lush bright green vegetation - the result is an obvious visual mismatch.
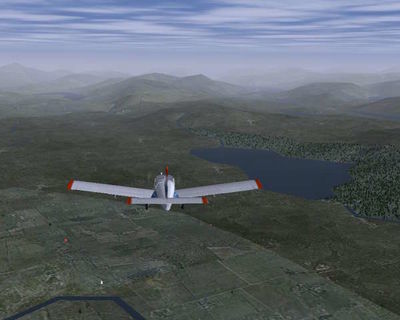
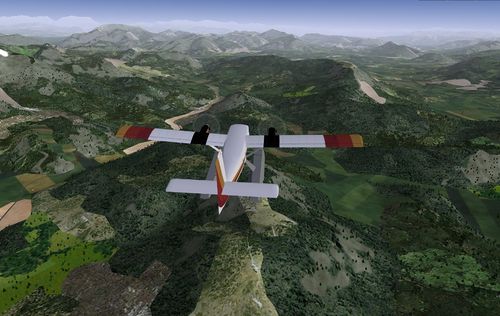
Compare this scene of the French Alps with multiple different hues of green and ground
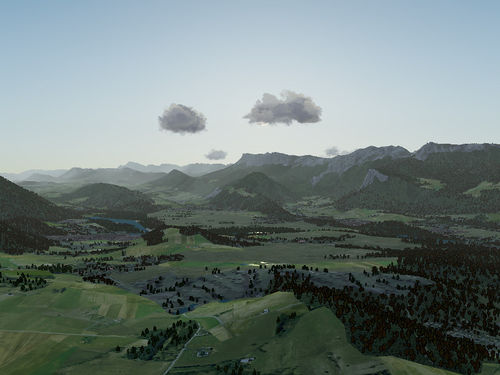
with a hue-blended scene of the same scenery:
to see just how important hue blending is. Procedural overlay texturing techniques are an excellent tool to do such blending, because they allow e.g. to keep the base texture the same across two landclasses and only vary the overlay layers to mark a landclass as different. Usually it is much better to use hue-blended texture sheets than to use the 'right' sheets when there is high contrast between landclasses which is not always there in reality.
By the way, do not aim to remove all vector seams - some of them are there in reality, for instance patches of managed forest in central Europe are characterized by very sharply pronounced boundaries, and so are suburban regions. Aim to de-emphasize only those that have no equivalent in reality.
Random vegetation, buildings and objects
Inside the <material> tag, it is also possible to declare random vegetation, random buildings or random objects. The difference is that the former two are supported by dedicated shaders which makes their rendering rather optimized, whereas random objects are normal 3d models without dedicated optimization. In general, random vegetation or buildings can hence be drawn in much higher numbers.
Random vegetation
The detailed syntax to generate random trees, buildings and objects is beyond the scope of this article, it is explained in the technical specifications of the materials definition in README.materials.
Texture sheets with rows of different vegetation types are used for tree rendering. A tree texture sheet might contain different types of trees in a forest, or different types of bushes in scrubland. Textures for each trees or plants are created by extracting them from a suitable photo. See Howto:Create textures from photos .
Deciduous and evergreen vegetation
There are different tree effects for different types of vegetation in a texture sheet. FlightGear supports an autumn effect for types of vegetation with leaves that gradually become yellow or red and drop off in autumn - deciduous ![]() vegetation. Vegetation whose leaves do not fall off is called evergreen
vegetation. Vegetation whose leaves do not fall off is called evergreen ![]() vegetation. Most tropical vegetation, and vegetation that originates in warmer climates, are evergreens. There is some deciduous vegetation in warmer climates that drop leaves in the dry season. The vast majority of conifers
vegetation. Most tropical vegetation, and vegetation that originates in warmer climates, are evergreens. There is some deciduous vegetation in warmer climates that drop leaves in the dry season. The vast majority of conifers ![]() are also evergreen although there are some conifers whose leaves fall off and change colour. Texture sheets can have a mixture of deciduous and evergreen vegetation. As of March 2021, deciduous vegetation is placed first in each row, followed by evergreen vegetation.
are also evergreen although there are some conifers whose leaves fall off and change colour. Texture sheets can have a mixture of deciduous and evergreen vegetation. As of March 2021, deciduous vegetation is placed first in each row, followed by evergreen vegetation.
Some materials parameters (see README.materials for the rest):
tree-effect: the vegetation effect to use. See below.
tree-varieties : The number of different trees (plants) defined in the tree-texture row (i.e. horizontally). (default: 1)
Tree (vegetation) effects and the number of deciduous plants:
tree.eff: 0 - use this when all trees are evergreens.
tree-european-deciduous.eff:8 - typically used when all trees 8 are deciduous. It can also be used in a mixed texture sheet with more than 8 plantstree-european-mixed.eff: 4 - used for texture sheets with a mixture of deciduous and evergreen plants. e.g. 4 decidious plants followed by 4 evergreen plants
Objects
Random or non-random placement
The object placement can be made non-random by specifying an object mask (i.e. an additional texture that tells how objects are placed). This allows to place trees on a specific part of the base layer texture if that part shows trees. The green channel mask is used for random vegetation placement, the blue channel for buildings and lights. and the red channel controls the rotation of buildings (0.0 is North, 0.5is South). Fractional colour values can be used to give a probability of placement.
Often, there is a tough choice to be made between placement masks and procedural texturing, because the placement masks are not compatible with the procedurally generated shapes. Placing 3d trees and buildings where they belong on the base texture looks stunning from close-up, but if the area to be covered is too large, tiling may spoil all the visuals. In general, a good idea is to choose placement masks where the landclass patches are small and tiling is not a problem, in particular for urban, suburban and possible small-scale agricultural terrain, use procedural techniques instead where areas covered by the same landclass are large and tiling is an issue.
Also note that the appearance of a large number of buildings does not need to be created by random building placement but can be alternatively done by the urban relief effect.
Object types
Object mask can be used for things like silos or farm buildings in agricultural landclasses. Random objects can be used for things like occasional wood cottages in forests, or for occasional ships/boats or icebergs over water landclasses (see globalsummer.xml [3]) of different types.
Birds
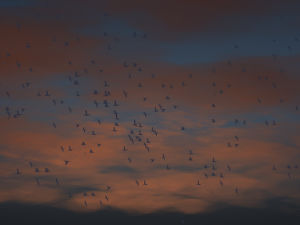
There is an animated 'bird flock' object. As of May 2021, it is in Models/Effects/Birds/birdswarm.xml [4] for a seagull type bird and consists of 4 swarms.
Defining a new object-group [5] for birdswarm objects in a regional definition - see Caribbean.xml, bermuda.xml, or southern-europe.xml for examples [6]:
    <object-group>
      <object>
         <path>Models/Effects/Birds/birdswarm.xml</path>
         <coverage-m2>1500000</coverage-m2>
         <heading-type>random</heading-type>
      </object>
    </object-group>
You can place bird objects over suitable landclasses. The default seagull texture is Models/Effects/Birds/birds_in_flight.png , and new textures can be integrated into specific effects when created.
Assigning effects
An effect is an instruction for the graphics card how a part of the mesh is to be drawn on screen. Everything on screen has an effect assigned, but to achieve e.g. the sun reflection on water or the relief mapping of urban terrain, a special effect has to be assigned explicitly.
Currently (as of April 2016), Flightgear supports three different rendering schemes, the classical renderer, Project Rembrandt and Atmospheric light scattering (ALS).
While ALS has per default support for procedural texturing, the other two have not and support only a limited range of effects which have to be assigned explicitly. For that reason, the focus of most regional texturing development has been on creating ALS procedural definitions, but care has to be taken to create visuals which work for the other renderers as well.
In addition, some situations require also in ALS to assign a special effect because the default terrain effect is ill equipped to handle the visuals (water and urban relief mapping are the prime examples, but there's also the procedural rock shader or the agriculture shader).
Technically, effects are assigned inside a material definition with a tag like
<effect>Effects/forest</effect>
Usually the assignment between ALS-supported effects and effects of the other frameworks is made to be unproblematic:
- assigning an effect like forest of the default rendering framework is ignored by ALS
- assigning ALS supported effects like water or agriculture automatically selects the corresponding classic and Rembrandt effects (water and crop in that case)
- ALS effects usually rely on texture set definitions like
   <texture-set>
      <texture>Terrain/deciduous-hires.png</texture>
      <texture n="12">Terrain/shrub-hawaii.png</texture>
      <texture n="13">Terrain/shrub-hawaii.png</texture>
    </texture-set>
all the higher index numbers (here 12 and 13) are ignored by the classic renderer and Rembrandt and exclusively used by ALS. It should therefore not be a problem to create a materials definitions which work for all renderers without clashes.
There are some special landclasses, for instance the runway, the taxiways and the airport keep. They have dedicated effects assigned to them which (among other things) render them in especially high resolution since these are terrain parts one usually sees from close-up. Like everything else, they can be regionalized, but do not mix their effects with the standard terrain effects! It may seem tempting to use the airport keep effect also for other grass surfaces, or to render the airport keep as a normal landclass, but this will have unexpected side effects as soon as the terrain is drawn e.g. snowy or wet.
Special situations
A few extras may be considered:
- ALS supports dynamical autumn coloring. Which part of a texture are vegetation and color reddish in fall is encoded in the texture alpha channel. Currently (April 2016) this is fully worked out for Europe, not for other parts of the world. For a good effect, this has to be done consistently for all materials which have textures with vegetation on them as well as for the tree texture sheets themselves.
- The color of both coastal areas and (in ALS) inland waters is determined at high shader quality by the global water depth map /Textures/Globe/ocean_depth_1.png. In coastal areas, the color encodes the seafloor color and the alpha channel depth, for inland waters the color directly affects water color. Do any modification to the depth map with care!
Guidelines
To create a good regional texture definition set, make sure you take care of and test the following issues:
- All texture sheets need to be GPL compatible - really. Google Earth, no matter how easy, is not acceptable as a source. Be prepared to bring proof of origin before anything is committed.
- Do not assume everyone uses FG like you do. For instance, in some regions of the world, it would look most compelling to assign a sand color to forest landclasses and represent the forest only explicitly via random vegetation. This is a big no, because a user who does not run random vegetation then never recognizes the forest. Any user, no matter how he uses FG, should have the chance to use a VFR map, and that means he has to recognize a forest as forest and a dry lake as a dry lake no matter his rendering settings.
- Test your texture scheme at different altitudes and visibility ranges - what looks very compelling 1500 ft from the ground does not necessarily from 36.000 ft. Usually tiling is much more of a problem from high altitude than from low altitude. Under ALS procedural texturing, tiling should be near absent in a well-done texturing scheme. Under the other renderers it cannot really be avoided, but aim to give compelling visuals to Rembrandt and classic renderer users nevertheless.
- Test your scheme for autumn coloring (if applicable) and snow cover, see whether you get consistent results under all conditions, adapt where applicable.
- If you modify an existing region, or make a sub-region of an existing region, find the maintainer of the region and discuss your proposed changes beforehand and again after you have made them. If someone worked before you, chances are he had a plan, try to work within that plan. Any subregion you define should blend smoothly into the larger region, not create a sudden jarring change in visuals.
- Test your scheme in at least five different locations within the defined area. Often changes which look well in one spot don't at all some 300 km distant. The scheme should work across the whole area - if it can't be made to work, the area is probably too large and sub-dividing it would be the better option.
- Have patience and persistence - creating a good regional texture scheme means balancing many different pros and cons against each other. Having a single stunningly textured landclass is pointless if the blend of the whole region doesn't work.
- Conserve server bandwidth and harddisk space - try re-using existing textures where feasible, add your own only when needed. Often hue and contrast changes to existing textures work surprisingly well.
Troubleshooting
You'll probably frequently end up in a situation in which your changes don't have any visual effect. The following tricks have proven useful:
- check the landclass you're editing in-sim - with the ufo, Ctrl+Alt+click on a triangle dumps the name of the landclass file containing the material definition (as of May 2020 nightly builds), material definition, and elevation briefly on-screen and into the console. This is extremely useful to find which file the regional definition you're seeing actually comes from.
- make sure you have the signs of latitude and longitude in your <area> tags correct: 30 degrees western longitude should appear as -30.0 - also make sure that really the smaller number is assigned to <lon1> or <lat1> and the larger number as <lon2> and <lat2>, keeping in mind that -10 is larger than -20.
- check whether any later definition overrides the file you're editing - this is why it's important to have a clear hierarchy of definitions rather than a mess of overlapping definitions which partially override each other
- to check hierarchies, you can gradually comment later definitions in materials.xml and see whether you observe changes
- to check whether you're editing the right file/region, do something obvious, like assign a rock texture to a lake. Change to subtle only once you're sure you're editing the right file.
Tips
- Reloading:
Menu inside the simulator > Debug > Configure development extensions > press reload Materials and then reload Sceneryto reload all material files without needing to close and restart FlightGear. This is extremely useful to tweak values and see the changes. To see subtle differences clearly: Pause the sim, and save before and after screenshots. - To reload changed textures without needing to restart the sim - e.g. when making textures in GIMP and tweaking various effect/filter parameters:
- a)
Menu inside the simulator > View > Rendering > change from regional texturing to global texturing, pres ok, then change back from global texturing to regional texturing - b) Change the name of the file, reload materials and scenery, and change the name of the file a
- c) Export a new texture in gimp with a slightly different filename e.g. change MyTexture.png to MyTexture.2.png. Reload scenery. This is the fastest way when tweaking textures in GIMP.
- a)
- Quickly creating albums of screenshots during review: These days you can simply drag and drop screenshots to online image hosts like imgur. It's also possible to paste image in the the clipboard (e.g. from GIMP) directly into the imgur file dialog by pressing ctrl+v (at least in Windows).
- See related content below, including creating textures.
Related content
- Procedural Texturing
- Coverage of the regions in FGDATA: https://github.com/Juanvvc/plot_regions/tree/master/regions
- Coverage of the regions that define a material in FGDATA: https://github.com/Juanvvc/plot_regions/tree/master/materials
- Howto:Create textures from photos
