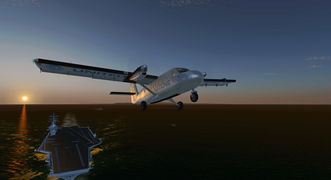
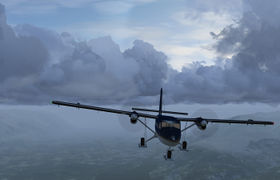
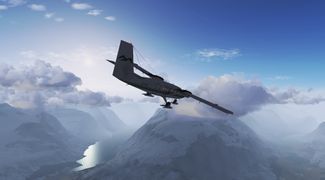
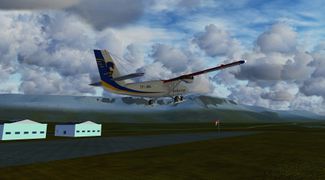
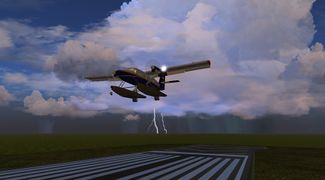
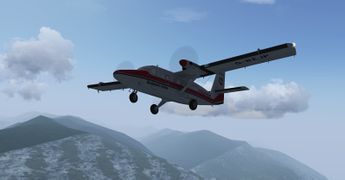
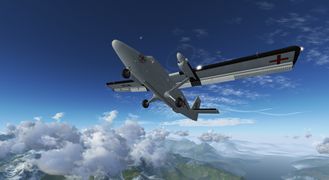
de Havilland Canada DHC-6 Twin Otter
 | |
|---|---|
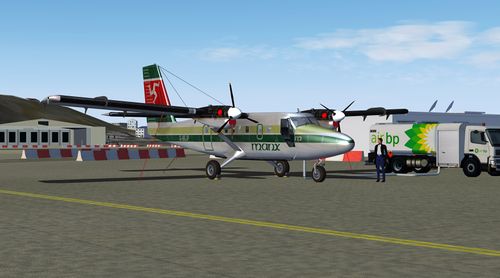
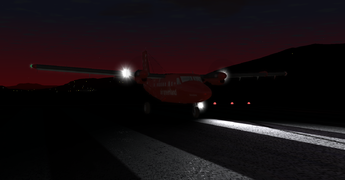
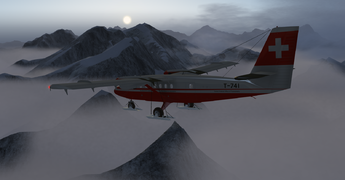
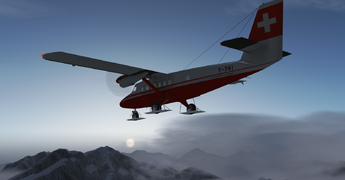
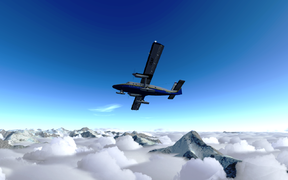
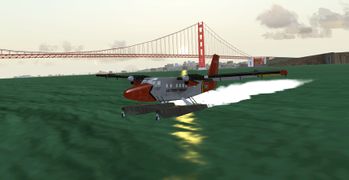
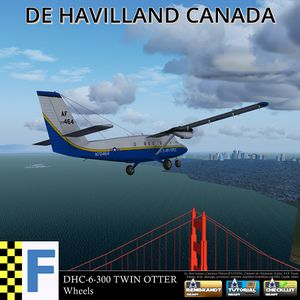 The DHC-6 Twin Otter in flight | |
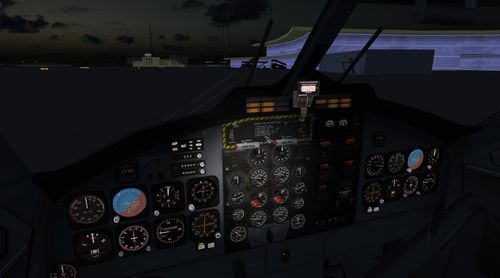
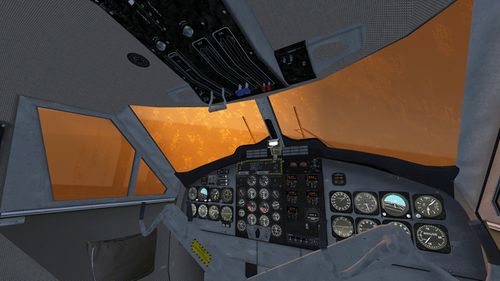
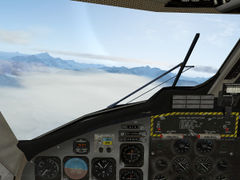
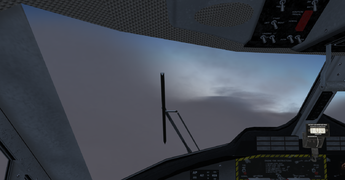
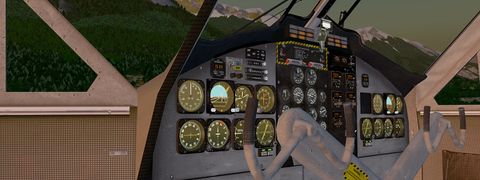
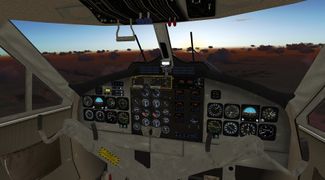
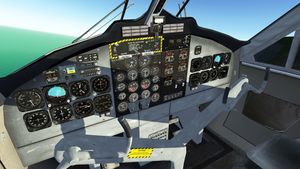 Cockpit of the Twin Otter with interior shading | |
| Type | Civil utility aircraft, Military utility aircraft, STOL aircraft, Floatplane |
| Configuration | High wing aircraft, Monoplane aircraft, Fixed gear aircraft, Tricycle landing gear aircraft |
| Propulsion | Turboprop aircraft, Twin-engine aircraft |
| Manufacturer | de Havilland Canada |
| Author(s) |
DHC-6 Twin Otter team
|
| FDM | YASim, JSBSim |
| --aircraft= |
dhc6 dhc6F dhc6S dhc6p dhc6pF dhc6pS dhc6jsb |
| Status | Advanced production |
| FDM |
|
| Systems |
|
| Cockpit |
|
| Model |
|
| Supports |
|
| Development | |
| Website |
|
| Repository |
|
| Download |
|
| Liveries |
|
| Forum |
|
| License | GPLv2+ |
|
| |
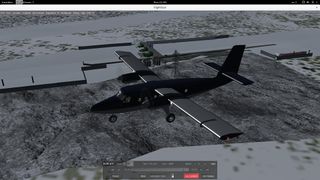
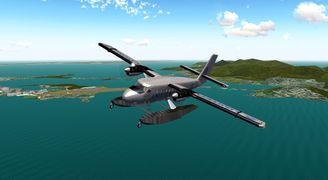
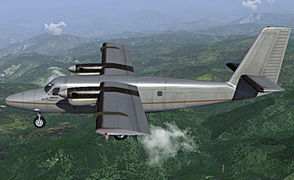
The de Havilland Canada DHC-6 Twin Otter, sometimes affectionately called the Twotter, is a 20-passenger STOL (Short Takeoff and Landing) utility aircraft. It has often been called the most successful aircraft program in Canada's history. The Twin Otter is a high-wing twin-engine turboprop aircraft with a non-retractable tricycle gear, a non-pressurised cabin and two constant-speed props. In FlightGear, there are three versions available: Wheels, Floats (amphibious) and skis.
About the original
The DHC-6 Twin Otter is the further development version of the DHC-3 Otter of the same manufacturer. The development of the Twin Otter began in 1964, it's first flight was on May 20, 1965[1]. To keep the STOL abilities of the Otter, the DHC-6 got two powerful Pratt & Whitney Canada PT6 ![]() turboprop engines with 410 kW produced by each turbine in the first version, the DHC-6-100.
turboprop engines with 410 kW produced by each turbine in the first version, the DHC-6-100.
In 1968, the Twin Otter was developed to a new version, the -200 series, which had improved STOL performance.
One year later, in 1969, the DHC-6-300 series was introduced, with more powerful engines, the PT6A-27 with 460 kW. Until today, the -300 Series is with 614 built aircraft the most successful variant of the Twin Otter. 1988 the production of the DHC-6-300 ended.
After 18 years of not-producing the Twin Otter Viking Air acquired the production rights from Bombadier Aerospace, and started producing a new series, the DHC-6-400, whose first flight was on October 01, 2008. The DHC-6-400 is equipped with modern state-of-the-art avionics and even more powerful PTA6-34 engines also from Pratt and Whitney. Until summer 2014, there were built 55 aircraft of the -400 series.
The aircraft's powerful engines, it's STOL abilities, and it's spacious cabin make the DHC-6 a popular aircraft for skydiving and well-suited as a bush plane for inacessible and remote terrain in many developing countries.
The FlightGear version is the DHC-6-300 Series.
Handling the aircraft
Preflight inspection
To make it as real as possible it is highly recommended to use the walker for the preflight inspection
- Nose:
- Remove the covers of both pitot tubes. Otherwise the airspeed indicator won't show anything. (The pitot tubes are approximately at eye level in front of the left and right cockpit doors)
- Check the nose gear (wheel, damper, taxi lamp) for damage and tire pressure
- Left wing:
- Remove the engine cover, or you won't be able to start the engines
- Remove the left tie-down
- Check the wing, landing light, aileron and flaps for damage
- Left main gear:
- Remove the wheel chocks
- Check the gear for damage and tire pressure
- Tail:
- Remove the rear tie-down
- Check the empennage for damage
- Right main gear:
- Remove the wheel chocks
- Check the gear for damage and tire pressure
- Right wing:
- Remove the engine cover, or you won't be able to start the engines
- Remove the right tiedown.
- Check the wing, landing light, aileron and flaps for damage
Engine startup process
The Twin Otter is a quite complex aircraft, so starting up the engines isn't something that can be done in two or three steps.
- Ensure that the parking brake is set, the throttle levers are in idle position, propeller levers are on feather position and fuel condition levers are in cutoff position
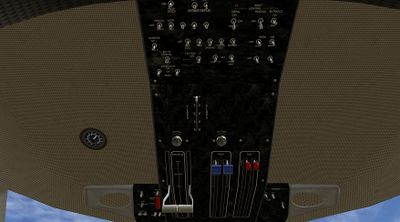
- Switch on the battery master and select BATTERY as power source (Captain's overhead panel)
- Switch on the cabin lights and the instrument lighting
- Check that the voltage is above 18 V; normally it's around 24 V (above the radio sack)
- Make sure that there is enough fuel in the tanks for the flight you've planned
- Switch on the "FASTEN SEATBELT" and the "NO SMOKING" sign
- Switch on the beacon (center overhead panel)
- If you do not start up on asphalt, you must switch on the intake deflectors. Otherwise the engines can get damaged
- Engage both boost pumps (at the bottom of the center panel, below the engine instruments)
- If the outside temperature is below 0°C you must switch on the Pitot Heat and the Prop De-ice
- Switch the IND selector to BAT (above the radio stack)
- Check that no one's about to walk into the left propeller
- Engage the stater switch left and watch GG RPM rising (lowest engine instrument on the center panel)
- When GG RPM exceeds 12 % push the left condition lever full forward to supply the engine with fuel
- When the PROP RPM rises stable repeat the steps 12 - 14 for the right engine
- When also the right propeller increases it's RPM stable you can switch off the starter
- Push both propeller levers full forward
- Switch on the navigation lights (POSN LT)
- Switch on both generators
- Select R GEN on the IND selector
- Switch on the window heating (First officers overhead panel)
- Compare the indication of the heading indicator with the magnetic compass: If they don't coincide you have to synchronize them by adjusting the heading offset of the heading indicator
- Set the radios to the required frequencies and the altimeter to QNH/airport elevation
| Note The startup procedure described above is slightly simplified. When following the in-sim checklists you have to execute 4 checklists with over 50 items. |
Take off
- Flaps 10-20° depending on runway length
- Landing lights on
- Release the parking brake
- Engage Autofeather to automatically feather the prop if an engine fails
- Give full throttle. Some engine limit warnings will appear, but for a short time you may exceed the limits.
- Rotate at aprox. 80-95 kts
Climb
- Reduce power to fall below the engine limits
- Flaps up
- Landing lights off
- Airspeed around 110-120 kts
- Intake deflectors and Autofeather off
Cruise
- Airspeed 150-165 kts
- If outside temperature falls below 0°C switch on the Pitot Heat and the Prop De-ice
- Engine instruments within limits
- Keep an eye on the fuel quantity
Landing
- Set Flaps step by step
- Airspeed below 108 kts when Flaps extended
- Landing lights on
- Condition and propeller levers full forward
- If not landing on asphalt, activate the intake deflector
- Verify that the parking brake is off
- Touchdown with 60-70 kts
- After touchdown apply reverse thrust
Airspeeds
| Airspeed | IAS |
|---|---|
| Stall speed, landing config (VS0) | 58 kts |
| Stall speed, cruise config (VS1) | 80 kts |
| Rotation speed (VR) | 80-95 kts |
| Maximum flap extended speed (VFE) | 108 kts |
| Cruise speed (VC) | 150-165 kts |
| Maneuvering speed (VA) | 130 kts |
| Never exceed speed (VNE) | 170 kts |
Systems overview[2][3]
The Twin Otter is equipped with several systems which operate the aircraft's components:
- Electrical: Operates i. a. hydraulic pump, boost pumps, engine gauges, turn coordinator, lighting, auto-feather
- Fuel: Supplies engines with fuel from two fuel tanks
- Hydraulic: Operates flaps, nose wheel steering, and wheel brakes
- Pitot: Supplies airspeed indicators with dynamic pressure
- Pneumatic/Bleed Air: Operates heating and de-icing system and intake deflectors
- Static: Supplies airspeed indicators, altimeters and vertical speed indicators with static pressure
- Vacuum: Drives gyros for artifical horizon and directional gyro/heading indicator
Please note that as of July 2016 not all of these systems are implemented!
Electrical system
The electrical system is fed by an 40 ampere-hour battery and two engine-driven generators (which operate as starter-motors when starting the engine). It is primarily a 28 volt, direct current (DC) system, but some components need alternating current (AC) to work.
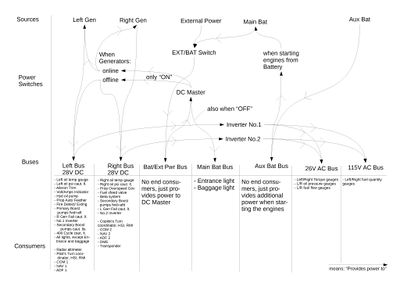
There exist seven buses which provide electrical power to several components:
- Left 28V DC bus: Is driven by left engine's generator. It feeds the DC voltmeter, hydraulic pump, prop auto-feather system, fire detection system, primary boost pumps (forward and rear), "R GEN FAIL" caution light
- Right 28V DC bus: Is driven by right engine's generator. It feeds the propeller overspeed governor, crossfeed fuel valve, secondary boost pumps (forward and rear), "L GEN FAIL" caution light
- Aux battery bus: Uses a auxiliary 3.6 ampere-hour battery to support the starter motors when starting the engines.
- Main battery bus: Is controlled by the Master Battery switch. When switched off, only the interior lights are provided with power. When MASTER is selected, it connects the electrical system to generators or battery or external power, depending on the EXTERNAL/BATTERY selector switch position.
- Battery/External Power bus: Is controlled by the EXTERNAL/BATTERY selector switch. When EXTERNAL is selected, it isolates the battery and connects the external power unit to the left and right bus. BATTERY will connect the battery to the left and right bus when generators are not running or the generator voltage is lower than the battery voltage. If the generator voltage is highter than the battery voltage it connects the left and right bus to the respective generator. When swithced off, the whole electrical system gets disconnected.
- 26V AC bus: Torque presure, fuel flow, and oil pressure gauges,
- 115V AC bus: Fuel quantity gauges, vacuum pumps for gyros (artifical horizon and directional gyro
The two AC buses are fed from one of the two static inverters. The No.1 inverter receives power from the Left 28V DC bus (and hence from the left generator), and the No.2 inverter receives power from the right 28V DC bus (and hence from the right generator). The inverters are selected alternatively by the inverter switch located on the overhead panel.
| Caution Please note that the above chart isn't 100% correct. E.g. the "DC Master" is connected only to the Left 28V DC Bus, not to the right. Or that the battery is connected to the Main Battery Bus even if the External/Battery selector is switched off. Maybe I'll correct these errors someday, but please don't hesitate to do it if you want. |
Fuel system
The Twin Otter's fuel systems consists of two fuel tanks, two primary fuel boost pumps, two secondary boost pumps, a crossfeed valve, gauges for fuel quantity and fuel flow, and a few caution lights.
The fuel tanks are located beneath the cabin floor and arranged in tandem. While the forward tank has a capacity of 1235 lbs the rear tank can contain up to 1341 lbs of fuel. With the engines mounted significantly above the fuel tanks the engines cannot bes supplied with fuel by gravity and hence the system has to rely completely on the fuel pumps. In normal operation (i.e. when the fuel tank selector is set to NORM) the foward tank feeds the right engine and the rear tank feeds the left engine.
However when the tank selector is set to BOTH ON FWD or BOTH ON AFT the boost pumps on the non-selected tank are deactivated and both boost pumps on the selected tank are activated which overwrites the boost pump switches.
The cross-feed valve is powered by the right DC bus, i.e. to work properly it needs either the battery connected or the right generator to be online.
If the primary boost pump fails, the secondary boost pump will automatically activate and the BOOST PUMP 1 FWD/AFT PRESSURE will light up. However the secondary boost pumps can be activated manually through the STANDBY BOOST PUMP EMER switches.
The FUEL LOW LEVEL caution lights will illuminate when the forward tank contains less than 75 lbs resp. the rear tank contains less than 110 lbs of fuel.
For the Twin Otter we have a refuelling system whereby you can easily refuel your Twin Otter or drain the tanks. To activate the fuel system, click on one of the fuel caps located on the left side of the fuselage or go to "Menu" -> "DHC-6" -> "Options" -> "Ground Services" -> "Fuel Truck".
Hydraulic system
The Twin Otter has a quite simple hydraulic system which is mostly automated. Hydraulic pressure is provided by an electrical pump which gets its power from the left electrical bus. Only a few components are operated hydraulically: Nose wheel steering, wheel brakes, and flaps.
If the hydraulic system fails or is inactive, you can still move the flap lever or the nose wheel steering bar, but it won't have any effect on the nose wheel or flap setting.
The only manual control is a mechanic hand pump whih can be used as a backup in case of an failure of the electric pump. The hand pump is stowed behind the copilot's seat.
Pneumatic/Bleed air system
The very simple pneumatic system of the Twin Otter is only used to provide hot air for the heating and the de-icing system.
Two switches labeled "BLEED AIR" on the overhead panel control the bleed air valve on the left (resp. right) engine.
To get the pitot heat and the prop de-icing working, you have to switch on the bleed air switches.
The intake deflectors are also extended pneumatically, but they don't need the bleed air switch to be activated. Instead they need GG RPM (also called "N2", or "Ng") to be higher than 80 percent.
Pitot system
A working pitot system is very essential for safe flight, although it is connected to only one instrument: The airspeed indicator (ASI). But if the ASI fails you have no opportunity to know your airspeed and you end up very likely in a stall or even a crash.
The Twin Otter has two indepentently working pitot systems. The left pitot system feeds the pilot's ASI and the right pitot system feeds the copilot's ASI with dynamic pressure.
The two pitot tubes are located on the side of the fuselage in front of the pilot's (resp. copilot's) door. Make sure you removed the pitot tube covers from the pitot tubes prior to the flight or your ASI won't indicate your airspeed but act similar to an altimeter as in this case only static pressure is provided.
If you notice some odd behaviour of the ASI in flight (e.g. accelerating in climb and decelerating in descent) this is a strong indication of a iced pitot tube. Switch on the pitot heat to prevent icing.
Static system
There are three instruments that work with static pressure: Airspeed indicator (ASI), altimeter (ALT), and vertical speed indicator (VSI). The Twin Otter has a total of four static ports which are located in front of the cockpit doors, two on each side. As they are not pointing into the airstream they are not in danger of icing.
Now what happens in case of an failure of the pitot and/or the static system?
| Instrument | Static failure | Pitot failure | Both failure |
|---|---|---|---|
| VSI | fixed at 0 | normal indication | fixed at 0 |
| ALT | fixed at current value | normal indication | fixed at current value |
| ASI | Ascent: indicates too slow
Descent: indicates too fast |
Ascent: Indicates too fast
Descent: Indicates too slow |
fixed at current value |
Vacuum system
Each engine has a vacuum pump that drives the gyros for the attidude indicators and the directional gyros.
The vacuum pump is powered by the gas generator (GG) of the respective engine.
Autopilot
There are 2 separate controllers: a vertical one, and a lateral one. Each has its own master switch (the bigger "ALT" and "HDG" buttons), which has to be "on" for it to do anything at all, and on top of that, the autopilot master ("AP") also has to be "on". Both controllers have several modes.
Vertical controller:
- No submode selected means maintain current altitude
- ALT climbs/descends to the altitude selected in the altitude selector dial at a fixed climb/descent rate of 500 fpm
- VS holds the selected vertical speed
- SPD holds the selected airspeed ("speed with pitch" - there is no autothrottle in the DHC6)
- GS arms the ILS glideslope capture; the previously selected vertical mode remains active until the glideslope is captured
Note that, unlike the autopilot systems in a typical airliner, the VS and SPD modes will not disengage and level off when the target altitude is reached, so for example setting target altitude to 7000 ft, target speed to 100 KIAS, and hitting the "SPD" button, will make the aircraft climb through 7000 ft and further.
Lateral controller:
- No submodes selected means keep wings level
- HDG captures and holds the heading selected with the heading bug
- NAV arms VOR/LOC capture; the previously selected mode remains active until the radial/localizer is captured
It is possible to engage and disengage the lateral and vertical modes independently, so you can for example enable vertical A/P, but hand-control lateral movements (bank/turn). This is great for sightseeing or flying low in mountainous terrain.
GPS:
The GPS unit emulates a Garmin 196, with the added twist that, unlike the real thing, the GPS unit can override the NAV1 localizer signal; you can use this feature to make the DHC6 follow a GPS flight plan.
Here's how that goes:
- Enter a route into the route manager (Autopilot/Route Manager) and activate it.
- In the GPS menu (Equipment / GPS), select "Leg" mode, and check the "Slave NAV1" box. The NAV1 instrument will now follow the route manager's GPS-based signal rather than the VOR/LOC radial from NAV1.
- Line up, align the heading bug with the runway heading, take off, stabilize, turn autopilot on. Set ALT mode to climb to your cleared altitude, HDG mode to HDG, then arm NAV.
If you're not on a suitable heading to intercept the fake NAV1 signal, adjust the heading bug accordingly. Once the autopilot captures the fake radial, the aircraft will keep following the flight plan as long as NAV mode remains active.
Keyboard shortcuts
| Key | Function |
|---|---|
| Del | Toggle thrust reversers for selected engine(s). Only with throttles in idle position |
| c | Show/hide cockpit |
| ! | Select left engine |
| @ | Select right engine |
| ~ | Select both engines |
| n/N | Increase/decrease propeller pitch on selected engine(s) |
| j/J | Increase/decrease left fuel condition |
| k/K | Increase/decrease right fuel condition |
| l | Toggle pitot heat on/off |
| L | Toggle prop deice on/off |
| m | Toggle intake deflectors on/off |
| f | Toggle flashlight (only if ALS activated) |
| y | Show/hide yokes |
| Y | Show/hide pilots |
| F5 | Aileron trim left |
| F6 | Aileron trim right |
| F7 | Rudder trim left |
| F8 | Rudder trim right |
| F11 | Autopilot controls |
| F12 | Radio Stack |
| q | Adjust nose wheel left |
| Ctrl+w | Center nose wheel |
| e | Adjust nose wheel right |
| w/a/s/d | Move walker forward/backward/left/right. Only in Walk View or Walker Orbit View |
Development
After some time of silence, in early 2014 the Twin Otter got under active development again. Until today (Jan. 2015), the visuals (mainly the interior, thanks to Patten and the FlightGear PAF team) and the electrical systems reached many improvements. For example, lanbo64 implemented a startup procedure which comes quite close to the reality.
In addition, dg-505 created an extensive tutorial system, which makes it easy to learn the standard operating procedures, and a number of checklists, which are taken from real Twin Otter Checklists. Richard Harrison is currently working on an interior shadow cubemap.
Currently, the Twin Otter is still under active development. If You are interested in helping to make the Twin Otter even better, You are welcome to join!
| Note Since December 2015 the development of the Twin Otter has moved away from GitHub and over to the official FlightGear FGAddon hangar!
If you want to contribute to the Twin Otter it would be advantageous (but not mandatory!) if you have at least basic knowledge about version control. See FGAddon for details. |
Review
| This section contains a review. Please note that statements made here are (mostly based on) a single person's opinion. |
Note that this review is about the actual version (January 2015), so some things may change in the future.
The appearance
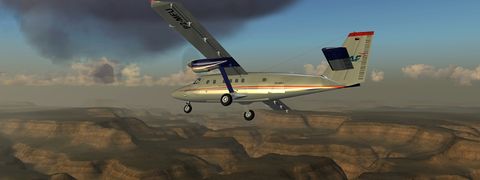
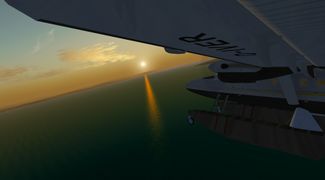
The Twin Otter has a accurately modelled 3D model. It has some details like the nose gear, the hinges for the ailerons/flaps, or the pitot tubes. All control surfaces are animated (ailerons, flaps, elevator, rudder) and the amphibious version has a retractable gear with two nicely modelled floats. The doors are animated and open/close by clicking on it. In the basic version there are some liveries included, which look partly really good. Many more liveries are available in the FlightGear Livery Database.
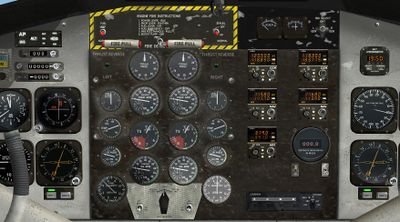
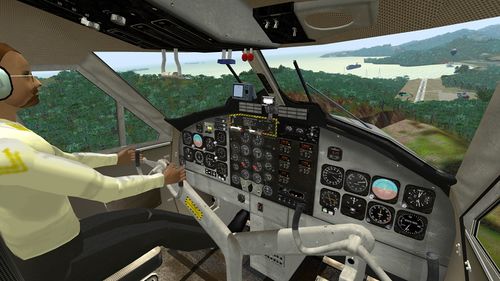
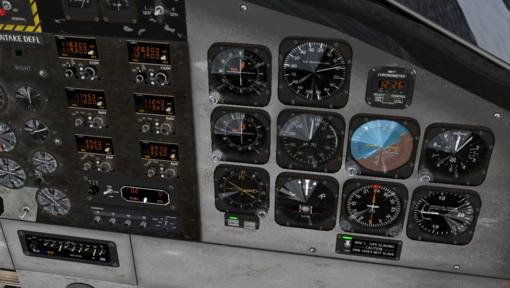
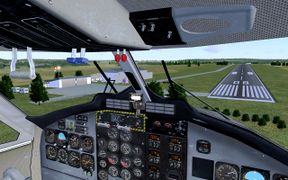
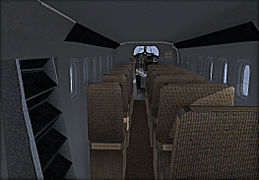
About the interior I have to say that both the cockpit and the cabin are quite accurate. Both have photo-realistic texturing, which is, at least from my point of view, very important for good optics. The interior gives some attention to detail: For example, the cabin has a extinguisher and a seatbelt/no smoking sign. Same thing in the cockpit: The Twin Otter has a very detailed cockpit with almost every instrument working and most switches animated and functional. In my view, the cockpit textures deserve a special mention. As said, it is photo-realistic textured and some of these textures look slightly worn, which gives the appearance of a pretty old, frequently used aircraft. Hats off to the designer(s), this looks really good and realistic.
Another nice function: If you want to know which instrument is which, you can press Ctrl+C to find out. Then you see also the clickable hotspots in the cockpit.
My personal wishlist concerning the appearance:
- A bit more detail of the skis
- A bit more detail of the props
- Some additional details like antennas, etc.
- Animation and implementation of the missing switches
Flying the Twin Otter
Starting the engines of the Twin Otter can be done in two different ways: First, using the Autostart button, which is absolutely NOT recommended because it's extremely unrealistic! The second way is by using the checklists/tutorials, which guide you step by step through the procedures. If you aren't familiar with this aircraft and want it realistic, it could take some time to get the engines running.
Due to the powerful engines and the STOL skills, the twin otter flies after only a short time of accelerating on the runway. During the climb, the Twin Otter can prove her excellent climb rate: Near sea level a climb rate more than 1500 fpm is also with full fuel tanks and pax absolutely no problem.
In the air the Twin Otter is quite easy to handle. The reactions to the joystick inputs are direct but not too sensitive. As I haven't flown the Twin Otter in reality, so I can't say precisely how realistic the FDM is. But taking the size, the powerful engines, and the relatively small control surfaces into account, it seems to me, that the creator of the FDM has done a good job, and it comes fairly close to the reality.
The FlightGear Twin Otter is also equipped with an autopilot, which is self-explaining and easy to use, but in general I fly manually, because the aircraft is easy to handle.
Landing the Twin Otter is as easy as the rest of the flight. Just pull the throttles back, slow down, line up in front of the runway, and descent. It's worth mentioning that the flaps work very good, so if you need to descent fast for any reason, you can put full flaps, and descent at -2000 fpm without gaining too much speed.
If you only have a very short runway for landing, thrust reverse might be a useful tool. Right after touch down press the Del key and apply full throttle. Your Twin Otter will quickly slow down, and is healthier for the brakes if you use reverse thrust.
Try this
If you want have a challenge, try to fly a long-range IFR route in bad weather without using the autopilot. Because all navigation instruments are operated from the cockpit, radio navigation is simulated realistically. Before the flight you can search for the VOR frequencies, and simply navigate from VOR to VOR using the NAV-Display and the DME.
Or try try flying in the mountains, where the high climb rate and the maneuverability is essential, especially if the weather is bad.
Changelog
This is intended to give a brief overview over the update history. No guarantee of completeness
Update 07.2015
Some new interior effects have been added by lanbo64 and dg-505:
- Rain effect
- Fog on windows
- Frost
- Glass reflections
- Interior shadows
- Flashlight
Update 12.2015
In December 2015 the Twin Otter received a major update. The major changes are:
- Addition of components to securing the aircraft
- Covers for the Pitot tubes
- Wheel chocks
- Covers for the engine intakes and exhausts
- Tie-downs
- Some cockpit elements added/updated
- A radar altimeter added (taken from the Citation and slightly modified)
- Removed the ADF display and replaced it with a Turn Coordinator (taken from the 707 and slightly modified)
- Replaced the Artifical Horizon with a more realistic one
- A Emergency Locator Transmitter added (taken from the Cessna Skymaster and slightly modified)
- Added a switch to mute the fire alarm
- and other, minor improvements
- Some work on the sound
- Rain sound when outside the aircraft
- Sound for rain on the windshield
- Thunder sounds
- The skis have now significantly more detailed 3D-objects
- Added a sophisticated 2D-Panel containing all the major instruments of the Twin Otter (that was tons of work!)
- New splash screens
- Added shadows for ALS and the default rendering system
- Added support for DFaber's walker
- Ground services: Added an advanced fuel truck system
- Added custom dialog windows for the radio stack and the autopilot
- Added a custom flight recorder which reads many of the DHC6-specific properties
- Updated the Autostart/Shutdown functions and the tutorials/checklists to match with the updates
- and many more further improvements, updates and bugfixes...
Update 06.2016
- Pilot 3D Models. Show/hide them with ⇧ Shift+Y.
- Major systems and instrumentation update
- Left pitot and static system for pilot's instruments
- Right pitot and static system for copilot's instruments
- Two independent altimeters for pilot and copilot
- Second KI206 VOR indicator vor better capability of IFR and radio navigation
- Hydraulic system
- Gauge for hydraulic pressure
- Pressure depends on voltage output
- Smooth animation of all switches
- Animation and implementation of the nose wheel steering lever.
Update 11.2017
After a lot of work and a long pause the Twin Otter now has a JSBSim variant!
- JSBSim FDM with data by Erik Hofmann from jsbsim.cvs.sourceforge.net and Aeromatic
- Realistic fuel system implementation in JSBSim
- Electrical system update:
- Main Battery bus, always connected to electrical system
- Battery/External Power bus, operate starter motors and switches between battery and external power
- Left 28 V DC bus, recieves power from Battery/External power bus or left generator, proviedes power to No.1 static inverter
- Right 28 V DC bus, recieves power from right generator, provides power to No.2 static inverter
- 26V AC Bus, recieves power from No.1 or No.2 static inverter
- 115 V AC Bus, recieves power from No.1 or No.2 static inverter
- Bus tie switch: When "NORMAL" power gets distributed between left and right 28 V DC bus, i.e. left bus feeds right bus when right generator is offline and right bus feeds left bus when left generator and battery and external power are offline. When "OPEN" Left bus only feeds left bus and right bus only feeds right bus, i.e. there is no power distribution.
- Circuit breakers are now included in the electrical system. So every consumer (e.g. Boost pumps, lights, Radios, Hydraulic oil pump, stall warning, caution lights, wipers, et al) has influence on the power consumption and can be deactivated individually by deactivating the respective C/B.
- Pneumatic system:
- Bleed air pressure is directly dependent on turbine RPM
- Intake deflectors need at least 50 psi to extend. Intake deflector switch must be held to "Extend" for at least 4 seconds.
Update 03.2021
In March of 2021 some avionics and instrumentation additions were made by Simworld2020:
( FGADDON/Commit status [r5629] )
- Added a second ADF receiver
- Pilot's RMI now listens to the 1st ADF reciever, Copilot's RMI listens to the 2nd ADF receiver.
- We now have a KMA 20 audio panel, where you can control the audio output of the NAV/COM systems.
- The COM radios now feature Spacebar PTT support, transmitter is selected by the KMA 20 knob.
- Addition of a NAV1/GPS slave switch and indicator light to the Pilot's and Copilot's panels.
- The Copilot's panel now has its own CDI instruments for the NAV1 and NAV2 receivers.
TODO list/future plans
In the forum thread about the development of the Twin Otter we've collected some ideas what will be done in the near future (or not so near, who knows...)
| Note TODO related to the March 2021 update: |
- (Submitted 18 March): "Cold and Dark" update to fix some lights that can illuminate without bus voltage. Lights treated: Nav1/GPS slave light, autopilot button indicator lights, KMA20 marker beacon lights, Pilot's and Copilot's RMI VOR selector lights, and amphibious gear lights.
- (Pending): Update of the F12 radio stack dialog box to include: (A): Volume control for the DME and the Marker Beacon receivers, (B) visual feedback of all radio receiver volume settings [via text box next to each radio's volume dial] and (C): controls in the dialog box to set the KMA20 audio panel's knob and switches.
Updates are submitted to the Twin Otter Development topic in the forum.[4]
| Note This is the status from January 4th, 2016 |
- Alternative DME, because the current one has some issues with the visibility of the digits[5]
 Done
Done - Ventilator models for the pilots[6]
 Not done
 - Electrical system: More detailed simulation of the various buses, external power, Bus Tie, circuit breakers[7][8]
 Done (nov. 2017)
 - Animation and implementation of Nose wheel steering bar and trim tabs[9]
 Done (29 June 2016)
 - Proper animation of the Oil temperature gauges and propeller spin[10]
- Maybe tweaking the FDM to better reaction to aileron input[11][12][13]
- Toggleable Pilot models
 Done (5 June 2016)
 - Add support for Dual Control
 Not done
 - Add a version with a JSBSim FDM
 Done (Nov. 2017)
 - Variable interior: Different cockpit layouts (e.g. with a glass cockpit), different cabin layouts (e.g. cargo or combined passenger-cargo), multiple colour styles
 Not done
 - Add a control lock
 Not done
 - Additional baggage compartment in the long nose
 Not done
 - Add more, and enhance the securing and ground equipment (e.g. safety cones, include tiedowns in the FDM (like the Cessna 182)
 Not done
 - Generally, make the 3D model more detailed, more high poly
 Not done
Specifications
- Never exceed speed: 170 knots (195 mph , 314 km/h)
- Maximum speed: 170 knots (195 mph, 314 km/h)
- Cruise speed: 150-160 knots (173-184 mph, 278-296 km/h)
- Stall speed: 58 knots (VSO, gross weight, landing configuration)
- Stall speed: 80 knots (VS1, cruise configuration)
- Range: 920 nautical miles (1,050 mi, 1,690 km)
- Service ceiling: 25,000 ft (7,620 m)
- MTOW: 12,500 lbs (5,670 kg)
- Rate of climb: 1,600 ft/min (8.1 m/s)
Galleries
| There is a category with screenshots of the de Havilland Canada DHC-6 Twin Otter. |
Flightgear 2018+
Old screenshots
Videos
Thanks to
- Syd Adams
- Christian Thiriot (PATTEN)
- Bo Lan (lanbo64)
- Jonathan Schellhase (dg-505)
- Clément de l'Hamaide (f-jjth)
- PAF Team
- Zdenal
- Erik
- abassign
- primtala2
- CaptB
- Adam Swift (Mig29pilot)
- tauchergreg
- Sebastian (rollershutter)
- Thorsten Renk
- The Cessna 172 development team
- The whole FlightGear community
If you have contributed something to this aircraft but don't find your name on this list, feel free to contact me on the FlightGear Forum, the FlightGear Wiki, send an Email to dg-505@web.de, or just edit this page by yourself.
External links
- De Havilland Canada DHC-6 Twin Otter (Wikipedia)
- Standard Operating Procedures (pdf)
- Official website
- Development thread (FlightGear Forum)
References
| |||||
- Civil utility aircraft
- Military utility aircraft
- STOL aircraft
- Floatplanes
- High wing aircraft
- Monoplane aircraft
- Fixed gear aircraft
- Tricycle landing gear aircraft
- Turboprop aircraft
- Twin-engine aircraft
- De Havilland Canada
- Aircraft with Checklists
- Interactive Tutorial Support
- Rembrandt aircraft
- GPLv2+
- FGAddon hangar
- All aircraft
- Aircraft with a cockpit-only autopilot
- Red Griffin ATC compatible aircraft
