FIAT G91R1B
 | ||
 | ||
| Type | Bomber aircraft, Reconnaissance aircraft | |
|---|---|---|
| Configuration | Low wing aircraft, Retractable gear aircraft, Tricycle landing gear aircraft | |
| Propulsion | Single-engine aircraft, Jet aircraft | |
| Manufacturer | FIAT Aviazione | |
| Author(s) |
| |
| FDM | JSBSim | |
| Status | Production | |
| FDM |
| |
| Systems |
| |
| Cockpit |
| |
| Model |
| |
| Development | ||
| Repository |
| |
| License |
| |
| ||
|
| ||
I have verified that the current version of the FIAT G91R1B does not display graphical elements correctly (many elements become white and shimmering, even at night) due to the latest update 2020.4.0 of April 2023. The issue has been resolved and the plane is now back to normal. However, there is still a defect on the engine throttle, which appears to have a transparent texture. This issue will be fixed soon. Therefore, I recommend that those who use this plane to update it from the project's GIT. GIT: https://github.com/abassign/G91-R1B_HD.git
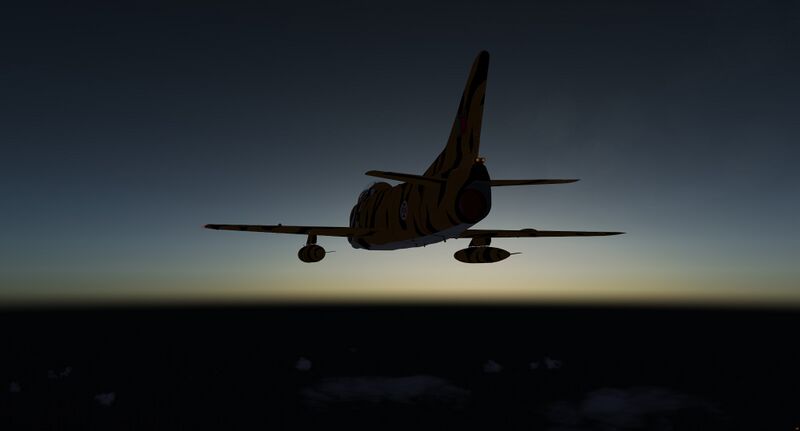
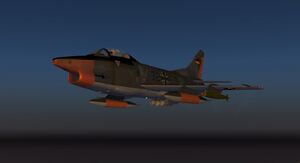
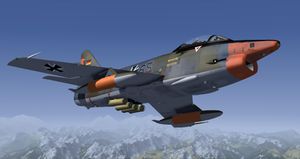
The Fiat G.91 is an Italian jet fighter aircraft designed and built by Fiat Aviazione, which later merged into Aeritalia. The G.91 has its origins in the NATO-organised NBMR-1 competition in 1953, which sought a light fighter-bomber "Light Weight Strike Fighter" to be adopted as standard equipment across the air forces of the various NATO nations. After reviewing multiple submissions, the G.91 was picked as the winning design of the NBMR-1 competition.
The G.91 entered into operational service with the Italian Air Force in 1961, and with the West German Luftwaffe in the following year. Various other nations adopted it, such as the Portuguese Air Force, who made extensive use of the type during the Portuguese Colonial War in Africa. The G.91 enjoyed a long service life that extended over 35 years.
The G.91 remained in production for 19 years, during which a total of 756 aircraft were completed, including the prototypes and pre-production models. The assembly lines were finally closed in 1977.
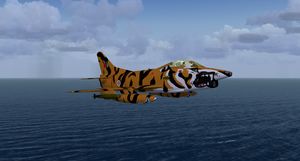
Several versions have been made, the one that is reproduced is the R1/B, an updated variant of the R4 NATO, built on the specifications of the Italian Military Aviation (AMI). The R1/B was the last produced version of the G.91 and was used by the National Acrobatic Patrol to replace some aircraft lost during the acrobatic activity.
Philosophy of realization of the simulated model
The project was started about 5 years ago at the request of some Italian friends who used the Flight Gear flight simulator. From the beginning the goddess was to create a hyper-real simulated model, that is, a model that reproduced, in the most faithful way possible, all aspects of the real plane. This ambitious goal was made possible by the possession of the technical and maintenance manuals for the aircraft and the help of various associations of ex-pilots and maintenance workers who operated in the flight groups of the G.91.
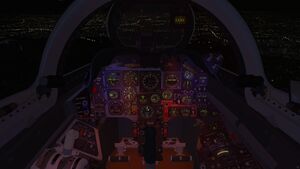
The quality of the simulated aircraft is high both in the external 3D model and in the cockpit, in all the analog instrumentation present on board and in the electrical, hydraulic and fuel systems.
The first two years of development were mainly used for collecting information material, drawings, manuals and testimonials from pilots. Then slowly we started by creating various parts, for example the first was the front landing gear, useful for learning some 3D modeling techniques and XML and JSBSim scripting. I personally think that a good model should always start from landing gear and not from the fuselage as many do. The reason is that the cart is a complex part that has a precise and easily measurable size. Its construction subsequently allows easy sizing of all the other parts. A mistake in this model was not to start initially with the cockpit and canopy as these parts are also critical in terms of size and constrain the correct sizing of the fuselage. The engine was also built in the early stages of the project using the original blue-prints, which made it possible to make the subsequent construction of the rear section easier.
From the beginning the JSBSim program was used for FDM, this allowed us to obtain a high dynamic fidelity, but also reduce the need to use NASAL for many system functions. In the development it was verified that JSBSim is much more productive than NASAL especially for the parts that operate in real-time regime. The reason is mainly due to the poor documentation of NASAL and to its lack of adequate debugging support. JSBSim is a functional 'data driven' language written in XML that makes it more difficult to make errors of a logical nature and this was an important aspect of realizing good code.
How to download the model
For reasons of license limitation of FGFS which does not accept GPL3 in the standard repositories compared to GPL2, it is not possible to obtain the aircraft directly from the standard repository, but, for now, it is necessary to download the aircraft from the GIT of the authors which is following address:
https://github.com/abassign/G91-R1B_HD
The GIT link is this:
https://github.com/abassign/G91-R1B_HD.git
you can download the compressed file (ZIP format) at this address:
https://github.com/abassign/G91-R1B_HD/archive/refs/heads/master.zip
However, I highly recommend using a program for downloading and managing GIT files in your own local directory. This solution allows, once the model has been downloaded, to be able to update it without having to download very large files.
The size of the G91-R1B_HD folder is quite large, it is about 2.6 GB of data and almost 2500 files. I don't think that in Flightgear (FGFS) there has ever been such a large project and this could make it difficult for some users to agree to download this beautiful aircraft. But I remember that the aircraft, due to the efficient design of FGFS, flies very well even on machines with 2-4 GB of GPU as rather optimized design methods have been adopted.
Prerequisites
The aircraft has been designed to operate with the most advanced software components of FGFS, therefore it is useful to have the latest version of FGFS or rather the development version of FGFS which can be found at the following address:
https://download.flightgear.org/builds/nightly/
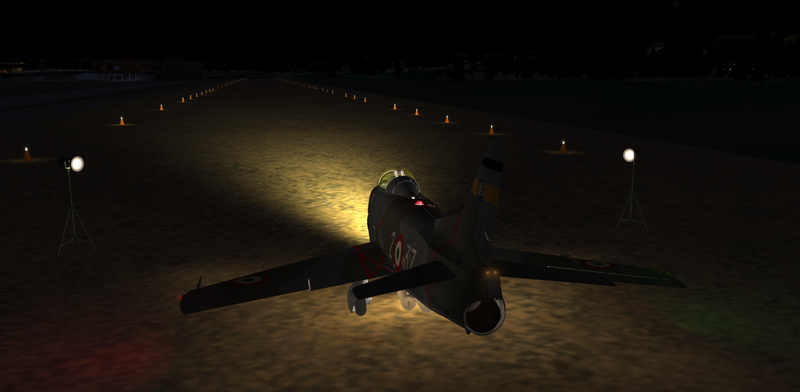
The development version of FGFS implements a whole series of faetures that make the aircraft truly special, with good management of both day and night lights and correct management of shadows. All the images I present in this wiki article were made using the development version of FGFS.
Install the template to be able to use it from the launcher
To use this aircraft, you need to change the Add-ons folder located in the Add-ons Folders section of the launcher. This is done simply by selecting the "Additional components" icon and clicking on the (+) symbol of the "Additional aircraft folders" subsection, enter the path that leads to the github folder that you have downloaded and then click on the "Aereo" icon and select Fiat G91- R1B (JSBSim).
Starting the plane
As mentioned above, the plane was made with the philosophy of being as close as possible to the real plane. This means that to start it you can follow the instructions in the flight manual as all systems emulate the original aircraft.
The flight manual can be found at this link:
https://github.com/abassign/G91-R1B_HD/blob/master/G91-R4%20Flight%20Manual%20-%201961.pdf
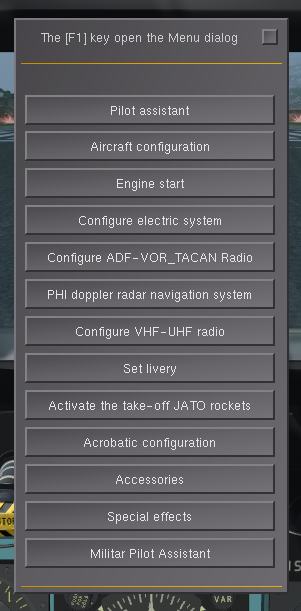
Obviously if one wants to try the plane faster there is an automatic start system. This menu belongs to the general menu of the aircraft which can be obtained by pressing the [F1] key or by clicking on the menu item "Fiat G91" in the sub-item "[F1] activate menu"
The menu items are several and each of which allows you to run and/or configure the aircraft. To start (or switch off) the plane, simply click on "Engine start" tag.
At this point a pop-up opens that allows you to choose between the following options:
[Engine auto start]
It starts the engine and the aircraft systems with the times imposed by the aircraft mechanics and by what is written in the flight manual. This sequence shows all the phases with a mobile camera.
[Fast mode]
Like the previous one, but with a much faster sequence.
[Abort start]
Blocks the automatic start sequence.
[Stop engine]
Engine and on-board systems shutdown sequence. This sequence also shows all the phases with a mobile camera.
A brief hint seems useful to me to explain how the menu [F1] works.
The menu is activated with [F1], but can be closed simply with the [ESC] key.
If you press [F1] twice quickly you get the last menu opened before, this is particularly useful for very complex menus, such as the one of the Pilot Assistant or the aircraft configuration menu.
A more complete explanation of the various menu items can be found in a specific section of this manual.
Manuals
In this section I report a series of manuals on some gauges used in this project. The manuals have been separated from the FIAT G91R1B wiki card as they refer to instruments also used by other aircraft in the 50s-70s of the last century.
Commands and Joistick
Airbrakes
The airbracke has two modes of operation:
- With the keyboard command CTRL-B
- With the joystick control spoiler deploy or spoiler retract
It should be remembered that, as in reality, in the G91 it is not possible to adjust the speed brake in intermediate positions, the speed brake can only be opened or closed.
PHI - Position and Homing Indicator
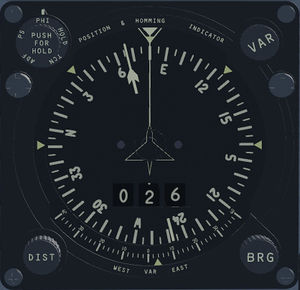
When you look at the cockpit of the G91 (but also of the F104) you can see in the center at the top a very particular instrument, particularly large and with 4 knobs on the sides. That instrument was one of the first navigation systems that used doppler radar to determine true ground speed.
The instrument is composed of various parts, some not visible, but simulated with JSBSim scripts, others visible as interfaces for the pilot.
- Position and Homing Indicator
It is the most evident element placed in the center of the cockpit, it is used to visualize the radial and the direction of the aircraft with respect to a compass rose with north fixed at the top. - Wind unit
It is a device for entering the direction and intensity of the wind useful for powering the analog computer placed in the black box bay located on the nose of the aircraft. - Selector unit
Keypad necessary to activate the device, together with a switch and analogic programmer of the (1 + 4) possible routes. - Doppler radar management unit
System to activate the Doppler radar functions.
Other instruments are needed for proper PHI management, these have been emulated via JSBSim code:
- Gyrocompass constantly aligned with a Fluxgate compass placed on one wing tip.
- Fluxgate compass managed by JSBSim code and corrected in magnetic declination through the VAR knob of the Position and Homing Indicator.
The accuracy of the instrument was, for those times, rather high, as it allowed to travel a long route up to 999 miles with a deviation in the position of the aircraft of 2-3%, a contained error that could be exploited both for flights both military and civilian in the transatlantic route, and in tactical flight in enemy territory or in areas with little radio assistance coverage.
GUI and advanced functions
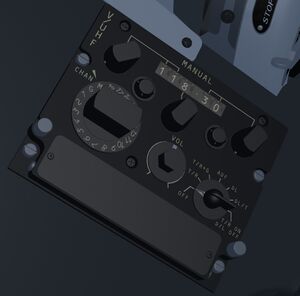
VHF / UHF PTR 175 radio
The FIAT G91R1B used various models of VHF-UHF radios, this is one of the most typical and advanced in the 60 '. It is a radio that can operate in a relatively wide frequency spectrum ranging for the VHF band from 117.5 to 135.95 Mhz with 50 KHz spaced channels and for the UHF band from 225.0 to 399.9 MHz with 100 KHz spaced channels.
The frequencies are generated with the PLL synthesis method by a quartz carusel arranged inside a special drum, the drum was placed inside a box that contained the electronics, all made of thermionic valves The carusel is rotated by a synchronized motor with the position of the selectors inserted in the box available to the pilot.
The box allows, in manual mode, to select the single frequencies using three selectors placed at the top of the box, the selected frequency appears in a window at the top.
The manual mode is not used much as the pilot cannot concentrate on the flight, for this other 18 frequencies can be pre-inserted in the radio via a special switch box located at the base. The eighteen frequencies can be selected via a 20-position switch on the left. The switch over 18 channels for pre-inserted frequencies has two other positions:
- M - Manual, which is the manually preset frequency visible in the top window.
- G - Guard, that is the distress frequency which for this radio is 243 MHz. Note that I currently use this frequency, but it can be changed to the current one which is 121.5 MHz or to others at the pilot's discretion.
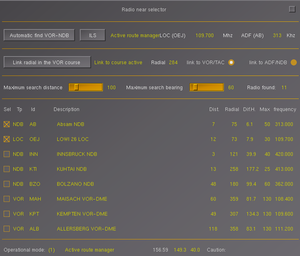
Radio near selector
Currently in flightgear there is no function to manage the frequencies used for navigation instruments (VOR, ILS, TACAN, NDB) during navigation. This fact makes it difficult for the pilot to manage this instrumentation as the simulator environment is very different from the real cockpit environment. It is obviously possible to make a flight plan and follow it, but the reporting of frequency data to the analog instrumentation is always quite inconvenient and uses a very different interface to that of the real plane.
For this reason, behind the solicitation of the pilots of the G91R1B in Flighgear, we have created this GUI which acts as a helper for the management of frequencies and radials.
The GUI has three different operating modes:
- Use the radios included in the flight plan.
- Scans the radios in the area with a criterion of proximity and angular distance, privileges the radios placed in the front part of the flight.
- In the vicinity of the airport, it provides ILS type radio assistance.
When the GUI intercepts a radio that can be useful for flying, it inserts the frequency and possibly the necessary radial.
If the proposed radial is not the one that interests the pilot, he can always modify it using the SET knob on the VOR instrument.
Tips & tricks
Execution speed problems
The aircraft model is rather atypical than the average aircraft models featured in Flightgear. Contains millions of vertices and few textures, the reasons for this choice were the need to be able to reduce, almost dramatically (see this Howto:Methods to replace the dial gauge bit mapped texture with vectorial objects), the GPU load and allow the use of such a detailed aircraft even on poorly equipped machines. Currently the aircraft has also been used on 2008-2012 PCs with 8 GB of RAM and 2 GB of GPU, which I would say surprising and which demonstrates the lightness of Flightgear compared to other simulators. Obviously I recommend the use of more performing machines, at least of the generation starting from 2016 (4-6 cores) that have video cards of at least 4GB. In these conditions, as for other aircraft in the traditional Flightgear hangar, it is possible to have all the features present in the latest versions of the simulator active.
I have often noticed that many speed problems with this aircraft, but also with many other Flightgear aircraft, are resolved by activating multithreading with the option:
<multithreading-mode>AutomaticSelection</multithreading-mode>
Inserted in the configuration file: ../fgdata/defaults.xml Which is, still incredibly, disabled by the standard installation! Activating this option can lead to a performance increase of 30-50%. However, as reported here: Howto talk:Activate multi core and multi GPU support hopefully it will soon become standard.
Another important aspect is to understand if the CPU is actually working at maximum speed. Normally for Windows and Apple's OS this happens, but for Linux it is not said, especially with kernel versions 5.8 onwards. This is a very special case that I noticed being present in some machines with Ubuntu-Debian installed (but I think also with other versions of Linux), in this link I have inserted a small hawto that explains the problem and, if possible, how to solve it.
A good reference to deepen the topic is this discussion: Threadripper 1920 (12/24 threads)+Vega56 = 10fps in W10?
Project Teachings
I believe that this project can teach a lot to those who want to try and build high-fidelity aircraft. I think it is useful to list some points that may be useful for other authors:
- Using dense polygons we do not believe that it is a crime and does not produce a real slowdown of the PC on which the aircraft is run. But it has the result of obtaining a pleasant and realistic aircraft both externally and internally. The G.91R1/B has more than 3 million polygons and always flies rather well on machines of the current generation (2019). Obviously it is not a plane to fly with PC 10 years ago with I3 and Intel GPU with 2GB of RAM, although many pilots have told us that it still flies even in these low configurations.
- A characteristic of the gauge produced for this aircraft is to be full 3D both in the 3D model,there is no 2D gauge, and in the characters and colored parts printed on the front of the gauge. This approach has been adopted in order to avoid the use of many 1024x1024 maps for the graduated scales of the gauges (I remember that the model was designed for 4K videos) used previously that led to an unsustainable slowdown in performance and even to failure of the FGFS program for PCs with 2 GB GPUs (For example, the GPUs integrated in the Intel I5-I7). The complete vectorization of the graduated gauges has completely solved the problem and allows the use of the aircraft even on relatively small machines, obviously with more contained performances (6-7 fps obtained, for example, in I5 machines built in 2010).
- The plane was designed to be used with a 4K monitor and therefore the cockpit needed to have a resolution of 1/10 mm in order to make each instrument readable even in the most complete view of all the instruments (CTRL-V ). This choice was used noting that in many FGFS planes, made with lower resolution analogue gauges, they make the reading of the cockpit gauges especially difficult in the overall views. A characteristic of this model is precisely that of having an easy reading of all the gauges, exactly as it happens in reality.
- Unfortunately, the extensive use of vector coloring does not seem to allow the correct use of Rembrandt, while for Compositor some tests have been made that appear to be promising, even though Compositor is still in development.
- The GUI is currently made without the use of canvases, the reason is due to the fact that writing a GUI in canvas requires a lot more work than it does in XML, maybe in the future someone will do it, even if I suggest creating a framework that is more consistent and better documented for GUI in canvas, perhaps directly using the XML and not the NASAL script language.
- The Documentation folder has been created in various parts, both in the direcory root of the project and in the individual parts. This allows anyone to take the files used and modify them and access the documentation files used. This procedure is unfortunately rare in FGFS and makes it even more difficult to update an aircraft.
- The 3D models were made in Blender for the parts with double curvature (fuselage, canopy, tanks etc ..), while Freecad was used for the parts for which the use of CAD is convenient, and for example the inside of the cockpit and some specific objects. In documentation there are all the CAD parts in Freecad format in order to be able to modify them by anyone who wants to do it.
