Cessna 550 Citation II
 | |
|---|---|
 | |
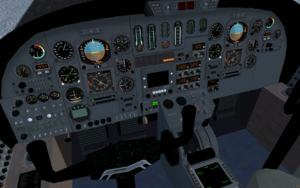
 The cockpit of a Cessna 550 | |
| Type | Business jet, Business aircraft |
| Configuration | Low wing aircraft |
| Propulsion | Jet aircraft |
| Manufacturer | Cessna |
| Author(s) |
|
| FDM | YASim |
| --aircraft= |
Citation-II Sierra-Super-II |
| Status | Advanced production |
| FDM |
|
| Systems |
|
| Cockpit |
|
| Model |
|
| Supports |
|
| Development | |
| Website |
|
| Repository |
|
| Download |
|
| License | GPLv2+ |
|
| |
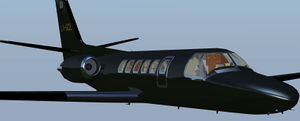
The Cessna 550 Citation II debuted in FlightGear 0.9.8 in January 2005. It has four "special views": copilot, center-console, passenger 1 and passenger 2.
Overview
The Cessna 550/551 Citation II is a light corporate jet built between 1978 and 2006. The FlightGear model is a luxury corporate jet for two pilots and seven passengers. However you should not view the original Citation II as a real jet; with a cruising speed of only 330 KTAS, it was really intended as a competitor for high-end twin turboprops.
The Cessna 550 requires two pilots; the 551 is the same aircraft certified for single-pilot use.
Later variants of this aircraft include the Cessna Citation Bravo, which has newer avionics (available separately in FlightGear), the Cessna Citation S/II with improved wings (not currently available in FlightGear), and the Sierra Super II, available together with this aircraft in FlightGear.
The Sierra Super II is an aftermarket modification of the Cessna 550/551 which replaces the engines with Williams International FJ44-3 turbofans introduced in 2004. They provide more thrust and less fuel consumption. Climb performance in particular is dramatically improved.
The new engines lack thrust reversers; they are not needed because their idle thrust is only 40 lbf, as opposed to 400 lbf on the old engines.
Features available in FlightGear include:
- Choice of two variants: the basic Citation II or the re-engined Sierra Super II
- Several liveries
- Several checklists and tutorials
- Autostart
- Weight and speed limitations
- Tuned autopilot with built-in climb schedule
- Working speedbrakes (engage with k, retract with j - alternatively Ctrl+b toggles the s/b's)
- Working thrust reversers (engage with Del) on the Citation II only
- Support for the Walk View
At low altitude, this aeroplane is light and slow enough for sightseeing in the canyons. At high altitude, it is fast enough for medium-haul, multiple-hour flights and GPS navigation. You can fly VFR or IFR, with or without GPS.
Download
For FlightGear 3.4 and earlier
For FlightGear 3.5 and higher
- Since FlightGear 2016.3 you can use the built-in Aircraft Center to download the Citation II from FGAddon.
- Subversion:
$ svn co https://svn.code.sf.net/p/flightgear/fgaddon/Citation Citation
$ svn up
Startup
Use the aircraft checklist for startup instructions; alternatively, use the menu for autostart.
Performance
| Citation II | Sierra Super II | |
|---|---|---|
| Never exceed speed | 263 KIAS | 263 KIAS |
| Typical cruise speed at FL410 | 330 KTAS | 380 KTAS |
| Range at MTOW and full fuel, FL410, full throttle | 1900 nmi | 2500 nmi |
| Endurance (hours) at full throttle | 5:45 | 6:33 |
| Climb rate at sea level | 3000 fpm | 6000 fpm |
| Climb to FL410 | 45 min (stepped) | 22 min (direct) |
| Thrust reversers | yes | no |
Manual landing procedure
As with most aeroplanes, you maintain a constant pitch and speed using the yoke and control descent rate (vertical speed) using throttle. The Citation II has an Angle of Attack indicator, left of the airspeed indicator, to help with this. This instrument uses an arbitrary unit going from 0.0 to 1.0 (these are not degrees; 1.0 corresponds to 14 degrees). The needle should be in the green zone for climb and cruise and in the white zone for landing. The red zone indicates a stall.
- Reduce speed to 170 knots indicated.
- Deploy flaps 3 steps (i.e. approach configuration).
- When the runway is in sight, increase throttle to n2=58% then deploy flaps 5 more steps (full flaps).
- Watch the angle of attack indicator.
- Push or pull the yoke to keep the angle of attack in the white zone. Do not let the needle into the red zone, or you will stall.
- At this point your throttle should be approximately n2=58%, AoA=0.6, airspeed=120 knots, descent rate=-500 feet/min.
- Extend gear.
- Look at the Precision Approach Path Indicator lights next to the runway.
- Reduce throttle a litte bit to descend faster; increase throttle to descend slower. Avoid rapid or large changes to throttle.
- The ideal vertical speed on touchdown is -500 feet per minute.
- When the rear wheels touch the ground, cut throttle and deploy speedbrakes (press k).
- Wait for the nose wheel to touch the ground by itself.
- On the Citation II, deploy thrust reversers (press Del) then open full throttle. The Sierra Super II lacks thrust reversers.
- Apply brakes as necessary.
Autopilot
The autopilot will disengage 500 feet above ground level or below the decision height selected on the radio altimeter, whichever is highest. This implies that you must climb at least to 500 ft above ground before you engage the autopilot. In addition, you should never engage autopilot while manoeuvering; always stabilize the aeroplane before you engage autopilot.
When the FD OFF button is illuminated, the autopilot is OFF. Clicking this button will engage the autopilot in wing leveler (horizontal) and pitch hold (vertical) modes. You can also engage autopilot, with the same effects, with the AP ENGAGE button between the seats. The following lateral, vertical and speed modes are available:
Lateral modes
- Wing Leveler
- All lights are off
- HDG
- Follow the magnetic heading bug selected on the pilot's HSI.
- NAV
- Follow the radial selected on either NAV1 or NAV2. Switch between NAV1 and NAV2 using the NAV/HSI button.
- GPS
- Follow the course selected by GPS. To engage, click on the NAV button a second time.
- APR
- Click this button to engage both NAV1 and glideslope for an ILS approach. Note that, since the autopilot will disengage at least 500 ft above ground, this aeroplane is certified only for CAT I ILS approaches; it has no autoland capability.
Vertical modes
- Pitch hold
- All lights are off. Adjust pitch (in increments of 1 degree) with the PITCH wheel between the seats.
- ALT
- Climb or descend to, then maintain the altitude selected with the ALT knob left of the ADF radio. You can adjust the selected altitude with this knob or with the PITCH wheel between the seats.
- V/S
- Hold current vertical speed. Adjust the selected vertical speed with the PITCH wheel between the seats.
You should engage ALT mode in more or less level flight with an angle of attack no greater than 0.2 and airspeed at least 220 KIAS. The autopilot includes a climb schedule and will climb at a speed appropriate for your engines; it will automatically decrease the rate of climb as you gain altitude.
On the base Citation II, you need a stepped climb and 45 minutes to reach FL410. The first step should be at FL330 or thereabouts.
On the re-engined Super II, you can climb all the way to FL430 in one step, even at MTOW, provided you respect the prerequisites listed above before engaging ALT mode.
Speed modes
- Autothrottle
- Engage and disengage with Ctrl+S to hold current indicated airspeed. Note that the real Citation II does not have this, so you may consider using autothrottle cheating.
Tune the two NAV and COM radios and the sole ADF radio on the cockpit.
Horizontal Situation Indicators
On startup, the captain's horizontal situation indicator uses NAV1 and the copilot's HSI uses NAV2. The NAV/HSI button under each HSI switches between NAV1 and NAV2; you can switch the HSIs independently. If the autopilot is engaged in NAV mode, then the autopilot will also switch between NAV1 and NAV2, always following the radio selected on the captain's HSI. The best usage of this feature is as follows:
- Tune the NAV1 radio to a VOR beacon.
- Select the NAV1 radial on the captain's HSI.
- Fly the selected radial.
- Tune the NAV2 radio to another VOR beacon.
- Select the NAV2 radial on the copilot's HSI.
- When you intercept the radial selected on NAV2, click on the NAV/HSI button on the captain's side. The autopilot will now follow the NAV2 radial.
- Switch the copilot's HSI to NAV1.
- Tune NAV1 to a third VOR beacon.
- Select the NAV1 radial on the copilot's HSI.
- Repeat as necessary.
The two HSIs feature an integrated Radio Magnetic Indicator: the thin red arrow points to the selected VOR beacon (either NAV1 or NAV2). They also have a built-in Distance Measuring Equipment showing the distance between you and the selected beacon, in nautical miles.
Radio Magnetic Indicators
The cockpit has additional Radio Magnetic Indicators on both the pilot and copilot side. This indicator has two arrows and two buttons:
- The left button switches the single-stemmed arrow to point either to the NAV1 VOR beacon or to the NDB.
- The right button switches the double-stemmed arrow to point either to the NAV2 VOR beacon or to the NDB.
Combined with the HSI you can have arrows pointing simultaneously to all three beacons. By default:
- The single-stemmed arrow points to the NDB selected on the ADF radio
- The double-stemmed arrow points to the VOR beacon selected on the NAV2 radio
- The thin red needle of the HSI points to the VOR beacon selected on the NAV1 radio
Glideslope NAV1 indicator
To the left of the pilot's HSI is an additional NAV1 indicator with two needles; this merely repeats localizer and glideslope information from the HSI and from the attitude indicator. Thus you have triple redundancy :) This instrument is hardwired to NAV1, so you can fly an ILS approach by hand while simultaneously pointing your HSI at the NAV2 beacon.
Distance Measuring Equipment
The DME shows the distance in nautical miles to the selected beacon. You can use it either to repeat the information on the HSI or to show the distance to the other beacon. This instrument also shows your speed towards or from the beacon (not your groundspeed: Only the component of your groundspeed that is on the line between you and the beacon), or the time to go to the beacon in minutes at your current speed.
Control Display Unit
The CDU on the central console allows you to create a simple route from one airport to another.
To create a route:
- Click on the DEP ARR button.
- Type the ICAO code of your departure airport.
- Click on the ORIGIN (top left) button.
- Type the ICAO code of your destination airport.
- Click on the DEST (top right) button.
- Optionally type the departure runway number then click the RWY button.
- Click ACTIVATE.
This activates the Route Manager, which you can of course still control with the generic Route Manager dialog.
Development
Recently updated
will be released with 2017.2
- Tutorials have been added.
- A new menu item is in place. The Citation II config dialog is available under menu -> Citation II -> Citation II config. It contains options for saving through sessions, some display options and several shortcuts for easy access to tutorials, help and more.
- New support for state overlays. Activate state overlay by adding
--state=$stateto your command-line.
 $state can be:
 * parking  ( cold and dark, all systems off) (same as without --state=$state )
 * taxi     ( engines and all systems running - ready to taxi )
 * take-off ( flaps and AP set - just throttle up and go )
 * cruise   ( flying at FL360 on AP )
 * approach ( !experimental! use with:
   --glideslope=degrees       ( usually 3 ) or
   --altitude=ft-above-msl    ( alt above sea level ) or
   --offset-distance=nm       ( 10 seems like a good start )
   Never use all 3 options at once! Only 2 of them. Triangle calculation - remember?
   --in-air                   ( well, just do it... )
   if you want, you can add options like this:
   --nav1=rad:freq            ( Going into LPAZ 18 enter --nav1=179:110.300 meaning NAV1 is set to 110.300 MHz with a radial of 179°, which is the G/S of LPAZ-18 )
   )
Systems
- Several checklists have been added.
- A realistic startup procedure.
- A major overhaul of the Autopilot-systems.
- The FDM got upgraded and several bugs got fixed in the process.
- All knobs can now be turned with the mouse-wheel.
- Some circuit breakers have been made functional, mainly on pilots side cb-panel.
Instruments
- Added a new Lighting Panel to the pilots panel. All knobs and switches, which actually have a function are animated.
- Instrument Panel got new textures. Looks a bit more used now.
- RMI now is switchable on Nav1/ADF and Nav2/ADF.
- HSI can be switched between Nav1/Nav2/GPS with the AP control panel's NAV-button.
- A CDU was added on the center pedestal.
Model
- All lights are now Rembrandt-capable.
- ALS flame / heat blur effect was added.
- ALS glass shader was added.
- The missing door-ladder was added and animated.
- Baggage compartments were added and doors animated.
- The speedbrakes got a major overhaul and are now much closer to the real thing, also the lower speedbrakes are added and animated.
- Small details like pitot tubes and antennas were added.
- Several small additions to the cockpit and cabin, including an accurate circuit breaker panel, with some functionality for now.
- Wing-flex has been added
Todo
- Create different liveries for Citation II and Sierra Super II.
- CDU needs more functions and bug fixes.
- Add some baggage.
- Add new GPS unit.
External links
- Cessna Citation II
 Wikipedia article
 - Corporate site for the Sierra Super II aftermarket modification
| ||||||||
