Normals and Transparency Tutorial
Blender and AC3D: Normals, Single and Double-sided faces, Transparency
2006-06-19
Roberto Inzerillo robicd at gmx dot net
Blender v.2.41 - AC3D Exporter v. 2.37a - AC3D 5.0.21
Tutorial Files (right click: Save Link As)
These short notes are aimed at providing new Blender users with a few ideas about how to work with Face-Normals and Transparency, keeping in mind what happens when you convert the model to AC3D file format in order to use it inside FlightGear.
Blender
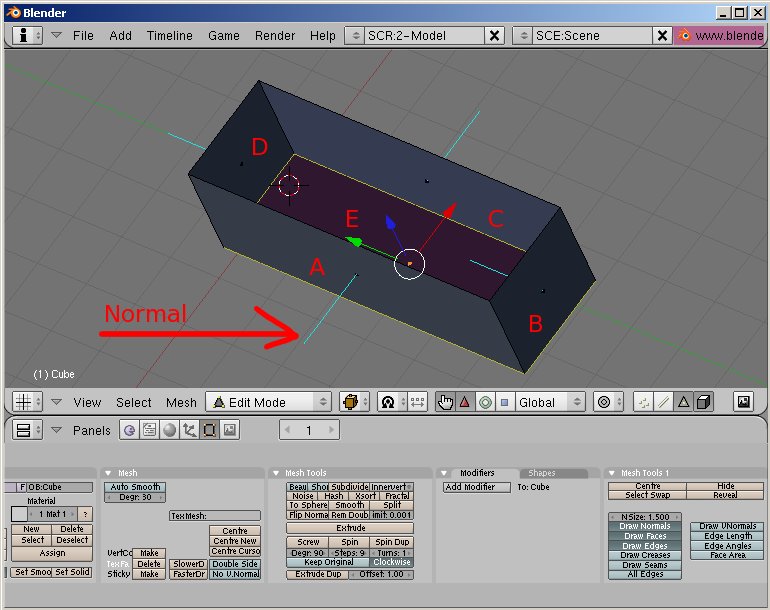
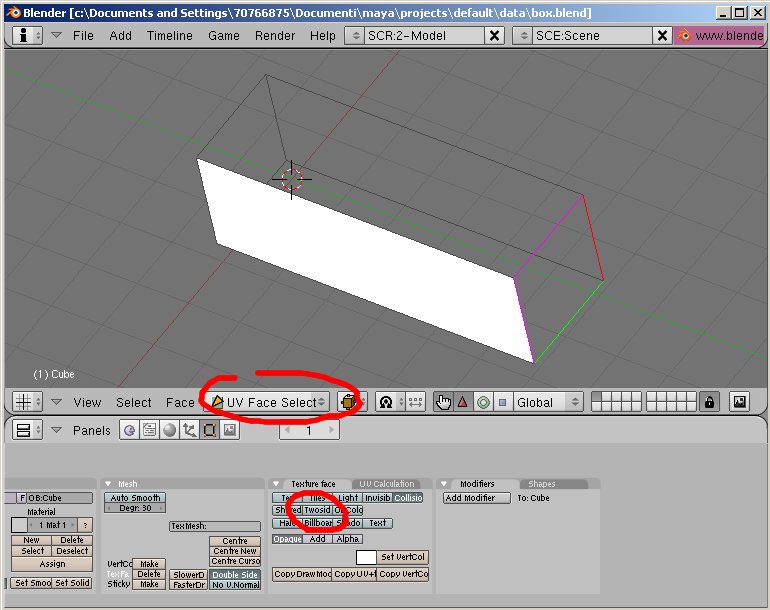
As a first example I created a box, I removed its upper face, so I ended up with a 5 sided (A,B,C,D and E) box. That way I can look inside it.
Every face has a Normal vector that tells Blender where the face “faces”. While in Edit Mode, hit F9 (Editing), then you hit the Draw Normals buttons inside the Mesh Tools 1 panel in order to make the face Normals appear. They are short blue lines, starting from each face. I increased the Normal vector's dimension to 1.5 (NSize: 1.500) otherwise they would be too small. With default settings Blender does not display the normals.
Here you can download the box.blend file.
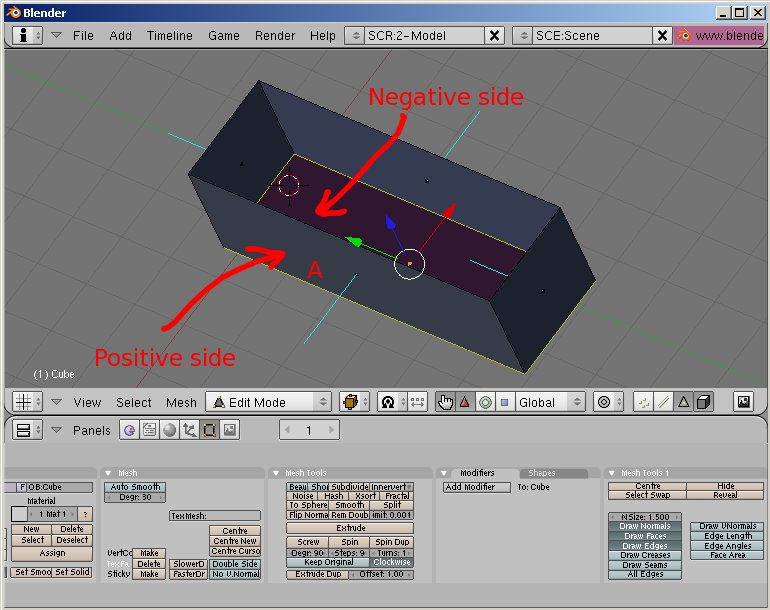
In order to help our minds understand what normals can be, we could think each 3d face having an inside and an outside. E.g. a closed box has 6 faces, each having a side that faces the inner part of the box and a side facing outwards. In this case, each face has the normal vector pointing outwards. We consider the outer sides the positive one.
In this example I changed things a little bit. I erased the upper face and I changed face B normal vector direction (Press Flip Normal button under Mesh Tool). Originally, it pointed outwards like faces A,C,D and E. Now face B normal vector points inside the box.
For each face we have two sides. We will call Positive the side pointing in the normal's direction. We will call Negative the side pointing in the opposite direction.
Now, remember that in order to see normals you have to be in Edit Mode. While in Object Mode you can't see them.
AC3D
I exported the box to a box.ac file, in order to get you an idea how things work with other modelling software. In this case I used the AC3D file format because FGFS uses AC3D files very often, and there are a couple of things you should know about that.
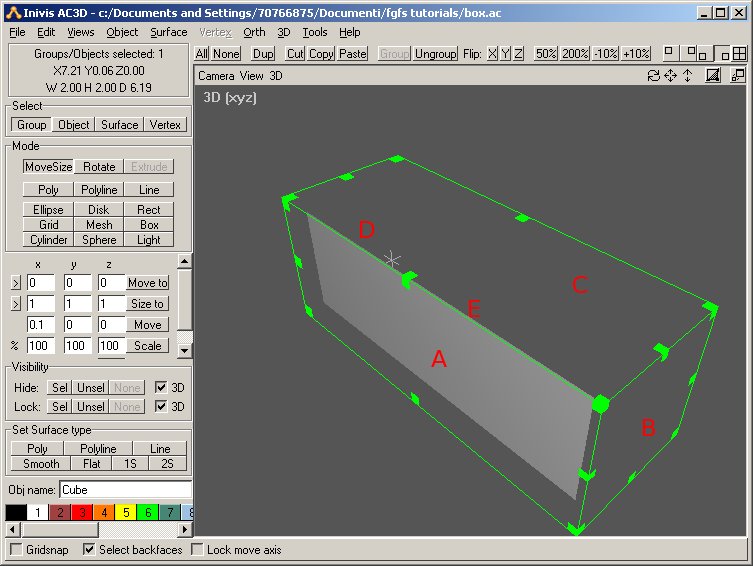
First thing you will notice is that while in Blender you see all faces' sides, in AC3D you see just one side of them. At first sight the exported 3d object looks messed up. Well, it's not. It's just that the AC3D eporter plugin does a conversion, result being each face of the object having a side which is transparent and the other one visible. The visible side of the face is the positive one (remember: Normal's direction). When looking at the same face from the other side, it becomes transparent.
Take a look at Face A. The face's normal was pointing to the viewer, and the face result being visible. Faces B,C,D,E all have normals pointing in the opposite direction. You can't see them, they become transparent. You have to rotate the object in order to see faces B,C,D and E. Only the positive side of each face is visible.
That's the basic behaviour of Blender and AC3D but you can customize a lot of things, as you wish.
Blender
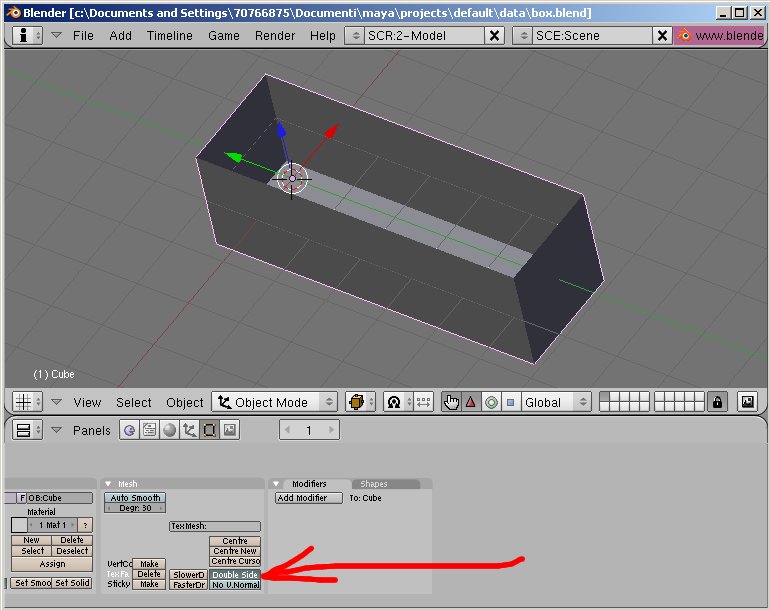
There's a way to make Blender consider a face to be visible from both sides: you use the material property called “Double Sided” (which is set by default). But why (if that's the default) we got one-sided faces in our AC3D exported box? That's because the AC3D exporter plugin does not take into account this material attribute, it simply discards it.
But there's another setting that influences how each face is visible to the user. This is hidden inside the UV Face Select mode, default being Twosided not set. This basically affects the UV mapping process inside Blender.
As you see, while in UV Face Select mode you have the same view as with AC3D, you only see positive faces' sides (in this case only face A) only, the others are rendered as being transparent.
You can change this, by selecting a face and hitting the Twosides button, this will make the face visible from both directions, and you get a bonus with that: after exporting the model to AC3D format, this face will be two-sided in AC3D file also.
That's the basic way you can get double-sided faces (i.e. faces which are visible from both directions) into an .ac file from within Blender. Otherwise you will always end up having one-sided faces objects in your .ac files.
Basic behaviour of the Blender AC3D eporter plugin is to not consider the Material Attribute ”Double Sided” at all. The exporter reads the Twosided attribute instead, and sets those faces regardless this attribute. Since Twosides is off by default, the AC3D exporter plugin will export each face as one sided (i.e. only the positive side of each face will be visible) unless you change that manually.
Working pipeline
Creating an AC3D file for FGFS is very simple, customizing face visibility could be tricky; nonetheless, once you know how to do, it will be very easy.
I'll explain here how to customize polygon object's faces visibility, ready to be exported by the AC3D exporter plugin (i.e. making a few of them visible from both sides and letting the others be visible from one side only). That's needed inside FGFS sometime.
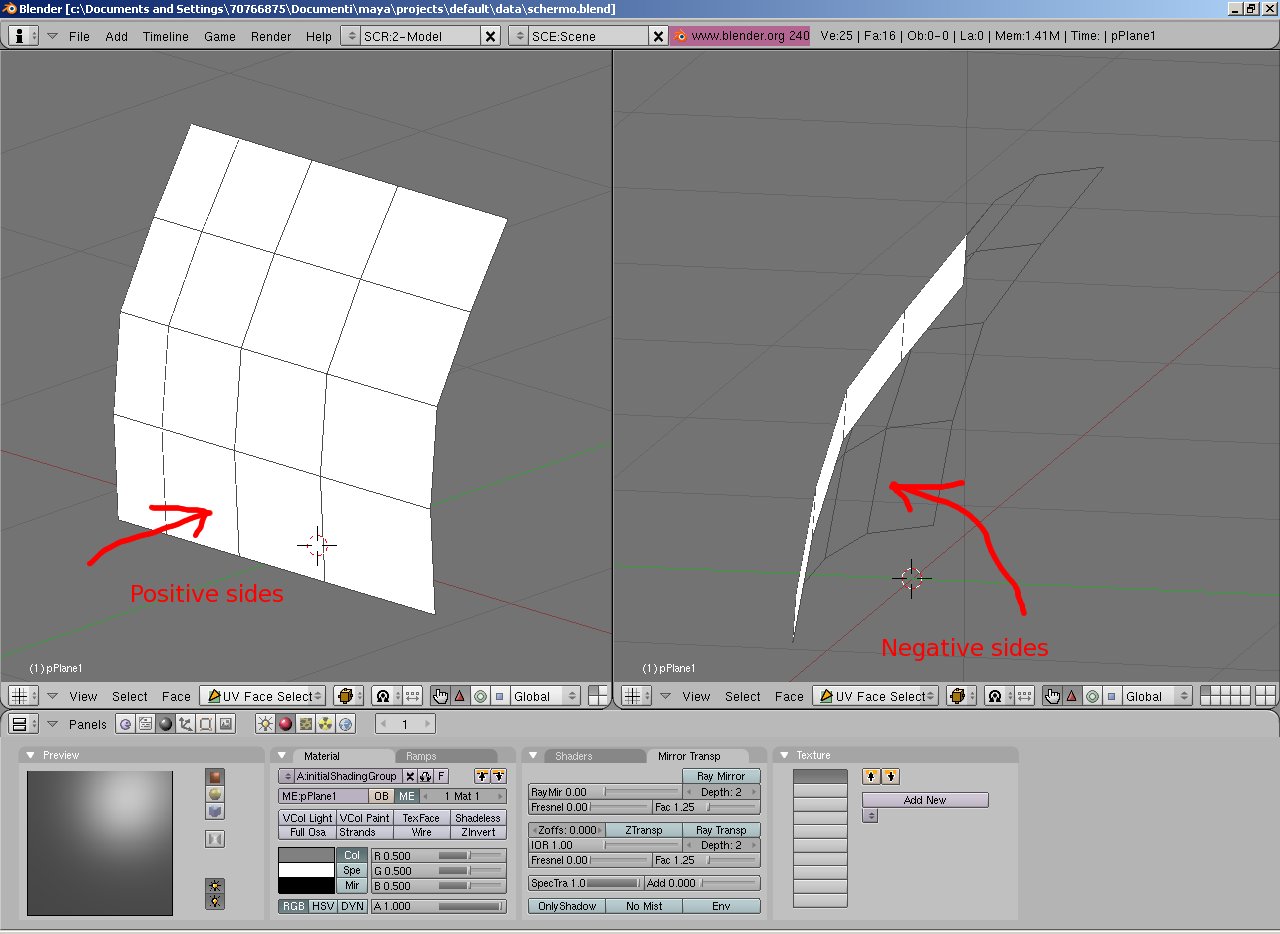
I start with a basic polygon object in Blender. The file is schermo.blend.
As you see, the polygon object has a basic material, a default Doublesided one, but in UV Face Select mode you only see the positive sides; when looking from back they become transparent. Exporting this to AC3D file format, you get a shield whose faces are visible when seen from the positive side only.
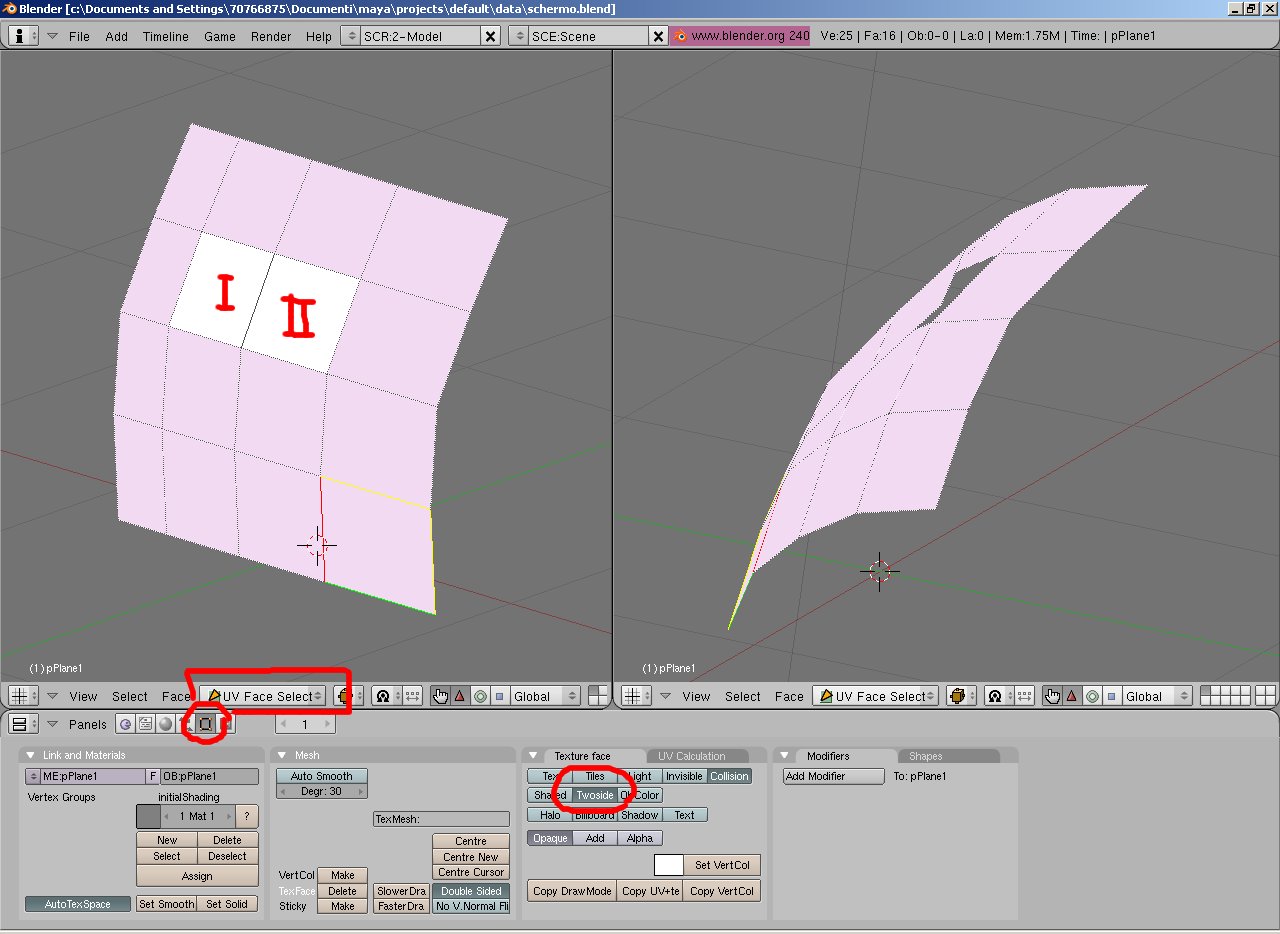
Now, in UV Face Select mode, select a few faces (I selected all of them expect the two marked as I and II), hit the Editing (F9) button, hit the Twoside button, and finally hit the Copy Draw Mode button. This will make the selected faces UV mapping double-sided and tell (later on) the AC3D eporter plugin to consider those faces as double-sided.
Now we have a shield which is completely opaque when viewed from both sides except for a little window that is transparent when looking from inside. The file is schermo2.blend .
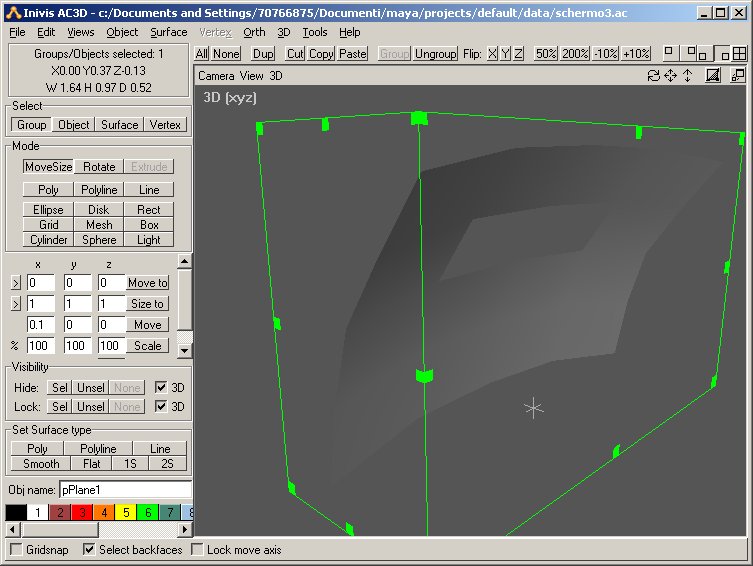
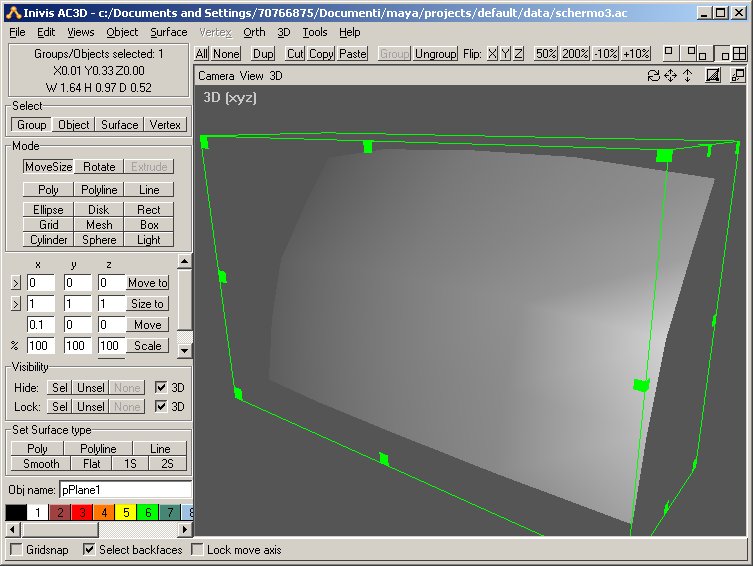
Exporting this to AC3D format will get the file schermo3.ac .
Have fun with that :-)
| ||||||||||||||||||||
