Howto:Decrease the number of faces
| This has been nominated for deletion since 16 November 2024. To discuss it, please visit the talk page.
Do not remove this tag until the discussion is closed. Reason for the nomination: This article either contains out of date information and/or may not meet the quality standards of the wiki. |
This short article is designed to show you, the prospective modeller some very good tips when creating models for use within FlightGear or any other situation which is dependant on face count.
Lets start with telling you why the face count is important. Every time you connect 3 or more lines together you get a what is known as a face. Whenever you place your model in FlightGear the more faces a model has, the more bytes of memory that model will use up of your computer. The more memory that your computer uses to load a model, the less it has to keep the simulation at a good frame rate. So...
It stands to reason that the less faces we use within a model the better it will integrate with FlightGear when you eventually place it in the Objects Database. For this demonstration we will use some simple models, used in the Princess Juliana International Airport scenery.
Examples
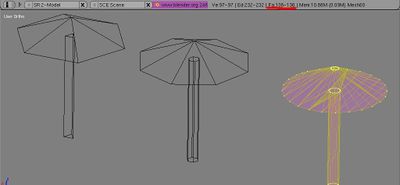
Below you can see three beach umbrellas. Each of these is different in face count numbers, the one on the right having the most and the one to the far left the least.
I’m sure you will agree that they look to all intents and purpose as they are designed to look you can see just from the picture the face count is bound to be different, but lets look a bit closer at them. Here you can see them without a texture or paint applied
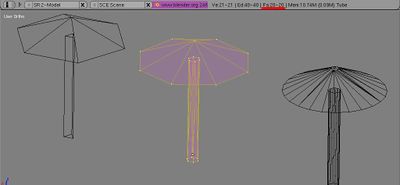
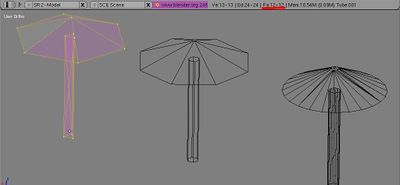
Have a look at the number underlined in red in the image above. This tells us that there are 136 faces in the image. That’s quite a lot for an object that is 2 meters high and the average pilot will fly over at between 80 - 140 knots at over 100ft. Yes sure, most players will go to explore this beautiful scenery with helicopters, cars or UFO, but after a while most of them will perform “only” takeoffs and landings. Taking into consideration those facts I think, we can still model this umbrella with quite nice level of detail using only 20 triangles (left image). Or, if you really want to make your scenery to take as low resources as possible you can build it using only 12 triangles.
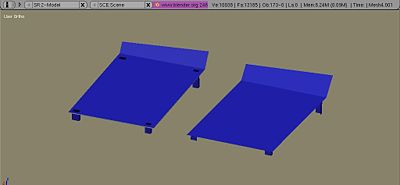
The same goes for other models too. Take a look at the two recliners here. The one on the left has 68 faces the one on the right 20! and in my opinion the one on the right looks better.
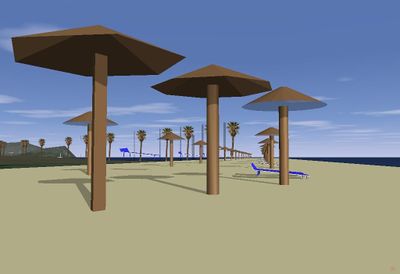
Heres how they all look in Flightgear from ground level.
As you can see, you can achieve good result using only 15% of triangles to model umbrella (middle one), or even 9% by sacrificing some details (left one) and 29% in case of recliner.
Decreasing the amount of faces (in SketchUp)
The main cause of such high number of faces in some models when using SketchUp and its simplified interface is the fact that this software was not produced with making low poly models for 3D games in mind. But you can still reduce the number of faces in models. Here is an example on how to make a low poly umbrella.
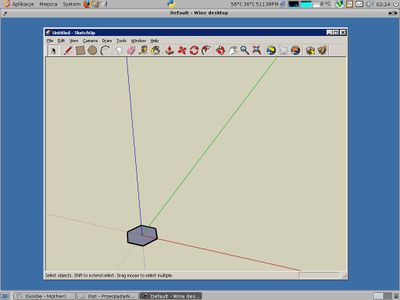
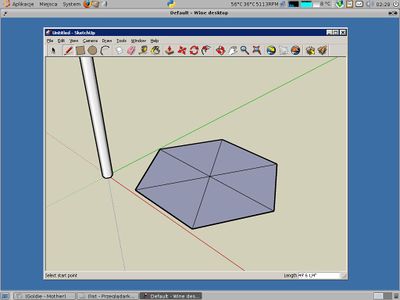
Let's start by making a pole for our umbrella. First, place a polygon on the ground. Before clicking, type the number of sides your polygon should have (six here) and press ↵ Enter.
Then using the push/pull tool extrude the polygon to the desired height and delete the faces at both ends of your pole, we don’t need them as they wont be seen.
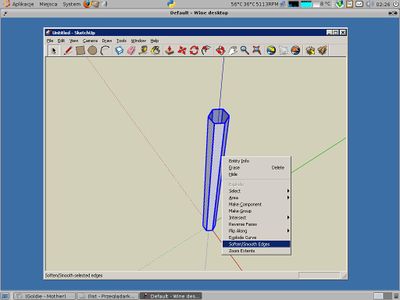
Next we will smooth out the edges by first left clicking three times on the pole which highlights the whole object, then going to the Window menu at the top (or right clicking) select soften/smooth edges.
A new pop up window will appear with a slider. This should be moved passed the 60 degree mark and you will see the pole soften considerably. And that’s it for the pole. Let's make the actual umbrella.
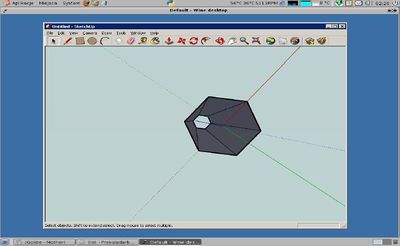
We start with a polygon. Using the pencil tool we will connect the centre spot with it edges. Quick tip: to make your pencil go straight to the centre point run the tool around the outside of the polygon then move it towards the centre, it will snap straight to the centre point.
Connect all the hexagons “points” to make six nice triangles.
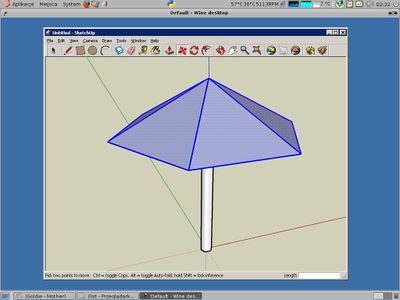
Using the move tool grab the centre point and move it upwards to the desired height. Holding the shift key down whilst moving up on the axis will hold it on that axis.
Click on the umbrella three times again to highlight it all, and again using the move tool place it over the pole.
As you can see the umbrella is showing the purple face to the outside. If we were to leave it like this we would not be able to see the outside of the umbrella from above. But if we want to see the underneath we would be able to do so. To reverse the faces simply highlight one face and right click. You will see the window appear again. Select reverse faces and the correct face is to the outside. Then right click again and select Orient faces. This brings all the faces to the correct way.
And that’s it, we have low poly umbrella made with (if I count correctly) only 18 triangles.
Placing the object on a surface
If you'd like to place the umbrella on some other surface within your model, make sure to create a group containing the umbrella first. You can do so by selecting the umbrella and pole and then choose Right mouseclick > Create group. To edit it again, double click the object to enter the group. Doing this will prevent SketchUp from connecting the umbrella with the floor (and adding extra vertices to do so!).
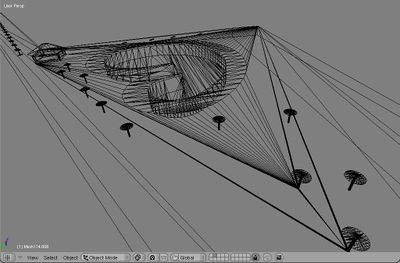
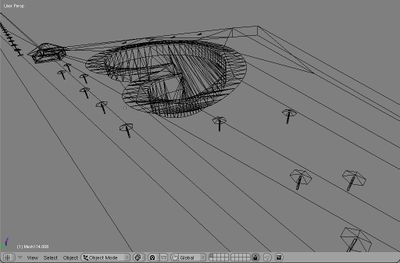
For instance when first making the beach area for TNCM, I simply made the beach and then placed the umbrella polygon on the beach and extruded it upwards. Do not make this mistake. As you can see in the picture on the left it makes the face count jump sky high. Placing the umbrella(s) in a group decrease the face count dramatically, as shown in the right image.
Results?
Ok lets see what difference these few helpful hints can make to your model. For the first beach scene created in FlightGear up 13133 faces were used, making it around 1.93 MB, which is huge. After redoing the beach using these great tips it came out at 2421 faces!
Todays beach at TNCM? 4.95Kb That’s it. Use these tips and you will be pleased to find your face count drops enormously.
My greatest of thanks go to Robert ‘erobo’ Leda firstly for helping me with the above information and secondly for allowing me to use his information and images for this short tutorial.
