Howto:Animated jetways: Difference between revisions
m (Out of date) |
|||
| Line 3: | Line 3: | ||
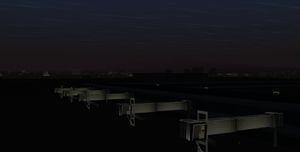
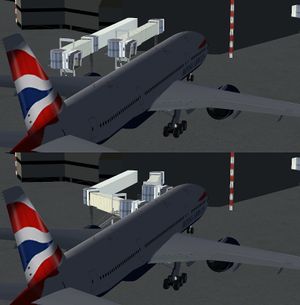
[[File:Movjetway-night.jpg|thumb|right|300px|Jetways at Reno International Airport (KRNO) lighting up during the night]] | [[File:Movjetway-night.jpg|thumb|right|300px|Jetways at Reno International Airport (KRNO) lighting up during the night]] | ||
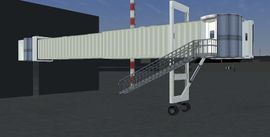
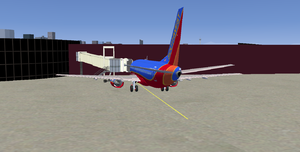
[[File:Animatedjetway1.jpg|thumb|right|270px|A gate with one animated jetway; note the style, the details, and the level walking passage]] | [[File:Animatedjetway1.jpg|thumb|right|270px|A gate with one animated jetway; note the style, the details, and the level walking passage]] | ||
'''The system is currently going through a major overhaul and the information on this page will become out of date.''' | |||
'''Animated jetways''' are dynamic jetway models that connect to your aircraft when you are pulled up at the gate. While [[FlightGear]]'s jetways are primitive compared to those of X plane or Microsoft Flight Simulator, they are still fun to use and an improvement compared to static jetways. This article describes how to use the jetways and implement them in various aspects of FlightGear. | '''Animated jetways''' are dynamic jetway models that connect to your aircraft when you are pulled up at the gate. While [[FlightGear]]'s jetways are primitive compared to those of X plane or Microsoft Flight Simulator, they are still fun to use and an improvement compared to static jetways. This article describes how to use the jetways and implement them in various aspects of FlightGear. | ||
Revision as of 20:52, 5 May 2011
The system is currently going through a major overhaul and the information on this page will become out of date.
Animated jetways are dynamic jetway models that connect to your aircraft when you are pulled up at the gate. While FlightGear's jetways are primitive compared to those of X plane or Microsoft Flight Simulator, they are still fun to use and an improvement compared to static jetways. This article describes how to use the jetways and implement them in various aspects of FlightGear.
Usage
Obtaining the models
For FlightGear versions 2.0.0 and below, the jetway models are not distributed with the base package. They can be downloaded directly from the FlightGear Scenery Database, or you can use TerraSync to fetch them.
Downloading from the database
Download the following models and extract the archives in $FG_ROOT/Models/Airport:
Downloading through TerraSync
Simply run TerraSync anywhere, and the models will be downloaded. However, for FlightGear 2.0.0 and below, you need to add one extra option to load them. For command-line users, add the following switch:
--prop:/sim/paths/use-custom-scenery-data=true
If you are using FlightGear Launch Control (the launcher distributed with the Windows version of FlightGear), click the "Advanced" button at the last page, click the "Properties" tab, click "New", set the property name to /sim/paths/use-custom-scenery-data, and set the value to true.
In the simulation
Fly (or spawn) to an airport with animated jetways in an aircraft with the required positioning information. Currently, the following airports implement animated jetways:
- Ted Stevens Anchorage International Airport (PANC) (TerraSync-only)
- Las Vegas McCarran International Airport (KLAS) (TerraSync-only)
- Reno International Airport (KRNO) (TerraSync-only)
- San Francisco International Airport (KSFO) Vinura is currently working on support for this airport,
The following aircraft are animated jetway-capable:
- Airbus A320 Family
- Airbus A380 (Git version only)
- Boeing 757-200 (Git version only)
- Boeing 747-400 (Git version only)
- Boeing 787-8 (Git version only)
- Bombardier CRJ-200LR (Git version only)
- Bombardier CRJ-900
Pull up to a gate, and determine for sure if the jetway is animated. To do this, press Ctrl-C. It is animated if its polygons are outlined in yellow. This holds true for all clickable objects, not just animated jetways!
Now align your aircraft so that the nose gear is centered on the marking line and is directly over the "T" at the end of it. Click the jetway; if your aircraft does not include the required positioning information, you'll get a tooltip informing you that the jetway cannot be extended. Otherwise, the jetway should begin to position itself and eventually connect to your aircraft.
If there are multiple jetways at the gate, each jetway is operated independently. (You'll have to click each jetway to extend/retract them.)
Implementation
In aircraft
This article assumes you have basic knowledge on how to use 3d modelling software.
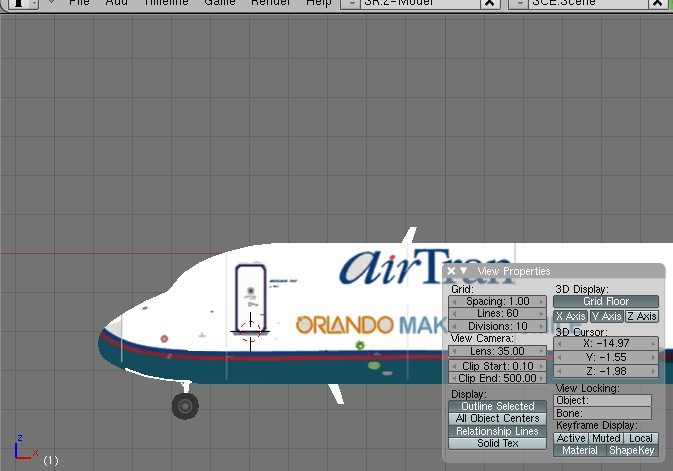
Open up your favorite 3d modelling program (the author prefers Blender), and load any one of the jetway models (jetway-movable.ac, jetway-movable-2.ac, or jetway-movable-3.ac). Now import your aircraft model, and move it around so that it is "parked" at the gate. After that, simply get the coordinates of the bottom of the door the jetway should connect to.
Now add the following XML code in your -set.xml file, outside the <sim> tag.
	<aircraft>
		<door n="0">
			<x-m>POSITION_X</x-m>
			<y-m>POSITION_Y</y-m>
			<z-m>POSITION_Z</z-m>
		</door>
		<jetway-hood-deg type="double">HOOD_DEG</jetway-hood-deg>
	</aircraft>
Where POSITION_X is the x coordinate of the door, POSITION_Y is the y coordinate of the door, POSITION_Z is the z coordinate of the door, and HOOD_DEG is the amount to rotate the jetway hood. Generally, this should be 2-3 degrees.
In the case of 2 or 3 jetways, simply find the coordinates of the other doors in the same manner and add more <door> elements. This example is from the Airbus A321.
	<aircraft>
		<door n="0">
			<x-m>16.582</x-m>
			<y-m>9.702</y-m>
			<z-m>3.642</z-m>
		</door>
		<door n="1">
			<x-m>25.468</x-m>
			<y-m>9.693</y-m>
			<z-m>3.642</z-m>
		</door>
		<jetway-hood-deg type="double">3</jetway-hood-deg>
	</aircraft>
That's it! Your aircraft is now animated jetway-capable!
In scenery
Placing in airports
Simply place a Models/Airport/jetway-movable.xml (single jetway), Models/Airport/jetway-movable-2.xml (double jetway), or Models/Airport/jetway-movable-3.xml (triple jetway) wherever you want- note that the model origins are always at the rotunda of jetway 1.
Making your own animated jetways
Just copy the XML file used in one of the default jetway models, and then use your own model. However, if you don't want to mess around with any Nasal code, it is important that the object names and the positions of the jetway parts are the same as those in the default jetway models.
If you insist on changing around those locations, find the following lines in the Nasal code:
 var xm = getprop("/aircraft/door[0]/x-m");
 var ym = getprop("/aircraft/door[0]/y-m") - 2.65;
 var zm = getprop("/aircraft/door[0]/z-m") - 3.752;
Change the - 2.65 to the distance from the jetway's center to the edge of the entrance connecting to the aircraft, and the - 3.752 to the height of the bottom of the jetway entrance.
How it works
Animated jetways work by making use of several rotate animations and a lot of Nasal scripting. All Nasal code for the system is contained in this pick animation. In the case of multiple jetways, one such animation is used per jetway.
	<animation>
		<type>pick</type>
		<object-name>Rotunda1</object-name>
		<object-name>Tunnel1Rotunda</object-name>
		<object-name>Tunnel1</object-name>
		<object-name>Tunnel2</object-name>
		<object-name>Tunnel3</object-name>
		<object-name>Rotunda2</object-name>
		<object-name>Entrance</object-name>
		<object-name>Hood</object-name>
		<action>
			<button>0</button>
			<repeatable type="bool">false</repeatable>
			<binding>
				<command>nasal</command>
				<!-- Nasal pick code -->
				<script><![CDATA[
				 ...
				]]></script>
			</binding>
		</action>
	</animation>
This is the actual nasal code. Documentation for each section follows.
if (props.globals.getNode("/scenery/airport/jetway[0]/extended") == nil)
 {
 props.globals.initNode("/scenery/airport/jetway[0]/extended", 0, "BOOL");
 setprop("/scenery/airport/jetway[0]/position-norm", 0);
 }
if (props.globals.getNode("/scenery/airport/jetway-movable-debug") == nil)
 {
 props.globals.initNode("/scenery/airport/jetway-movable-debug", 0, "BOOL");
 }
Here, we check if the jetway properties in the property tree exist. First, we check for /scenery/airport/jetway[X]/extended. If it exists, we assume that the necessary properties are already up and running. Otherwise, we intialize the extended and the position-norm properties. Then, we check for /scenery/airport/jetway-movable-debug- this is a special property that, if set true, will cause the script to output debugging information. If this property does not exist, we also initialize it.
# nasal interpolation function - returns a value based on a set interpolation table, like the <interpolate> feature of XML animations
# takes an array with sub-arrays, like
# [[<ind>, <dep>], [<ind>, <dep>]]
var interpolateTable = func(table, value)
 {
 ...
 };
This is a custom function that computes a value based on an interpolation table (the kind found in animations and autopilot filters). Since it's difficult to explain how it works and it's not totally necessary to understand this function to understand the animated jetway system, I'll skip over it.
var xtranslate = nil;
var yrotate = nil;
var zrotate = nil;
var hoodrotate = nil;

if (props.globals.getNode("/aircraft/door[0]/x-m") != nil and props.globals.getNode("/aircraft/door[0]/y-m") != nil and props.globals.getNode("/aircraft/door[0]/z-m") != nil)
 {
 var xm = getprop("/aircraft/door[0]/x-m");
 var ym = getprop("/aircraft/door[0]/y-m") - 2.65;
 var zm = getprop("/aircraft/door[0]/z-m") - 3.752;
We create our variables, xtranslate- the length, in meters, to extend the jetway, yrotate- the amount, in degrees, to rotate the jetway along the Y axis, zrotate- the amount, in degrees, to rotate the jetway along the Z axis, and hoodrotate- the amount, in degrees, to rotate the jetway hood along the X axis.
If the user's aircraft happens to have support for the latest animated jetway implementation, we initialize variables xm- the relative location of the aircraft's door, in meters, along the X axis, ym- the relative location of the aircraft's door, in meters, along the Y axis, zm- the relative location of the aircraft's door, in meters, along the Z axis. In the case of jetway #1, the Y and the Z axises need to be offset for the initial position of jetway. The X axis also needs to be offset, but we will factor this in later- some calculations require a "clean" X value without any modification.
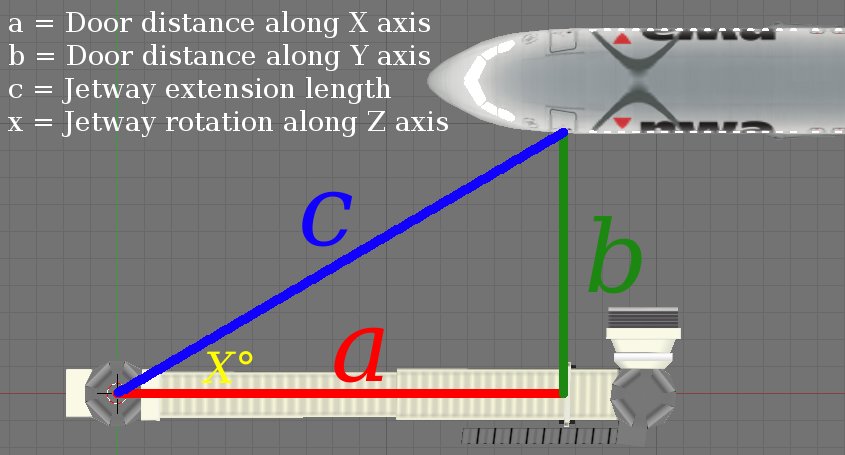
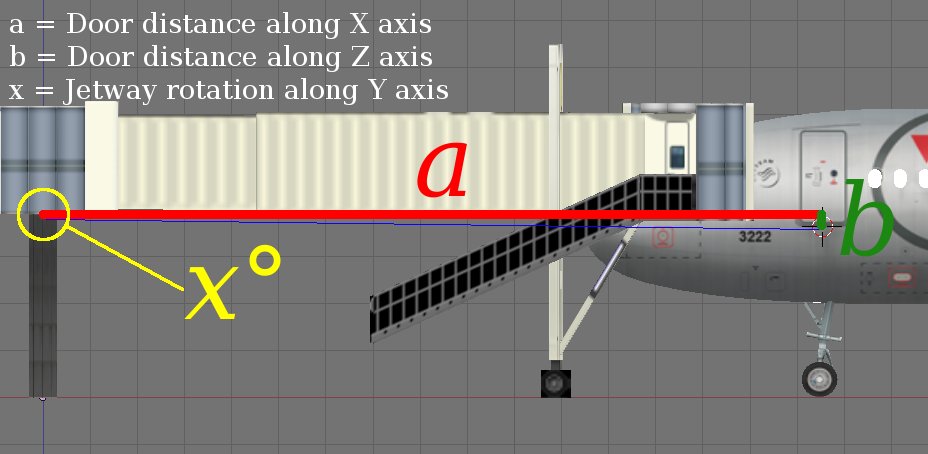
Now we'll calculate the actual values of the xtranslate, yrotate, zrotate, and hoodrotate variables from earlier. For this purpose we will consider the jetway and the aircraft door as parts of right triangles.
 # calculate the extension length using the Pythagorean Theorem (c = sqrt(a^2 + b^2))
 xtranslate = math.sqrt(xm * xm + ym * ym) - 19.536;
Refer to the first diagram. Calculating xtranslate is relatively simple- all it takes is a simple Pythagorean equation (a² + b² = c², or c = √(a² + b²)). We factor in the length of the jetway in its initial position by subtracting 19.536 meters from our result.
 # calculate the rotation angle along the Y axis
 yrotate = math.atan2(zm / xm, 1) * R2D;
For this section, refer to the second diagram. Here is where that trigonometry you learned back in school becomes useful! Here, we calculate yrotate using the tangent of angle x, or b / a. Then we use the mathematical function atan. Nasal doesn't have atan implemented in its math object, so we use math.atan2(b / a, 1) instead. All trigonometric calculations in FlightGear are done in radians, so we multiply our result by R2D (pi / 180) to convert to degrees.
Author's note: In hindsight, perhaps the A320 wasn't the best example aircraft to use, since the height difference between the jetway and the door is fairly small.
 # calculate the rotation angle along the Z axis
 zrotate = math.atan2(ym / xm, 1) * R2D;
Refer to the first diagram for this section. Here, we calculate zrotate, again using atan.
 # hood rotation angle is predefined
 hoodrotate = getprop("/aircraft/jetway-hood-deg");
The hood rotation amount is predefined by the aircraft.
 }
# old system (legacy support)
elsif (props.globals.getNode("/aircraft/jetway-pos/x-tra") != nil and props.globals.getNode("/aircraft/jetway-pos/y-rot") != nil and props.globals.getNode("/aircraft/jetway-pos/z-rot") != nil and props.globals.getNode("/aircraft/jetway-pos/hood-rot") != nil)
 {
 # rotation angles and extension lengths are predefined
 xtranslate = getprop("/aircraft/jetway-pos/x-tra");
 yrotate = getprop("/aircraft/jetway-pos/y-rot");
 zrotate = getprop("/aircraft/jetway-pos/z-rot");
 hoodrotate = getprop("/aircraft/jetway-pos/hood-rot");
 }
And finally, if the user's aircraft supports the old system instead of the latest, we fall back to the properties used in the old way that thout shall not mention.
var xtranslaterate = 0.5;
var xtranslatetable = [
  [0.0, 0.0],
  [0.2, 0.5],
  [0.6, 0.5],
  [0.8, 1.0],
  [1.0, 1.0]
 ];

var yrotaterate = 1;
var yrotatetable = [
  [0.0, 0.0],
  [0.4, 0.7],
  [0.7, 1.0],
  [1.0, 1.0]
 ];

var zrotaterate = 1;
var zrotatetable = [
  [0.0, 0.0],
  [0.2, 0.0],
  [0.6, 0.7],
  [0.8, 0.7],
  [0.9, 1.0],
  [1.0, 1.0]
 ];

var zentrancerotaterate = 5;
var zentrancerotatetable = [
  [0.0, 0.0],
  [0.5, 0.0],
  [0.6, 0.7],
  [0.8, 0.7],
  [0.9, 1.0],
  [1.0, 1.0]
 ];

var hoodrotaterate = 1;
var hoodrotatetable = [
  [0.0, 0.0],
  [0.9, 0.0],
  [1,0, 1.0]
 ];
These are the interpolation tables used by the earlier function. The extension and rotation rates are also defined here, in meters per second and degrees per second.
if (xtranslate != nil and yrotate != nil and zrotate != nil and hoodrotate != nil)
 {
 var length = math.abs(xtranslate / xtranslaterate) + math.abs(yrotate / yrotaterate) + math.abs(zrotate / zrotaterate) + math.abs(zrotate / zentrancerotaterate) + math.abs(hoodrotate / hoodrotaterate);

 if (props.globals.getNode("/scenery/airport/jetway-movable-debug").getBoolValue())
  {
  print("Animated jetway debug information:");
  print("----------------------------------");
  print("x-translation-m: " ~ xtranslate);
  print("y-rotation-deg: " ~ yrotate);
  print("z-rotation-deg: " ~ zrotate);
  print("hood-x-rotation-deg: " ~ hoodrotate);
  print("");
  print("Total animation time: " ~ length ~ " seconds");
  }
If all our variables exist (they were assigned a non-nil value somewhere along the line), we calculate the total animation length for a full extension and print debug information if /scenery/airport/jetway-movable-debug is set to true.
 if (!props.globals.getNode("/scenery/airport/jetway[0]/extended").getBoolValue())
  {
  props.globals.getNode("/scenery/airport/jetway[0]/extended").setBoolValue(1);
  interpolate("/scenery/airport/jetway[0]/position-norm",
    1, -getprop("/scenery/airport/jetway[0]/position-norm") + 1 * length
  );
  gui.popupTip("Extending jetway.");

  var loop = func
   {
   var position = getprop("/scenery/airport/jetway[0]/position-norm");
   setprop("/scenery/airport/jetway[0]/x-translation-m", interpolateTable(xtranslatetable, position) * xtranslate);
   setprop("/scenery/airport/jetway[0]/y-rotation-deg", interpolateTable(yrotatetable, position) * yrotate);
   setprop("/scenery/airport/jetway[0]/z-rotation-deg", interpolateTable(zrotatetable, position) * zrotate);
   setprop("/scenery/airport/jetway[0]/z-entrance-rotation-deg", interpolateTable(zentrancerotatetable, position) * zrotate) ;
   setprop("/scenery/airport/jetway[0]/hood-x-rotation-deg", interpolateTable(hoodrotatetable, position) * hoodrotate);

   if (position < 1 and props.globals.getNode("/scenery/airport/jetway[0]/extended").getBoolValue())
    {
    settimer(loop, 0);
    }
   };
  loop();
  }
If extended is set to true, we retract the jetway. We use the native interpolate() function to interpolate the position-norm property, and then create a loop that modifies the animation properties as the jetway extends/retracts.
 elsif (props.globals.getNode("/scenery/airport/jetway[0]/extended").getBoolValue())
  {
  props.globals.getNode("/scenery/airport/jetway[0]/extended").setBoolValue(0);
  interpolate("/scenery/airport/jetway[0]/position-norm",
    0, getprop("/scenery/airport/jetway[0]/position-norm") * length
   );
  gui.popupTip("Retracting jetway.");

  var loop = func
   {
   var position = getprop("/scenery/airport/jetway[0]/position-norm");
   setprop("/scenery/airport/jetway[0]/x-translation-m", interpolateTable(xtranslatetable, position) * xtranslate);
   setprop("/scenery/airport/jetway[0]/y-rotation-deg", interpolateTable(yrotatetable, position) * yrotate);
   setprop("/scenery/airport/jetway[0]/z-rotation-deg", interpolateTable(zrotatetable, position) * zrotate);
   setprop("/scenery/airport/jetway[0]/z-entrance-rotation-deg", interpolateTable(zentrancerotatetable, position) * zrotate);
   setprop("/scenery/airport/jetway[0]/hood-x-rotation-deg", interpolateTable(hoodrotatetable, position) * hoodrotate);

   if (position > 0 and !props.globals.getNode("/scenery/airport/jetway[0]/extended").getBoolValue())
    {
    settimer(loop, 0);
    }
   };
  loop();
If extended is set to false, we do the exact same thing in reverse.
  }
 }
else
 {
 gui.popupTip("Cannot extend jetway: Your aircraft does not define the required positioning information.");
 }
If our variables are nil, then we assume that the aircraft lacks animated jetway support and notify the user that this is the case.
Limitations
- The jetway does not "know" the position of the aircraft, but rather moves to a predefined location relative to the jetway, unlike in X plane or Microsoft Flight Simulator where the jetways extend to an aircraft (mostly) precisely regardless of its location.
- Separate gates cannot move independently- you may notice that all jetways extend when you click one of them.
