Textures & Texture Maps in SketchUp
Once you get into modelling for FlightGear, you want to use textures. They give the certain touch of reality to every model. This tutorial shows you how to embed your own textures into a SketchUp model on Mac OS X and Windows.
Copyright issues
Any textures found in the SketchUp paint-box are subject to Google copyright. As FlightGear operates under the terms of the GNU General Public License, model makers must not use any item, be it texture, photograph, or code etc., unless it has been released under the terms of GPL.
You can see all the details for GNU GPL at http://www.gnu.org/copyleft/gpl.html .
The only things you can safely use in the SketchUp paint-box are the named colors. I recommend you open the "Colors" or the "Colors-Named" menu, and do everything from there, ignoring the rest of the main paint-box menus. That way you cannot accidentally use something you shouldn't.
Making your own textures
You can apply either a color or an overlay image (texture) to your model. Colors are easy; simply pick one of the SketchUp's predefined colors. But it gets really nice and realistic once you use images. Let's assume you want to overlay ribbed concrete:
- Take a photo of some ribbed concrete with a digital camera, preferably with some marks to show 1 square metre.
- Upload that photo to your computer, then, in your photo processor (iPhoto on Mac; GIMP, IrfanView or any other on windows), ‘Crop’ it to show just the square meter, and export it with a good highest detail/lowest file size compromise ("export to web" in iPhoto).
- During that export procedure, select a pixels size which is compatible with FlightGear - that means its resolution must be a power of two (e.g., 21 = 2, 22 = 4, 23=8, 24 = 16, etc.). That gives you possible resolutions like 2x2, 2x4, 8x32, 256x16 and all the like. If you don't do this, FlightGear can show the image, but only after a resizing procedure, which eats up processor capacity. So you want to do that for FlightGear before applying the image to your model. You can re-scale distorted images in SketchUp later again.
- Save that photo to your desktop.
If this is to be the only texture for this model, try to keep the pixels as small as you can without losing too much detail. If it is to be part of a texture map (see below), you can keep the high pixel count at this stage to preserve detail, though it still needs to be set to the powers-of-two sizes.
If your photo processor does not allow you to set the pixels, use another like Preview (Mac) or GIMP to pixel size the exported photo.
Semi-transparent textures
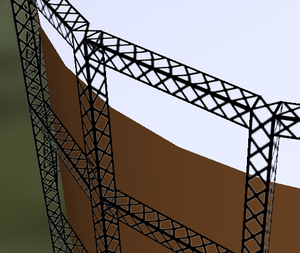
Semi-transparent textures are a powerful tool. When you want to model mesh, banisters, scaffolding, etc., you can use semi-transparent textures to minimize the complexity of the model. Like in the model to the right.
A good example is the gasometer by Jon Stockill. To simulate the framework, he used this minimal image that is transparent except for the metal parts:
Another good example is the roof structure of the A380 hangar at EDDF by Christian Schmitt.
Loading your texture into SketchUp
Now you need to read that texture into SketchUp.
First you open the new texture dialog:
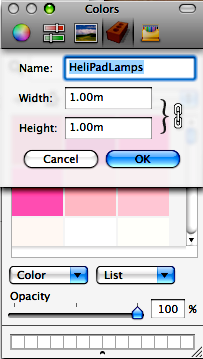
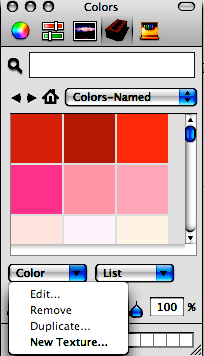
- Mac: Select "New Texture" from the "Colour" menu inside the "Colours- Named" section of the SketchUp paint-box.
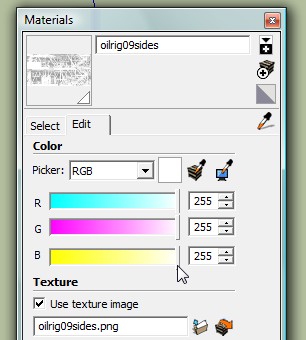
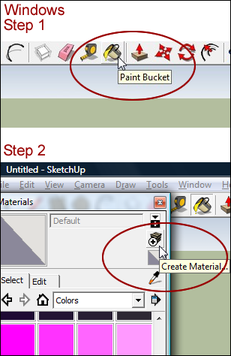
- Windows: Click the paint bucket (or select Window > Materials), then click the 'Create Material...' button.
| Mac | Windows |
|---|---|
 |
|
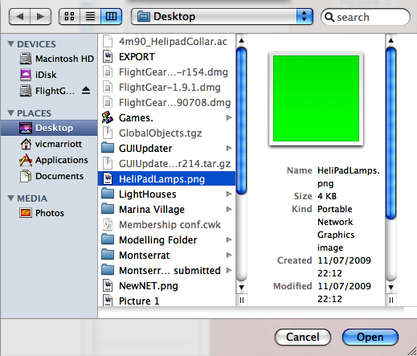
Select that, and you should be presented with the means to select the path to your photo (in this example we have put it on our desktop).
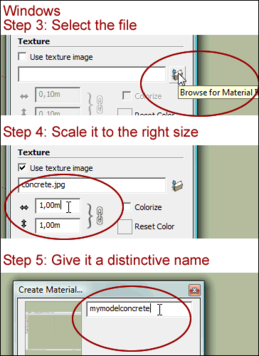
Select your photo, and click Open. This will take it into the paint-box with whatever name you saved it with.
| Mac | Windows |
|---|---|
 |
|
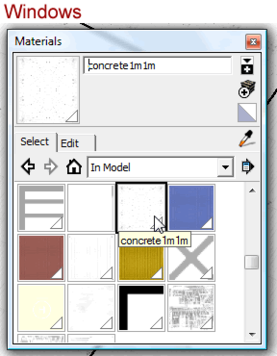
In the SketchUp paint-box you can give your new texture a unique name. Try to make this name relevant to the model you are making. This could be useful in reuniting them if ever the model and its texture get separated. For use in FlightGear there should not be any gaps in the texture name.
You need to set the size of your new concrete texture to 1x1 m. This means: If the area you are using the texture in is bigger than 1 meter square, the texture will be repeated every meter in every direction, until the whole target area is textured.
Applying the texture is the same as painting an area.
- Select the texture.
- Place the paint-pot tool over the target area, and click.
If your texture is a specific item, e.g. a window, the picture of the window will be presented again and again. It will be necessary to position the texture to place the required section in the target area. I describe how to do this later.
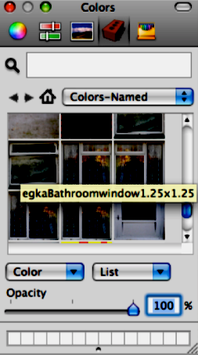
| Tip When making a texture of an item like a door, or window, it is a good idea to include it’s measurements in the individual texture name. The name of each item in the paint- box appears when you hold your mouse pointer over it. This helps when marking up your model with its target areas. |
| Mac | Windows |
|---|---|
 |
|
| Tip When you first start modelling, there is a lot of satisfaction to be had from making very detailed models. The downside of that is the large file size produced. This affects loading times in FlightGear. |
By "all" means make your detailed model - take a snap for your own collection - then try to minimize the face count (MaverickAlex has produced a tutorial on this, see: Howto: Decrease the number of faces.
Alternatively, you could keep your detailed model, and make a copy of the file to reduce the file size on. This copy would be the one you send to the scenery database.
| Tip You could save a lot of file space by snapping the whole side of your model and making a texture of it to keep in all your hard earned detail, but with only one face on the texture to be counted. |
Correct display of texture colors in the AC file
Later, when your model is done and you export it to AC format, the textures will be defined in that AC file. There, the RGB settings should be rgb 1 1 1 for a correct display of the texture colors (AC files: Basic changes to textures and colors). To insure that this will be done automatically, you should set the color of the texture to rgb 1 1 1 already in SketchUp. The texture will appear whitish in SketchUp, but correctly after export. You do that during the definition of the texture. In SketchUp, rgb 255 255 255 is the same as rgb 1 1 1 in the AC file:
Making a texture map
If you only have one texture in a model there is no need to make a texture map, but if there are to be several textures used in the model, or, as in the Caribbean scenery project, the same textures used in many models - rather than have to forward/use multiple texture files, it is better to make a texture map.
This can all be accomplished in SketchUp - though some modelers prefer to do it in a separate application.
| Note A texture map only works for textures which are used only once in each place. Textures that are used as tiles, i.e. appear many times next to each other to form a pattern (as in the gasometer example above), must stand alone. Otherwise the whole texture map would have to be the tile - which you probably do not want. |
| Tip I do it all in SketchUp to ensure the measurements are correct and match my SketchUp model. |
First you need to make each of the textures you are going to use in your model. You can produce textures (as described above) from photos, or from drawings you may have done in SketchUp, or another application (eg. iWorks or Appleworks for Mac). You can use quite high resolution pics or drawings for these, thus keeping more detail, as you will be minimizing the pixels on the final map stage.
You will not be able to use the repeats, as described in the previous section, so the size of each texture "Target" area needs to be noted.
| Tip I use a "stickie" with these details permanently at the top left of my desktop whilst modelling. |
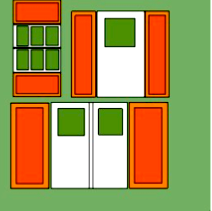
| Object | Width (m) | Height (m) |
|---|---|---|
| Single door with shutters | 2.55 | 2.25 |
| Double door with shutters | 4.11 | 2.25 |
| Window with shutters | 2.54 | 1.25 |
| Square | 4.7 | 4.7 |
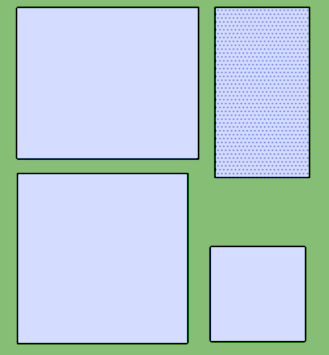
Next you need to mark the area where each texture is going to be placed on your model with the outline (usually a rectangle) of the texture. I call these "targets".
Next, place a duplicate of each of the model's targets into as near a square as you can - flat on the ground using the "Top" view under the "Camera" menu.
Use the "Orbit" tool to make sure they are all level.
Then go back to the "Top" view.
Make sure your square is well away from your model, and doesn't coincide with any guidelines from your model, as these could end up in the pic you take later - you don't want them in your texture map.
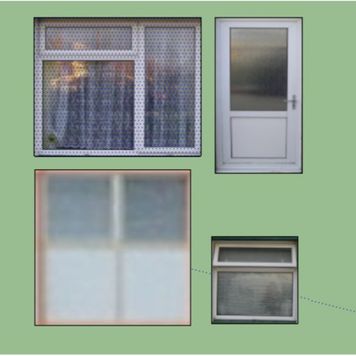
Next, texture each of the targets in your square (not the ones on your model).
It does not matter if they are not all the same way up because you can rotate them when you place them on your model.
If you are going to use the same texture on different sized targets - as in roof tiles on the sides of a roof and the ends of a roof, your texture map needs a target large enough to cover the biggest measurements in your model targets. This allows you to use it to texture the smaller ones too.
Example: If the side roof is 10x5, and the roof end is 6x6, you would need to have the roof tile part of the texture measuring 10x6. That would enable you to use the same texture for both parts of the roof.
You could play safe and just make the texture more than large enough to cover the roof size, but that way you would be making the file size bigger, which is to be avoided because of loading speed.
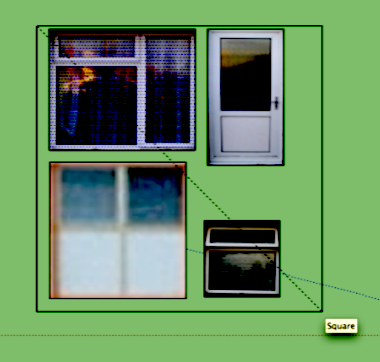
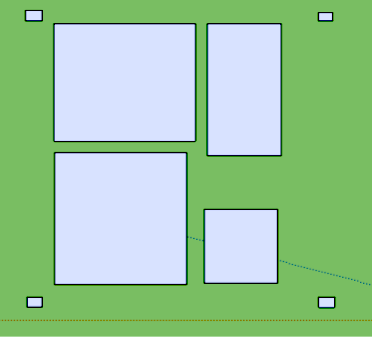
Now use the SketchUp 'Square' tool to cover your square of targets as tightly to the edges as possible. Make this a perfect square, even if you have to include some of the background between the targets.
| Tip You can see an unwanted guide line in the above picture (Bottom right, above the word ‘Square’). If you make the individual targets into a group after you have textured them, you can easily move your square beyond the guide lines or make the guide lines and axes invisible during this exercise. |
Use the SketchUp measuring tool to measure your square. Note the measurements down for future use.
| Object | Width (m) | Height (m) |
|---|---|---|
| Single door with shutters | 2.55 | 2.25 |
| Double door with shutters | 4.11 | 2.25 |
| Window with shutters | 2.54 | 1.25 |
| Square | 4.7 | 4.7 |
Now use the square tool again to make another smaller square at the outside of each corner - these will act as markers for the next procedure - then erase the covering square being careful not to erase any of your textured targets.
Use the inside corner of each of those corner squares as the limits of your screen-shot (Photo). In this example the photo will be equal to 4.7 m x 4.7 m when you take it back into the SketchUp paint-box as a new texture. Use a photo processing application (like Gimp, Photoshop, (for Macs Preview or iPhoto will do as well)) to make the pixels a square of two. Keep the squared pixel size to the smallest one that keeps the necessary detail in the textures. Bear in mind most models are viewed as a 'flypast', which means at a distance. Try a couple of sizes to decide which will do the job effectively.
Go back to the SketchUp paint-box and make a new texture from your photo. Make sure this new texture has a unique name, and the width and height of this texture is equal to the square you covered the targets with (hopefully you noted the measurement earlier).
Then use that new texture to texture your model with the following method:
- In the SketchUp paint-box, select your new texture.
- Take the paint pot to your target area and click.
- When you have clicked the paint pot onto your target area, right-click: this should give you the option to position the texture.
- Another right-click at this stage will give you the option to rotate the texture if necessary. Do not forget to click Done (right-click menu, or Ctrl + click menu for Macs) when you have got the correct part of the texture map in your target area.
Work your way round the model until you have placed all of the required textures.
Remember to erase the duplicate square of targets in your SketchUp file before you export to .ac.
When you export your SketchUp file to the AC format, there will only be one texture file.
| Tip Leave deleting the square until you have placed all of it’s constituent parts on your model. This makes it easier to add in any textured parts of your model which you had missed out. If you erased the square before this stage, you would have to start completely again from scratch, or have an extra texture file with that model. (It is a pride thing I guess). |
This tutorial was written by VicMar, with special thanks to Alex Park, who showed how to make texture maps, and D-79 for the PC details to match the Mac instructions
