Rockwell B-1B Lancer
Jump to navigation
Jump to search

 | |
| Type | Military aircraft |
|---|---|
| Author(s) | Markus Zojer, Paul Jay Schrenker, NC-687, Zorka, Eagle01, Marsdolphin |
| FDM | YASim |
| Status | Early production |
| FDM |
|
| Systems |
|
| Cockpit |
|
| Model |
|
| Development | |
| Repository |
|
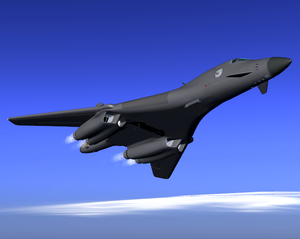
The Rockwell B-1B Lancer is a four-engine supersonic variable-geometry swing-wing, jet-powered strategic bomber used by the United States Air Force (USAF).
Aircraft Help
Startup
- Switch on Battery switch (overhead/middle)
- Start APU left and/or right (overhead/right) by switching APU MODE L/R to on/start
NOTE: use one of the points below!- Couple left and right drive by switching L/R DRIVE to 2/4 ADS COUPLE
- Switch on L/R BLEED AIR. If only 1 APU active, switch to CRSVR AIR to start engines in the other nacelle
- Switch on Engines (middle console/back)
NOTE: APU left powers engines 1,2 APU right -->3,4 - Switch APU off when engines are on, or after climb
Terrain Following Systems TER FLW
- Adjust clearance SET CLR (200ft increments)
- ...A=0, B=200ft, C=400ft, D=600ft to J=2000ft
- ...flatlands: down to 200ft, hills: 400/600ft
- ...mountains: 800ft and above
- switch -PRTY- to TER FLW (other setting MAP)
- Toggle master switch TER FLW on
(buggy, often causes fatal errors)

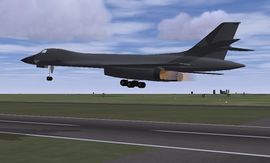
A takeoff with the afterburners on
Terrain Avoidance Systems TER AVD
- Adjust obstacle clearance CLR PLN
- ...possible settings: 0, 100, 300, 500, 1000ft
- Adjust distance RNG, currently 2.5 or 5nm
- Toggle master switch TER AVD on plane clears obstancle, stays at new alt
Fuel Center of Gravity Management System FCGMS
- Set CG SET to %MAC of desire also visible at %MAC scale as orange marker
- Switch SYS to ON CG %MAC visible as white marker works only within a certain margin, then orange and white marker are at same %MAC
Weapons Operation
- Make sure you load up your weapons from the dialog (
B-1b>Weapon/Fuel Management). You can't do this in-air! - Switch to the OSO view (
ctl+v). You'll see three screens:- Top right one shows all of the bombs, their
ARM/SAFEstatus, and time to drop. - Top left one shows where your target(s) are (symbolized by a yellow circle(s))
- Bottom one is your IKB, through which you can set/modify the coords of targets.
- Top right one shows all of the bombs, their
- To Arm the bombs, select the bay you want to arm (Three verticaly-arranged buttons, labeled
FWD(forward bay),ITMD(intermediate/middle bay), andAFT(Aft/rear bay)), click the number on the rightmost numpad of the bomb you want to arm, and click theARMbutton on the far right of the OSO station- If you want to, disarm the bomb for any reason, select the respective number and press the
SAFEbutton, under it.
- If you want to, disarm the bomb for any reason, select the respective number and press the
- Now that you've armed your bombs, you have three ways to select a target: via the IKB display, through the TGP, or by the
Targetting Computerdialog.- IKB: use the arrows to select the number position, then input the numbers using the left numpad. Position 0 is reserved for the
-sign, use0/1to toggle that. - TGP:
r/Rto select the rack, cursor click to mark the target,tto save it. - Dialog: Manually input lat/lon for each rack.
- IKB: use the arrows to select the number position, then input the numbers using the left numpad. Position 0 is reserved for the
- To release, press
BOMBunder theSTEERCategory (Panel on left side of the OSO station), and the rightmostBOMBbutton underBOMB/NAVcategory. - Make sure to open the Bay doors (Lower/right part of OSO station, click the buttons to open)!
- If none of this made sense (which it probably won't, so don't get disappointed), see here: https://www.youtube.com/watch?v=Eg26k9TTdz8