Howto:Multi-channel lightmap
There are two basic possibilities to bring light to a scene in real-time 3d rendering. One is to specify the geometry (i.e. the location and characteristics of a light source) and compute which surfaces are illuminated by it runtime, the other is to compute the illumination offline and supply it via a texture to the renderer. The latter is called a lightmap.
The advantage of the first family of techniques (to which the deferred approach of Project Rembrandt belongs) is that it can treat movement of the lights relative to the scene - but because light needs to be computed every frame, the computation is very simple (secondary lights do not cast shadows, lit surfaces do not re-emit diffuse light into the scene,...).
Lightmaps on the other hand only work for a static scene, but since they can be computed offline with the help of raytracing software (which can run for hours if needed), secondary shadows and multiple reflections of light on bright surfaces are not an issue. In addition, at runtime a lightmap corresponds to just a texture lookup, i.e. is very performance-friendly.
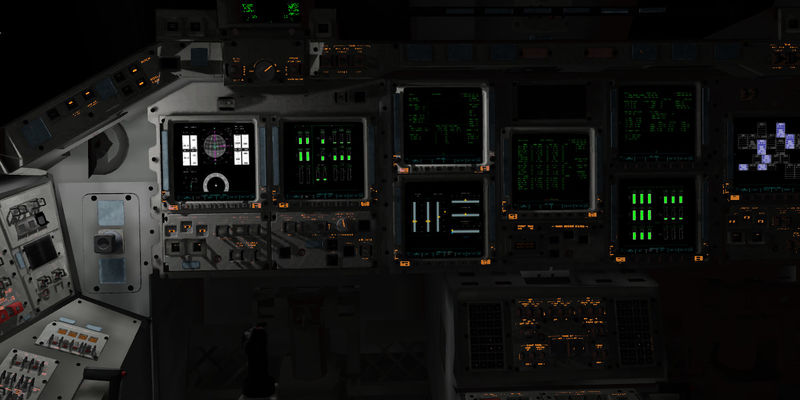
For many situations where a light on an airplane illuminates that airplane (both in interior and in exterior view), lightmaps thus are a useful technique and can lead to graphically very impressive outcomes:
FG supports both single channel maps (the rgb value of the lightmap encodes the full color of the light at that pixel) and multi-channel lightmaps. In these, each r,g,b and a of the lightmap texture specify intensity of the light, the color (which can then not vary across the lightspot) has to be supplied per channel as a parameter.
Lightmaps are supported in FG by:
- $FG_ROOT/Effects/model-combined-deferred.eff (for exterior views)
- $FG_ROOT/Effects/model-interior.eff (cockpit interiors, ALS only) and
- $FG_ROOT/Effects/glass.eff (for reflections of a lit cockpit in the glass, ALS only).
Creating a lightmap or multi-channel lightmap using Blender
This documentation is intended to be a step by step guide to produce lightmaps for FlightGear using Blender and Gimp. It is not intended to be a comprehensive tutorial on the use of Blender or Gimp, just enough to get the job done. Anyone with expert skill in either Blender or Gimp is more than welcome to add to this guide with more details, techniques and tricks.
Start by setting up your lighting scheme in Blender. Create the light sources you want to map (bake) in your blend. You can have up to 4 lightmaps per multi-channel lightmap effect in FlightGear. Each of those four lightmaps can be a single light source or a combination of light sources. In other words, you could potentially have 5 lights on the left combined into one lightmap and two on the right into another lightmap, leaving 2 channels open for 2 more lightmaps of any configuration.
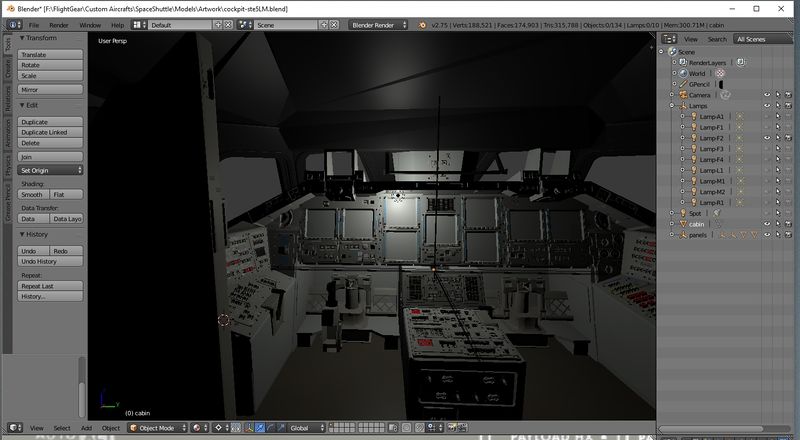
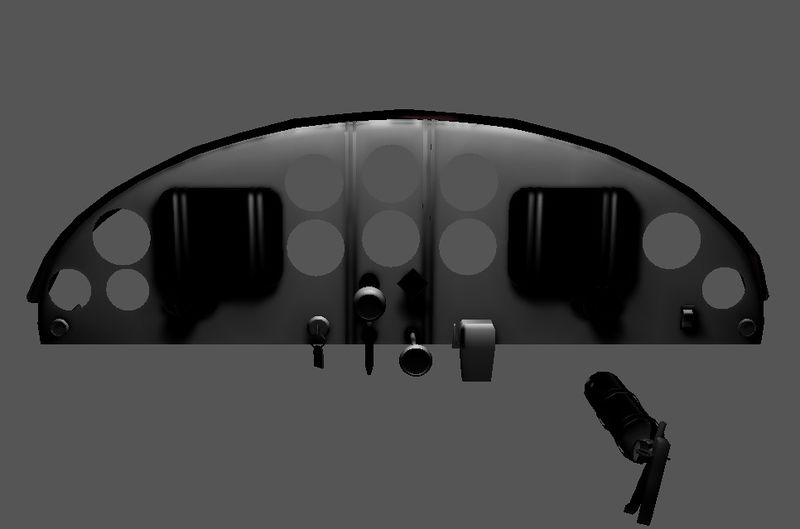
This is what your cockpit or subject will look like when looking at it in the Material Viewport if using only one normal white light.
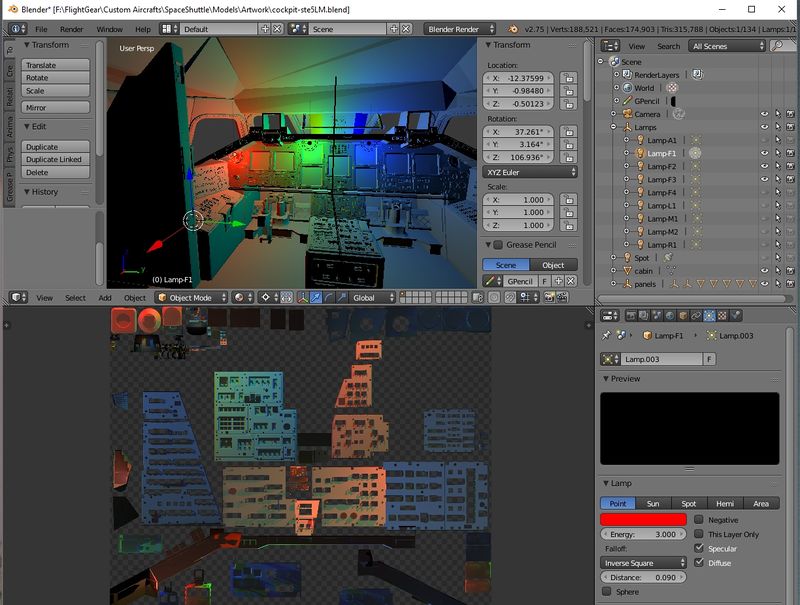
You can set up your lights to mimic the 3 color channels used in the shader and thus bake three different light sources into three different channels in one bake session if you wish. However in this case you can only use one light source per channel. This would eliminate some steps in Gimp during the next part of the process, but for the purpose of this tutorial, we'll take the longer approach so you can see how it is possible to work with images and their channels. This is what you might expect to see if you do a light source per color channel (rgb).
Using Blender, it would be wise to work from a copy of your original blend file to use for the lightmap creation so as not to disturb the original.
Because of the nature of the lightmap effect and the way it is applied using shaders, it is required to have all the objects to be influenced by the same lightmap also mapped to the same texture. In most cases UV-texture mapping should not overlap, ie: don't map multiple objects to the same texture space. This will cause a problem when baking the lightmap by causing the bake to apply two different light conditions to the same texture space. Also, I have had issues where a panel or object on top of another will cause issues with the bake, you can get a shadow on an object that should be in full light. I don't know if this is an "order of operation" bug in Blender or if it was due to incorrectly unwrapping the objects texture map.
Tip: Other blends that use a different coordinate space must be converted to the same coordinate space as the final blend that you are creating the lightmap from and also be mapped to the same texture sheet if you want to apply a single lightmap to all those object. This obviously can be a real challenge if using generic instruments.
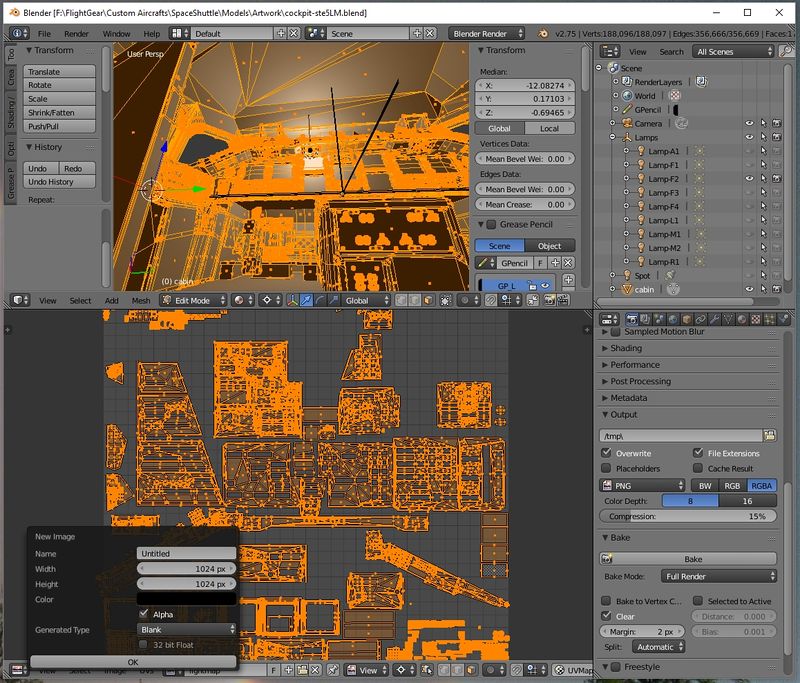
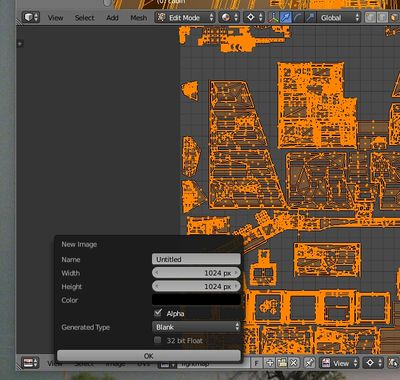
Using the UV-Image Editor screen in Blender, create a new image that is the same size as the texture sheet being used. Here is where you may have a problem if you have set up your blend to have multiple texture sheets. I happen to have only one texture sheet for the entire blend (by design). These things need to be well thought out, in advance, for ease in setting up the effects later on in the creation process. This is what the map will bake to and be the source of the final lightmap.
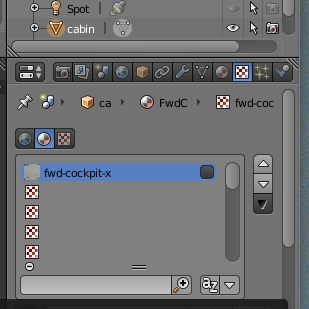
Uncheck the texture being applied to the objects.
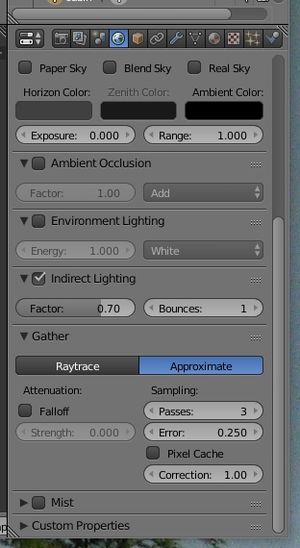
In the "World" tab select the effects you want Blender to add to the lightmap.
Tip: Use only indirect lighting. Let FlightGears shaders take care of the rest.
I had good results with the following indirect lighting settings...
- Factor .7
- Passes 3
- Error .25
I set "Correction" to 1.0, but it may only be use if Ambient Occlusion is also checked.
Your now ready to bake.
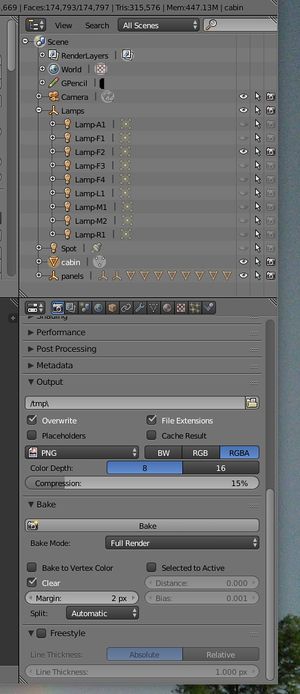
You can either join all the object into one and do a single bake or you can uncheck the "Clear" box in the Bake section and do multiple bake runs over the same image using different selected objects in the edit mode one at a time. With the complexity of the Shuttle Cockpit, I found it easiest to join all the object into a single object and bake only once per light source.
- Make sure your object is selected and in edit mode.
- Make sure you have only the light source or sources you want in this lightmap active.
- In the bake information (Render Tab) make sure you have a reasonable "overlap". Read up in Blender docs for that info. I used 2 and it appears to have been a decent setting for my texture sheet resolution.
- Make sure you have selected the image you created in the UV-image editor.
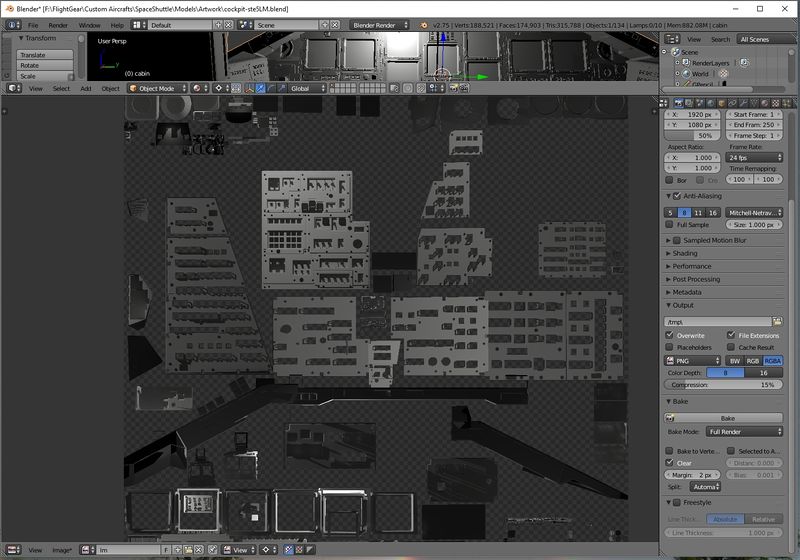
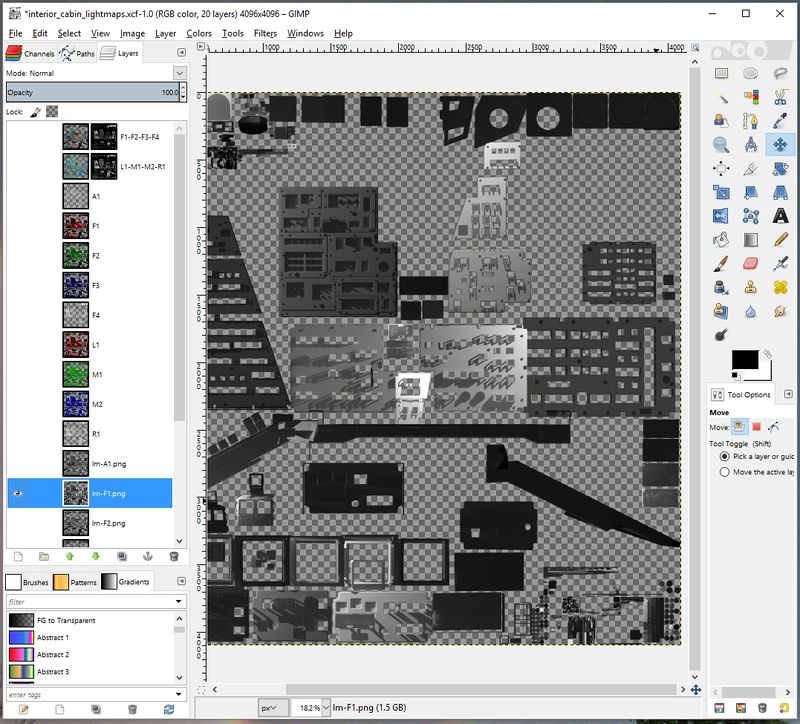
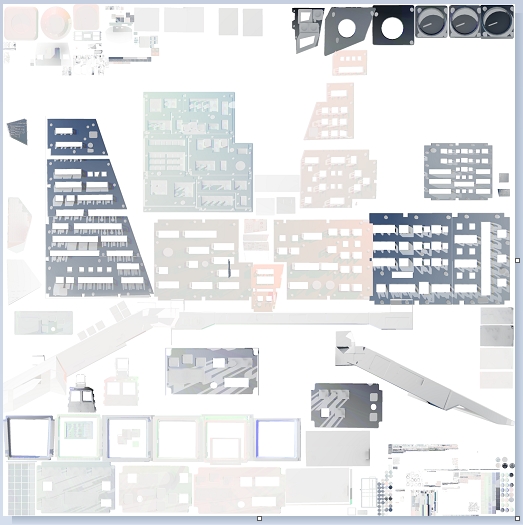
Hit the bake button. When the baking is finished, if everything went OK, you should have a baked map that looks something like this.
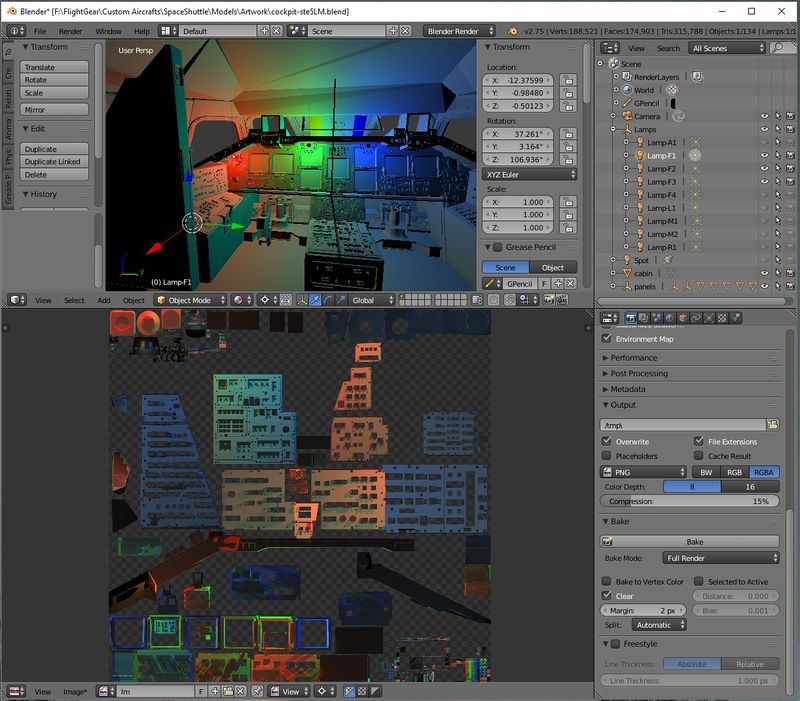
Or if you used colored lights it will look like this.
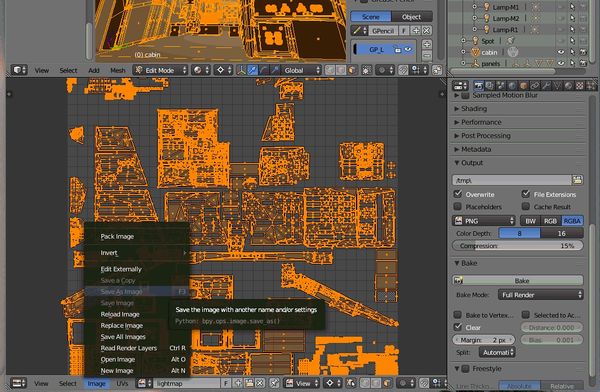
The last step is to save the baked image. If you have successfully baked the image, you'll see an asterix above- left of the "Image" menu choice on the UV-editor window. Click on "Image" then "Save As Image" to save the image as a png.
Creating a lightmap or multi-channel lightmap using AC3D
Creating a lightmap texture using AC3d requires the same preparations to the mesh and texture layout as described by the previous section for Blender. Place a light in the scene and select all surfaces that use the same texture. De-select everything else. You can preview the result of the light position by disabling the headlight option in the 3D menu.
When you're satisfied wit the result go to Tools and select Render To Texture. Set the texture width and height to the same widht and hight of the original texture covering the surfaces and select Lights and Shadows from the Render option. By pressing Render AC3D will generate a lightmap texture sheet that matches the original texture at a file location of your choice.
The best end result is achieved by combining the original texture and the lightmap texture using the hard-light filter in Gimp.
Using Gimp to construct a multi-channel lightmap from baked Blender images
Some of the following Gimp steps will not be necessary if you used the colored lights approach as you will already have the three color channels combined. Also I like to have backup in case I mess something up so I usually make copies of the original bakes to work with VS using the original. Therefor throughout these steps I am copying or creating new layers as I break the channels apart and when I re-combine them. It's not a necessary step. Unless otherwise noted I am usually working with only one layer selected at a time. Later on when your combining them that isn't necessarily true. But then you have to be sure to only have the layers your working with active or it will corrupt the results. Especially during the channel combining steps where you are "adding" layers together.
Import the "baked" Blender lightmaps into Gimp. If you baked a three color channel lightmap you can proceed to the section on converting the greyscale to alpha.
If not then with only the greyscale lightmap layer that you want to convert to the the first rgb color channel (r) selected, click on the Channel tab. De-select green and blue channels. All that you should have selected is the red and alpha channels. Save visible to new layer. This new layer is now the red channel layer (the first channel) of what will be your four channel lightmap. Repeat this process for the greyscale image (lightmap) that is going to represent the green channel and again for the one that will represent the blue channel.
When finished with this step you should have three different original lightmaps, each in their own color channel (rgb).
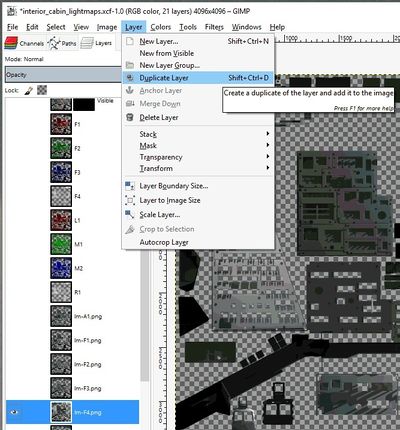
For the alpha channel, duplicate the greyscale layer that you want to convert to the alpha channel.
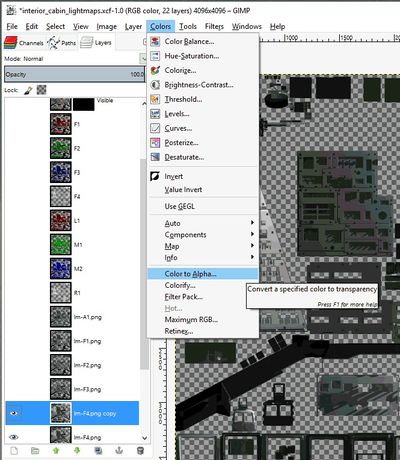
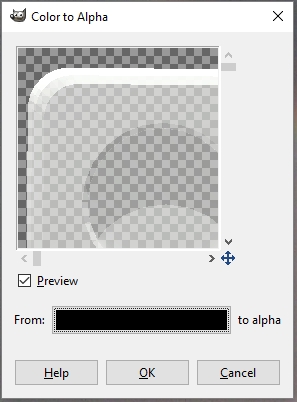
Select color to alpha.
Change the color selector to black by clicking on it and choosing r = 0, g = 0, b = 0, apply. You should now have a simi-transparent layer that will become the alpha channel of the four-channel lightmap.
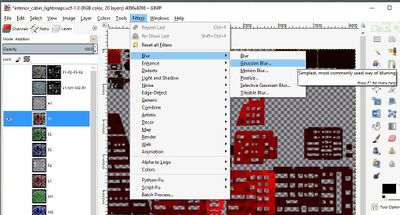
Next you can apply some Gaussian blur to each of the channels you have now created (rgba). To save a few steps you can apply the Gaussian blur to the final four channel lightmap, I think you get the same results.
The next step combines the channels back into one image that will be the final lightmap used by the shader in FlightGear.
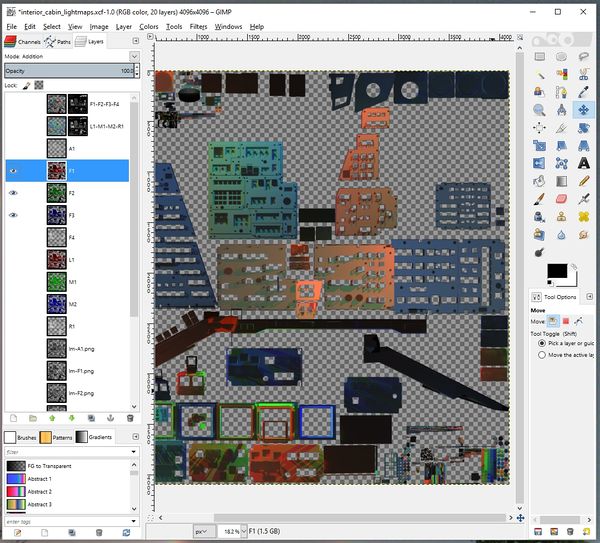
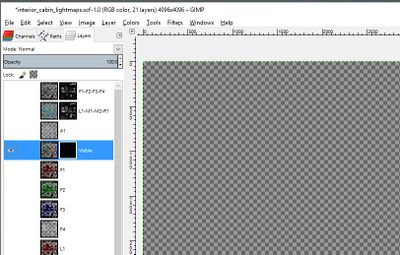
With the images in order by r, g, b, a Using the dropdown below the Channel/Path/Layer tabs, put the red and green layer to addition. Leave the b layer to normal. Make sure they are the only layers active. The last layer (blue) will show to have all three channels combined.
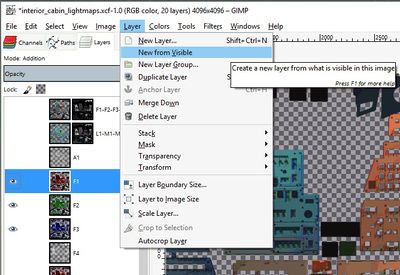
Again, I like to copy the last layer (the blue channel) to a new layer. Select that layer and copy it to a new layer or use the "Layer" menu choice "New from visible". That is now a three color (rgb) layer.
Were almost finished, The next step adds the alpha channel to the 3 channel rgb layer you just created.
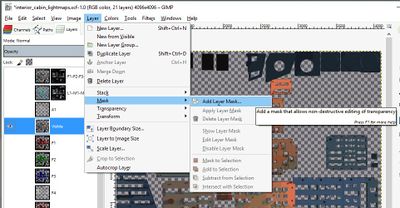
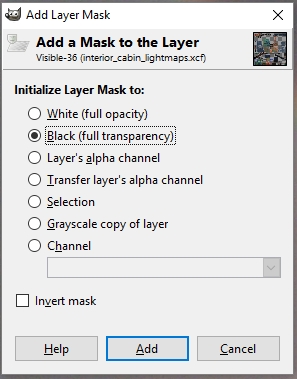
While there may be other ways to do this step, I used a mask to add the alpha channel that we created previously back into the final four channel image. The order here is tricky. First add a layer mask to the three channel layer you created previously by "addition" for the alpha channel to be copied into later.
Select Black (full transparency).
Copy the greyscale layer you want to become the alpha channel to the clipboard.
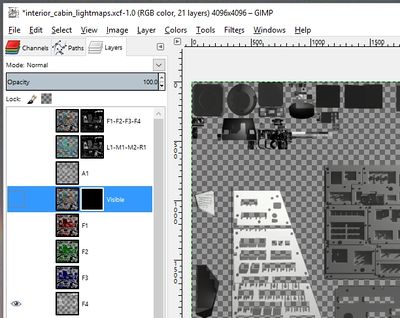
Once copied, select the mask side of the 3 color channel image. Make sure it is highlighted.
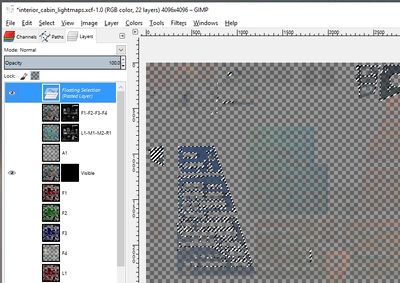
Then paste the clipboard back to the list.
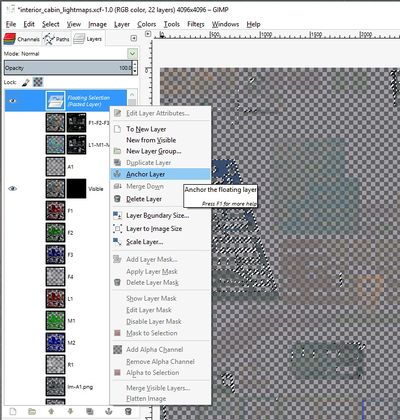
Now anchor the pasted layer to the selected mask.
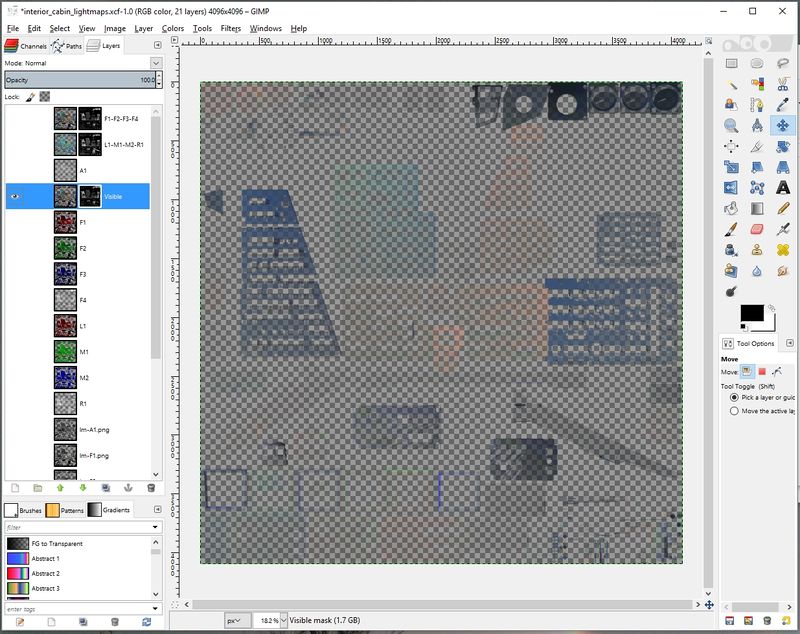
That is it, you now have a four channel lightmap with a different light configuration per channel to use in FlightGear.
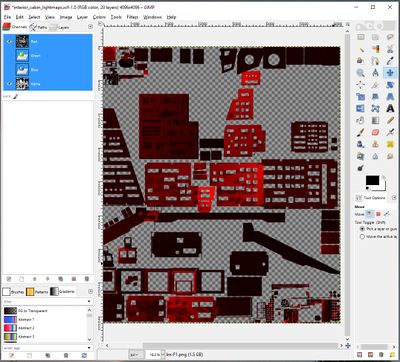
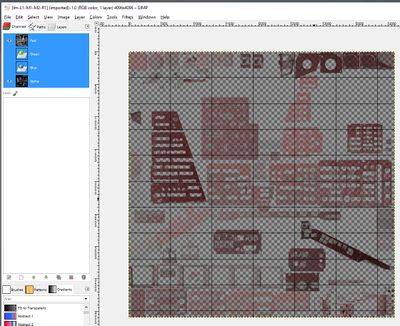
This is what the final rgba lightmap looks like. You can verify that it is correctly configured by examining it in Gimp using the Channel tab.
Here the green and blue channel are off so you can see the red channel and alpha channel (you wont see anything if you turn off the alpha).
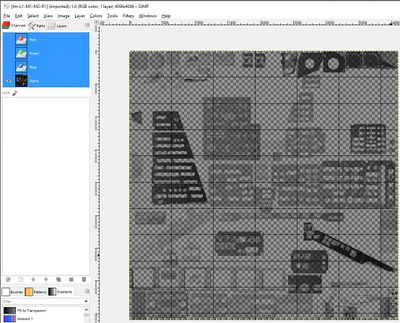
This is showing the alpha channel. Note that it has some transparency. That is correct. If it is solid black then you don't have a correctly configured alpha channel.
Using XML and GLSL to activate the multi-channel lightmap in FlightGear
Now that we have a multi-channel lightmap we are ready to use it in FlightGear. First thing we need is to assign the lightmap effect to the objects that the lightmap was created for. The code looks like this. Even though in my Blender baking example I joined all the object into one object prior to baking (I called it cabin). In the XML they need to be listed as they are actually used or called in the XML. In the case of the shuttle there were approximately 600 objects affected by the lights and subsequent lightmap. But for this example I will only use a small subset of the total objects involved.
First in the aircraft's model file. Where shuttle-interior is the name assigned to the effects code in the effects file that will contain the code to activate the lightmap. This block tells the program what objects to apply the associated effect to.
$FG_AIRCRAFT/Aircraft/SpaceShuttle/Models/cockpit.xml
<effect>
        <inherits-from>Aircraft/SpaceShuttle/Models/Effects/Interior/shuttle-interior</inherits-from>
        <object-name>backwall</object-name>
        <object-name>floor</object-name>
        <object-name>panels</object-name>
        <object-name>switches</object-name>
</effect>
Next is the XML effects file with all the information needed to implement the effect, in this case the lightmap.
$FG_AIRCRAFT/Aircraft/SpaceShuttle/Models/Effects/Interior/shuttle-interior.eff
<?xml version="1.0" encoding="utf-8"?>

<PropertyList>
    <name>Effects/shuttle-interior</name>
    <inherits-from>Effects/model-interior</inherits-from>
    <parameters>
        <lightmap-enabled type="int">1</lightmap-enabled>
        <lightmap-multi type="int">1</lightmap-multi>
        <lightmap-factor type="float" n="0"><use>/fdm/jsbsim/systems/light/cabinlight1-intensity</use></lightmap-factor>
        <lightmap-color type="vec3d" n="0"> 1.0 1.0 1.0 </lightmap-color>
        <lightmap-factor type="float" n="1"><use>/fdm/jsbsim/systems/light/cabinlight2-intensity</use></lightmap-factor>
        <lightmap-color type="vec3d" n="1"> 1.0 1.0 1.0 </lightmap-color>
        <lightmap-factor type="float" n="2"><use>/fdm/jsbsim/systems/light/cabinlight3-intensity</use></lightmap-factor>
        <lightmap-color type="vec3d" n="2"> 1.0 1.0 1.0 </lightmap-color>
        <lightmap-factor type="float" n="3"><use>/fdm/jsbsim/systems/light/cabinlight4-intensity</use></lightmap-factor>
        <lightmap-color type="vec3d" n="3"> 1.0 1.0 1.0 </lightmap-color>
        <texture n="3">
            <image>Aircraft/SpaceShuttle/Models/Effects/Interior/lm-F1-F2-F3-F4.png</image>
            <type>2d</type>
            <filter>linear-mipmap-linear</filter>
            <wrap-s>clamp</wrap-s>
            <wrap-t>clamp</wrap-t>
            <internal-format>normalized</internal-format>
        </texture>
    </parameters>
</PropertyList>
Note:
lm-F1-F2-F3-F4.png is the multi-channel (four channel) rgba lightmap.
lightmap-factor allows you to control the intensity of the lightmap effect.
It is adjusted by a property created in the *-set.xml file (/fdm/jsbsim/systems/light/cabinlight#-intensity).
Extending the multi-channel lightmap to use 8 channels or 2 X 4 rgba channels
The multi-channel lightmap effect can be extended relatively easy to allow for as many as 8 light sources. The SpaceShuttle was extended to use 8 lights in the cockpit. But because it is out of the scope of this tutorial I will just refer you to look at the following files to see how it is accomplished. Extending the multi-channel lightmap to allow for more lights should only be undertaken by experienced developers that are somewhat familiar with the XML effects wrapper and GLSL code as it requires to have shader code aircraft-side.
- $FG_AIRCRAFT/Aircraft/SpaceShuttle/Models/Effects/Interior/shuttle-interior.eff
- $FG_AIRCRAFT/Aircraft/SpaceShuttle/Effects/model-interior-extended.eff
- $FG_AIRCRAFT/Aircraft/SpaceShuttle/Shaders/model-interior-ALS-extended-lightmap.frag
You can compare the above files against their counterparts to see the differences and how it was extended.
- $FG_AIRCRAFT/Aircraft/SpaceShuttle/Models/Effects/Interior/shuttle-interior.eff (the above example file)
- $FG_ROOT/Effects/model-interior.eff
- $FG_ROOT/Shaders/model-interior-ALS-detailed.frag
Additional reading
Scalar maps in GLSL - the interior working of lightmaps explained with code examples.
Light intensity - some context on the problem of correctly adding lights in the scene.
