Howto:Fly a circuit pattern
A circuit pattern (also: airfield traffic pattern or just pattern) is a standardized procedure to regulate the air traffic around an airport, which guarantees a safe and smooth processing of the departing and arriving traffic and also minimises the noise pollution of populated areas around the airport.
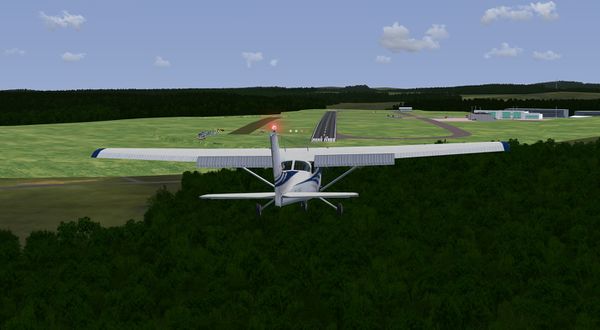
This tutorial explains how to fly a pattern in FlightGear using the example of Siegerland Airport (EDGS) ![]() , a medium-sized airport in the middle of Germany and you will fly the Cessna 172P, the default aircraft for FlightGear and a very nice training aircraft.
, a medium-sized airport in the middle of Germany and you will fly the Cessna 172P, the default aircraft for FlightGear and a very nice training aircraft.
Basics of a circuit pattern
Sections
So what do you need to know in order to fly a pattern properly?
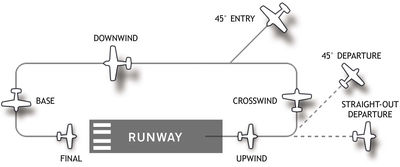
Basically a pattern is a rectangle with the runway on one of the long sides and you follow the flight path by turning left 90 degrees four times.
The individual sections of the pattern are called:
- Upwind/Departure: The first section after takeoff where you maintain runway heading and start climbing to the pattern altitude.
- Crosswind: After a lift turn by 90° you fly the crosswind leg perpendicular to the runway heading while you reach pattern altitude.
- Downwind: A long leg parallel to the runway where you fly level at pattern altitude. During the gliding training the trainee pilot will fly various maneuvers in this leg. When you are abeam the runway threshold you should start preparing the approach.
- Base: The second but last section perpendicular to the runway where you fly right up to the extended centerline of the landing unwy.
- Final: In the final approach you start a continuous descent above the extended centerline until touchdown. If necessary, you can do a go-around after touchdown and fly a second pattern.
Altitude
It's very important to know the elevation of your airfield in order to know at which altitude you have to fly the pattern. The elevation of Siegerland is 1965 ft MSL, or roughly 2000 ft (to make it easier). The pattern altitude is usually about 1000 ft AGL, so in this case you have to fly at 3000ft MSL.
Headings
Which headings do you have to fly? Departure and final have of course the same heading (runway heading), ca. 130°. Crosswind has 90° less, so you have to fly at 40°. On downwind you have to fly directly the opposite direction to your runway, therefore you need to fly 310°. And finally, the base has a heading of 220°.
Startup preparations
You need to start FlightGear with the following options:
Integrated launcher
| Note For more information about the new Qt5 launcher see it's wiki page |
- "Aircraft"-tab: Select the Cessna 172P Skyhawk (1981 model, detailed)
- "Settings"-tab: Select Noon in the dropdown menu "Time of day". If you want, choose Enable Multi-sample anti-aliasing. Important: Choose the option Enable automatic scenery downloading (TerraSync). Uncheck the option Fetch real weather online. If desired, choose Start full-screen. In the text box under Additional options add the following:
 --lon=8.077177
 --lat=50.707672
 --heading=70
- Click Run!
FGRun
| Note For more information about the extensive and complex, but old launcher see it's wiki page |
- Aircraft selection page: Select the Cessna 172P Skyhawk (1981 model, detailed) from the list. Then click Next.
- Airport selection page: You dont' need to specifiy an airport, so you can skip this and click Next.
- Options page: Choose the option Time of day and set it to Noon. Uncheck the option Real weather fetch. Choose the option TerraSync. On the bottom right, click Advanced...
- Advanced options:
- General: Make sure that the lines TerraSync directory and FG_SCENERY contain the same path (you can change the path FG_SCENERY on the first page).
- Initial position: Type in Longitude:
8.077177. Type in Latitude:50.707672. Type in Heading:70. - Change the other options in this dialog window only if you really know what you're doing!
- Click OK.
- Click Run!
Command line
| Note For more information about the command line and it's capabilities, see it's wiki page |
Windows
- Press Start+R.
- Enter the path to the FlightGear program in quotation marks (by default this should be
"C:\Program Files\FlightGear\bin\fgfs.exe") - Behind that, type: Important: The paths to
--fg-scenery=PATH\TO\YOUR\SCENERY\FOLDER --terrasync-dir=PATH\TO\YOUR\DOWNLOAD\LOCATION --aircraft=c172p --lon=8.077177 --lat=50.707672 --heading=70 --timeofday=noon --enable-terrasync --disable-real-weather-fetch
--fg-sceneryandterrasync-dirshould be identical! If you didn't mess anything up, the default isC:\Users\{USERNAME}\Documents\FlightGear\TerraSync - Press ↵ Enter or click OK!
Linux
- Open a terminal window.
- Type Important: The paths to
fgfs --fg-scenery=PATH\TO\YOUR\SCENERY\FOLDER --terrasync-dir=PATH\TO\YOUR\DOWNLOAD\LOCATION --aircraft=c172p --lon=8.077177 --lat=50.707672 --heading=70 --timeofday=noon --enable-terrasync --disable-real-weather-fetch
--fg-sceneryandterrasync-dirshould be identical! If you didn't mess anything up, the default is/home/{USERNAME}/.fgfs/TerraSync - Press ↵ Enter!
For all operating systems
| Caution The paths to the scenery and terrasync folders may not contain spaces! |
If you want it to look better you can add, among others, the following parameters:
 --prop:/sim/rendering/multi-sample-buffers=1
 --prop:/sim/rendering/multi-samples=4
 --enable-clouds3d
 --fog-nicest
 --texture-filtering=16
So now, if you did everything correctly you should sit on the Siegerland Airport near the tower.
Preparing the flight
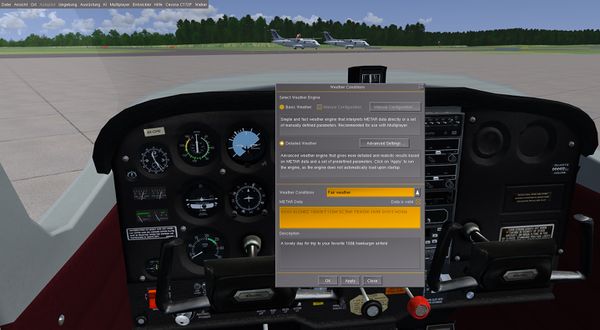
For this flight there should be good weather, and in FlightGear you can choose your own weather conditions: In the menu bar go to Environment -> Weather (If the menu bar is not visible, hit F10 once). Then select Detailed Weather, choose Fair weather from the drop-down menu, and press OK.
The Fair weather model in FlightGear simulates wind coming from the south-east (150°). Since it is important to take off and land with headwind you have to choose that runway which points in the wind as much as possible. For our situation this is runway 13 with a direction of about 130°.
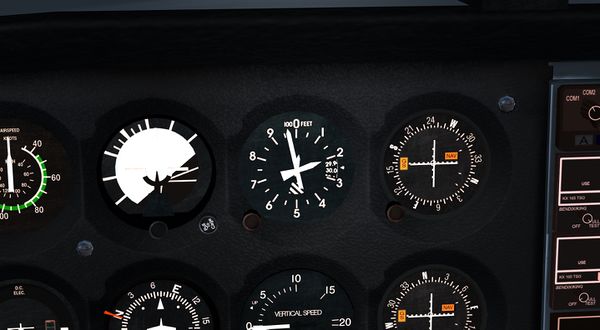
The next step is setting the altimeter. The altimeter works with air pressure and as the air pressure changes depending on the weather, you have to adjust it accordingly. By turning the knob on the bottom left of the gauge you set the altimeter to about 1965 ft.
Now you can start the engine of the Cessna either by following the checklists under Help -> Aircraft Checklists (recommended) or by using Autostart (not recommended).
When the engine is running you have to set the radio to the frequency of Siegerland: 120.37. Then you transmit the message: "Siegerland Info, Four-Xray-Charlie-Hotel-Victor, Cessna one seven two, taxiing to holding point one-three!" Now you can taxi to the holding point of runway 13. When you have arrived on that point you execute the checlist "Before Takeoff" and after a radio message "Siegerland Info, Four-Xray-Charlie-Hotel-Victor entering the runway and taking off!", you take a look outside and make sure that no other aircraft is approaching your runway.
Now you can enter the runway and take off!
Fly the pattern
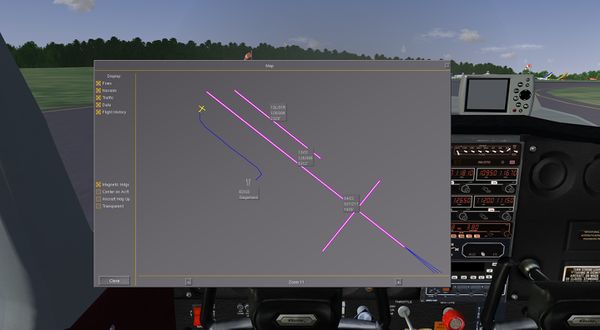
Give full throttle and rotate at about 55 KIAS. Accellerate to 70 KIAS and start climbing. Maintain runway heading (130°) for roughly 30 seconds. As long as you are below 85 KIAS, you should retract the flaps. Now make a left turn to 40° to fly the crosswind leg. Switch off the landing light. While flying crosswind you should reach the pattern altitude of 1000 ft AGL, which is 3000 ft on your altimeter. Level off at 3000 ft MSL and accelerate to 100-110 KIAS. You shouldn't fly much faster because then everything will get hectically.
Before you reach a small town in the north-east of EDGS make a left turn to 310° and fly downwind parallel to the runway. When you reach the position abeam the threshold you reduce the speed to 80 KIAS, set the flaps to the first step (10°), and switch the landing light on again. You also start a slow descending to 2500 ft MSL which is about 500 ft AGL.
From now on you fly 40 more seconds straight before you turn into base at 220°. You transmit the message: "Siegerland Info, Four-Xray-Charlie-Hotel-Victor turning to base, coming in to land at one-three!" Level off at 2500 ft MSL and set the flaps to step 2. Maintain that heading and altitude until you are in the extension of the runway centerline. Then turn into final (130°).
In the final you reduce speed to about 60 KIAS and start descending to the touchdown point. The PAPI to the left of the runway indicates if you are at the correct altitude: More red lights than white ones mean, you are too low. Two white and to red indicate a good glideslope and if there are more white lights, you are too high. Now you set the flaps to the third and last step. Shortly before touchdown you lift the nose to reduce the sink rate and bring the aircraft back to the ground smoothly.
Now you have two options: A final landing or a touch-and-go.
- You did everything perfectly? Well, than apply brakes so that you can exit the runway via a taxiway. Switch on the taxi light and switch off the landing light and the strobes. Taxi to a parking position of your choice and secure the aircraft following the respective checklist.
- Not everything was perfect? Well, so apply full throttle take off again. Tell the tower: "Siegerland Info, Four-Xray-Charlie-Hotel-Victor going around!" When you have reached a safe altitude and at least 60 KIAS you can retract the flaps step by step and repeat the whole procedure! You can do this over and over again until your tanks are empty.
Have a nice flight!
