Howto:Use TerraGear without wanting to kill yourself
My aim was to go through this whole process successfully with as little manual labour (don’t have the knowledge to go fine tuning in QGIS? no problem! neither did I) as possible. "Automation ftw" has been my perspective entering this endeavour.
Special thanks to some brilliant lads who walked these roads long before I did, for helping me discover the way! Shoutout Fahim, D-ECHO, and legoboyvdlp, among several others (you know who you are) – in fact, big up the whole FG community.
Hopefully, some of you will find this guide helpful – though at the time of writing, it appears that TerraGear is on the verge of becoming obsolete any minute now. So, if nothing else, it can serve as a time capsule of sorts – a way of recollecting how this task used to be done. Cheers! –– IskenderWang (talk)
Directory structure
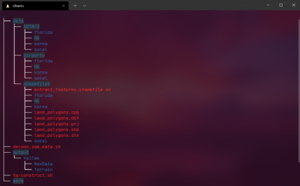
Inside your working directory for TerraGear you will simply need three subdirectories – one for your starting data which you will process as necessary, one for the work that the TG tools will achieve which provides it with the actual recipe for constructing your scenery, and one for the output or end product after running tg-construct (the final step) to generate your terrain. My directory structure in the midst of generating several sceneries was looking as pictured.
As you can see, what I like to do is compartmentalise the various sceneries I’ve created/aim to create in their own subdirectories in /data so to prevent any confusion and easily keep them separate them as I use the TG tools. Since you’re generating terrain one at a time though, I’d strongly recommend clearing out your /work directory completely in between each.
Gather all the necessary starting data
The materials you will need to embark on your TG journey are:
- Elevation data: Numerous sources for that but the best option will probably still be viewfinderpanorama.
- All the airports in the area you aim to build: Best to use some tool like TerraMaster for this, but keep in mind that Docker TG (even running terragear:latest) seems to only support up to XP apt.dat version 1100 – it unfortunately won’t work with 1130 which is the version most of the latest and greatest airports on the gateway will come with, whereas if you compiled the latest TG you should be all good in this respect.
- World landmass polygon: This is great since it serves as your base layer and also has very accurate coastlines.
- Shapefiles: This is where things get interesting, there are numerous sources one can defer to. In the past, people mainly relied on vmap0 and there was a nice mapserver that made it easy to acquire. Nowadays, the mapserver’s gone by the looks of it. Today, while you can still choose vmap0, far better options exist for most areas nowadays thanks to the availability of OSM shapefiles (solid option almost anywhere these days) as well as CORINE (Europe), NLCD (U.S.), and LCC (Canada), though these others can be a bit less straightforward to obtain and work with – thankfully, if you’d like to try them out there’s documentation for all of those supplied by some top blokes in the FG community.
Process your elevation data
When you unpack your elevation data, make sure to somehow place ALL the hgt files you intend to use in the relevant folder for the scenery in question, with no subdirectories dividing them – using mv and the wildcard to move all the contents of the needed folders from VFP to where they belonged worked just fine for me; quick and efficient.
For only this step, you could use this command: docker run -i -v ~/terragear-work:/terragear-work/ -t flightgear/terragear:ws20 /bin/bash
Since this is guaranteed to not have buggy elevation tools, so it’s really your call – you could do it just in case, especially if you’re working exclusively with Docker.
for f in ${PWD}/data/SRTM-3/scenery-in-question/*.hgt; do hgtchop 3 "${f}" "${PWD}/work/SRTM-3"; done
terrafit work/SRTM-3
Now for everything else: docker run -i -v ~/terragear-work:/terragear-work/ -t flightgear/terragear:latest /bin/bash
Process your airports
Once you’ve collected all your airports from the gateway and you’re confident that they’ll work with genapts (perhaps through trial and error) you can just place all the zips in a burner directory and create an airports directory inside of that – then if you have zsh you can simply run my script here in the command line:
#!/bin/zsh
for file in *.zip
  do
    FILENAME=$( echo $file | sed s/.zip// )
    ICAO=$( echo $file | sed s/_Scenery_Pack.zip// )
    unzip $file
    cd $FILENAME/"Earth nav data"
    mv apt.dat ../../airports/$ICAO.dat
    cd ../..
    trash $FILENAME
  done
trash ./*zip
and there you have it – all your .dat’s are there and sorted correctly by ICAO, which you can then transfer to your TG /data/airports folder.
Another way which is even better in a perfect world is to cut out the middleman by using the dlaser tools, however this will always fetch the latest ones, which may not work for you if you’re using Docker TG.
Either way, this step may or may not be cumbersome depending on the amount of .dat files you’ll need, which can often include not just airports and airfields but also other things such as helipads – for instance, my Hong Kong scenery needed only 5 in total, while 12 tiles of scenery for Florida required 177 (!!) rasclart .dat files, which meant that using the gateway_pull.py script was a must (you'll need to run it through Python 2 though).
Then, once you’re ready, simply run this command:
for i in ./data/airports/scenery-in-question/*.dat; do genapts850 --threads --input=$i --work=./work --dem-path=SRTM-3; done
Determine your bounding box coordinates
You may have already done this step in the very beginning, but if not, now would be a good time. Think of the corners as bottom left, upper right, longitude BEFORE latitude.
In my case, for the Hong Kong scenery, the relevant coordinates were 113 21 and 115 23.
Crop your shapefiles
Before we dive more deeply into shapefiles, an important thing to mention is that while the .shp files will be the “stars of the show” in a sense, many of the other files it will come with are also NECESSARY! This means you should not try to delete files that may have seemed redundant to the uninitiated (i.e. me, at that point), and that if you’re going to move shapefiles between directories you’ll have to copy/move ALL of the ones that you will need which come in a set (by having the same filename, just different extensions). After all, most of those other files are there for a good reason, and not just to provide alternative options for GIS users as I had initially assumed. This had me stumped for a little while, wondering why this next tool wasn’t working and almost concerned that I wouldn’t be able to advance beyond this step, UNTIL I came across this post on Stack Exchange and it all made sense, so big up Michael Stimson as well for the helpful answer.
Something to note so that you don’t have to make that same mistake :) First, make sure you're inside /data/shapefiles (run a quick cd if not). Then, we simply run:
ogr2ogr -clipsrc 113 21 115 23 hk.shp land_polygons.shp
and so on for ALL the others as well – you can even use colons to run them all in one go, as I did. Be patient, though, because if your initial region & shapefiles are large then it can take longer than you may have expected at first.
Split your shapefiles
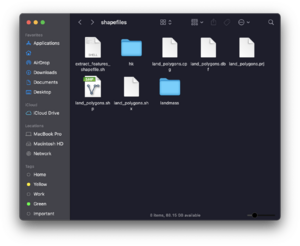
At this point, you can put your cropped project shapefiles in their own directory and then delete or keep the full shapefiles depending on if you intend to use them again or not – that said, you should probably keep the land polygons (default) shapefile for future use since it can act as the base for the whole world, but for your cropped landmass shapefile for THIS scenery you can make a separate directory. I called mine simply “landmass” and now it may look something like what you see in the screenshot.
Here is Fahim's wonderful script, which allows us to perform this step:
#!/bin/bash
# Check arguments
if [ $# -lt 2 ]; then
    echo "Usage: bash extract_features_shapefile.sh <path-to-shapefile> <path-to-output-dir>"
    exit
fi
src_shp=$1
dest_dir=$2
# Extract available feature list in supplied shapefile
echo "Extracting available features..."
feature_list=$(ogrinfo -al $src_shp | grep 'fclass (String)' | tr -s ' ' | cut -d' ' -f5 | sort | uniq)
echo "Found following features:"
for feat in ${feature_list}; do
    echo $feat
done
# Create shapefile per feature from supplied shapefile
echo "Creating new shapefiles..."
mkdir -p $dest_dir
for feat in ${feature_list}; do
    echo "Processing $feat..."
    mkdir -p $dest_dir/osm_$feat
    ogr2ogr -where "FCLASS LIKE '"$feat"'" $dest_dir/osm_$feat/osm_$feat.shp $src_shp
done
Now you can use it on each of your shapefiles in the project directory, like this:
bash extract_features_shapefile.sh hk/gis_osm_landuse_a_free_1-hk.shp .
and so on.
This step prepares us to translate each of the specific types of land classes we need to the FlightGear format, as defined by Material definitions, while also deciding which ones to prune – bear in mind that many of these we can (and should) exclude because leaving them in the final recipe would add too much complexity.
Map and decode your shapefiles
(Tip from User:david.megginson: from this point forward in the scenery-generation process, I often find problems when I try to generate an entire 10x10 degree bucket at once, so I run a script to do it 1 1x1 degree sub-bucket at a time).
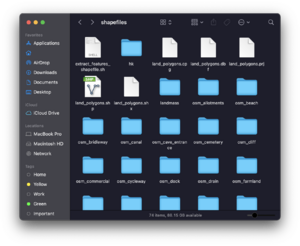
Once you reach this stage, you may now have a shit-ton of directories – that was certainly the case for me, as the screenshot illustrates.
Not to fear – the light at the end of this tunnel is in sight already. Now we have to do something called mapping, which is basically the translation I mentioned earlier, and then run ALL these inputs through the TG tool called ogr-decode.
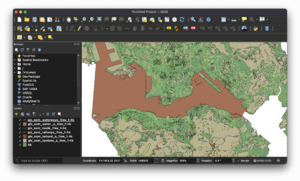
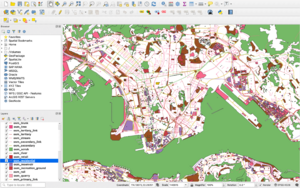
This step can be time-consuming: deciding what to exclude [from the decoding step], and how to map the landclasses you do include. You don’t need expertise in QGIS by any means – however, it can certainly come in handy with helping you view all your split shapefiles by importing them in and then tinkering with the layer visibilities to decide on what you don’t need/would add too much complexity versus what is necessary, because remember, performance in FG is of the essence as well (always keep that in mind during this step).
BRO TIP: I didn’t realise this myself at first as a n00b to the toolkit, but I was advised by legoboyvdlp that osm_unclassified actually includes numerous roads and isn’t as irrelevant as the name would suggest, in fact it’s better to include this and PRUNE osm_residential for improved performance.
When you map, try to use more standard landclass names as much as possible since those cover mostly everything – unless you have something specific in mind (such as for a custom scenery with its own set of material definitions), try to avoid using any landclasses that aren’t even mentioned in the default priorities file. That said, if you insist on using other landclasses for whatever reason, you can always create your custom priorities file and add your own landclasses to it, and then just tell tg-construct to use that instead. We’ll likely be doing this in bulk, so it makes a ton of sense to create a script for this (shoutout to D-ECHO who I would say has championed this approach) and place it in the TOP level of the TG working directory (so it’s level with /data, /work, /output).
Then, all the arguments will essentially follow this sort of format exactly:
ogr-decode --max-segment 500 --area-type Default work/Default data/shapefiles/landmass/
ogr-decode --max-segment 500 --line-width 12 --area-type Asphalt work/Asphalt data/shapefiles/osm_motorway/
and so on for ALL the other landclasses, hoping you’ve mapped it all correctly. So once that’s set, you simply run the script:
./decode_osm_data.sh
(note: if you're doing it like this make sure it’s executable first, a quick chmod +x may come in handy – I like to do this here instead of invoking bash because when I was on Ubuntu in a zsh shell it may have been more efficient for it to simply work through the same shell, entirely up to your preference though)
Generate your terrain
At long last! This step requires us to use the final utility in the TG workflow, tg-construct, and I like to use a modified version of D-ECHO’s script for this as well:
./tg-construct.sh
In my case, the one command I was truly running was as follows:
tg-construct --work-dir=./work --output-dir=./output/Terrain --min-lon=113 --max-lon=115 --min-lat=21 --max-lat=23 --threads=3 --priorities=/usr/local/share/TerraGear/default_priorities.txt AirportArea SRTM-3 AirportObj Default Ocean Hole Road-Motorway Road-Trunk Road-Residential Road-Primary Road-Secondary Road-Tertiary Road-Service Road-Pedestrian Road-Steps Road-Unclassified Airport Pond Lake DryLake Reservoir IntermittentLake IntermittentStream Watercourse Canal Cliffs Glacier PackIce PolarIce Ocean Estuary Urban SubUrban Town Fishing Construction Industrial Port Dump FloodLand Lagoon Bog Marsh SaltMarsh Sand Saline Littoral Dirt Rock Lava OpenMining BuiltUpCover Transport Cemetery DryCrop IrrCrop Rice MixedCrop Vineyard Bamboo Mangrove ComplexCrop NaturalCrop CropGrass CropWood AgroForest Olives GolfCourse Greenspace GrassCover Grassland ScrubCover Scrub ShrubGrassCover SavannaCover Orchard DeciduousForest DeciduousBroadCover EvergreenForest EvergreenBroadCover MixedForest RainForest BarrenCover HerbTundra Sclerophyllous Heath Burnt SnowCover Island Default Void Null Unknown River Freeway Road Asphalt Railroad Stream
When I changed computers, the only thing I had to alter here was the thread count and the path to the default priorities file.
Now just sit back n relax and enjoy everything, you feel me, because you know what’s about to happen.
And have patience, because this could take a while! Seriously!!
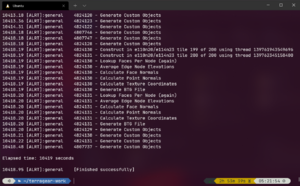
For legoboyvdlp, Ireland took a whole week (nonstop!!) to generate! And even for a relatively small scale such as Hong Kong and some of the surrounding area, because the Pearl River Delta is rather dense and data-rich, it took me 24 hours on my 2017 Macbook Pro just for it to reach stage 2 (the second stage out of three, the last of which generates the BTG files), at which point it inexplicably killed the process! So I was left with no choice but to bring out the heavy artillery, and on my beefier rig (8 core CPU, running at 14 threads) at last I was able to complete the whole process in just about three hours (wow!) with Ubuntu in WSL, compiled from source using the download_and_compile script, followed by adding install/terragear/bin to my user $PATH (in .zshrc, for me) – this way, all the terragear tools can be called normally.
So you see, the quickness of this step will depend entirely on a) the processing power at your disposal and b) the size and richness of the scenery you aim to generate. It may fail along the way for reasons you don’t understand – that’s OK, as long as you know you followed the process correctly just try again and most likely, it should work after some time.
