Howto:Canvas Skinning
| This article is a stub. You can help the wiki by expanding it. |
Background

when creating new instruments/MFDs, you will find that the Canvas GUI API is lacking many widgets that would be useful:
It is also likely that many new Canvas/MFDs will outgrow PUI at some point, which may be the right time to explore phasing it out in favor of a native Canvas dialog, or even a corresponding widget. [2]
Thus, you would end up using either a conventional PUI dialog, or create custom widgets from scratch.
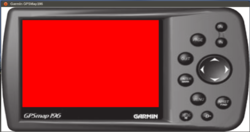
Alternatively, a good/better workaround may be to use a raster image and register event listeners, to show an embedded canvas with the actual canvas displayed separately - that is an approach that F-JJTH originally came up with. F-JJTH was originally prototyping the whole Garmin GPSMap 196 using a standalone dialog with a shell/skin to control the thing via just a GUI dialog (with the buttons responding properly)[3]
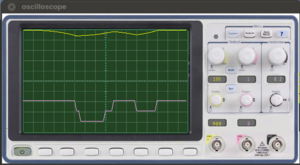
Basically, you'd have a "shell" with controls (think widgets) and an inner canvas showing the actual graph, which is accomplished using clipping (you can treat another canvas as a raster image and place it in an outer canvas) - for example, the red area is treated as a screen region, where the instrument is displayed, whereas the outer area is just a conventional raster image that responds to "events" to set up the instrument/oscilloscope):
Note that this would make it possible to have all sorts of custom "skins" (think themes) for your "oscilloscope" - if that's what you are having in mind, i.e. without having to create any missing GUI widgets from scratch, and also without having to use the legacy PUI engine.[4]
this way of setting up the skin using a hash with arguments is pretty elegant - I forgot to mention that you can obtain the coordinates for the hotspot by using a global event listener on the canvas/group and make that print the coordinates for drag/drop to the console. That way, it is easy to come up with the coordinates for all widgets, but also for the inner screen region - i.e. where you'd probably use clipping and/or a canvas image child to reference the actual graph canvas.If you are planning on adding such a skin also to your GCA addon, my suggestion would be to come up with a helper class, e.g. something like "Skinnable", using an outer image and an inner one (potentially, even a vector of images). The helper class could also contain support for setting up hot-spots specific tooltips. I've been in touch with Stuart about this, mainly in the context of his recent FG1000 work, so if you should come up with such a helper class (or even just a wiki tutorial demonstrating the approach), that may be helpful in and of itself.[6]
Related
References
|
