Howto:Build FlightGear with NetBeans using CMake
Important
The latest CMake-specific build instructions can be found in $FG_SRC/README.cmake: flightgear/README.cmake. If you encounter any CMake-related bugs while trying to build SimGear and/or FlightGear, please consider filing a bug report here: Issue tracker tickets. If you think the instructions are lacking some details, you are invited to add them as required. Also, if you think that some more specific screen shots would help, please do feel free to upload new screen shots here: Special:UploadWizard. Don't worry if you don't know how to embed these images, you can simply leave a comment on the article's talk page, so that we can update the article accordingly. Thanks!
Download and install NetBeans
NetBeans is a multi-platform IDE (integrated development environment) that supports a number of programming languages, C and C++ among them. NetBeans is a highly modular and very powerful IDE with a huge range of features. Go to https://netbeans.apache.org/ in order to download the latest version of NetBeans for your OS/platform. After downloading NetBeans, you'll need to install it.
| Note According to the latest release notes release notes 12.0 the C++ plugin is not ported to the new Apache infrastructure. You have to enable Netbeans 8.2 plugin center and install C/C++ plugin from it. It will be available in the future releases in the NetBeans core. |
Linux: getting & compiling
Please take a look at generic page: Building_FlightGear or Building on Linux using the download_and_compile.sh bash script
Windows: getting & compiling
Please take a look at the generic page regarding Windows compilation: Building using CMake - Windows
Folder Structure
You need separate folders in which the project build outputs will be created. If you download and create folders according to the build environment in Windows/Linux OS there is nothing new.
Netbeans project import
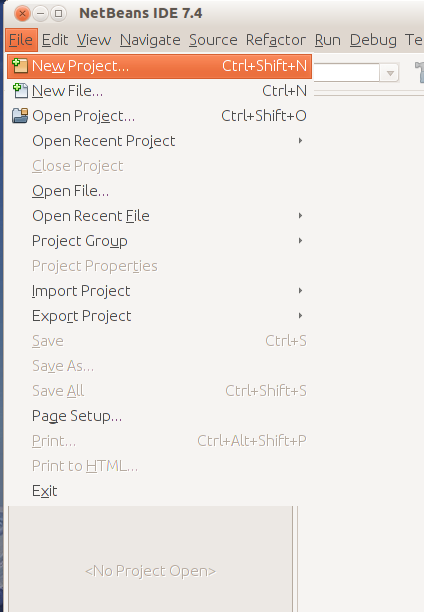
After checking out the repository, you'll want to use the NetBeans project wizard to CREATE A NEW PROJECT FROM EXISTING SOURCES for each dependency:
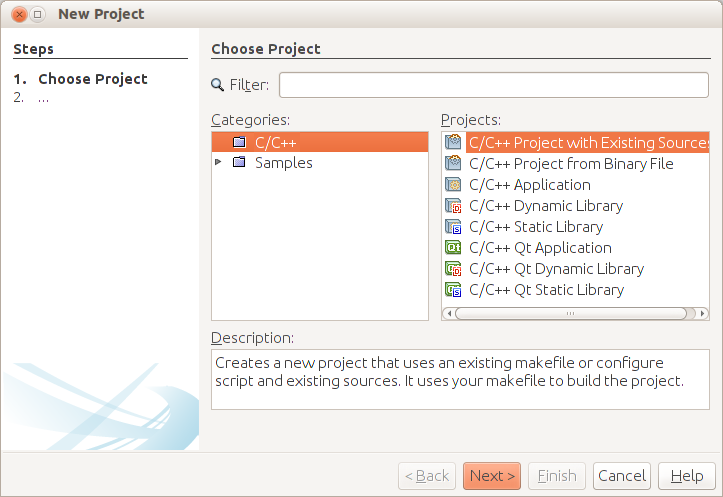
Next, pick "...from existing sources":
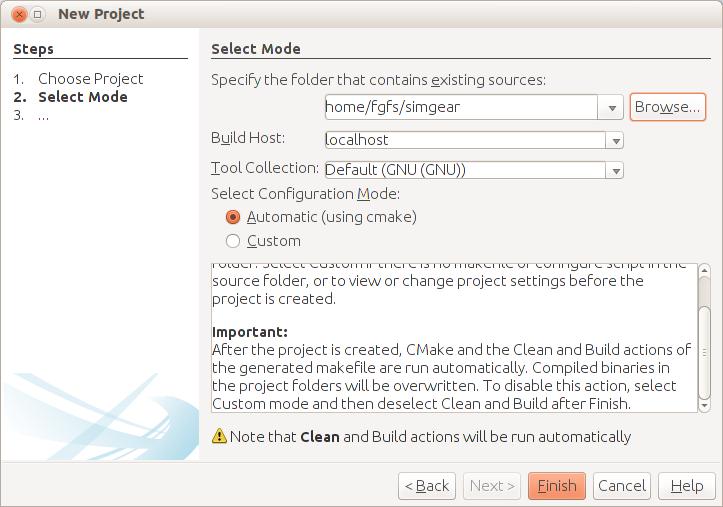
Specify the folder where the checked out sources can be found:
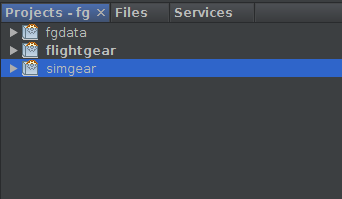
Click Finish. NetBeans will attempt to build the project, which will fail, as no dependencies have been set. Ignore it, the project will still be set-up. Repeat above steps for the simgear code. Finally, you should see all projects neatly structured in NetBeans:
Disable code indexing
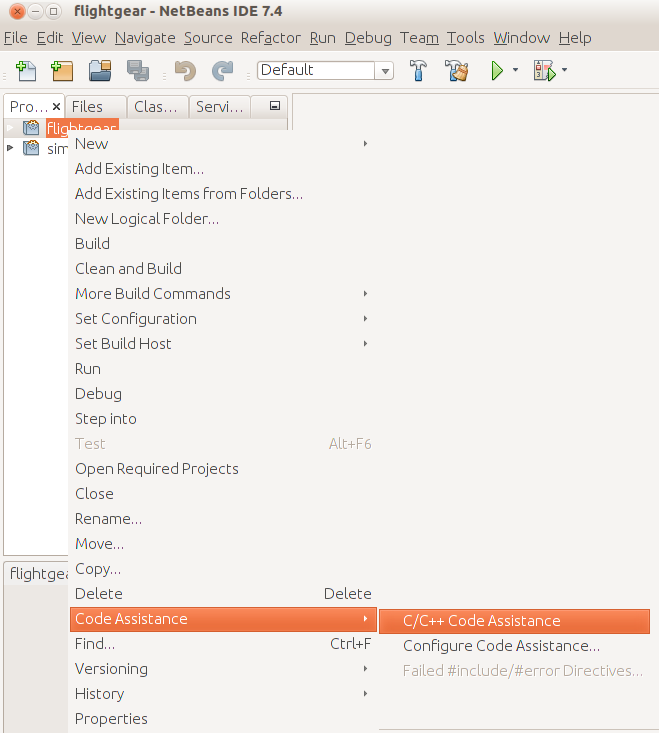
By default, NetBeans will keep on trying and index all your sources, this may slow down the IDE considerably, so it's a good idea to disable this feature if you don't need it (CONTEXT MENU/RIGHT CLICK on project, go to CODE ASSISTANCE and then uncheck the marked entry):
Debugging using Gdb/Netbeans as a IDE
Examplary configuration for easy debugging FlightGear source code inside IDE using GDB as a backend can be configured in various ways. This screens shows how to configure two projects 'simgear' and 'flightgear' to compile with the debug flags inside the IDE and be able to execute it or debug directly inside IDE. This is a great way to extend FlightGear and help fixing bugs for people not very experienced with the GDB commandline interface. It has all features of the debug inside IDE as graphical watches, breakpoints etc.
| Note Following settings are set according to one user directory structure and his compile/debug options. Please refer to the latest compile/debug options in SimGear/FlightGear in order to set them correctly. |
In order to configure it, this settings has to be set in one user environment in order to successfully compile it and debug.
- Simgear
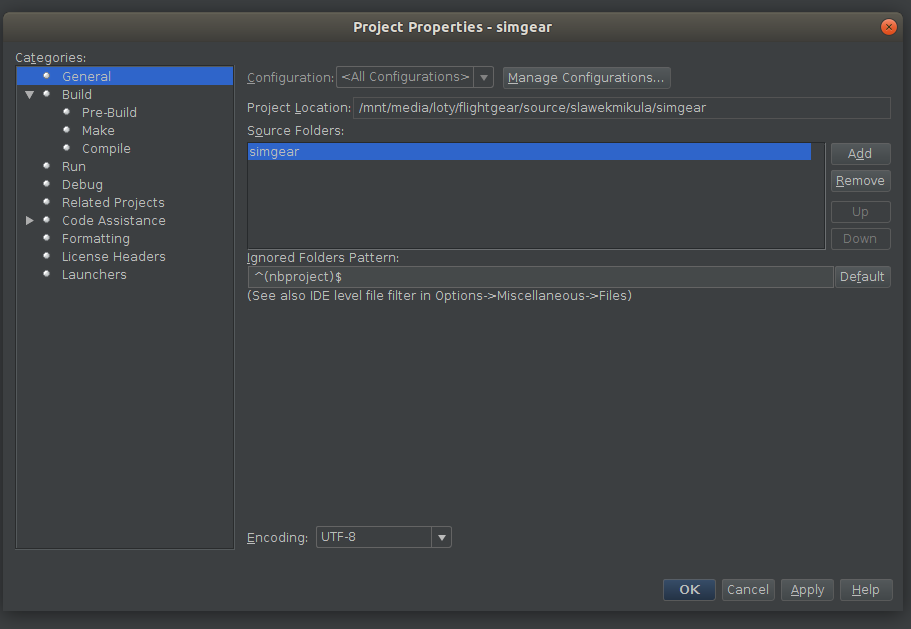
SimGear source configuration
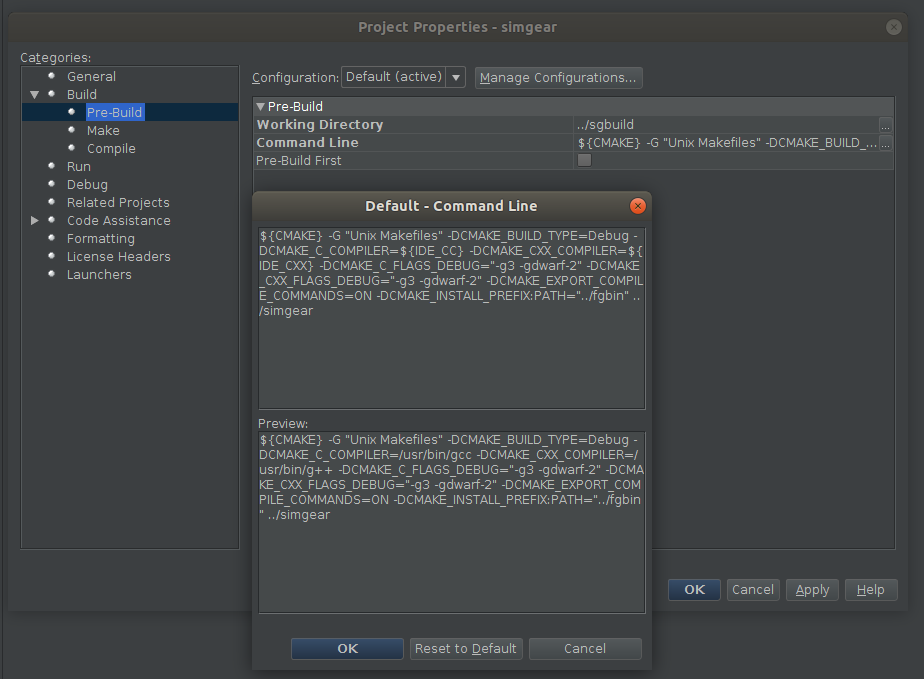
Simgear prebuild (CMAKE) options
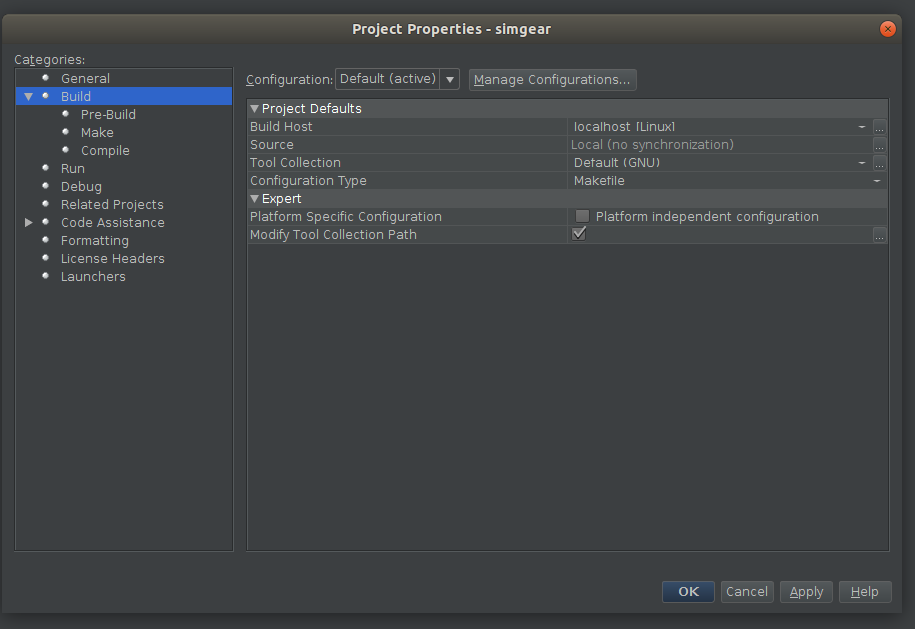
Simgear build options
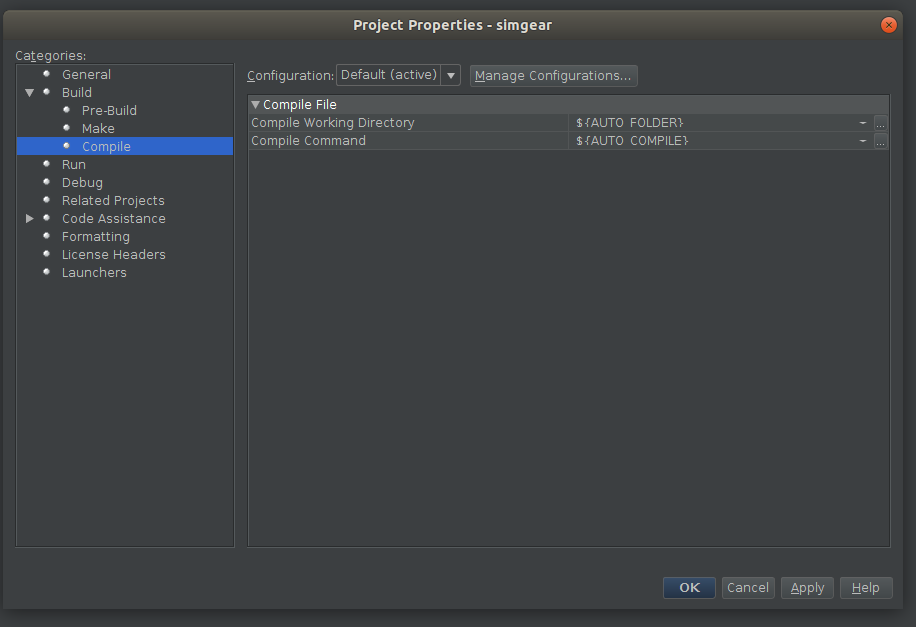
Simgear compile options
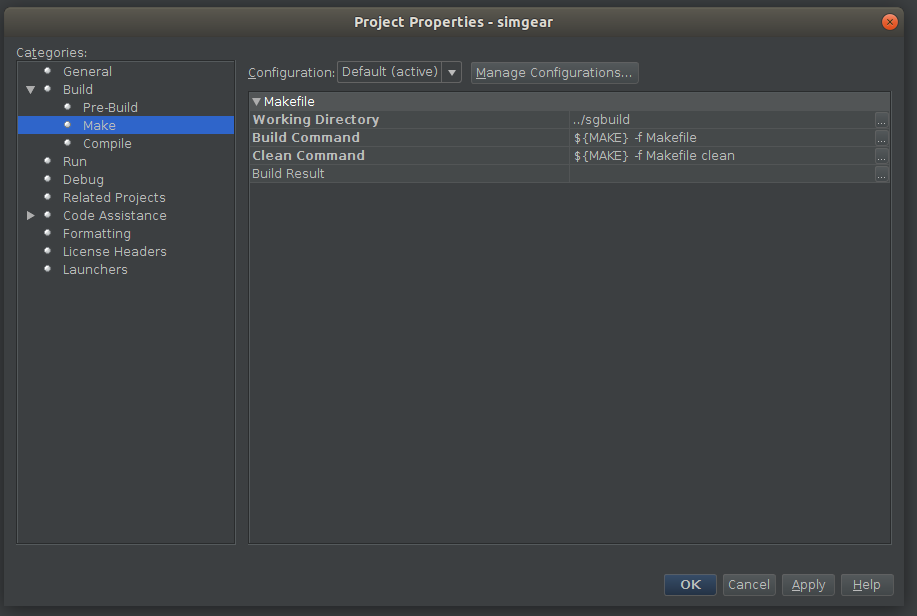
Simgear make options
- FlightGear
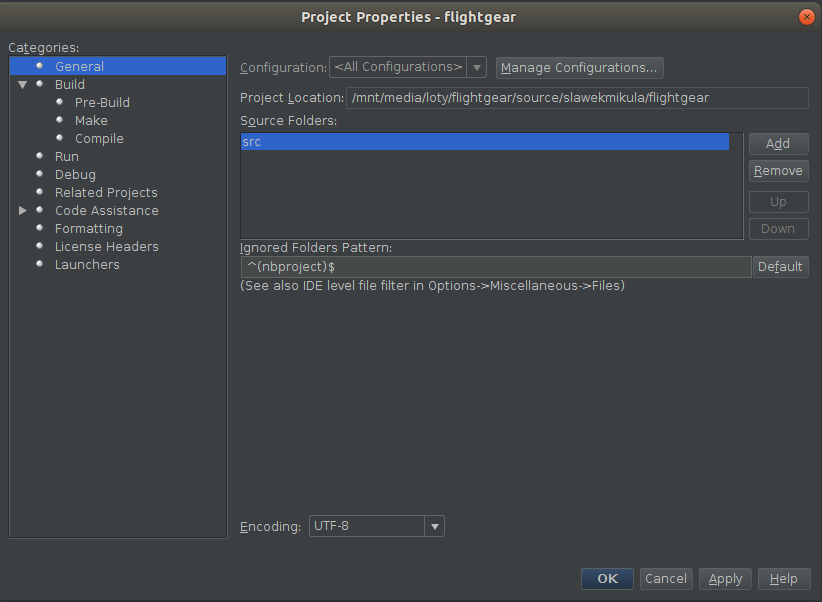
FlightGear source configuration
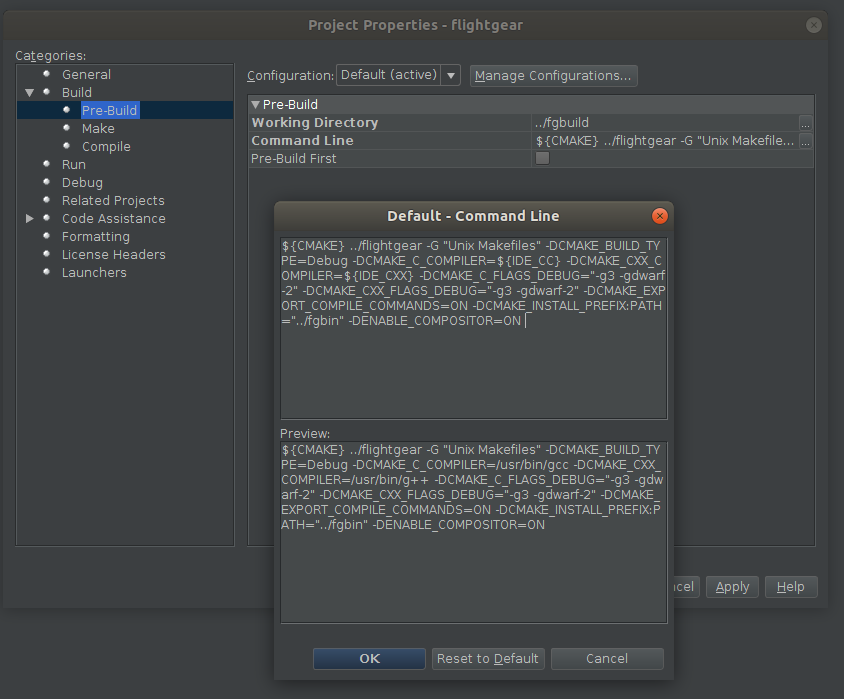
FlightGear prebuild (CMAKE) options
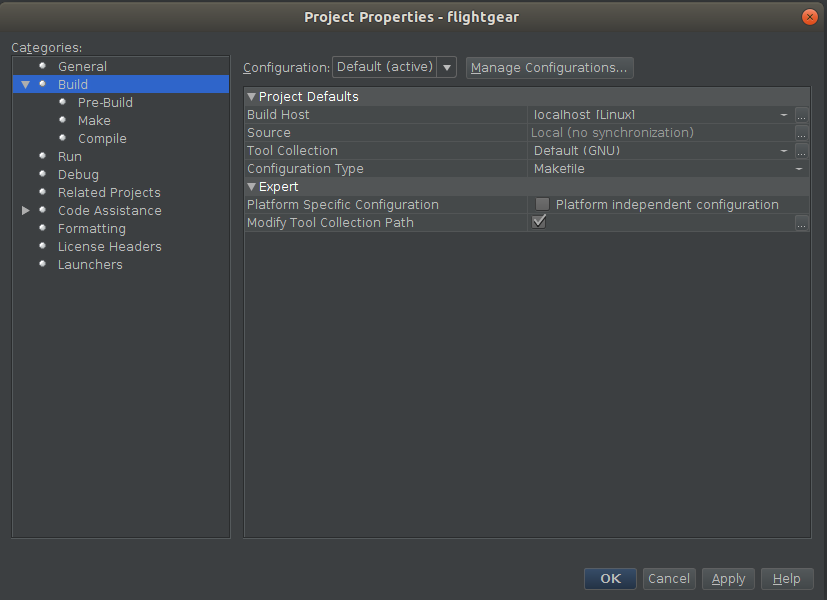
FlightGear build options
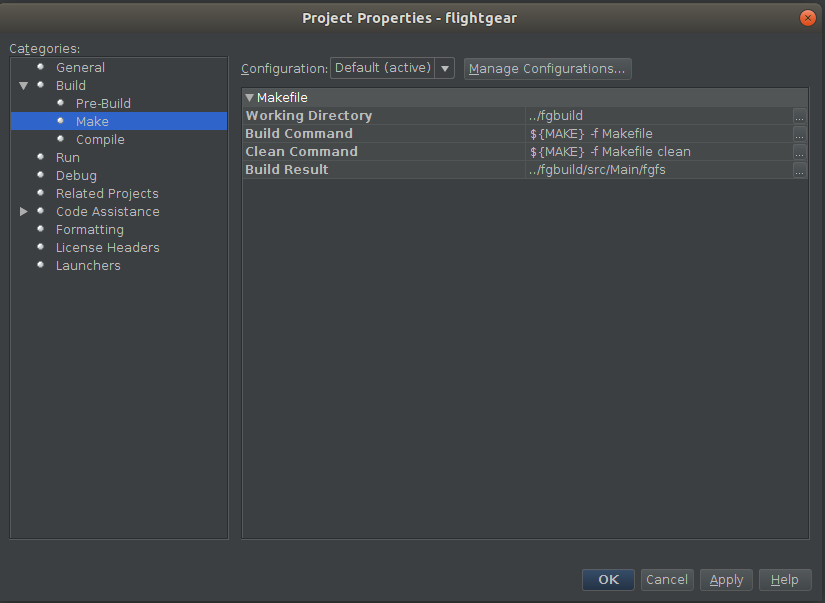
FlightGear make options
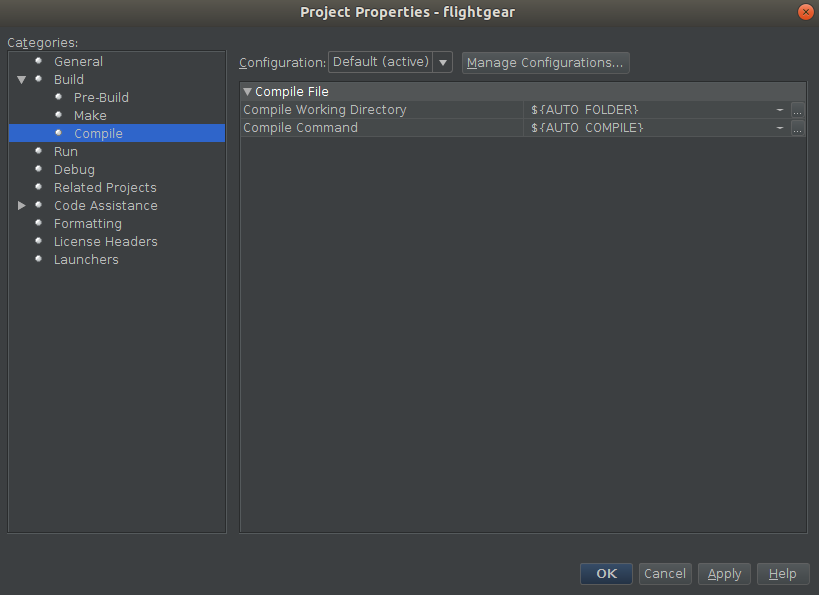
FlightGear compile options
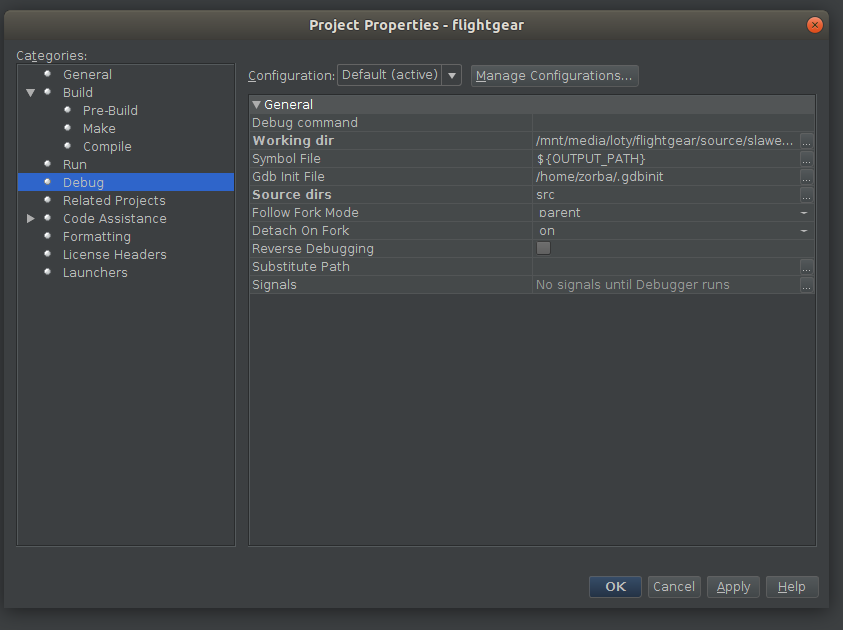
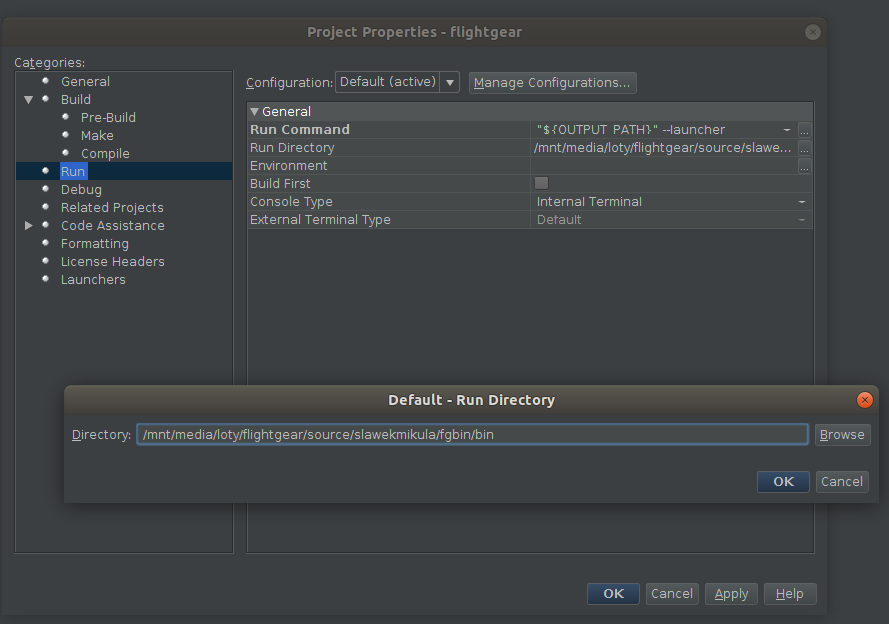
And setting regarding debug and run sessions:
FlightGear debug options
FlightGear run options
After this settings one can run/debug FlightGear source code inside the IDE :)
