Howto:Adding gun effects

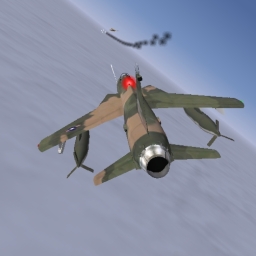
With Flightgear's increasing capabilities gun effects such as tracer bullets and smoke on impact are now supported. You will need FlightGear version 1.9 or later, in order to use the effects.
Setup
There is no default key/button binding for a trigger in FlightGear, so you will have to make your own. An obvious choice of button would be the trigger on a joystick, but you can also make a keyboard binding by adding something like this to your $FG ROOT/keyboard.xml file:
 <key n="101">
  <name>e</name>
  <desc>Gun Trigger</desc>
   <binding>
    <command>property-assign</command>
    <property>controls/armament/trigger</property>
    <value>true</value>
   </binding>
  <mod-up>
   <binding>
    <command>property-assign</command>
    <property>controls/armament/trigger</property>
    <value>false</value>
   </binding>
  </mod-up>
 </key>
In the code, we have used the e key as the trigger. You can change it to a choice of your own but e is the standard key binding used by most aircraft in FlightGear.
Joystick bindings are a bit more complex. Sample code is below, but you may want to read the article on joysticks.
See more complex/complete sample code below.
Adding gun and bullet effects to your aircraft
Once you have a key or button binding defined to active the trigger, you'll then need to add the needed submodel configuration file to your aircraft's root directory, and ensure the file is activated in your *-set.xml file. The choice of tracer, smoke and impact visual models is up to you. You may also add a sound effect to your sound configuration file that activates with the trigger.
The standard trigger location for FlightGear is
/controls/armament/trigger
To add triggers for more than one weapon:
/controls/armament/trigger
/controls/armament/trigger1
/controls/armament/trigger2
etc.
In a submodel.xml file, this typically looks something like this:
    <submodel>
    <name>cowl-guns-bullets</name>
    <model>Models/Geometry/null.ac</model>
    <trigger>/controls/armament/trigger</trigger>
    . . .
Aircraft already equipped with guns
Some aircraft have the needed submodel files included. All aircraft equipped with guns in Dave's hangar are capable bullet effects. Like:
- Embraer AT-29, A-29B Super Tucano
- McDonnell F-4D/E/F, FGR.2, Phantom II
- Republic F-105D Thunderchief
- North American F-100 Super Sabre
- North American FJ-3 Fury
- LTV A-7E Corsair II
- Dassault Mirage IIIC, F-103E
- MiG-21MF (Fortele Aeriene Române)
Other aircraft (not from Dave's Hangar) include
- F-16 Fighting Falcon
- Sopwith Camel
- Spad VII
- A6M Zero - Armed version available here : [1]
- F-15C - Armed version available above----⤴
- JSBSim P-51D from main repository.
Current limitations
- Submodel information is not sent with the multiplayer protocol, so multiplayer users will not be effected by your bullets. The tracers, smoke and impact effects will only be seen by you.
- The impact cylinder for models is fairly large, so you will see impacts occur outside of the target model's boundaries.
More complex/complete sample keyboard code
Different FlightGear aircraft use different locations for the main armament trigger. Two locations are commonly used:
 controls/armament/trigger   (preferred)
 ai/submodels/trigger        (used by some)
In addition, a number of aircraft have more than one weapon--typically a light machine gun and a heavy cannon.
Typically this trigger is used for the second armament:
controls/armament/trigger1
The following code, which you can place in your keyboard.xml file or (if you are an aircraft designer) in your aircraft's -set.xml file in the <keyboard> section, triggers both locations, both types of armament, and works with almost all FG aircraft.
It uses e to trigger the main armament and ⇧ Shift+e to trigger the secondary:
      <key n="101">
         <name>e</name>
         <desc>Gun Trigger</desc>
         <binding>
          <command>property-assign</command>
          <property>ai/submodels/trigger</property>
          <value>true</value>
         </binding>
         <binding>
          <command>property-assign</command>
          <property>controls/armament/trigger</property>
          <value>true</value>
         </binding>
         <mod-up>
          <binding>
           <command>property-assign</command>
           <property>ai/submodels/trigger</property>
           <value>false</value>
          </binding>
          <binding>
          <command>property-assign</command>
          <property>controls/armament/trigger</property>
          <value>false</value>
         </binding>
         </mod-up>
      </key>
      <key n="69">
         <name>E</name>
         <desc>Cannons Trigger</desc>
         <binding>
          <command>property-assign</command>
          <property>controls/armament/trigger1</property>
          <value>true</value>
         </binding>
         <mod-up>
          <binding>
          <command>property-assign</command>
          <property>controls/armament/trigger1</property>
          <value>false</value>
         </binding>
         </mod-up>
      </key>
Sample joystick code
This sample code that can be modified/inserted into a joystick XML file uses one button to trigger the main armament and another button to trigger the secondary armament:
  <button n="0">
    <name>trigger</name>
    <desc>Trigger</desc>
    <binding>
      <command>nasal</command>
      <script>
        setprop("/controls/armament/trigger", 1); #this seems the most common
        setprop("ai/submodels/trigger", 1);       #many planes use this instead
      </script>
    </binding>
    <mod-up>
      <binding>
        <command>nasal</command>
      <script>
        setprop("/controls/armament/trigger", 0); #this seems the most common
        setprop("ai/submodels/trigger", 0);       #many planes use this instead
      </script>
      </binding>
    </mod-up>
  </button>
  <button n="1">
    <name>trigger1</name>
    <desc>Trigger1</desc>
    <binding>
      <command>nasal</command>
      <script>
         setprop("/controls/armament/trigger1", 1);  #this seems the most common
      </script>
    </binding>
    <mod-up>
      <binding>
        <command>nasal</command>
      <script>
         setprop("/controls/armament/trigger1", 0);  #this seems the most common
      </script>
      </binding>
    </mod-up>
  </button>