FFGo
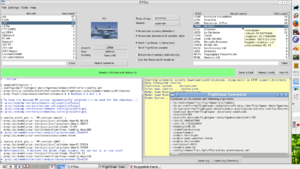
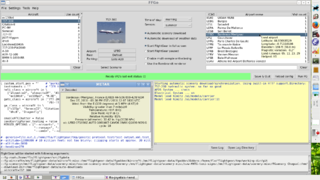
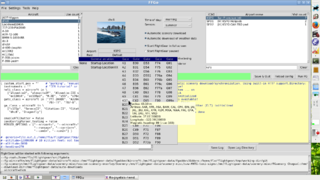
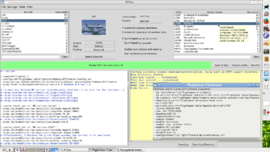 Screenshot of FFGo 1.12.3 | |
| Developed by | Florent Rougon |
|---|---|
| Initial release | 1.0.0 (Aug 21, 2015) |
| Latest release | 1.12.9 (April 2, 2025) |
| Written in | Python (Version 3) |
| OS | Unix-like (incl. Linux), Windows, macOS |
| Development status | Low maintenance (as of April 2025) |
| Type | Graphical launcher for FlightGear |
| License | WTFPL version 2 |
| Website | |
FFGo is a graphical launcher for FlightGear, and a fork of FGo!. It vastly improves on FGo! by fixing bugs and adding a host of new features.
Features
One of the things that distinguish FFGo from other FlightGear launchers is the text window allowing one to write any (possibly advanced) command line options that will be passed to FlightGear. This is similar, but more convenient and powerful, to editing the .fgfsrc configuration file. The main difference in power compared to editing .fgfsrc or using FGo! comes from FFGo's use of CondConfigParser to process the user's configuration. See FFGo conditional config documentation for more information on this aspect of FFGo.
In addition to this, FFGo offers:
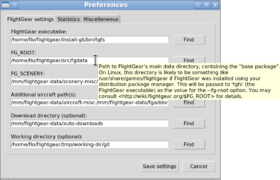
- an easy setup (Preferences dialog);
- convenient selection of aircraft and startup airport or AI carrier;
- possibility to choose between identically-named aircrafts based on which directory they are stored in (using tooltips in the aircraft list);
- easy selection of startup runway or parking position, offering startup locations from apt.dat if there is no groundnet-defined parking position for the selected airport;
- detailed airport, runway, helipad and parking tooltips. Airport tooltips show things such as airport type (land airport, seaplane base or heliport), latitude, longitude, elevation, number of land runways, water runways, helipads, magnetic variation... Runway/helipad tooltips show runway type, length and width, surface type, magnetic as well as true heading, etc. Parking tooltips show similar information as runway tooltips, plus maximum aircraft radius, reserved airline codes... (note: The MagneticField program from GeographicLib is needed for magnetic data)
- easy consulting of METAR data for the nearest station relatively to the selected airport (if any);
- a Pressure Converter dialog to convert between inches of mercury (inHg) and hectopascals (hPa);
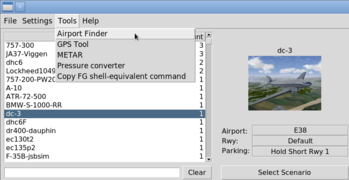
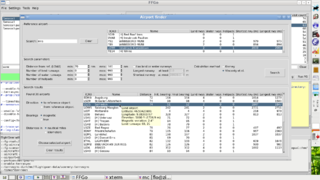
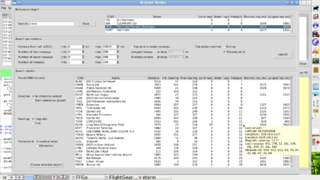
- a powerful Airport Finder dialog allowing one to easily find airports using various criteria: distance to a chosen, reference airport; number of land runways, water runways, or helipads; length of the longest or shortest runway in the airport, etc. The table of results displays, among others, the distance and bearings between the reference airport and each “result airport”. It can be sorted according to any column with a simple click on the column header.
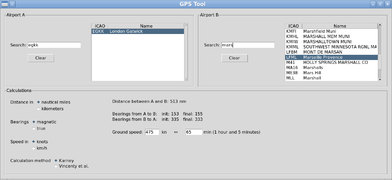
- a GPS Tool dialog allowing one to find the distance, initial and final bearings for the shortest path between two given airports. The dialog also computes the flight duration for a given ground speed, and vice versa.
- easy selection of one or more scenarios, allowing one to browse the description of each available scenario;
- realtime preview of the arguments that would be passed to fgfs (the FlightGear executable) if the Run FG button were to be pressed;
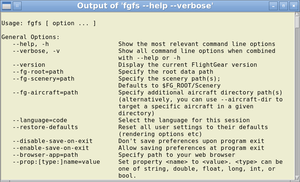
- easy display of the output of fgfs --help --verbose for the selected FlightGear version (Help → Show available fgfs options);
- the possibility to copy to the clipboard a shell command that is equivalent to what FFGo would do if the Run FG button were to be pressed;
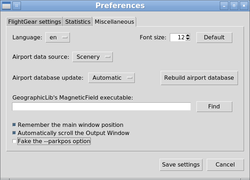
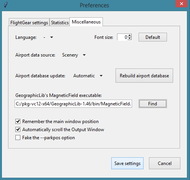
- the option to translate fgfs' --parkpos option into the corresponding combination of --lat, --lon and --heading options. This behavior can be enabled using the Fake the --parkpos option checkbox found in the Miscellaneous tab of the Preferences dialog. It is useful when the --parkpos option is broken in FlightGear (which is unfortunately the case in FlightGear 2016.1.1 and in the next branch of FlightGear's Git repository as of March 2016);
- easy viewing and saving of FlightGear output (log);
- automatic FFGo + FlightGear log saving and rotating;
- ability to read and merge an arbitrary number of in-scenery-paths, uncompressed or gzip-compressed apt.dat files. This is compliant with a feature[1] introduced in FlightGear 2016.4.0, more precisely on October 17, 2016. For the interfacing with FFGo, FlightGear must be more recent than November 9, 2016 (precisely, FlightGear commit fb10f76e is needed). FlightGear 2016.3.x and older still work with FFGo, but using the old behavior, where only $FG_ROOT/Airports/apt.dat.gz is read.
- complete German translation, complete French translation except for the help file (en, fr), other translations currently outdated (English is the language FFGo is written in, thus it is obviously complete, and not a translation per se).
Screenshots
Main window and Command Window
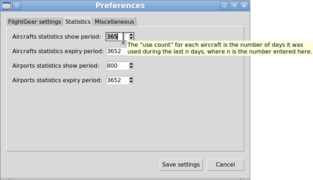
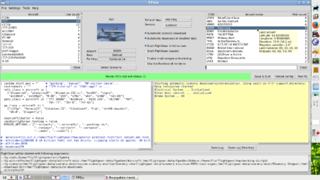
Starting from version 1.10.0, FFGo remembers how many days you used each aircraft, or visited each airport, during a user-defined period (see the Statistics tab in the Preferences dialog). This data is subject to expiration via configurable periods too. These simple statistics allow FFGo to know which aircrafts (resp. airports) you used (resp. visited) most during the selected period, and present them first in the aircrafts (resp. airports) list. You can still sort the lists based on other criteria if you wish (aircraft or airport name, airport ICAO code...) by simply clicking on the corresponding column headers. Click a second time on a given column header to reverse the sort order.
The FlightGear Command window shows exactly which arguments are going to be passed to the FlightGear executable (fgfs) when the Run FG button is clicked. It can be resized, hidden, detached (as in the screenshot) or attached to FFGo's main window.
| Note If you want to copy these arguments to the clipboard for use in a shell (“command line”), use the corresponding function from the Tools menu (Copy FG shell-equivalent command). This will prepend the configured path to the FlightGear executable, properly quote all arguments for a POSIX shell (which might contain spaces or other special characters), and separate them with spaces. |
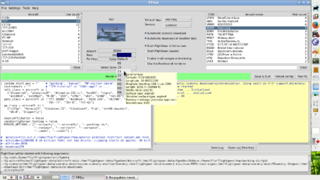
The Preferences dialog
Selecting AI scenarios
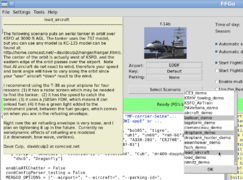
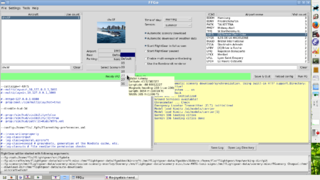
You may select one or more AI scenarios to load from the Scenarios popup menu. Selecting a scenario does nothing particular for FFGo, but each selected scenario will be passed as part of a --ai-scenario=... option to FlightGear when it is started. Left-clicking on a scenario name toggles selection of this scenario. Right-clicking displays its description.
Selecting an AI carrier
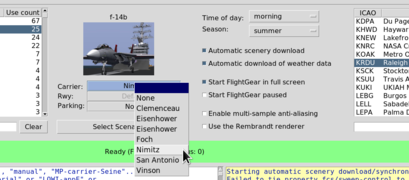
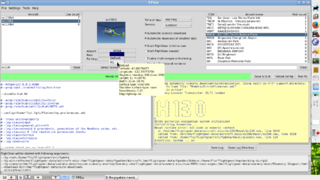
Instead of starting at an airport, you can select an AI carrier in the Carrier popup menu and FFGo will make you start there, automatically adding the corresponding AI scenario. In order to make the Carrier popup menu appear, just click on the airport ICAO code below the aircraft image.
If you choose a different carrier or quit “carrier mode” (by choosing None in the Carrier popup menu, or simply selecting an airport in the airport list), the scenario for the selected carrier will be automatically removed from the list of scenarios to load.
Weather info — the METAR widget
The METAR widget allows one to check the latest weather information for the selected airport. It is available from the Tools menu.
The Pressure Converter dialog
This dialog, accessible from the Tools menu, allows one to quickly convert a pressure value from inches of mercury (inHg) to hectopascals (hPa) and vice versa. This is useful when the QNH value obtained from METAR or ATIS (the “altimeter setting”) is not in a unit that is directly usable with your aircraft's instruments.
Airport metadata
Airport tooltips
Runway tooltips
Parking tooltips
The Airport Finder dialog
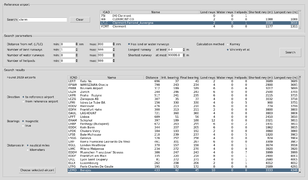
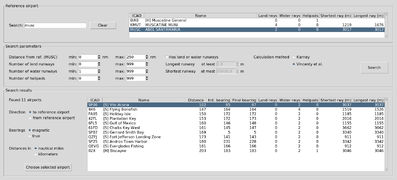
The Airport Finder dialog, accessible under the Tools menu, allows one to easily find airports using various criteria: distance to a chosen, “reference airport”; number of land runways, water runways, or helipads; length of the longest or shortest runway in the airport, etc. Results are listed in a table giving these criteria for each airport as well as the initial and final bearings for the shortest path from or to the reference airport. The table of results can be sorted according to airport ICAO code, name or any of the aforementioned criteria (click on a column header to sort according to the corresponding field; click a second time on the same column header to reverse the sort order).
This dialog is fairly versatile, but one of the uses it is particularly well-suited for is to find a start airport in the desired range with respect to a given airport. For instance, let's say you saw on the multiplayer map that someone is offering Air Traffic Control (ATC) services at MHTG (just an example), and you are looking for an airport that is neither too close, nor too far from MHTG in order to take off from there and land at MHTG, following instructions from the air traffic controller. Since it is possible, in the Airport Finder dialog, to sort found airports based on bearings from, or to the reference airport, you can also easily find airports that are, for instance, located more or less north-east of the reference airport. Many, many other things are possible. cf. this forum message for more details ![]() .
.
The GPS Tool dialog
The GPS Tool dialog allows one to find the distance, initial and final bearings for the shortest path between two given airports. The dialog also computes the flight duration for a given ground speed, and vice versa.
This dialog should be more convenient than the Airport Finder dialog for the cases where you already know the start and destination airports you are interested in, and you just want to get the results for these airports. Or you want to check several pairs of airports, and you know precisely which ones you want the calculations to be done for.
Seeing the available fgfs options
From version 1.11.0 onwards, FFGo allows one to easily see the output of fgfs --help --verbose, i.e.: the command-line options supported by FlightGear. This is useful to get an idea of what can be put in the Options Window.
Installation tips
Instructions — Read this first!
Since installation instructions may in general depend on the particular FFGo version you want to install, they are always included in release tarballs and zip files, precisely in the docs/INSTALL folder. Such tarballs and zip files can be downloaded from FFGo's home page as well as from FFGo's page on PyPI (PyPI being the Python Package Index). However, apart from the addition of a small number of optional dependencies, the installation method hasn't changed since FFGo 1.0.0, therefore there is little risk for now using the online Git version of the installation guide.
The guide mentioned in the previous paragraph is rather detailed, because it explains a few concepts that may be new to users who are not Python developers, and tries to give general instructions covering all common cases, which is not very easy given that Python may or may not be shipped depending on the particular operation system in use (Windows, Linux, macOS, etc.). To the contrary, the following sections give specific instructions applicable in the most common cases on each OS where I know a working procedure. They are more practical, probably easier to follow than the installation guide, at the expense of being less generic.
Sample installations
Windows
Installing FFGo and its dependencies
Typical FFGo installation on Windows is easy, because there is no system Python shipped with Windows, therefore there is no risk of messing up your Windows installation by just installing or upgrading Python packages. The instructions below assume you have no existing Python installation on your Windows system.[2] There we go:
-
Install Python 3.4 or later:
- Download Python from the Python home page.
- Make sure to enable the Tcl/tk and pip components in the installer (this may be located under a label such as Customize installation).
-
Don't change the default value for the Python installation folder, otherwise you are likely to run into permission problems: except for old versions of Windows, writing to Program Files, at least, is subject to special restrictions that may cause the
pip installstep to fail. Also take note of what this installation folder is—you may find this helpful later. - It is recommended not to disable the Python Launcher for Windows, as it may prove very useful later.
-
If you are not comfortable with the command line (“Command Prompt”), it is suggested you choose Add python.exe to Path (or Add Python X.Y to PATH: the precise wording depends on the Python version). This way, you will be able to run the pip and ffgo programs directly at the Command Prompt in the simplest possible way (this mainly matters for pip, because for ffgo, you can easily create a shortcut on the Desktop, for instance).
If you choose not to do this:
In such a case, assuming you didn't disable the Python Launcher for Windows in the Python installer, you'll have to type commands such as:
py -3.5 -m pip install ...
instead of:
pip install ...
Such a command is similar to
pip install ..., but makes sure that pip is run by Python 3.5, in case there are several Python installations on your Windows system.Another way would be to call the desired pip executable by specifying its full path, like this:
C:\PythonXY\Scripts\pip install ...
(where XY would be 35 for a Python 3.5 installation, for instance)
This method requires knowing where the Python installation you are interested in is installed (C:\PythonXY in this example), which seems to depend on the Windows version. Therefore, thepy -X.Y -m pip ...method, using the Python Launcher for Windows, will be preferred here.
-
Open a terminal, also known as “Command Prompt”:
There are various ways to do this, depending on the version of Windows in use. One way that should work is using the Windows+R keyboard shortcut, then entering cmd.exe in the text input box. Apparently (according to Google, see for yourself), on Windows 10, this can (also?) be done with the Windows+X keyboard shortcut, then choosing Command Prompt in the menu that should appear. If you have never used the Command Prompt on Windows, reading the Command line page on the wiki would certainly be a good idea.
-
In this terminal, type:
pip install FFGo Pillow geographiclibNote If you didn't add Python to your PATH environment variable when installing it, the command would rather be something like:
py -3.5 -m pip install FFGo Pillow geographiclib
for a Python 3.5 installation. Specifying
-3instead of-3.5would use the latest Python 3.x version installed on your system.FFGo can work without Pillow and geographiclib, but it will offer more features if you install them. The previous command should automatically download and install FFGo from FFGo's page on PyPI.
Note pip install ffgohas the same effect aspip install FFGo.Also note that messages such as:
warning: no previously-included files found matching 'docs\README.conditional-config\_static\README.txt'
when running the
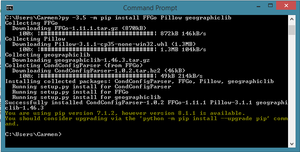
pip install ...command are completely normal and harmless, just ignore them. This command should print something like:Successfully installed CondConfigParser FFGo Pillow geographiclib
towards the end if all went well.
After these steps, you should have a working FFGo. You can run it by double-clicking on either ffgo.exe or ffgo-noconsole.exe in a directory such as C:\PythonXY\Scripts, where XY corresponds to the Python version that was used in the pip install FFGo ... command. These two executables do the same, except ffgo.exe opens a Windows terminal (“console”) containing all FFGo messages, while ffgo-noconsole.exe doesn't. You can safely use the latter most of the time. Should FFGo refuse to start for some reason, running ffgo.exe and examining/reporting the printed messages would certainly be helpful. You may want to create shortcuts for these files by right-clicking on the .exe file of your choice, choosing Create Shortcut and dragging the newly-created shortcut to the final, desired place (e.g., your desktop).
| Tip If you wish, you can also run FFGo from a Command Prompt; here is how.
First, open a Command Prompt, then:
|
The instructions given above install all dependencies of FFGo, except one optional dependency: the MagneticField executable from GeographicLib (see below). To have a complete installation, that is able to show the magnetic variation at each airport and magnetic headings for runways, routes, etc., you need to do this in addition:
-
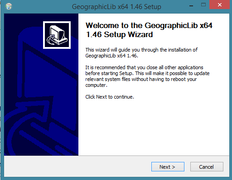
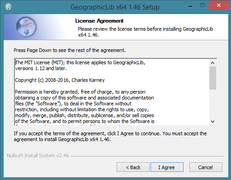
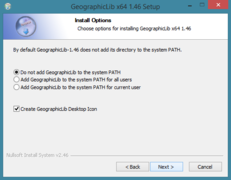
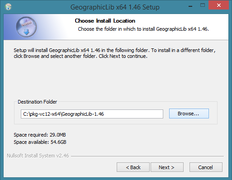
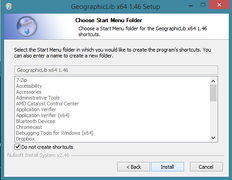
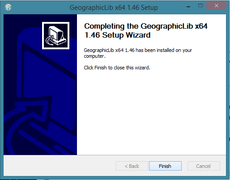
Go to GeographicLib's installation page and run the appropriate installer for your system. This will install the MagneticField.exe executable on your computer. Take note of the folder it is installed to, because you'll have to tell the full path of this program to FFGo, unless you let the GeographicLib installer modify your PATH environment variable.
-
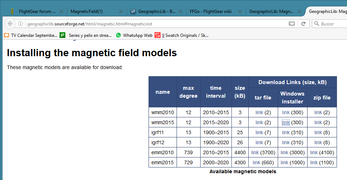
MagneticField.exe needs one or more datasets to be installed, otherwise it can't work properly. To get such a dataset, go to GeographicLib's page for magnetic models and install the magnetic model data file(s) of your choice. wmm2025 appears to be required in 2025 (default model) and should be fine until 2030. You may also install the wmmhr2025 dataset, however I can't say whether this will bring any visible change for typical aviation usage.
When asked for the installation folder, you should probably choose C:\ProgramData\GeographicLib as per the above link.
-
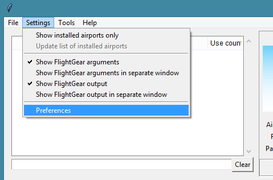
If you let the GeographicLib installer modify your PATH in step 1, there is nothing else to do. Otherwise, you have to tell FFGo where to find MagneticField.exe. In order to do this, start FFGo and open the Settings → Preferences dialog; go to the Miscellaneous tab, and enter the precise path for MagneticField.exe in the appropriate field (cf. step 1). Finally, click on Save settings and you should be done.
The FFGo dialog reachable via Help → About displays the versions of the main dependencies used by FFGo. In case you entered an invalid path, or some other error, a hint is generally given there. In any case, troubleshooting information is always printed to the terminal (if you ran ffgo.exe as opposed to ffgo-noconsole.exe) and to the FFGo log file located in the %APPDATA%\FFGo\Logs folder (do a Google search with keywords “Windows” and “APPDATA” if you don't know what this means).
If for some reason you can't run pip:
- Write down exactly what you did, copy the error messages, take screenshots to make sure you won't miss anything, and report your problem in FFGo's thread on the FlightGear forum
 .
. - If you feel adventurous and want to solve the problem all by yourself, a user reported success using the get-pip.py script as explained on the pip home page. Personally, I would first try running something like
py -3 -m ensurepipfrom a Command Prompt, but both methods should work to install pip into a Python installation where it is missing (py -3invokes the Python Launcher for Windows to automatically find the latest Python 3.x installation present on your system; you can usepy -3.5to invoke Python 3.5, etc.).
Updating the software
The method for updating software installed via pip is basically the same as on Linux. The main difference compared to the instructions given in the Linux section is that the procedure described here uses pip directly on your Python installation, whereas the procedure given for Linux below uses a virtual environment. This means that instead of doing stuff like:
<venv-dir>/bin/pip ...
as in the Linux section, you just need to do:
pip ...
here (it is assumed that the pip executable is in your PATH, which should be the case if you chose Add python.exe to Path in the Python installer). Otherwise, just replace pip with its full path (something like C:\PythonXY\Scripts\pip.exe, where XY corresponds to the Python version). So, here we go:
Open a terminal (also known as “Command Prompt”) as explained above in the section concerning installation, and examine what we have installed with pip:
C:\> pip list
CondConfigParser (1.0.2)
FFGo (1.9.0)
geographiclib (1.45)
Pillow (3.1.0)
pip (1.5.6)
setuptools (18.8)
| Note If the pip executable is in your PATH, it shouldn't matter in general whether the prompt starts with C:\, C:\Windows, C:\Users\UserName or whatever—this part, up to and including the > character, is called the prompt, and the actual command is what you type afterwards. |
Now, let's see what can be updated:
C:\> pip list --outdated
setuptools (Current: 18.8 Latest: 19.5)
pip (Current: 1.5.6 Latest: 8.0.2)
Only setuptools and pip are out-of-date in this venv, let's upgrade them:
C:\> pip install --upgrade setuptools pip
Downloading/unpacking setuptools from https://pypi.python.org/packages/3.5/s/setuptools/setuptools-19.5-py2.py3-none-any.whl#md5=c44407cb10f9b231f5a05908dea1a803
  Downloading setuptools-19.5-py2.py3-none-any.whl (471kB): 471kB downloaded
Downloading/unpacking pip from https://pypi.python.org/packages/py2.py3/p/pip/pip-8.0.2-py2.py3-none-any.whl#md5=2056f553d5b593d3a970296f229c1b79
  Downloading pip-8.0.2-py2.py3-none-any.whl (1.2MB): 1.2MB downloaded

[...]

Successfully installed setuptools pip
Cleaning up...
This is it. We have updated the two pip-installed packages that were not at their latest stable version. Of course, had FFGo been listed as outdated too, we could have updated it this way:
C:\> pip install --upgrade ffgo
which, by the way, can be shortened this way if you wish:
C:\> pip install -U ffgo
Using development snapshots, release candidates, etc.
The instructions given above for pip-installed Python software
only upgrade to releases labelled as “stable” by their upstream maintainers.
Sometimes, you'll want to try a beta or development release of FFGo for
instance, especially if you didn't install it from the Git repository (which
is only covered in the Linux section in order to keep things simple here).
To do this, the method is the same as previously described, except that you
have to pass pip install the --pre option to indicate
that you are ready to install a version that is not necessarily labelled as
“stable”. Therefore, instead of upgrading FFGo with:
C:\> pip install --upgrade ffgo
you would use:
C:\> pip install --upgrade --pre ffgo
| Note Development snapshots have version numbers such as 1.9.0.dev2; beta versions have numbers like 1.9.0b1; for release candidates, the version number can be of the form 1.9.0c2 or 1.9.0rc2, etc. All this is explained in PEP 0440 if you are interested. |
Uninstalling the software
If you installed FFGo using the instructions given above, you can remove it by simply running:
C:\> pip uninstall ffgo
from a Windows terminal (“Command Prompt”). This assumes you chose Add python.exe to Path in the Python installer. Otherwise, just replace pip with its full path (something like C:\PythonXY\Scripts\pip.exe, where XY corresponds to the Python version).
This command only removes FFGo, of course. You can remove other packages
listed by the pip list command using the same method. And you can
also uninstall Python if you so desire, using standard methods for software
installed on Windows.
Linux
Using distribution packages
Debian
Debian packages for FFGo have been prepared by the FFGo upstream maintainer, Florent Rougon. They can be downloaded and installed normally using apt, aptitude, etc., provided you have installed Florent's OpenPGP key.
- First step: install Florent Rougon's OpenPGP key into the apt keyring
In order for apt to trust Florent's repository of Debian packages, you need to download his OpenPGP key. It is linked from that page on Florent's website and is also available from GitHub.
Optional: if you want to verify that both keys are the same, you'll probably need to add a trailing newline to the key distributed by GitHub in order to ensure a byte-for-byte match. For instance:
printf '\n' >>frougon.gpg
cmp frougon.gpg OpenPGP-key.asc && echo "Identical files"
The second command should print
Identical files.Once you have the key, say in file OpenPGP-key.asc, you can install it into the apt keyring using the following command, run as root:
cp OpenPGP-key.asc /etc/apt/trusted.gpg.d/Florent_Rougon.asc
The next
apt updaterun will see the key and from this point on, apt will trust it. If you later decide to revoke this trust, simply delete /etc/apt/trusted.gpg.d/Florent_Rougon.asc and rerunapt update.You'll have to repeat this key installation step every time the key expires (apt will tell you if the key has expired and is still in its keyring). In the last decade or so, this has been once a year.
-
Second step: add the relevant lines to your /etc/apt/sources.list file
Add the following lines to your /etc/apt/sources.list:
deb https://frougon.net/debian-ffgo unstable main
deb-src https://frougon.net/debian-ffgo unstable main
(replace unstable with bookworm if you are using Debian 12, also known as bookworm). You can safely comment out the second line with a
#if you don't intend to useapt sourcefor these packages. - Third step: update the apt package list
This is typically done with:
apt update
or
aptitude update
etc., depending on the Debian package manager you are using.
- Final step: install the packages
Install the ffgo package, at least. It is also recommended to install:
- python3-pil.imagetk, otherwise you won’t be able to see the aircraft thumbnails;
- geographiclib-tools for the MagneticField program, in order to be able to see the magnetic variation at a given airport, magnetic headings, etc.;
- python3-geographiclib for better geodetic calculations.
In other words, if you are using Debian bookworm or later, you can run:
apt install ffgo python3-pil.imagetk geographiclib-tools python3-geographiclib
Note To avoid pulling in the entire FlightGear packages, you could tell apt not to install the recommendations in the deb file:
apt install --no-install-recommends ffgo python3-pil.imagetk geographiclib-tools python3-geographiclib
This is useful, if you have FG installed some other way, than by your package manager.Note Installing the geographiclib-tools package is not enough to have the MagneticField program working. This program needs one or more datasets which are not part of the geographiclib-tools package. One easy way to install the minimal dataset on Debian is to run the following command with root privileges: /usr/sbin/geographiclib-get-magnetic minimal
This will automatically download and install a minimal dataset under /usr/share/GeographicLib/magnetic, where it can be found by MagneticField (not registering the added files with dpkg though, which is a bit ugly, cf. Debian bug #687253). Otherwise, you can read the MagneticField(1) manual page which explains how to tell MagneticField where he should look to find the datasets it needs.
Once the ffgo package is installed, FFGo can be run from the freedesktop menu and, obviously, from the command line (the command name is ffgo).
Using download_and_compile.sh
A very easy way to install FFGo on systems that have Python and the Bash shell is to use the download_and_compile.sh script. This script supports an FFGO component that installs the latest FFGo release using pip. On Debian-based systems, unless option -pn is used, download_and_compile.sh will install FFGo dependencies using the distribution package manager for those that are available in Debian (no third-party repository added).
Sample installation session
First get download_and_compile.sh:
mkdir -p ~/flightgear/dnc-managed
cd ~/flightgear
git clone https://gitlab.com/flightgear/fgmeta.git
Now use it to install FFGo under ~/flightgear/dnc-managed/install/ffgo (if you pass option -pn to download_and_compile.sh, sudo won't be used but you'll have to install dependencies yourself):
cd ~/flightgear/dnc-managed
~/flightgear/fgmeta/download_and_compile.sh FFGO
Start the installed FFGo program:
~/flightgear/dnc-managed/install/ffgo/bin/ffgo
Behind the scenes, this installation method uses a Python venv and pip inside the venv. Updating FFGo with this method is done like installation:
cd ~/flightgear/dnc-managed
~/flightgear/fgmeta/download_and_compile.sh FFGO
For more information on download_and_compile.sh, use download_and_compile.sh --help or visit Scripted_Compilation_on_Linux_Debian/Ubuntu.
Using pip (generic method)
A word about pip and Python virtual environments
pip is nowadays' standard, OS-independent tool for clean installation, upgrade and removal of Python packages. The method described in this section should thus be applicable to any distribution (even to non-Linux OSes, provided you can install Python and pip, and know where the installed Python executable can be found).
The first thing to understand is that, when installing Python packages with pip, the destination directory is by default entirely determined by the particular Python interpreter used to run pip. For instance, let's assume you have several Python installations:
- one of Python 2.7 reachable via /usr/bin/python, with third-party packages located in /usr/lib/python2.7/dist-packages (this would be Debian or a derivative—other distributions are more likely to use /usr/lib/python2.7/site-packages);
- one of Python 3.4 reachable via /usr/bin/python3.4, with third-party packages in /usr/lib/python3/dist-packages[5];
- and one of Python 3.5 that you compiled yourself and installed in /opt/python3.5, with the interpreter executable being /opt/python3.5/bin/python3, and third-party packages located in /opt/python3.5/lib/python3.5/site-packages.
If you run pip this way:
/opt/python3.5/bin/python3 -m pip install FFGo
(think of /opt/python3.5/bin/python3 -m pip as the name of the pip command) then FFGo will be installed for the interpreter you compiled yourself, with Python modules under /opt/python3.5/lib/python3.5/site-packages and executables in /opt/python3.5/bin. This should be fine. However, if you run this pip invocation with /usr/bin/python instead of /opt/python3.5/bin/python3, then it will try to install things under /usr/lib/python2.7/dist-packages and in /usr/bin, which is certainly a bad idea with most Linux distributions (and that would require root permissions, but don't do it unless you really know what you are doing). The same would apply if the command were to be run with /usr/bin/python3.4: it is a bad idea, because it would step on the toes of a Python installation from your Linux distribution.
So, what can we do short of compiling Python ourselves? The canonical answer is to use pip in a virtual environment. Quoting the Python documentation:
A virtual environment (also called a venv) is a Python environment such that the Python interpreter, libraries and scripts installed into it are isolated from those installed in other virtual environments, and (by default) any libraries installed in a “system” Python, i.e. one which is installed as part of your operating system.
In other words, you may create as many virtual environments from a given “base” Python installation as you want. Then, when you install, upgrade or remove a Python package from one of these virtual environments, it will have no effect on the other virtual environments nor on the base installation. Since virtual environment creation and package installation with pip is very quick and easy, virtual environments are quite convenient to experiment with Python packages without taking the risk of messing up your system.
For more explanations on all this, you can read FFGo's INSTALL_en file.
General idea of the method
The general idea behind the pip-based method explained here is the following:
- First, you choose a Python interpreter, for instance /usr/bin/python3.4, and create a virtual environment from this Python interpreter.
The interesting thing, with this kind of workflow, is that you never need to install packages as root, except for the base stones such as python3 and python3-tk[6], which are part of a standard Python installation. These can be installed normally using your usual distribution tools: apt, aptitude or dpkg for Debian and derivatives; yum or rpm for Redhat and derivatives, pacman for Arch Linux, etc. Therefore, using this method, there is no risk of messing up your Linux system (contrary to people coming up with crappy installation scripts and telling you to run them as root and hope for the best). A virtual environment can be created as a simple user, like this:
/usr/bin/python3.4 -m venv <venv-dir>
Just as for the pip command explained above, think of
/usr/bin/python3.4 -m venvas the name of a program (it just runs the main function of the Python venv module). In the above command, you can freely choose the <venv-dir> directory. It is just a directory that is going to contain the newly-created virtual environment once this command returns (therefore, you shouldn't have anything inside it before running the command, otherwise that would be messy).Note:
Some systems may provide executables named pyvenv-3.4 or similar. For instance, on Debian, /usr/bin/pyvenv-3.4 is a “shortcut” for
/usr/bin/python3.4 -m venv. Thus, one may type:/usr/bin/pyvenv-3.4 <venv-dir>
to obtain the same effect as above: creating a virtual environment in <venv-dir> based on the Python interpreter /usr/bin/python3.4. Thanks to shell command history, using
/usr/bin/python3.4 -m venvis not much of a problem, and since this makes it quite clear which Python interpreter is going to be used, I'll favor this syntax here rather than the shorter syntax based on pyvenv-3.4. - Once you have a virtual environment (and you can have as many as you wish), you can install, upgrade and uninstall Python packages inside it as a simple user, like this:
<venv-dir>/bin/pip install package_1 package_2 ... package_n
<venv-dir>/bin/pip install --upgrade package_1 package_2 ... package_n
<venv-dir>/bin/pip uninstall package_1 package_2 ... package_n
Such installations are done in the venv based at <venv-dir>, therefore the ffgo executable obtained after running
<venv-dir>/bin/pip install ffgowill be <venv-dir>/bin/ffgo.In order to save some typing afterwards, you may want to create an alias for this command in your ~/.bashrc, ~/.zshrc, etc.[7]. This way, you'll be able to just run ffgo from a terminal. Alternatively, you can create a /usr/local/bin/ffgo symlink pointing to <venv-dir>/bin/ffgo.
Sample installation sessions
In this section, I'll give two sample installation sessions using the pip-based method explained above. Both sessions start by installing the major dependencies of FFGo (Python 3 and Tkinter) with usual distribution tools. Then, the first session installs FFGo and the rest of its dependencies with pip, whereas the second session installs the rest of the dependencies with pip, but clones FFGo itself from its Git repository (this is best if you want to follow FFGo development). In this second case, it is not useful to install FFGo per se: it can be run directly from the Git repository clone using the ffgo-launcher.py script shipped with FFGo.
These sample sessions are given for Debian—at least for now—but the method is generic and can be applied to other distributions (the apt commands will have to be adapted, obviously):
-
First session: installing FFGo (and some of its dependencies, such as CondConfigParser) using pip in a virtual environment.
-
First, as root:
Mandatory:
apt install python3 python3-tk python3-venv
Optional—may help if you want to compile Pillow (which is automatically done if you install it using pip):
apt install gcc libpython3-dev tcl-dev tk-dev
If the Pillow installation (later) fails even with this, run the following command as root:
apt build-dep python3-pil.imagetk
This will install more packages, but should definitely allow you to compile Pillow.
Optional: to have magnetic declination, magnetic headings, etc.:
apt install geographiclib-tools
# Install a minimal dataset for the MagneticField program
/usr/sbin/geographiclib-get-magnetic minimal
Highly optional, for better precision (no idea if one can see the difference for typical aviation needs):
/usr/sbin/geographiclib-get-magnetic wmmhr2025
Then, as an unprivileged user:
Create a virtual environment in ~/my-venvs/venv1, linked to the base Python installation that provides /usr/bin/python3.4:
~ % mkdir -p ~/my-venvs && cd ~/my-venvs
~/my-venvs % /usr/bin/python3.4 -m venv venv1
Check what we have in there:
~/my-venvs % ls venv1
bin  include  lib  lib64  pyvenv.cfg
Install FFGo in this venv using the pip executable from this venv. This is the crucial point. Don't run this with any pip executable you find, otherwise you won't be able to know where the installation is taking place.
~/my-venvs % venv1/bin/pip install ffgo
Downloading/unpacking ffgo
  Downloading FFGo-1.9.0.tar.gz (767kB): 767kB downloaded
  Running setup.py (path:/tmp/pip-build-phq2qtge/ffgo/setup.py) egg_info for package ffgo

[...]

Downloading/unpacking CondConfigParser (from ffgo)
  Downloading CondConfigParser-1.0.2.tar.bz2 (46kB): 46kB downloaded
  Running setup.py (path:/tmp/pip-build-phq2qtge/CondConfigParser/setup.py) egg_info for package CondConfigParser

[...]

Installing collected packages: ffgo, CondConfigParser
  Running setup.py install for ffgo

[...]

Successfully installed ffgo CondConfigParser
Cleaning up...
Run FFGo:
~/my-venvs % venv1/bin/ffgo
FFGo 1.9.0 started
Using:
  - Python 3.4.4
  - CondConfigParser 1.0.2
  - MagneticField: GeographicLib version 1.45

[FFGo warning] Pillow library not found. Aircraft thumbnails won't be
displayed.
[FFGo notice] GeographicLib's Python binding not found. FFGo has fallback
strategies, therefore you shouldn't see much of a difference. However, some
particular geodetic calculations can only be done with GeographicLib. You will
be notified when such a case is encountered.
Detected FlightGear version: 2016.1.0
FFGo works. It just told us about the two optional dependencies we haven't installed. Let's install them now. There is another way that uses Debian packages (creating the venv with --system-site-packages); it is explained in docs/INSTALL/INSTALL_en, but I can't replicate all of its contents here...
OK, so let's install these optional dependencies now:
~/my-venvs % venv1/bin/pip install Pillow geographiclib
Downloading/unpacking Pillow
  Downloading Pillow-3.1.0.tar.gz (9.9MB): 9.9MB downloaded

[...]

Installing collected packages: Pillow, geographiclib
  Running setup.py install for Pillow

    warning: no previously-included files found matching '.editorconfig'
    building 'PIL._imaging' extension

[...]

Cleaning up...
Let's start FFGo again:
~/my-venvs % venv1/bin/ffgo
FFGo 1.9.0 started
Using:
  - Python 3.4.4
  - CondConfigParser 1.0.2
  - GeographicLib's Python binding 1.45
  - MagneticField: GeographicLib version 1.45

Detected FlightGear version: 2016.1.0
No warning anymore: all optional dependencies have been installed.
-
Second session: installing some of FFGo's dependencies (such as CondConfigParser) using pip in a virtual environment, while using FFGo directly from a clone of its Git repository.
Create a virtual environment (the second command is equivalent to
/usr/bin/pyvenv-3.4 venv2on Debian):~ % cd ~/my-venvs ~/my-venvs % /usr/bin/python3.4 -m venv venv2
Install CondConfigParser in this venv using the pip executable from this venv:
~/my-venvs % venv2/bin/pip install CondConfigParser
Downloading/unpacking CondConfigParser
  Downloading CondConfigParser-1.0.2.tar.bz2 (46kB): 46kB downloaded
  Running setup.py (path:/tmp/pip-build-gdlz9yez/CondConfigParser/setup.py)

[...]

Successfully installed CondConfigParser
Cleaning up...
Clone FFGo's Git repository:
~ % mkdir -p ~/src && cd ~/src
~/src % git clone https://github.com/frougon/FFGo.git ffgo.git
Cloning into 'ffgo.git'...
remote: Counting objects: 3001, done.
remote: Total 3001 (delta 0), reused 0 (delta 0), pack-reused 3001
Receiving objects: 100% (3001/3001), 1.39 MiB | 940.00 KiB/s, done.
Resolving deltas: 100% (1927/1927), done.
Checking connectivity... done.
The following
makecommand must be run whenever you work with FFGo's Git repository (unless you know what you are doing), aftergit cloneand everygit pullin order to have exisiting and up-to-date icons and translation (.mo) files. The command requires one to have installed stuff as indicated in the Installation from the Git repository section of FFGo's docs/INSTALL/INSTALL_en file.~/src % cd ffgo.git ~/src/ffgo.git % make make -C share/icons make[1]: Entering directory '/home/flo/src/ffgo.git/share/icons' [...] make[1]: Leaving directory '/home/flo/src/ffgo.git/ffgo/data/locale'
Since FFGo was not installed with pip in this case, no ffgo executable has been created. The recommended way to run FFGo in such a case is via the ffgo-launcher.py script. The full path to ffgo-launcher.py is not needed here since it is in the current directory, however if you create an alias for this command, or if you configure an icon in your menu bar/whatever to run it, you will need the path (and maybe /home/username instead of ~ too). The path to the Python interpreter (~/my-venvs/venv2/bin/python), however, is crucial since it is for this Python interpreter that we have installed CondConfigParser.
~/src/ffgo.git % ~/my-venvs/venv2/bin/python ~/src/ffgo.git/ffgo-launcher.py
FFGo 1.9.0 started
Using:
  - Python 3.4.4
  - CondConfigParser 1.0.2
  - MagneticField: GeographicLib version 1.45

[FFGo warning] Pillow library not found. Aircraft thumbnails won't be
displayed.
[FFGo notice] GeographicLib's Python binding not found. FFGo has fallback
strategies, therefore you shouldn't see much of a difference. However, some
particular geodetic calculations can only be done with GeographicLib. You will
be notified when such a case is encountered.
Detected FlightGear version: 2016.1.0
Again, FFGo works fine and just warned us about the two optional dependencies it couldn't find. They can be installed in exactly the same way as above:
~/src/ffgo.git % ~/my-venvs/venv2/bin/pip install Pillow geographiclib

[...]
Updating the software
| Note None of the following should be run as root. |
First case: FFGo was installed in the virtual environment under ~/my-venvs/venv1.
Examine what is installed in ~/my-venvs/venv1:
% ~/my-venvs/venv1/bin/pip list
CondConfigParser (1.0.2)
FFGo (1.9.0)
geographiclib (1.45)
Pillow (3.1.0)
pip (1.5.6)
setuptools (18.8)
Now, let's see what can be updated:
% ~/my-venvs/venv1/bin/pip list --outdated
setuptools (Current: 18.8 Latest: 19.5)
pip (Current: 1.5.6 Latest: 8.0.2)
Only setuptools and pip are out-of-date in this venv, let's upgrade them:
% ~/my-venvs/venv1/bin/pip install --upgrade setuptools pip
Downloading/unpacking setuptools from https://pypi.python.org/packages/3.5/s/setuptools/setuptools-19.5-py2.py3-none-any.whl#md5=c44407cb10f9b231f5a05908dea1a803
  Downloading setuptools-19.5-py2.py3-none-any.whl (471kB): 471kB downloaded
Downloading/unpacking pip from https://pypi.python.org/packages/py2.py3/p/pip/pip-8.0.2-py2.py3-none-any.whl#md5=2056f553d5b593d3a970296f229c1b79
  Downloading pip-8.0.2-py2.py3-none-any.whl (1.2MB): 1.2MB downloaded

[...]

Successfully installed setuptools pip
Cleaning up...
Second case: FFGo is used directly from a clone of its Git repository by means of the ffgo-launcher.py script.
The procedure for updating the software that is installed in the venv is the same as in the first case:
% ~/my-venvs/venv2/bin/pip list --outdated
setuptools (Current: 18.8 Latest: 19.5)
pip (Current: 1.5.6 Latest: 8.0.2)
Again, the same two packages need an update; all the others are at their latest upstream stable version. Let's upgrade the two packages:
% ~/my-venvs/venv2/bin/pip install --upgrade setuptools pip
Downloading/unpacking setuptools from https://pypi.python.org/packages/3.5/s/setuptools/setuptools-19.5-py2.py3-none-any.whl#md5=c44407cb10f9b231f5a05908dea1a803

[...]

Successfully installed setuptools pip
Cleaning up...
FFGo was not installed via pip in the venv; we are using the Git repo for FFGo. Let's update our clone of FFGo's Git repository:
% cd ~/src/ffgo.git
~/src/ffgo.git % git pull

[...]
Always run make after updating your clone of FFGo's Git repository:
~/src/ffgo.git % make
make -C share/icons
make[1]: Entering directory '/home/flo/src/ffgo.git/share/icons'
make[1]: Nothing to be done for 'all'.
make[1]: Leaving directory '/home/flo/src/ffgo.git/share/icons'
make -C ffgo/data/pics
make[1]: Entering directory '/home/flo/src/ffgo.git/ffgo/data/pics'
make[1]: Nothing to be done for 'default'.
make[1]: Leaving directory '/home/flo/src/ffgo.git/ffgo/data/pics'
make -C ffgo/data/locale update-mo
make[1]: Entering directory '/home/flo/src/ffgo.git/ffgo/data/locale'
make[1]: Nothing to be done for 'update-mo'.
make[1]: Leaving directory '/home/flo/src/ffgo.git/ffgo/data/locale'
~/src/ffgo.git %
Everything is now up-to-date.
In these instructions, we have updated each outdated package one by one.
pip in its current state doesn't allow updating all packages in a
virtual environment at once with a simple command
(cf. pip issue #59). However, with a
bit of plumbing, it is possible to write a script that does that: see
this message ![]() on the FlightGear forum
for an example (the error handling may be imperfect, so watch the updates as
they are going if you use such a script).
on the FlightGear forum
for an example (the error handling may be imperfect, so watch the updates as
they are going if you use such a script).
Using development snapshots, release candidates, etc.
The instructions given above for pip-installed Python software only
upgrade to releases labelled as “stable” by their upstream maintainers.
Sometimes, you'll want to try a beta or development release of FFGo for
instance, especially if you didn't install it from the Git repository. To do
this, the method is the same as previously described, except that you have to
pass pip install the --pre option to indicate that you are
ready to install a version that is not necessarily labelled as “stable”.
Therefore, instead of upgrading FFGo with:
<venv-dir>/bin/pip install --upgrade ffgo
you would use:
<venv-dir>/bin/pip install --upgrade --pre ffgo
(development snapshots have version numbers such as 1.9.0.dev2, beta versions like 1.9.0b1, etc. All this is explained in PEP 0440 if you are interested)
Uninstalling the software
Let's assume you have a virtual environment based at directory <venv-dir> and you want to uninstall two Python packages named pkg1 and pkg2 from this virtual environment (one of these packages could be ffgo, for instance). All you have to do is:
<venv-dir>/bin/pip uninstall pkg1 pkg2
If you'd rather get rid of the whole virtual environment, just delete its base directory <venv-dir>. That is all there is to it!
When the base Python installation is updated or removed
Let's say you built a virtual environment using a command such as:
/usr/bin/python3.4 -m venv <venv-dir>
In such a case, your virtual environment located in <venv-dir> is somehow linked to its base Python installation, the one providing /usr/bin/python3.4. If you are on Debian for instance, this base Python installation comes from the python3.4 package. So, what happens when this package is updated or removed?
-
My experience didn't show any particular problem so far when the package for the venv's underlying base installation is updated. I suppose this will be more or less always like that as long as updates are reasonable in terms of backward-compatibility—which is normally the case when the Python major version isn't changed (here: 3.4).
Note:
It is possible to pass the following option upon venv creation (i.e., after something like
/usr/bin/python3.4 -m venv):--upgrade Upgrade the environment directory to use this version of Python, assuming Python has been upgraded in-place.(this can be found by running, e.g.,
/usr/bin/python3.4 -m venv --help)Since venv creation using a script is extremely fast, I haven't felt any need for this option so far, and thus have no experience to share regarding it.
-
However, when you upgrade your Linux/BSD/etc. distribution, it may happen that for instance Python 3.4 is removed and replaced with Python 3.5. This is not very frequent, but it does happen. In such a case, your virtual environments built from /usr/bin/python3.4 are quite likely not to work anymore.
The cure for this kind of problem is not very difficult: just delete the concerned virtual environments and recreate them using the new Python interpreter of your choice (e.g., /usr/bin/python3.5). To facilitate this, and also as a convenient means of remembering exactly which commands you ran to create your virtual environment, I suggest to keep a short script containing exactly the commands you used to create the venv. For instance:
#! /bin/sh

set -e

target_dir="${1:-default-venv-dir}"
base_python="/usr/bin/python3.4"

if [ -e "$target_dir" ]; then
   echo "!!Warning!! '$target_dir' already exists. If you continue, its"
   echo "            contents will be deleted. Press Enter to continue,"
   echo "            otherwise interrupt the script with Ctrl-C."
   read dummy
fi

"$base_python" -m venv --clear "$target_dir"
"$target_dir"/bin/pip install --upgrade \
  pip setuptools Pillow geographiclib FFGo
This script takes one optional argument: the base path where you want the virtual environment to be created (represented by <venv-dir> above). As the script is written, this argument defaults to default-venv-dir in the current directory, but you can of course replace this with any path of your choice.
Note This script installs FFGo inside the virtual environment. If you want to use FFGo from its Git repository instead, just replace FFGo with CondConfigParser in the last line of the script (since CondConfigParser is a mandatory dependency of FFGo).
macOS
Installation should be similar to how it is done on Linux with pip in most ways, once you have installed a suitable Python version. macOS expert needed for the little macOS-specific details:
- how to install Python 3.4 or later in a non-intrusive way for the system;
- how to access the corresponding python executable, and;
- how to create a shortcut to the resulting ffgo executable for convenience.
A word about GeographicLib
GeographicLib is a powerful C++ library that can perform many kinds of geographic calculations (such as finding the shortest “walkable” path between two points on Earth), and also provides information about Earth's magnetic field. This library has been written by researcher Charles F. F. Karney, who designed well-known algorithms to solve the geodetic direct and inverse problems.
Apart from the C++ library and accompanying programs such as MagneticField, Charles Karney provides a standalone Python 2 & 3 implementation of the geodetic algorithms. This Python implementation is what you get when running commands such as (depending on your setup):
pip install geographiclib
or:
<venv-dir>/bin/pip install geographiclib
It is not a binding for the C++ library; rather, it is a reimplementation in Python of some of the algorithms featured by the GeographicLib C++ library.
FFGo uses the following software components if it can find them:
- GeographicLib's implementation for Python 3;
- GeographicLib's MagneticField program.
The former is normally obtained via pip, while the latter comes with the “full GeographicLib package” as published on GeographicLib's home page.
Related content
- FFGo's home page
- FFGo conditional config documentation
- FFGo's thread on the FlightGear forum

- FGo! — predecessor to FFGo
- FlightGear Launch Control (a.k.a. FGRun)
- FlightGear's integrated Qt-based launcher
- FGx
Footnotes
- ↑ In short, FlightGear and FFGo now read and merge all $scenery_path/NavData/apt/*.dat[.gz] files for each scenery path, plus the default $FG_ROOT/Airports/apt.dat.gz, coming last.
- ↑ If you do, the general principle is the same, but you'll have to make sure to invoke pip for the right Python installation, for instance with:
py -3.5 -m pip install FFGo Pillow geographiclib
 with enough details to allow me to help you).
- ↑ As shown in the command, you may omit the .exe extension from the executable name.
- ↑ The default Python installation path (e.g., C:\PythonXY) seems to depend on the version of Windows, not only on the Python version (which would be X.Y in this example).
- ↑ Python 3.2 and later are smart enough with .pyc files to allow using only one base directory for all Python versions, cf. PEP 3147: PYC Repository Directories in What’s New In Python 3.2
- ↑ These are package names used in Debian; other distributions may ship the same software components under slightly different names.
- ↑ A line such as:
alias ffgo="<venv-dir>/bin/ffgo"
should be enough to create the alias in typical Unix shells.
