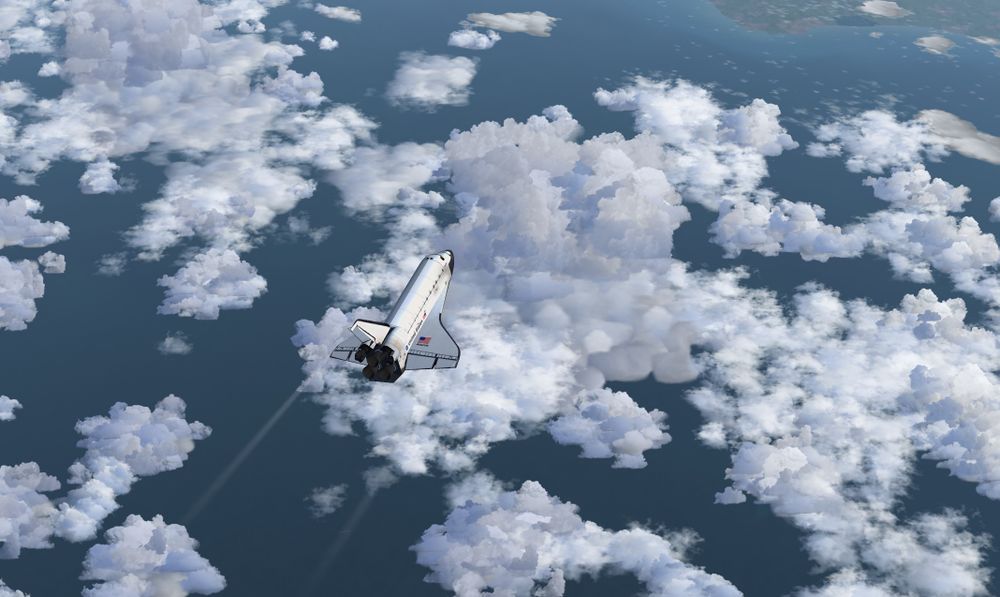
Flying the Shuttle - Entry
| Note This article refers to the SpaceShuttle in the FGAddon repository. |
| Space Shuttle |
|---|
| Main article |
| Technical |
| Checklists |
| Nominal Operations |
| Nominal Operations Advanced Tutorials |
| Intact Aborts |
| The other space shuttle |
This mission phase can directly be started using --aircraft=SpaceShuttle-entry on the command line.
What are we trying to do?
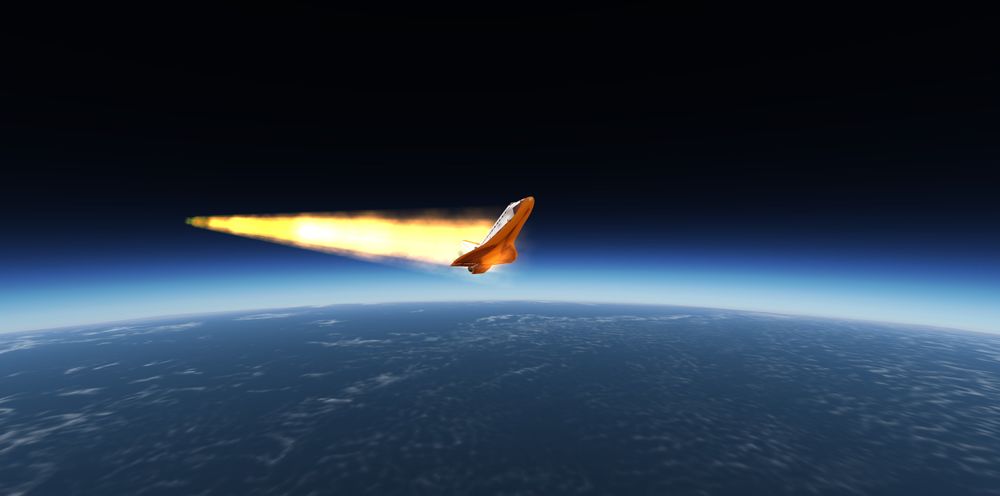
The entry phase of a Shuttle mission lasts from the so-called entry interface at about 400.000 ft to the terminal area energy management (TAEM) interface at 85.000 ft. During that time, the Shuttle decelerates from orbital speed (Mach 26) to supersonic speed (Mach 2.5) and changes from a ballistic flight trajectory to an aerodynamical glide. The deceleration is provided by atmospheric friction which converts the tremendous energy of the propellant burned during launch and used to reach orbit into heat. The goals during entry are hence (in decreasing order of importance):
- manage the heat load such as to prevent destruction of the orbiter
- manage the deceleration rate such as to prevent destruction of the orbiter and TAEM interface is reached close to the landing site
- manage the ground track such that it points towards the landing site
Some theory
The total energy in the friction heat is sufficient to destroy the orbiter (as the Columbia disaster has demonstrated). It is therefore mandatory that most of the energy never reaches the orbiter. This is accomplished by a blunt-body entry - for a streamlined hypersonic body, the shockwave of compressed air is attached to the surface, but for a blunt body it detatches, containing most of the energy, and only a small fraction of a few percent are radiated to the actual spacecraft structure. This remaining heat flow still leads to temperatures close to 3000 F at the nose and leading wing edges, but can be managed by the thermal protection system.
It is hence mandatory that the airstream during an entry never reaches the weakly protected upper fuselage and that the shockwave remains always detatched from the orbiter.
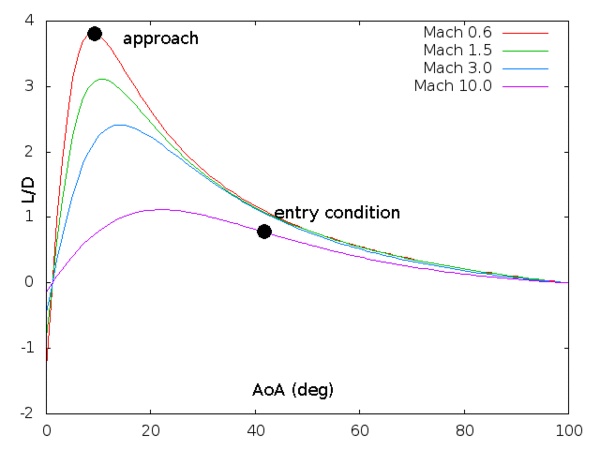
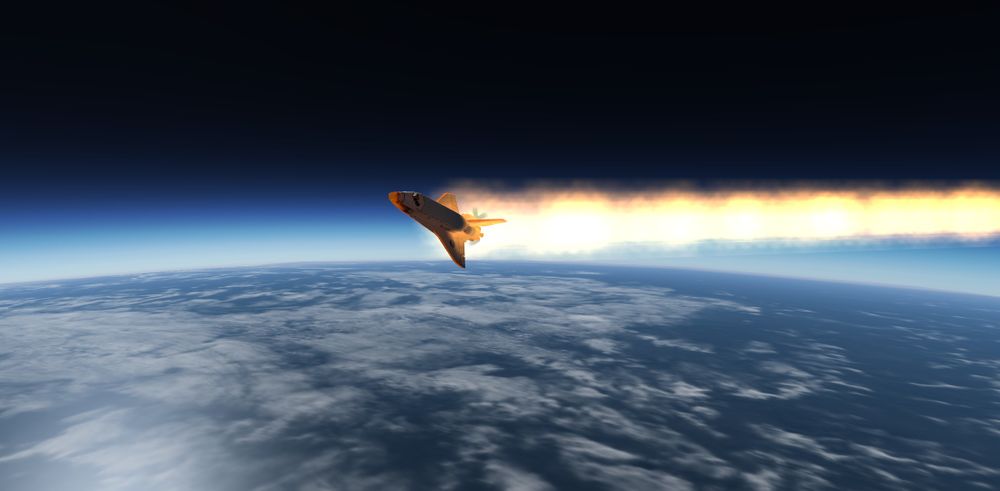
This is accomplished by maintaining a high AoA, i.e. during the hot entry phase, the Shuttle is flown in what is technically close to a stall condition - pitched up at 40 degrees.
As the lift/drag curves of the Shuttle show, at hypersonic speeds, even in that regime, the glide ratio is still about 0.8, so the shuttle will produce lift even at such high AoA.
The density of the ambient atmosphere largely sets the deceleration force and thermal load, and the altitude determines the atmosphere density, hence to manage the deceleration force and thermal load, the vertical speed needs to be controlled. As soon as the transition to aerodynamical flight is made, aerodynamical lift provides the means to do so.
As lift builds up, the descent of the Shuttle will slow down, come to a halt and, if no further action is taken, will turn into a rise, i.e. the orbiter is able to 'bounce' off the atmosphere. This is different from the entry trajectory of a non-lifting body (such as the Vostok-1 spacecraft modeled in FG) which undergoes a so-called ballistic entry, i.e. it will penetrate the atmosphere till drag eventually stops it. Ballistic entries consequently are much harder both in peak g and thermal loads. The sinkrate when reaching the upper atmosphere essentially determines how deeply the Shuttle will penetrate at near-orbital velocity and how hard the deceleration will be. On a normal de-orbit, sinkrates are well within acceptable limits, but entry trajectories for scenarios like a three engine failure during launch may not be survivable.
Once the initial vertical descent comes to a halt, the vertical velocity can be actively controlled to manage heat and deceleration force - if the shuttle is steered upward, heat load and deceleration decrease, if downward heat load and deceleration increase. In a normal airplane, one would use the elevator to control AoA and simply steer down. In the Shuttle, this is not an option, because, as explained above, the AoA is fixed by the need to have thermal protection. The solution is to roll the orbiter to a high bank angle (up to 70 degrees) to reduce lift.
The combination of 40 degree upward pitch and 70 degree roll is something not usually experienced by pilots. In such a confguration, the lift now acts sideways, i.e. the orbiter changes course. This may be desirable to steer the trajectory towards a landing site, or it may not. In the second case, the roll needs to be reversed periodically ('roll reversal') to steer the ground track into an S-shape around the desired trajectory.
Using a combination of high bank angle, low bank angle and roll reversals, direction and deceleration rate are managed to steer the orbiter to the landing site.
Note that the heat load is proportional to the dynamical pressure qbar times the velocity relative to the air, whereas the structural load is proportional to qbar. Thermal management is thus most important at the initial high-velocity phase in which the deceleration force is modest, and only when thermal management is over, trajectory deceleration control becomes important. For the same reason, the pitch angle can be gradually reduced with Mach number, ending in a just 14 degree pitch at Mach 2.5 where the TAEM interface is reached.
Since aerodynamical forces push the shuttle into a low AoA configuration, a high pitch angle, once lost, is not easily recoverable. It is best established outside the atmosphere where qbar is low and kept during entry, only to be relaxed in the final phase.
De-orbit preparations in FG
| Note You can find a detailed tutorial on the Deorbit preparation following real Checklist here Flying the Shuttle - Deorbit Preparation Advanced |
| Note You can find a detailed tutorial on the Deorbit Burn and Final Entry preparations following real Checklist here Flying the Shuttle - Deorbit Burn and Final Entry Preparation Advanced |
(you don't need to do this if you start with the entry scenario directly - but if you want to fly down from orbit rather than from entry interface, the Shuttle needs to be prepared)
Entry preparations begin in orbit - it is important to work through the entry preparation checklists, in particular payload bay door and ET umbilical doors need to be closed or the Shuttle will have incomplete thermal protection and burn up. APUs need to be running to provide hydraulic power for the aerodynamical control surfaces.
Another important aspect is CoG management - during entry, the CoG should ideally be at 66% of the vehicle length - check this in the propellant dialog. There is about a 1 % margin around this value in which the orbiter gets progressively more difficult to manage, but for instance an entry with full OMS tanks is not survivable, the elevons can not hold the Shuttle in such a tail-heavy configuration.
Forward RCS fuel should be dumped for safety reasons, the forward RCS will not be used any more (usually it is burned up by firing left and right-firing thrusters at the same time - Control+f toggles this). Excess OMS fuel should be burned by orienting the Shuttle perpendicular to the motion vector (i.e. a normal or anti-normal burn) which will change the entry trajectory very little. In the unlikely case that there is excess aft RCS fuel, this can also be burned by a normal burn in translational mode.
If there is insufficient RCS fuel in one or both of the rear pods, pre-entry preparations are a good time to set up RCS to RCS or OMS to RCS crossfeeding.
The next thing is to activate the guidance computer.
For a real Shuttle mission, mission control would take care of trajectory planning, and the Shuttle crew would just execute the plan. In FG, this option is not available and you have to do the planning yourself. As of September 2015, several planning and guidance instruments have been added to give the Shuttle the required capability.
A viable entry trajectory based on maintaining 70 m/s sink throughout the entry is part of the vertical trajectory guidance. This trajectory has a length of 4100 miles and it is possible to deviate both into the direction of a shorter and of a longer trajectory by changing descent rate.
This means that ideally the entry interface (EI) needs to be 4100 miles from landing site. This can be accomplished by using the range lines of the entry guidance computer.
The entry interface location is likewise shown as soon as the orbit intersects the lower atmosphere. Thus, in order to manage the de-orbit, make sure the projected groundtrack is close to the site, then start the de-orbit burn some 10.000 to 12.000 miles ahead. As soon as the EI is shown, burn as long as it moves across the range line and you'll have an entry trajectory with a specified length.
However, what is crucially important is also the perigee. If it is too high (> 70 km) atmospheric capture will be slow or might not happen at all - this will lead to a very long trajectory. If it is too low (< 20 km), sink into the lower atmosphere will be rapid, reducing range quite a bit and making the trajectory difficult to fly (the Shuttle will however take a lot of punishment, which is required for the abort trajectories specifically).
Here's an example of a good de-orbit burn stared from a 320 km orbit 10.000 miles to range to a perigee of 40 km.
The trajectory from orbit to entry interface is then pure spaceflight - all you need to do is make sure that the Shuttle has a good attitude at entry interface, then do an OPS transition and activate the Aerojet DAP. The following tutorial describes how to fly the actual entry.
Going home - a tutorial
(written for the devel version of October 2017)
| Note You can find in complement of this tutorial a more advanced tutorial for entry once you feel confident Entry Advanced |
| Note This tutorial is for an up to date version by the official Flightgear Space Shuttle Flight Manual. |
In this tutorial, you'll learn to use the Shuttle's avionics to fly the hypersonic trajectory from entry interface to TAEM interface. The tutorial assumes that you have (by doing the on-orbit tutorials) gained basic familiarity with the avionics and the systems such that you can configure the MFDs to your needs and enter commands.
- Start Flightgear with the commandline options
--aircraft=SpaceShuttle-entry --lat=0.0 --lon=-160.0 --heading=45 --timeofday=morning
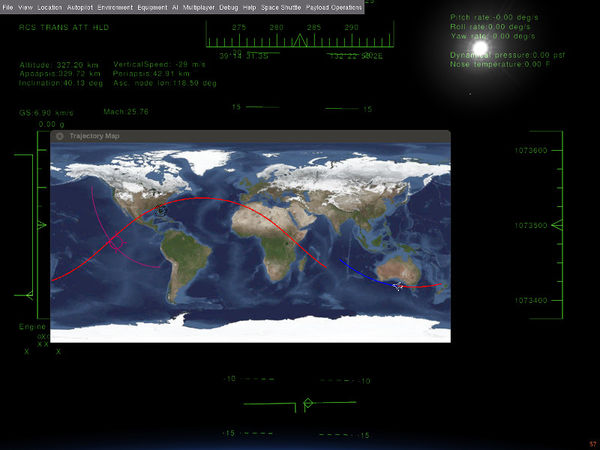
You'll find yourself right in the upper atmosphere on a sinking trajectory. Let's bring up the trajectory map from the menu to see where we are going:
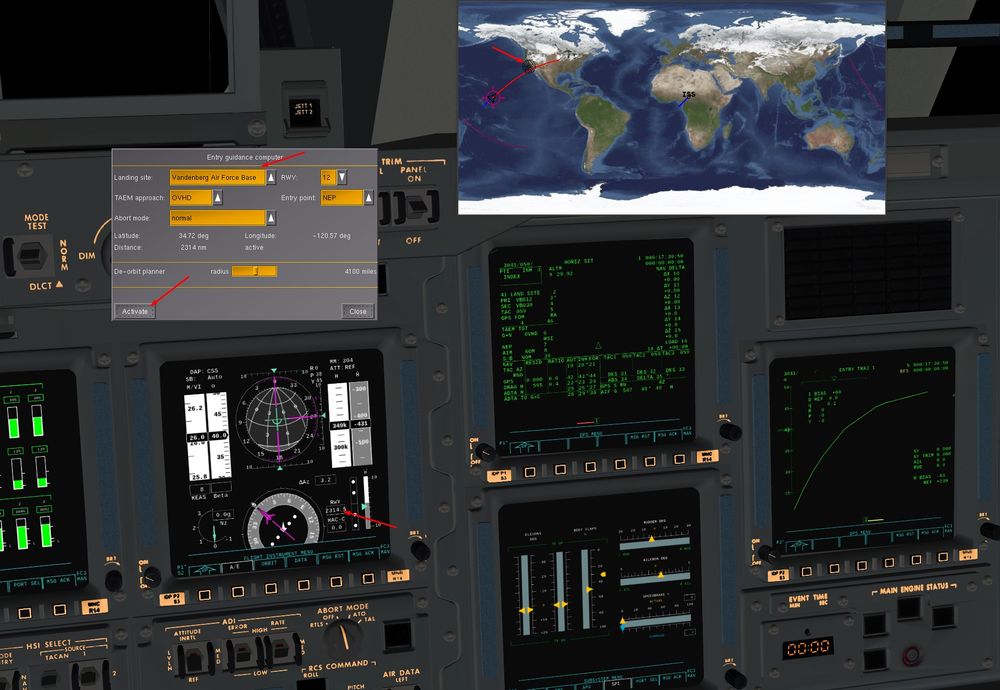
As you can see, the trajectory ends close to Vandenberg, which is where we'll land. The next thing is to tell that to the avionics (in real life, we would have done that before leaving orbit, but we just started FG...) - so let's bring up SpaceShuttle -> Entry guidance and confirm Vandenberg as the landing site by pressing 'Activate'. Don't bother with the other options like the runway, TAEM approach selection or entry point at this point, they're relevant for TAEM guidance only.
As soon as guidance is active, the FG native HUD should show a few new figures, among them the distance to destination.
Now, let's take a minute to consider our situation. The red trajectory line is a ballistic trajectory, and it's endpoint is where the Shuttle would hit the surface if there wasn't an atmosphere. Since there is an atmosphere however, we may end up somewhere else - which is the whole point of entry trajectory control.
Since the Shuttle is an aerodynamical object, it can (within limits) control its lift and drag and thus change the trajectory (shorten, lengthen or extend laterally) around the ballistic impact point - by a good 1085 miles in fact (that's technically known as 'cross range capability'). So we will aim such that the actual point where we hit the lower atmosphere is some 60 miles away from Vandenberg (at which point TAEM guidance takes over and this tutorial ends).
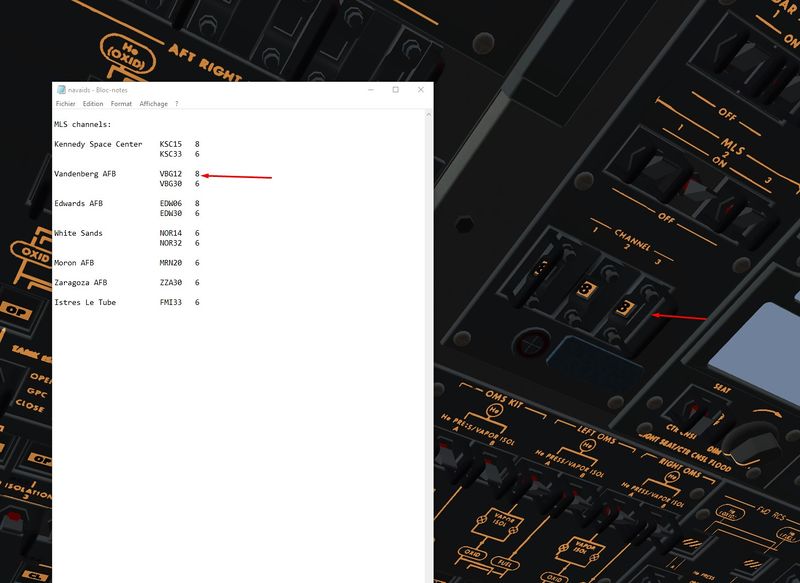
Now that you choose Vandenberg as the destination, don't forget to set the correct frequency for the MLS channels ( done normally during Pre Deorbit Preparation)
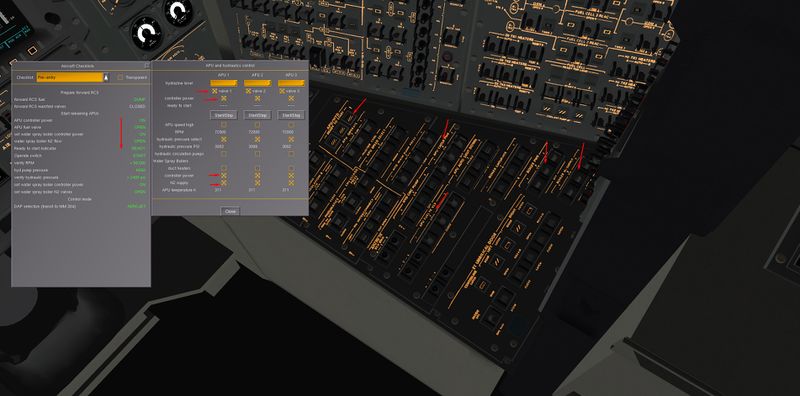
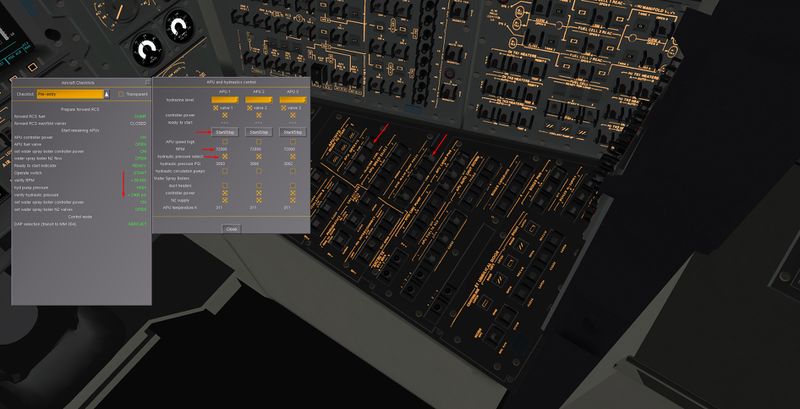
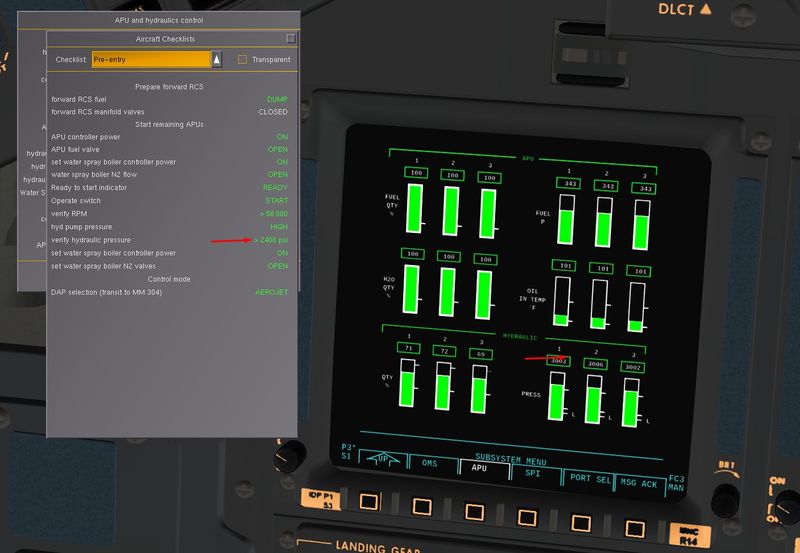
Let's assure that the Pre-Entry check is completed. It consists mainly on checking that APU are running and Hydraulics pressure is normal for Elevons actuations, Landing Gear Deployement and Nose Wheel steering.
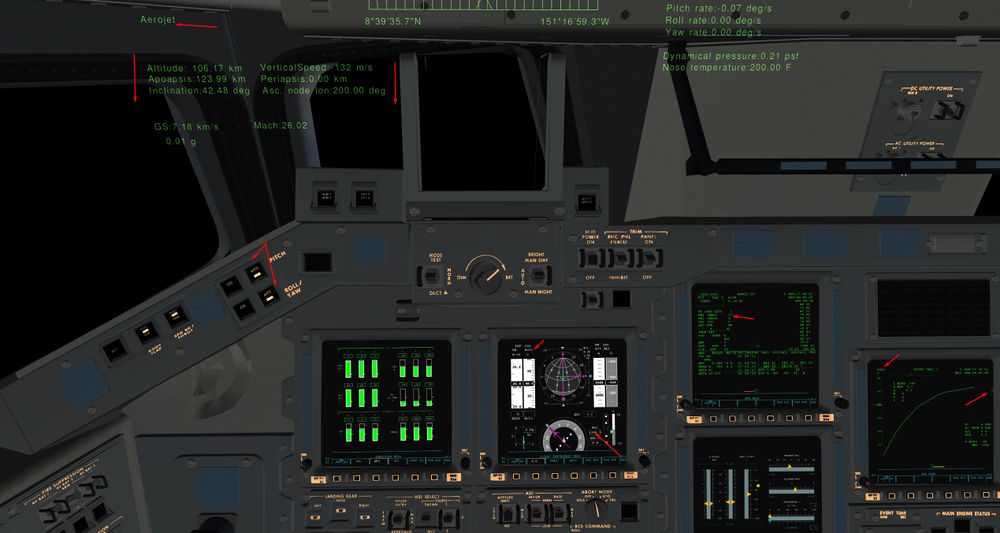
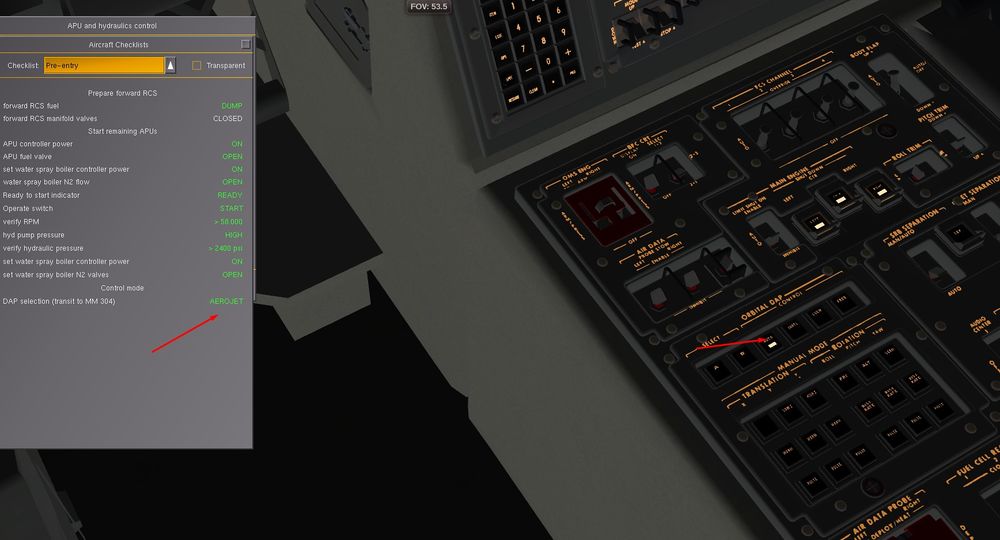
- We have a few minutes time before we really reach the dense atmosphere, so we can configure the cockpit to our needs. Bring up a DPS screen in GNC mode (it should show the ENTRY TRAJ 1) before you, next to it the PFD might be handy, and the APU/HYD and the SPI displays to your right. You may find the information from the FG-native HUD useful, though if you want to be realistic, switch the layer off (before you do so, check that the DAP selection in the upper left reads 'Aerojet' - if not, you'll be in big trouble...)
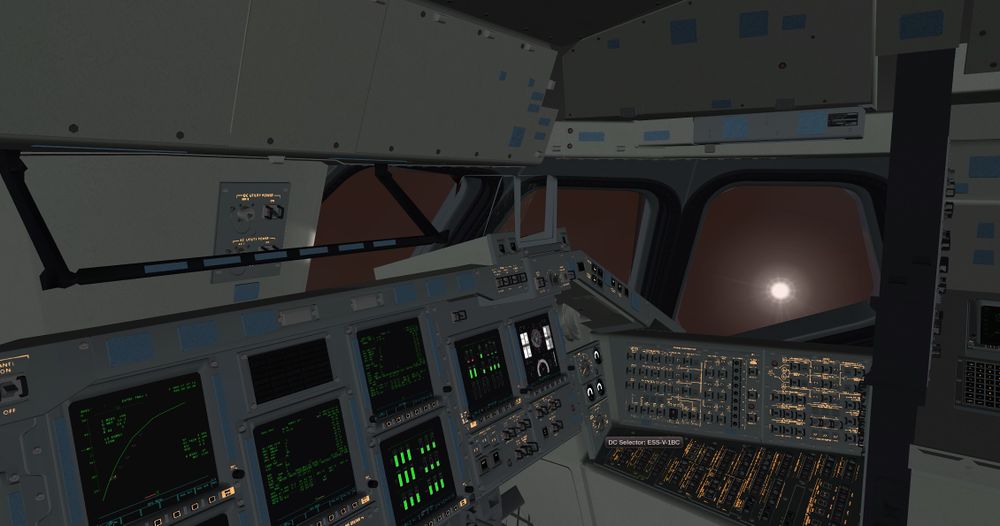
The whole configuration might look like this:
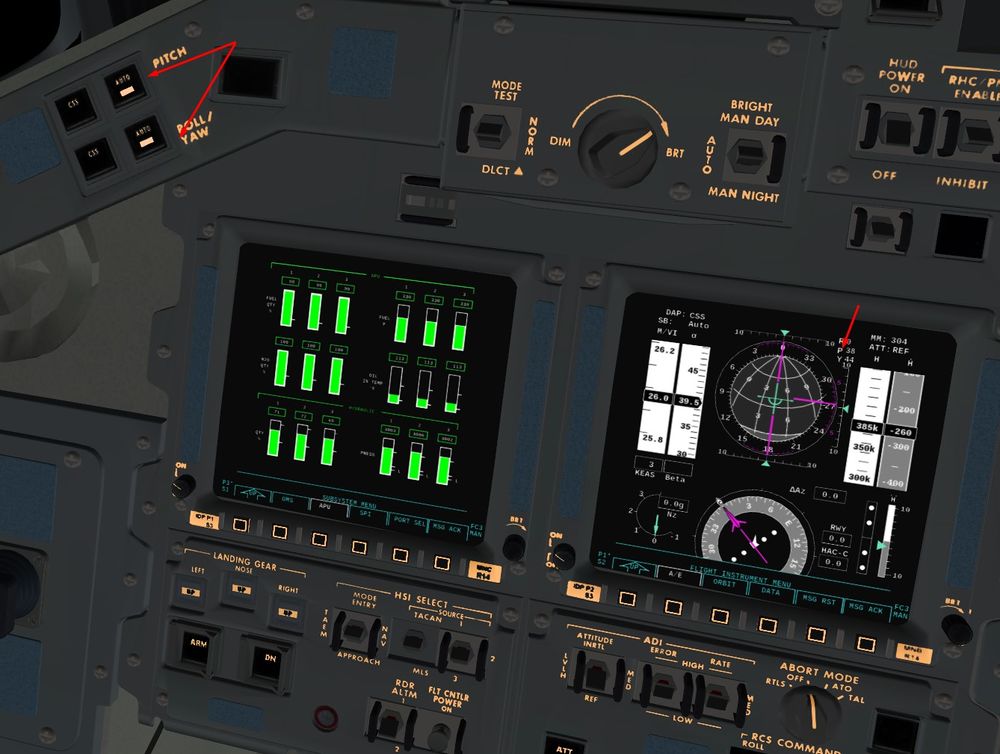
To the upper left of the leftmost panel, at the edge of the console, there's four pushbuttons. The upper two change select CSS or AUTO for the pitch channel - change the selection from CSS to AUTO and verify that the button lights up. The Shuttle will respond by automatically pitching up to about 40 degrees.
The purpose of this is as follows: During entry, thermal protection requires that we turn the blunt end of the Shuttle into the plasma stream. This translates into a rather strict Mach-dependent AoA requirement - for instance at Mach 23 we must fly 40±3 deg AoA or we'll burn and break up. Setting the pitch channel to AUTO makes the flight computer control AoA very precisely - which gives us the room to worry about trajectory control.
Of course, that means that all we can control is the roll channel, so we need to use that.
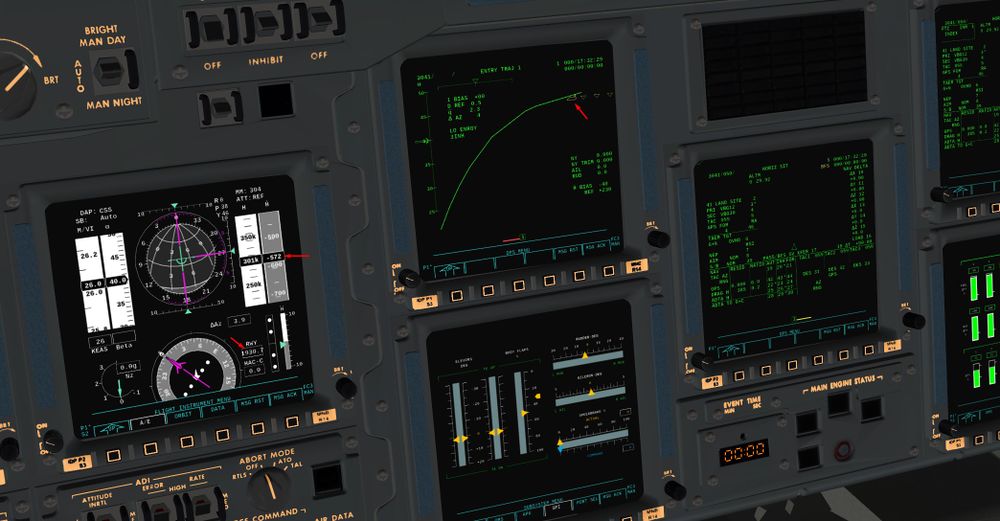
- Now wait and see - you can use the native HUD to see range to site decrease and vertical speed increase - we're soon dropping with more than 100 m/s (300ft/s). When range is some 2100 miles and vertical speed above 150 m/s (450 ft/s), you should start to see the Shuttle symbol appear on the entry trajectory display:
This is a display of remaining range (x-axis) versus velocity (y-axis) - be warned, there's no altitude shown on this display! Moving left means you're closing with the site, moving down means you're slowing down.
For the next minutes, one important thing to monitor is whether we're above or below the line - if we're above, we are too fast for the remaining range and need to slow down more, if we're below the line we're too slow and need to brake less.
The second important quantity is ΔAz - the azimuthal offset to target. If it is zero, we're headed right towards the landing site, if it's not zero we're aiming past it. For a perfect guidance solution, we want the Shuttle to move right down the line and keep ΔAz between -10 and 10. You can also find the same quantity displayed on the FG native HUD layer on the lower right.
There is nothing simple about either range or azimuth - for instance, if you aim past the target, the azimuthal difference will grow as range decreases (that's simple geometry, at the closest approach to target we miss ΔAz will always be 90 degrees). For the current approach trajectory, we cross a decent amount of latitude, and thus there will be a Coriolis force pushing the Shuttle left. The actual range we fly will thus almost never be the direct distance shown. But if we fly the line, it'll all be taken care of.
- You'll also find qbar displayed on the ENTRY TRAJ screen (and on the FG HUD). Once it reaches 10 psf and 40 psf respectively, you'll see callouts that roll and pitch control is transferred from thrusters to aero surfaces. You're likely to not notice, because the Aerojet DAP is designed to give you a crisp response in both regimes, but you can verify it via the thruster firing indicators (as during entry the nose RCS thrusters are not used, you'll not hear any thruster firings).
- Now, short recap: The pitch channel is under automatic control, determines AoA and can't be changed due to thermal considerations. The yaw channel is unstable and is also under automatic control to enforce zero sideslip (or we burn). That leaves the roll channel to control azimuth and range.
How?
Azimuth is obvious - we just roll into the direction we want to go. If we're going right of the landing site, we roll left to decrease ΔAz and vice versa. At hypersonic speeds, the turn rate will be very small even for large bank angles, as Mach number decreases we'll gradually get more nimble - so it's a good idea to never let ΔAz grow too large or it might be beyond the Shuttle's maneuverability to recover.
Controlling range is more tricky. The chain of control goes like this: Range is controlled by velocity. We have control over velocity by controlling the deceleration. Deceleration is controlled by atmosphere density, the denser the atmosphere, the more drag, the stronger deceleration. Atmosphere density is controlled by altitude - the higher up, the less density, the less drag. Altitude is controlled by vertical speed. Vertical speed is controlled by aerodynamical lift - and aerodynamical lift is controlled by bank angle, the more we bank to the side, the less lift we'll have.
Thus, if we get below the nominal trajectory, we want to fly small bank angle, if we get above we want to fly large bank angle. At the same time, we want to bank into the direction to keep ΔAz small, thus if we're right of the target, we bank left till we reach a -10 deg ΔAz, then we reverse attitude (that's called a 'roll reversal') and bank right to let ΔAz grow to +10 degrees, then we do another roll reversal.
So, as the Shuttle symbol enters the display, watch vertical speed on the native HUD layer upper left. It'll move slowly upward from -170 m/s (500ft/s) as lift builds - when it reaches about -100 m/s (300ft/s), bank towards your target. Do this carefully, don't roll much faster than 6-8 deg/s, control is tenuous at this altitude, the Aerojet DAP does a good job in hiding this from you, but don't overdo it or you'll lose control.
If you're used to how this feels in an airplane, it'll feel exceedingly weird because the guidance holds 40 deg AoA all the time - in essence you'll do this:
Watch both vertical speed and change bank angle to stabilize it at -70 m/s (-200 ft/s) (you'll have to bank towards some 60 degree for this trajectory). That's called 'hdot capture'.
Observe how with small changes in bank angle you can make vertical speed increase and decrease - there's really control here. Utilize it to maneuver the Shuttle symbol back to the trajectory (you'll inevitably go a bit below initially for the chosen trajectory).
- Watch azimuth as well and do a roll reversal (again, keep roll rates below 6-8 deg/s) when it goes beyond either -10 deg or 10 deg. During each roll reversal, your descent will slow down because you're rolling through zero bank angle and create a spike of lift - you need to capture and adjust hdot every time anew. Practice will make you perfect.
- The Aerojet DAP will leave the Shuttle in its current attitude if you do nothing, so once you have a good attitude, you can let go of the controls for half a minute (in fact, you can just nudge the Shuttle into attitude using keyboard input and center controls when you're there, this is probably easier than using a real stick).
That gives us time to check on a few other things - APU status and SPI (surface position indicator). You can take in APU status at a glance - if all is green you're fine, if anything shows red, you might have to shut down the APU. Airfoils will still work with only one APU running (just in case) but the response of the Shuttle will be less crisp and immediate.
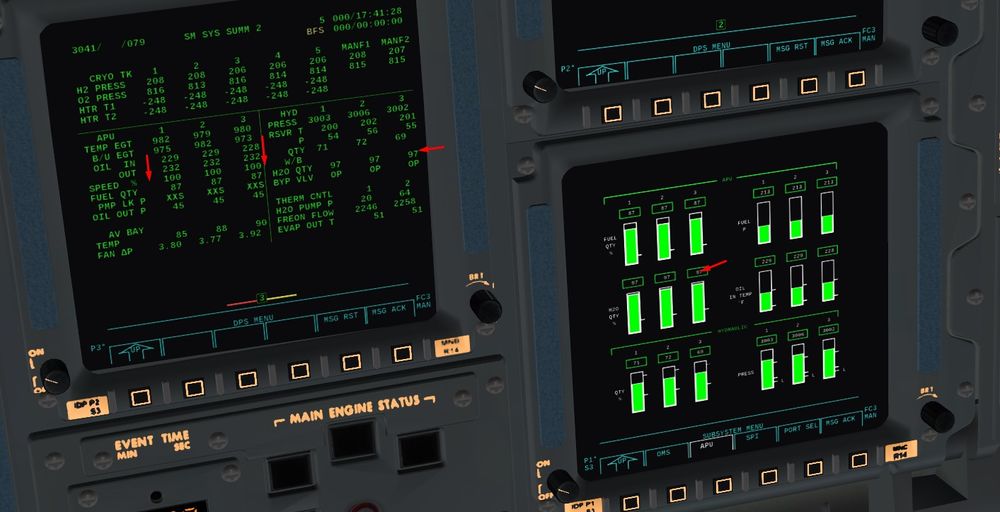
To have access to System Management during entry, you have to use the BFS which support the SM Software You can activate the display on the pedestal with BFC CRT DISPLAY switch ( display on CRT 3 if you don't change it) SYS summ 1 and 2 are usefull to have a quick sum up of critical parameters of the Orbiter.
APU Water boilers will start to activate when Oil in APU gearbox is reaching 230°F Before that Temperature, boilers are bypassed, and water quantities say the same
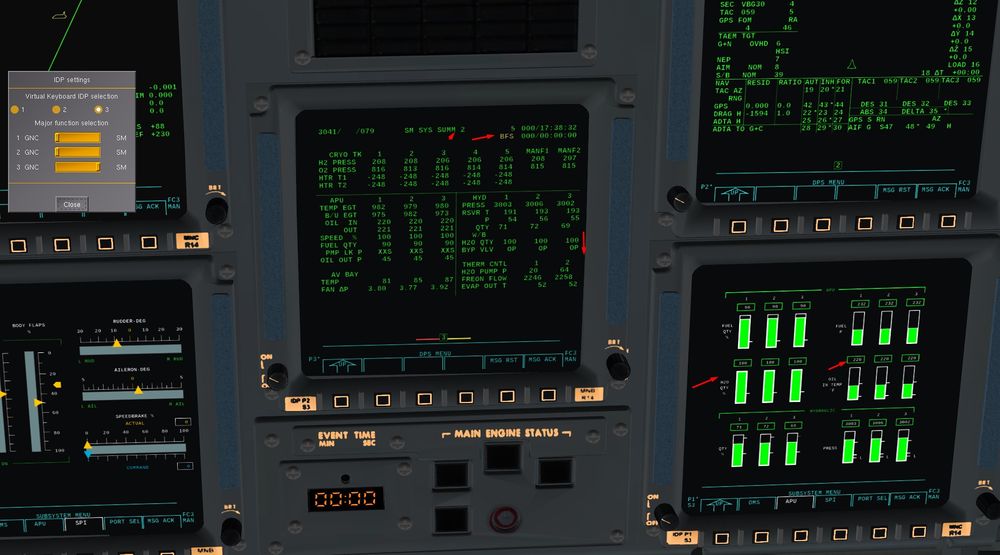
Then, once Oil Temp is high enough ( OIL IN), Boilers activate to keep the Temperature below 230 °F roughly ( OIL OUT) and H2O Quantity decreases
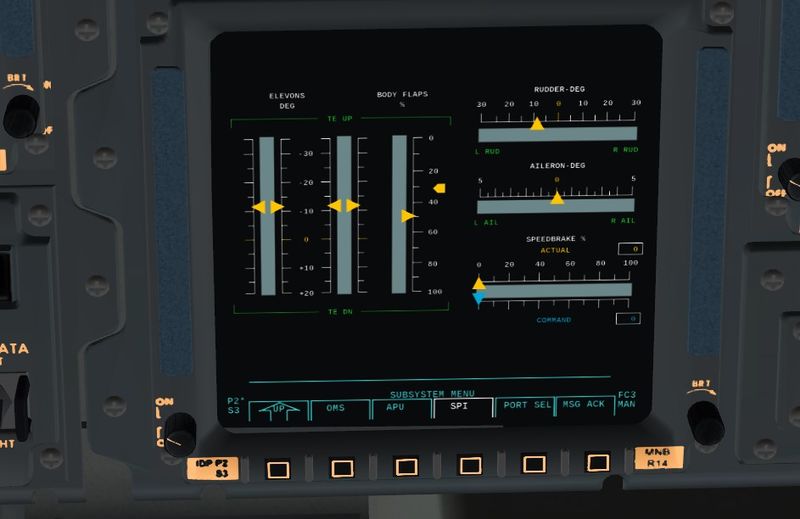
SPI will show the need for trim. Usually the elevon indicators should be close to zero - if they're not, you're gradually losing roll control. Below Mach 10, you can use the body flap and the speedbrake to try to ease the trim load of the elevons. For the loadout of this entry scenario, you can trim body flap up if you like.
Cockpit Glowing with Plasma and nice visuals of a hot situation
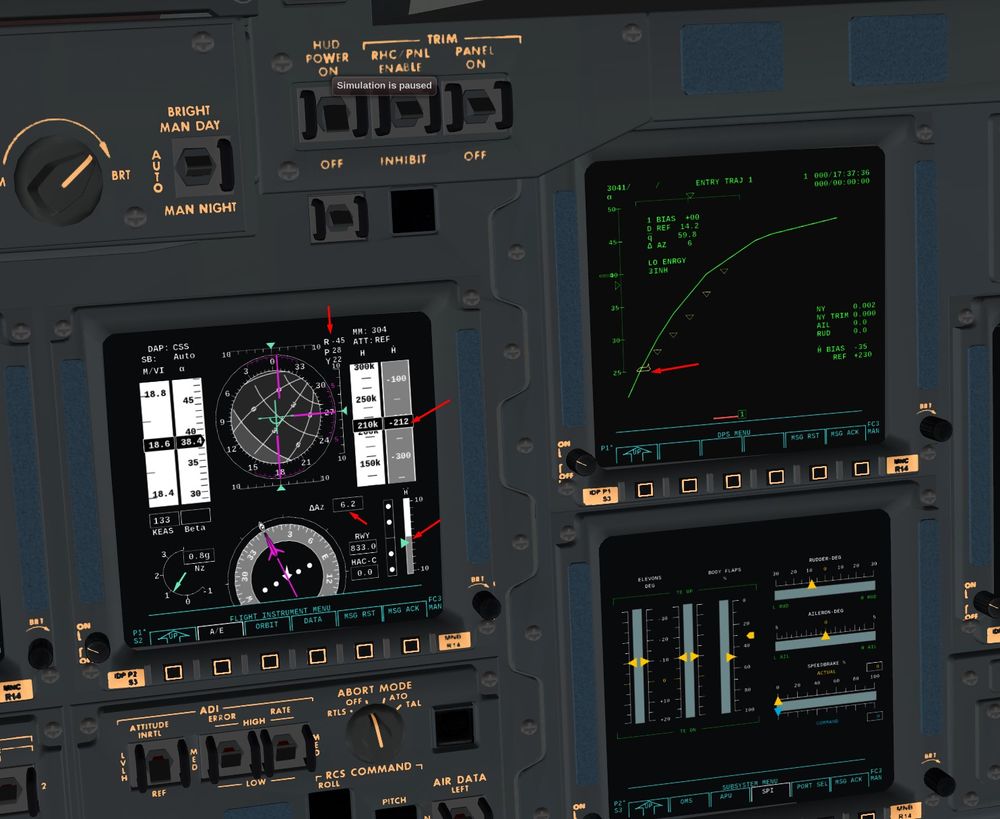
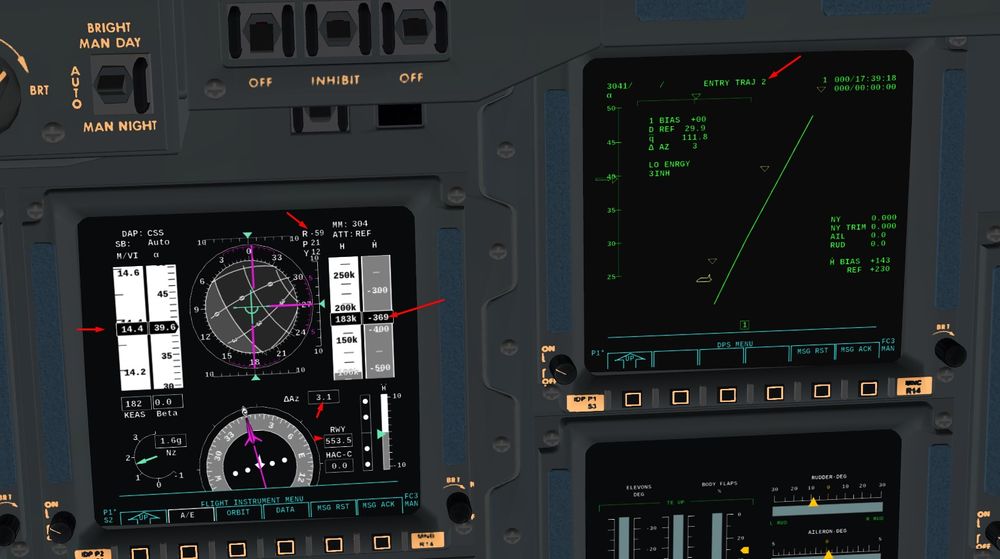
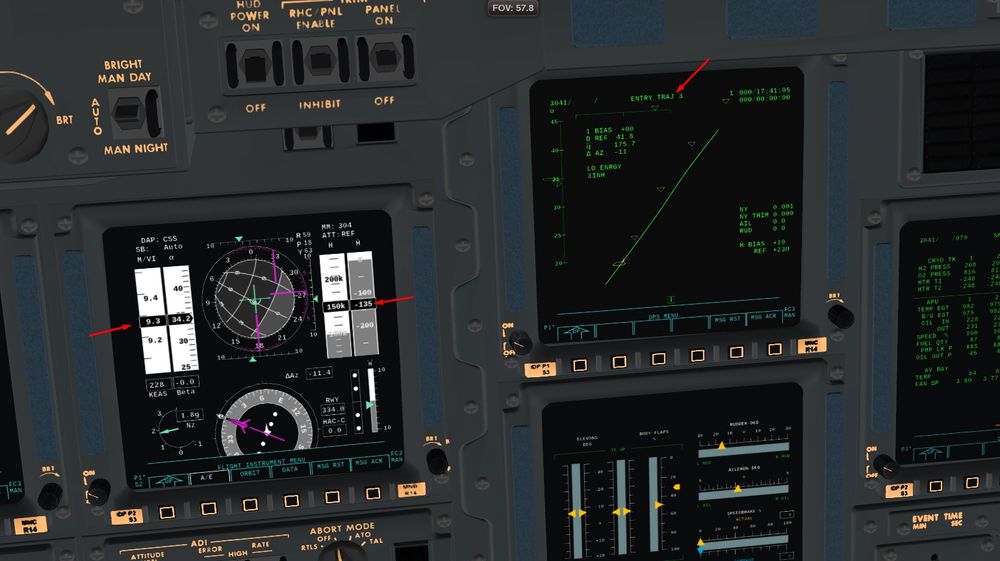
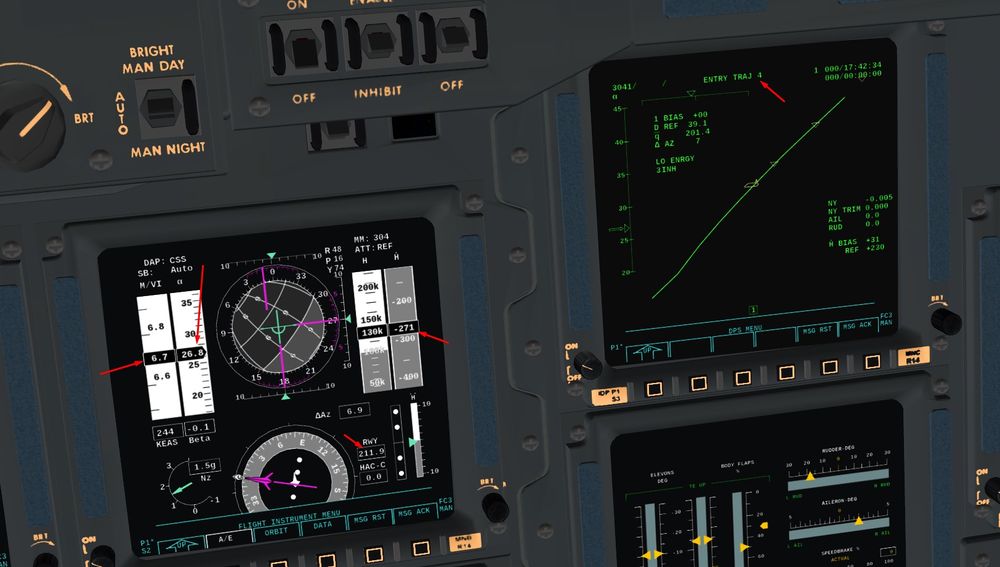
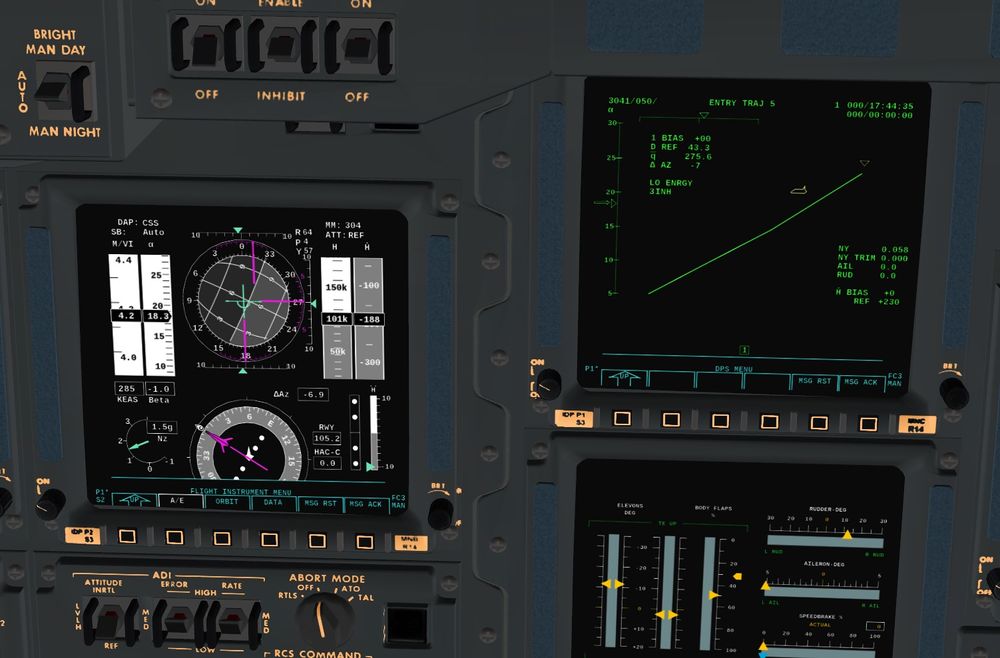
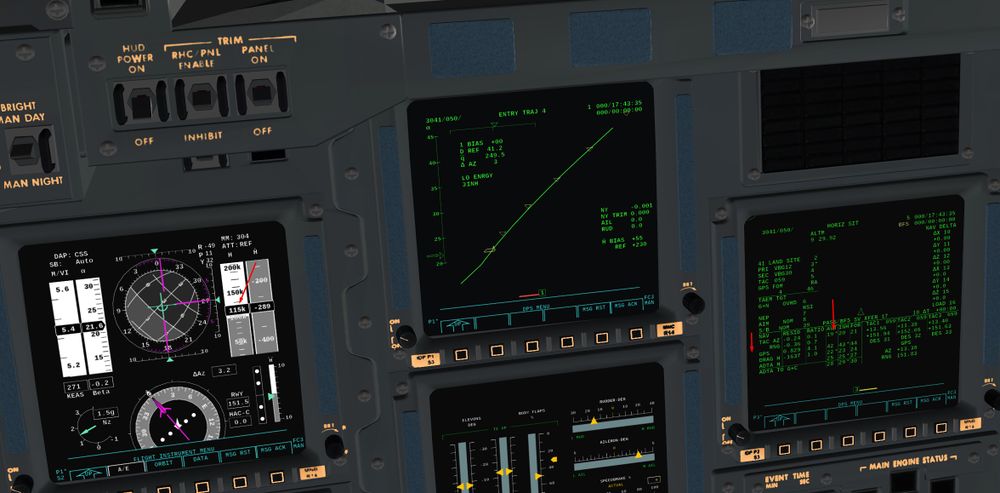
- As you slow down, the screen will automatically change from ENTRY TRAJ 1 to ENTRY TRAJ 5. If you have good control over your bank angle and sink rate, you should see somthing like this. Some different screens about Nominal trajectory and parameters to closely monitor during Entry
Below Mach 16, Entry Traj 2, Thermal Constraint phase is gone, now we have to be carefull with Over G and later ( Entry traj 4) with EAS limits that will be reached earlier than Max Temperature limits below Mach 16
Once the craft slows down further, the computer will gradually reduce AoA (no need to be alarmed) and the Shuttle will become more responsive - which unfortunately means you'll hit the ΔAz limits rather sooner than later, so roll reversals become more frequent.
Below 150 kft, you can incorporate TACAN on SPEC 50 display into Navigation Filters. It will help to update the Sate Vector ( SV) and to have a better precision
ITEM 19 EXEC
Mach 5 , time to deploy the probes (ADTA) to have more accurate datas about Speed, Altitude, and Angle of Attack
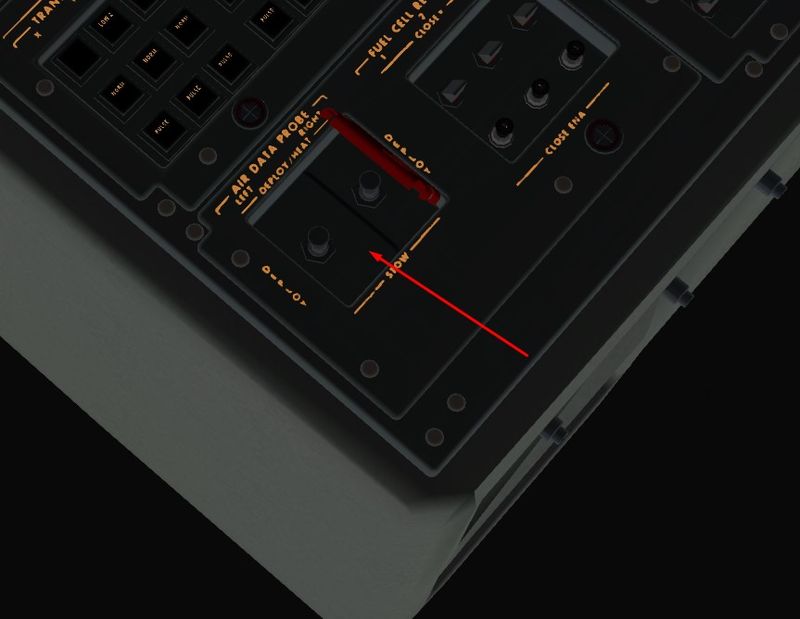
Almost at the TAEM interface, let's cross check the ADTA value on SPEC 51 with the one's we have on the Primary Flight Display coming for now from IMU ( Cross check of Mach, Altitude and Alpha angle)
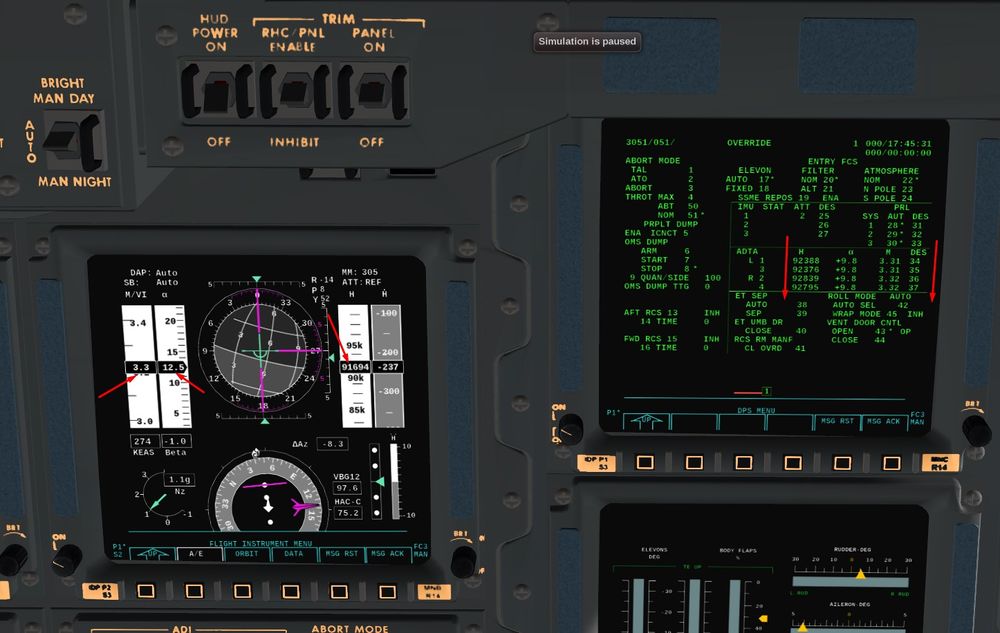
If data are good ( close enough), we can incorporate the ADTA filters on SPEC50.
Altitude for Navigation Filter ITEM 25 EXEC
Mach, Altitude and Alpha for Guidance Software ( It will feed PFD instead of IMU, like in a normal plane) ITEM 28 EXEC
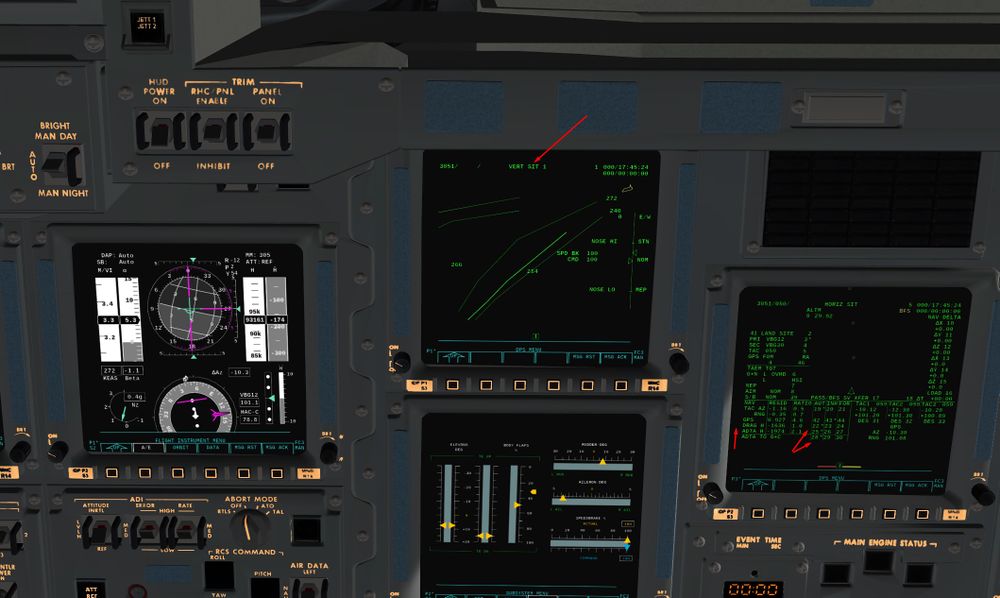
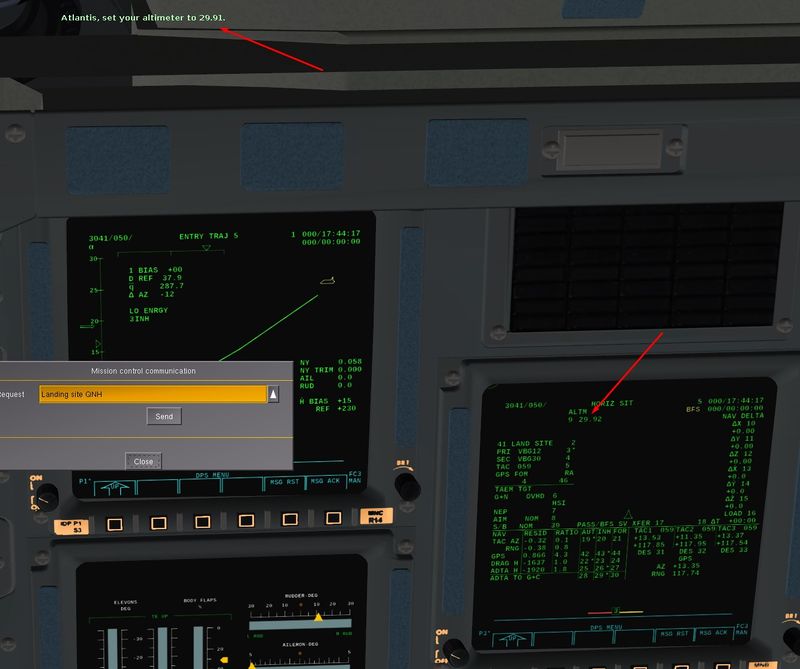
Finally, to be really accurate, Landing site QNH ( Atmospherical pressure at landing site Sea Level) can be asked to MCC and updated in SPEC 50 with ITEM 9 + X.X EXEC ( X.X being QNH given)
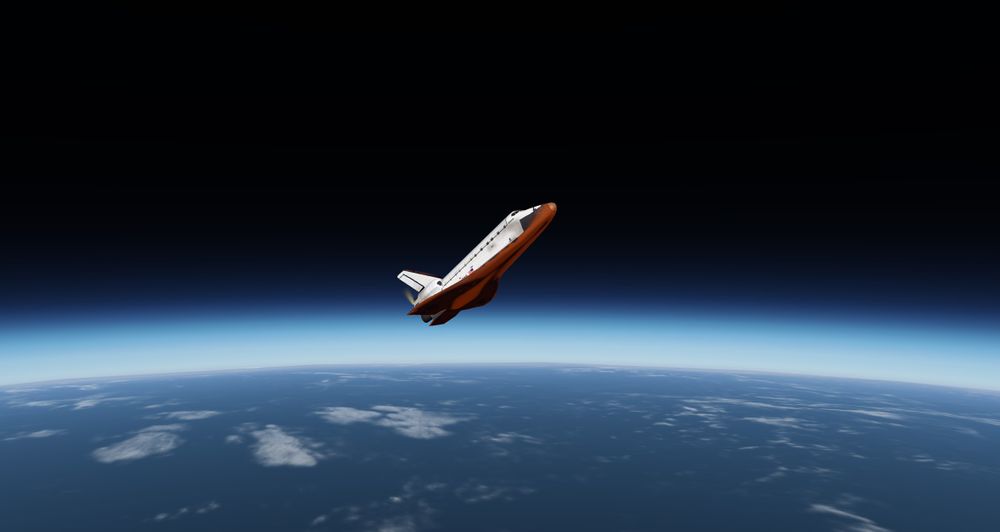
- Close to TAEM interface, you can start to see the color of the sky change to a deep blue. If you've stayed with the nominal trajectory and kept the azimuth under control, you should be some 85.000 to 100.000 ft altitude with about Mach 3 with some 60 miles to site on the indicator.
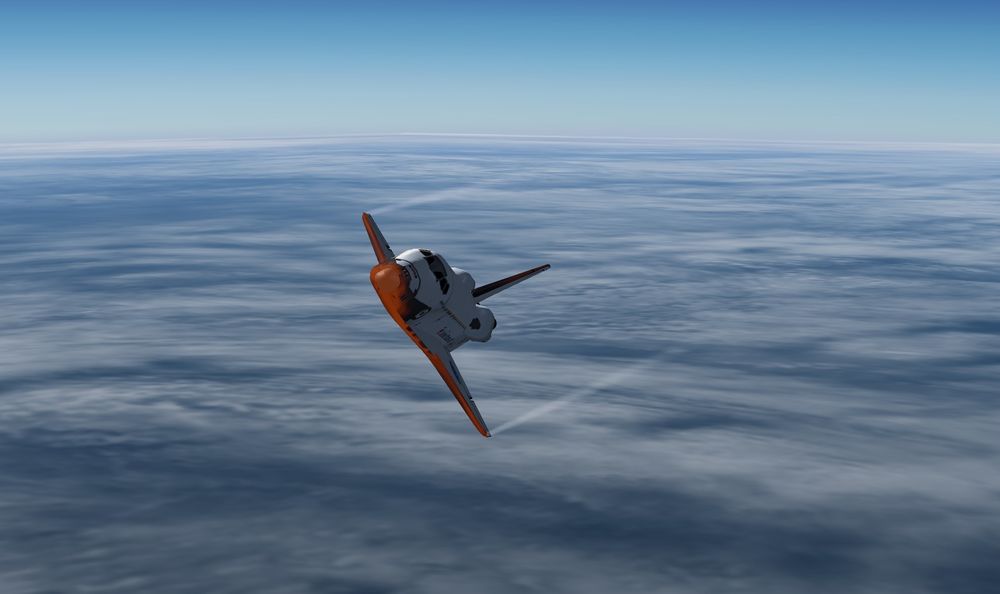
That's the point where you do an OPS transition and change from entry guidance (OPS 304) to TAEM guidance (OPS 305 VERRT SIT which works rather differently). While entry trajectory control is really different from the way an airplane is flown, during the TAEM pattern the Shuttle resembles a supersonic airplane. But that's for a different tutorial. You can still switch off AUTO control of the pitch channel and try to fly to the runway on your own (you can cheat and use the FG map for navigation...).
Note the VERT SIT and OPS 305, 90000 feet and Mach around 3, time for TAEM
- If you get much below the nominal trajectory, you need to aim at the target at the first reasonable opportunity (perhaps around Mach 14 when you have plenty of speed left and the Shuttle actually can already change direction) and otherwise fly zero bank angle for optimum glidepath. If you aim too early, it costs a lot of lift without changing direction, if you aim too late the additional distance you have to fly due to the azimuth offset is too large.
If you get much above the nominal trajectory, you can let ΔAz grow to more than 10 degrees - this will not only make roll reversals (which give additional boosts of lift) less frequent but also lengthen the actual trajectory since you'll be flying an S-curve. You can decelerate quite rapidly by selecting a high vertical velocity, but never stress the Shuttle above structural limits.
- If you're in for a challenge, try to control pitch yourself using the guidance information displayed in the FG native HUD. It's not as bad as it seems because of the 'attitude hold' characteristics of the DAP.
If you're in for a real challenge, use the m outside the atmosphere to change to the ENTRY DAP. This will allow you to directly control the airfoils with the stick like in a plane - you'll find control in the upper atmosphere extremely difficult and only gradually see a measure of stability return. You'll be hard-pressed to stay alive rather than to reach any precision on trajectory control!
- You can also try varying the entry interface location (by changing lat and lon) when you re-do this scenario - explore what to do if you're coming in higher or lower on energy, what to do if azimuthal offset is different.
