Mikoyan-Gurevich MiG-21bis
 | ||
|---|---|---|
 | ||
 | ||
| Type | Fighter aircraft, Military aircraft, supersonic jet fighter | |
| Configuration | Low wing aircraft | |
| Propulsion | Jet aircraft | |
| Manufacturer | Mikoyan and Gurevich | |
| Author(s) |
MiG-21bis team
| |
| FDM | JSBSim | |
| --aircraft= | MiG-21bis | |
| Status | Early production | |
| FDM |
| |
| Systems |
| |
| Cockpit |
| |
| Model |
| |
| Supports |
| |
| Development | ||
| Website |
| |
| Repository |
| |
| Download |
| |
| Forum |
| |
| License |
| |
| ||
|
| ||
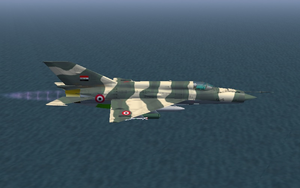
The Mikoyan and Gurevich MiG-21bis is a supersonic jet fighter aircraft, designed by the Mikoyan-Gurevich Design Bureau in the Soviet Union.
FlightGear Versions
There are currently 2 versions of the MiG-21bis available in FlightGear:
- An older version in FGAddon
- An actively developed version in a Git repository
Eventually, the version in FGAddon will be updated at intervals with the version on Git. The instructions below are covering the Git version, as it is more complete and realistic both in terms of flight model, systems and for supporting military simulation.
Performance Data
The main specifications including performance characteristics are available in a Wikipedia article about the MiG-21bis.
Keyboard Controls
| Key | Function |
|---|---|
| s | Press start button |
| Ctrl+f | Toggle Afterburner Reheat (CLR) |
| Ctrl+B | Air brakes |
| Ctrl+d | Deploy braking parachute |
| Ctrl+t | Jettison braking parachute |
| c | Toggle canopy |
| ⇧ Shift+S | Activate smokepod (the color can be changed using drop-down menu MiG-21 -> Smokepod Color)
|
Flaps and Gears
| Key | Function |
|---|---|
| ] | Flaps down |
| [ | Flaps up |
| ⇧ Shift+G | Gear handle down |
| g | Gear handle up |
| Ctrl+g | Gear handle safety |
Autopilot
| Key | Function |
|---|---|
| Ctrl+a | Auto-leveller autopilot |
| ⇧ Shift+W | Autopilot off |
Weapons
| Key | Function |
|---|---|
| f | Gun trigger |
| q | Weapons release - release selected store |
| ⇧ Shift+Q | Trigger flare release |
| n | Lock on target |
| ⇧ Shift+N | Unlock target |
| i | Rotate throttle drum up grossly |
| ⇧ Shift+I | Rotate throttle drum up fine |
| k | Rotate throttle drum down gross |
| ⇧ Shift+K | Rotate throttle drum down fine |
| r | Pylon select next |
| ⇧ Shift+R | Pylon select previous |
| Ctrl+z | Centre tank jettison |
Ground-Controlled Interception (GCI)
| Key | Function |
|---|---|
| F5 | Request Picture - full tactical picture |
| F6 | Request Bogey Dope - BRAA of nearest target |
| F7 | Request Cutoff - vector to nearest target |
Aircraft Help
Checklists
There are ca. 10 Aircraft_Checklists, which can help in many situations.
View Options
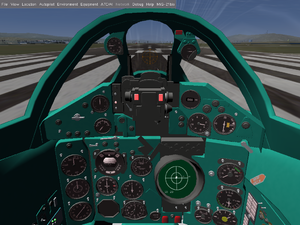
In order to get better access to switches and for better readability of the labels in the cockpit, consider adapting the views in the aircraft by using drop-down menu View -> View Options. Reduce the number of views in "Standard views" to the minimum and enable all views in "Mig-21bis" Specific Views. Then you can change the view by v and ⇧ Shift+V.
Minimal Start-Up
If using the automatic startup using the drop-down menu MiG-21 -> Autostart/Shutdown, then you still should do a couple things:
- Set the needle of the fuel gauge manually to the correct level depending on the loaded fuel. The fuel gauge does not automatically set to the level in the tank, you need to set the initial level. In drop-down menu
Equipment -> Fuel and Payload Settingsyou can read the value - maybe after having added an external drop-tank and having manually clicked into the "Ventral Drop Tank" slider to get it filled. Please observe that the total displayed will be in gallons, however the MiG uses litres (i.e. you need to multiply by a factor of ca. 3.8). Alternatively, the checklists include the fuel amounts for the various configurations. - Slave the gyro compass. First toggle the
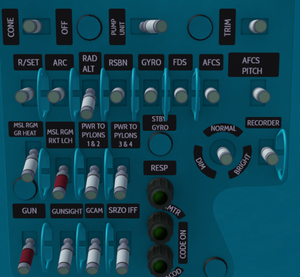
FDSswitch on the switch panel on the right wall of the cockpit. Then hold down theFDSbutton until the Heading Indicator compass needle settles (the button is positioned just to the right at the top of the attitude indicator). The compass will drift over time, press the FDS button every now and again to re-slave. - Set the magnetic declination instrument to your current latitude to help minimize gyro error. You can find the current latitude by going to the drop-down menu
Equipment -> GPSand then read the value in the top middle part of the dialogue. The magnetic declination instrument is situated on the lower right part of the console between the pilot's legs. - Turn on the auxiliary hydraulics for full aileron control (switch called
Pump Unitin the middle of the top row on the switch panel on the right wall of the cockpit). Not doing so will make it very challenging to handle the roll stability and get decent roll rates. - Turn on the
Conewith the switch to the left of the switch used in the previous bullet point. - While you are at it turn on the radar altimeter (
RAD ALT, third switch from left in the second row from the top on the switch panel on the right wall of the cockpit).
Flying
Taxi
In order to ease alignment and to prepare for later use consider enabling the gunsight:
- Flip the
Gunsightswitch on the switch panel on the right cockpit side (bottom row, second switch from left). - Flip the pipper switch (right side of the box below gunsight) and fixed net switch (under the box on the right side a bit hidden).
There is no nose wheel steering, because the nose wheel is free to swivel in any direction. Use differential breaking to steer to plane and align on the runway.
Takeoff
- Open the safety pin of the gear handle (Ctrl+g).
- Set flaps to takeoff (])
- Add full military thrust, count 4-5 elephants, set full afterburner (first reheat)
- ~150-200 km/h: 3/4 stick back
- ~250-270 km/h: ease up the stick
- ~340-360 km/h: takeoff (hold 10° of AoA until well above ground. Else you'll suffer tail strike)
- Flaps up ([)
- Gears up (g).
- Once verified that gears have retracted, set the gear handle to neutral and then put the safety pin back to closed (Ctrl+g).
Afterburner reheat is usually turned off at 600 km/h, unless you need to scramble to intercept. Second reheat (using CTRL+f) is allowed on takeoff for short runways or when you need to get in the air fast, but it isn’t a normal practice.
Autopilot
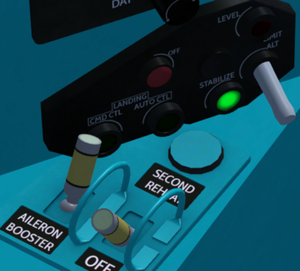
There are a few different modes - all of which are commanded by using the black panel on the front left cockpit wall below the gear handle.
Stabilise:
- In general holds pitch and roll - changes are commanded by the stick
- If in level, then it holds the heading, not the bank angle.
- Enabled by clicking on the button labeled
Stabilize. Disabled by clicking on the red buttonOffor using ⇧ Shift+W.
Auto leveller:
- Holds bank and pitch to level.
- Enabled by using Ctrl+a.
Limit altitude:
- If flying below altitude limit, pitches automatically up.
- Enabled by switching the switch
Limit Alton the right side of the panel up. The actual altitude is chosen on the console between the pilot's legs: On the left side there is a dial form 0 to 600. The minimum altitude is set in metres! - You need to have the radar altimeter enabled.
- When below the set minimum altitude, then a red light on the top left side of the front panel will light up.
Landing
- Approach with around 500 km/h
- Flaps to landing (twice ])
- Gear down (⇧ Shift+g). Once locked back to neutral
- Final approach ~350 km/h
- Once crossed the threshold idle the engine
- Touchdown at ~250 km/h
- Apply brakes and deploy drag chute (CTRL+d)
- Jettison the chute before fully stopped (CTRL+t)
Engine and Throttle Management
In general the engine of the MiG-21bis is less responsive than that of a modern jet fighter - and throttle and engine management is more subtle.
- Wait a few seconds at MIL power before going into afterburner.
- N1 and N2 are the rotational speeds of the engine sections expressed in percentage instead of in the actual rate of rotation. If N1 gets too much higher than N2, you will cause an engine surge (can happen at as low as 20% separation, it's guaranteed by 30%). Therefore one needs to keep an eye on the N1 and N2 needles and sudden changes in the throttle over a large range are bad. The max N1 to N2 ratio depends on airspeed as well, so you'll have to make sure you don't blow up your engine on a dive. The tachometer r.p.m. gauge is situated on the right side of the front panel in the cockpit - below the radar warning receiver and to the left of the radar screen.
- On the other hand the air intake cone in the nose is handled by the plane automatically, i.e. without necessary pilot intervention.
- Second reheat (CTRL-f) is only effective below 15,000 feet mean sea level, and use should be limited to 3 minutes.
Other Things to be Aware of
Metric system:
The metric system is used throughout. E.g. kilometers per hour for speed, metres for altitude, litres for liquid quantities etc.
Angle of Attack:
Getting into the yellow range of the AoA indicator results in a high chance of getting into a spin. Getting into the red range of the AoA indicator is not healthy.
Compressor stalls:
If indicated airspeed exceeds 1300 km/h, the compressor will stall. You'll notice this from the shaking and the drop of N1 and N2. Recovery is easy:
- Reduce speed
- Pull back the throttle and wait for it to spool back up
Fuel system in negative G:
The fuel system cannot feed the engine under negative G load. The engine will shut down in ~10 sec on mil thrust and ~5 sec with reheat / afterburner on. To recover:
- Stabilise flight
- Press and hold the starter button (s)
Radar Altimeter:
It only works reliably at a pitch angle up to 20 degrees and a bank angle up to 20 degrees.
Speedometer:
Please note that the speed indication on the ground is first reliable around 60 km/h. This is a realistic behaviour, not a bug. Look out of the window and guestimate the speed while you are taxiing!
Also between ca. 950 km/h and 1200 km/h the needle might wiggle. Again this is a simulation feature, not a bug.
Weapons Management
There is a separate wiki article for MiG-21_Weapons_Management.
Radios / Communication
The radio / communication frequencies must be entered before take-off. There are two ways to do it (the usual way of using the drop-down menu Equipment -> Radio Settings does not work):
- Using the separate dialogues for the Comm radio, ADF radio and VOR/ILS radio below the
MiG-21drop-down menu. - Using the drop-down menu
MiG-21 -> Select Radio Config Fileto load a file. An example fileradios.txtis included in the aircraft folder and contains formatting instructions, so you can create your own.
There is also a Google drive with example files, where others can contribute to.
(There is a FG wiki article containing the basics of radio beacons like VOR and NDB.)
The MiG-21bis is in real life equipped with
- equipment for navigation using internal systems
- using NDB's
- using RSBN
RSBN is similar to VOR's and has been used in Russia. Due to a lack of RSBN stations in FlightGear, the MiG-21bis being simulated can use VOR's.
The internal navigation system is a very simple system that uses airspeed and the heading on the gyro compass to calculate your position compared to a set destination.
The Compass
The compass is driven by a gyro that can be slaved to a magnetic compass, which is not displayed to the pilot. Before moving the aircraft on ground, press the FDS button to align the gyro to the magnetic compass. Be aware that deviations of 30 degrees or larger are possible, especially if aligning the gyro while banking, climbing, or descending. Being 5 degrees off is quite within the realm of possibility.
To ensure the most stable gyro compass usage, be sure to set your latitude on the lower front panel.
Navigation Display
All navigation display is shown on the compass on the left side of the front panel. The needle with large flags points either directly to the radio station, or to the setting of the internal navigation system.
The internal navigation system uses indicated airspeed, air temperature, and bearing to triangulate your position.
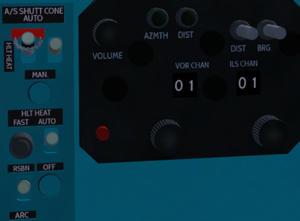
On the left cockpit wall is the radio panel used for VOR controls. On the upper right hand of that panel, there are two switches labeled bearing and azimuth. These two switches control the system.
- Ensure that the VOR system is not in use (neither green light should be illuminated) - preferably turn it off or tune it to an unused frequency.
- Enter the desired azimuth using the azimuth switch, and observing the large flag on the compass.
- Enter the desired distance, observing the distance gauge to the right of the gunsight on the upper front panel
If you wish to enter your current position as the destination, simply reduce the distance to 0.
As you fly around, the azimuth and distance should continue to point towards that destination. It may be off due to errors in measuring your airspeed or the outside temperature, or due to compass drift.
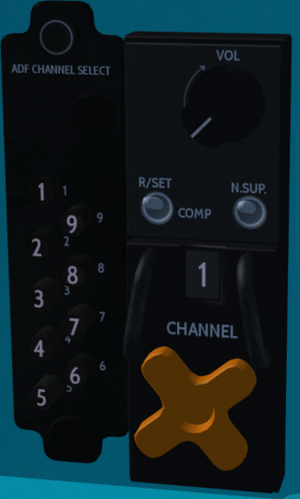
While in flight, ensure the RSBN/ARC switch on the left hand side of the cockpit is switched to ARC, and use the ADF panel on the right hand side of the cockpit to select which frequency to use. This panel has channels 1 through 9 available, and is located next to the comm radio which has a large orange knob in the shape of a cross.
Some airports use two NDB's in order to help aircraft align with the runway. If the INBOUND/OUTBOUND switch is set to OUTBOUND, the ADF radio will automatically switch to the closer NDB after crossing the outer NDB when flying towards a runway. The outer NDB should remain tuned.
To hear the ID of an NDB, switch the RSET/COMP switch located on the comm radio to COMP, and use the volume knob on the comm radio to set the volume.
While in flight, ensure that the NAVIG/PROCEED/LANDING switch on the left side of the gunsight is set to either NAVIG or PROCEED. Set the RSBN/ARC switch on the left cockpit wall to RSBN. Set your VOR channel using the left knob on the VOR radio. If information is received from a ground radio station, the green lights on the radio will illuminate indicating whether bearing (Azimuth) and/or distance (Dist) information is being received. Note that this input overrides and overwrites the internal navigation system. If contact with a VOR is lost, then the internal navigation system will still point towards that VOR, so be sure to check the green lights to make sure you are within range.
Using ILS is very similar. Ensure that the NAVIG/PROCEED/LANDING is set to LANDING, and select your ILS channel using the right nob on the VOR radio. ILS will illuminate the green lights, and override the internal navigation system, just like the VOR would.
Volume is controlled by the volume knob on the VOR radio panel.
YouTube Videos
Videos Describing the Git Version
Older Videos on the FGAddon Version
External links
| |||||
