FGCOM for Windows
| This article or section contains obsolete information.
Please refer to FGCom_3.0 instead. |
| This article is obsolete but is kept for historical reference.
The new version of FGCom is much more simple to use, a clean documentation is available at FGCom_3.0 |
In this wiki you will find a more detailed description of how to install and test the FGcom feature of the FlightGear Flight-Simulator (FGFS) on a Windows-Operating-System. This was tested on “Windows XP Professional SP2” and “Vista Home Premium SP2”.
Please consider this only as a supplementary to the FGCOM wiki-pages. Branch to those FGCom pages for all basic directions, setups, descriptions, etc.
In the following the phrase “left mouse-click” (short: “click”) means moving the mouse-pointer over the target and push the” left mouse-button”. That usually is used to mark or activate or select something. Whenever you need the so called “context-menu” in order to select an option you are asked to click with the “right mouse-button”.
Download and Install FGCOM
- Open the Internet-Download-Page with a left mouse-click onto: http://code.google.com/p/fgcomgui/downloads/list )
(For details see the "Project Home" on http://code.google.com/p/fgcomgui/, see also the "wiki"-tab on top of it) - Verify what target-directory is set for your "Downloads":
- For Mozilla-Firefox open "Preferences" now. You find the "Preferences" in the Menu-bar under "Edit" or "Tools" (Depending on version)
- For the Internet-Explorer the system will ask you where to download later during the downloading-process
In both cases the default is (or has been at installation time) your "Desktop". We suggest to keep it there or select it via the "Browse" button.- Whatever you decide to choose: Memorize that target-directory for later!!
- Start the download with a left mouse-click onto the newest entry under "Filename"
- In the appearing PopUp select the “Save”-option (a ZIP-file cannot be executed directly)
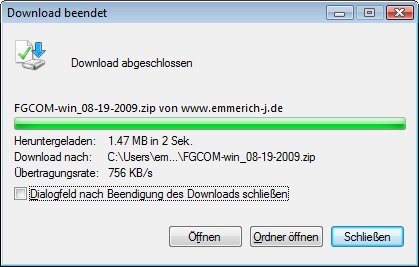
- Depending of your system-settings there may appear a download confirmation like
(Please consider the following pictures as examples - they may not represent the actual data you will see!!) - Extract the ZIP-File
- If you now have a Directory with the ZIP-Folder in it: Use that one in the following
- If not: Look for the ZIP-Folder on your desktop (or the directory you defined for downloading, see above) and use that one in the following
- Move that folder onto your desktop: (remember: We are now placing the Directory onto the Desktop - not the ZIP-file with the ".zip"-extension!)
- Locate your mouse-pointer over the folder-icon
- push the right-mouse-button and keep it pushed while moving the pointer to an empty spot on your desktop
- release the mouse-butten and select "copy"
- close the windows used for the download
- You should now have 2 additional icons on your desktop
- both with the same name
- but one having the ".zip" at the end of it.
- You may delete that one with the ".zip" at the end (Mouse over it --> right mouse click --> select "delete")
Useing the FGComGUI.exe
How to start
You may start the FGComGUI, either
- out of the Folder (the one without the ".zip" at the end, described above)
- by a mouse-double-click onto that folder and then a mouse-double-click onto the "FGComGUI.exe"
- or by creating a "Start-Icon" and using that for all future:
- mouse-double-click onto the folder (without that ".zip", see above) opens it
- move the mouse-pointer over "FGComGUI.exe"
- push the right-mouse-button and keep it pushed while moving the pointer onto an empty place on your desktop
- release the mouse-button and select "link"
- --> from now on you can start the FGComGUI always just by a mouse-double-click onto that newly created icon
- You can move the GUI somewhere else on your desktop (mouse over it, push and hold the left mouse-button, move to your desire, release button)
Testing
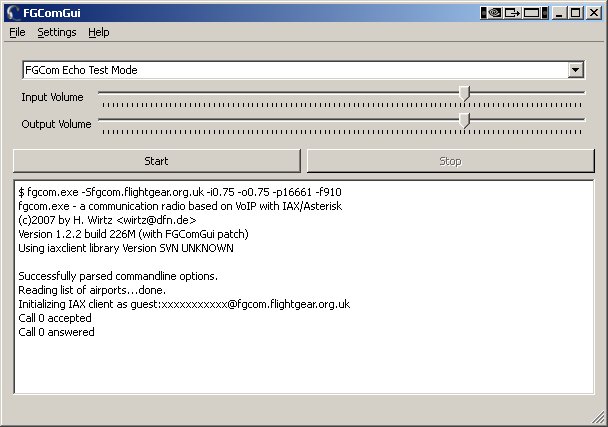
- With the down-arrow at the right side of the upper field you can select "Normal Mode" or "Test Mode" (the latter is usually called the "-f910 Test")
- the last 2 output-lines ("Call 0..") will only appear after you switched to the "FGComEcho Test Mode" (as long as FGFS is not started!)
- 1. Without FGFS: Speak into your microphone and your words should be echoed back with a short delay. e.g. say "one" - and you should notice that the "one" is returned after you finished speaking it.
- in case of trouble continue with Standard Debugging at chapter: Error: "TYPO" (mistyped command or option) or Network-problem:
- 2. With FGFS: After you started the FGFS
- Stop the FGComGUI (Click onto the "Stop"-button)
- switch to the "Normal Mode" (remember: The down-arrow at the right side of the top input-field
- click the "Start"-button.
- From then on the FGComGui follows the FGFS Radio-settings.
- Set the COM1-Radio to the test-frequency 910.00 MHz
- repeat testing as described under 1. -- but this time you have to use the PTT-button when speaking! (PTT = "PushToTalk", usually the space-bar on your Keyboard (key 32).
- If that does not work try first to use one of the very Standard airplanes (e.g. the c172), where you can be sure that the Space-bar is not reassigned e.g. for bombing or other unusual functions).
- If it still does not work see the troubleshooting under Test the FGCOM together with the FlightGear Simulator
- If after a lengthy period of "on-line-duties" the co-players tell you that the connection sound weak or disturbed try to stop and restart the FGComGUI.
Setting Options
- For a detailed description of all options click onto "Help" in the FGComGUI-Menu-bar
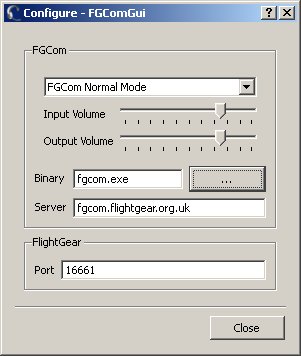
- Open the Options-Menu by clicking onto "Settings" --> "Configure..":
- also here you can select the "Normal" or the "Test" Mode (Click onto downward arrow at the right of the first input-field)
- set your "input" (Microphone) and "Output" (Loudspeaker) volumes as desired -- but be aware that these are only affecting the FGCOM behavior internally, for a basic setting of your system-audio-controls see the general setup "Adjust the Microphone and Speaker volumes" in the wiki "FGCOM_Testing".
- select a different "Binary" if e.g. you are testing different versions of the FGCom
- same with the "Server": Define a different one only if you know there is another one available for you!
- change the "Port"=16661 only when advised so by the troubleshooting procedures
Please continue with the chapters:
Creating an extra batch-file for unique environments
With the now available version of the FGComGUI the need for using an extra batch-file for special options and or environments has been drastically reduced. So it will not be described here any more in detail. If you still need to use it, you can do it by using the "fgcom.exe" within the above downloaded folder. You may also see the design-pages http://code.google.com/p/fgcomgui/.
If after all you still have problems:
When reporting that problem, please directly state:
- Your Operating-System (and if you know: your Sound-card)
- Did you read and follow this FGCOM-WINDOWS-wiki?
- Could you record and playback on your PC, without using FGFS and/or FGCOM?
- Did both (with/without FGFS) -f910 tests work? If possible send a copy of the cmd-window when FGCOM has failed
- Tell us: What happened When and How did it show up
thanks in advance.


