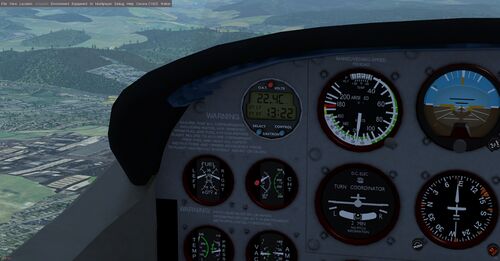
Davtron M803

The Davtron M803 digital clock displays various information to the pilot and features timers and alarms. The clock is (usually) turned on automatically when the master battery switch is engaged.
The device features two LCD rows and three buttons (one red at the top, two blue at the bottom, labeled SELECT and CONTROL).
Testing of the device can be done by holding the select-button for more than 3 seconds; all display elements and LCD segments are expected to show.
Top LCD row modes
The LCD top row can show outside air temperature (OAT) in Fahrenheit and Celsius, and also the current battery voltage. The clock will boot into the voltage mode for an quick battery health check by the pilot.
Cycling between the top modes is done by pushing the red top button.
Bottom LCD row modes
The lower LCD row displays four different time related information modes. The active mode is currently highlighted left via a blinking annunciator: UTC-Time (UT), Local-Time (LT), Elapsed flight time (FT) and an elapsed time counter (ET).
The flashing mode annunciator signals that bottom modes can be cycled using the select button.
How to enter and use the set-mode
You can enter the set-mode for the currently selected mode by pressing select and control together (shift-click in simulator). This will stop the annunciators flashing and start to flash the first digit to notify this is now selected for adjustment. You can cycle the flashing digit using the control button. Once you are satisfied, confirm the selection by pressing select. This will switch to the next digit. If you confirm the last digit, the change is applied.
Flight timer (FT)
The flight timer shows elapsed flight time in HH:MM format and starts counting up as soon as power is applied to the clock.
To reset the timer, push and hold the control button for at least 3 seconds (display will show `99:59` and reset the flight timer once button is released).
You can setup an alarm for reaching a future flight time (audible tone and flashing display) by pressing the select and control buttons together (shift-click one of the two buttons). This will enter the setup mode: the currently selected digit will blink, you can cycle it with the control knob. If you are satisfied, the select button will bring you to the next digit. When all four digits are confirmed, the alarm is armed automatically.
Elapsed timer (ET)
The elapsed timer is a custom timer and shows elapsed time in MM:SS format (until reaching one hour, then it switches to HH:MM and counts until 99:59 hours is reached). By default it is a count-up, but using the set-mode you can also enter a time to count-down from and alarm.
You can start the count-up timer by pushing the control button. The next button press stops the timer. Another press resets it to zero.
You can setup the countdown timer by by pressing the select and control buttons together (shift-click one of the two buttons). Enter the digits like just described above. After confirming the last digit, the countdown is armed and ready to be started by another press of control. The alarm will go off once the countdown reaches zero. You can confirm the the alarm by either pressing select or control. After reaching zero, the ET timer will continue counting upwards, it can be stopped and cleared like with the normal count-up timer mode. You can reset a setup countdown by just setting up a fresh one like just outlined, and then setting every digit to 0.
