AI groundvehicles

Groundvehicles can be anything, from trains to busses to cars.
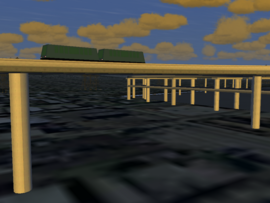
The in this article shown examples are based on the SFO AirTrain scenario, included in FlightGear 2.0.0 and later.
The model
Create a .xml file for your model, preferably in $FG ROOT/Models/Transport/. The minimum required content will be similar to:
<?xml version="1.0"?>
<PropertyList>

 <path>KSFO_AirTrain.ac</path>

 <animation>
  <enable-hot type="bool">false</enable-hot>
 </animation

 <animation>
  <type>range</type>
  <min-m>0</min-m>
  <max-m>20000</max-m>
 </animation>

</PropertyList>
- The path is relative to the directory that the .xml file is located.
- The range animation can be left out, but it will improve our framerates a little, as the model will be hidden when the viewer is 20000 meter away. For small vehicles this can be significantly less than, as they won't be visible from large distances anyway.
- For the moment the enable-hot workaround is neccesary, in order to stop the vehicles from climbing into the air. This might become redundant one day.
The flightplan
Altough our vehicles are groundbased, they need a flightplan (= route). Flightplans are saved in the $FG ROOT/AI/FlightPlans/ directory.
Some neccesary content:
<?xml version="1.0"?>
<PropertyList>
 <flightplan>
Now we start on the actual route. A route exists of waypoints. The train will calculate its own (shortest) route between the current and next waypoint. The shorter the distance between waypoints, the more accurate the train will follow the track. However, if the distance is too small, the train will miss waypoints and go off track.
It is advised to cut the route into several sections. This will ease the bugtracking, as FlightGear does not tell you what line to look if an error occurs.
  <wpt>
   <name>1</name>
   <lat>37.61467</lat>
   <lon>-122.39498</lon>
   <ktas>30</ktas>
   <on-ground>true</on-ground>
  </wpt>
- name: name of the waypoint. This can also be the name of a station, which will ease bugtracking later on.
- lat: the latitude coordinate of the waypoint.
- lon: the longitude coordinate of the waypoint.
- alt: altitude above sea level in feet. Redundant when on-ground=true.
- ktas: the speed in knots. The train will accelarte/decelerate after passing the waypoint.
- on-ground: true if te vehicle should calculate its altitude based on scenery objects (it will drive on top of them).
Special waypoints
There are a couple of special waypoints.
Wait
The following will stop the train, which is useful at stations to (un)board passengers/load:
  <wpt>
   <name>WAIT</name>
   <time-sec>20</time-sec>
  </wpt>
- time-sec: time in seconds that the train will wait before driving to the next waypoint.
Tunnel
If your vehicle should drive through (or underneath) buildings, bridges etc. you have to add tunnel waypoints. The tunnel waypoint must be added after the entrance waypoint and after the exit waypoint.
  <wpt>
   <name>TUNNEL</name>
  </wpt>
All waypoints within the tunnel (so including the ones in front of the tunnel waypoint) should have on-ground set to false and an altitude specified.
If your entire route can be considered as a "tunnel" you can also set <tunnel>true</tunnel> in the scenario.
End
Every route should end in a END-waypoint. When this waypoint is reached, the train will be removed or set back to the starting point (we will define this in the scenario file).
  <wpt>
   <name>END</name>
  </wpt>
Close the file with:
 </flightplan>
</PropertyList>
The scenario
Create a .xml file in FlightGear's $FG ROOT/AI/ directory. This is the main file of the scenario, as FlightGear will look into it to see what else to load.
The first lines of the file are general:
<?xml version="1.0" encoding="iso-8859-1"?>
<PropertyList>
 <scenario>
Now we can add the actual content.
  <entry>
   <type>groundvehicle</type>
   <model>Models/Transport/KSFO_AirTrain.xml</model>
   <name>Train-11</name>
   <flightplan>KSFO_AirTrain_blueline.xml</flightplan>
   <tunnel>false</tunnel>
   <restart>1</restart>
   <turn-radius-ft>5</turn-radius-ft>
   <fixed-turn-radius-ft>5</fixed-turn-radius-ft>
   <lead-angle-gain>1</lead-angle-gain>
   <lead-angle-limit-deg>5.0</lead-angle-limit-deg>
   <lead-angle-proportion>0.5</lead-angle-proportion>
   <rudder-constant>50</rudder-constant>
   <speed-constant>3</speed-constant>
   <pitch-coefficient>0.1</pitch-coefficient>
   <elevation-coefficient>0.1</elevation-coefficient>
   <contact-x1-offset>-18.90</contact-x1-offset>
   <contact-x2-offset>18.90</contact-x2-offset>
   <hitch-x-offset>20.00</hitch-x-offset>
  </entry>
- model: the full path to the .xml file of the model that we created earlier.
- name: the name of this piece of the train. If you have a train with multiple cars, each car needs its own name.
- flightplan: file name (including .xml format) of the flightplan (= route) that the vehicle should follow. Each train can have its own flightplan, but all cars of the same train must share a flightplan.
- tunnel: set to true if the train starts where there is scenery overhead e.g a tunnel or terminus.
- restart: after the last waypoint of the flightplan is reached, the model will be destroyed (<restart>0</restart>) or placed back on the starting waypoint (<restart>1</restart>).
- speed-constant: speed increase/decrease in kts/sec.
- contact-offset: define the points at which ground elevation is measured for pitch calulations in ft from the origin. Negative is forward. z and y components are not (yet) available. When x=0 no pitch calculations are performed.
- hitch-x-offset: the distance in feet from the model origin to the hitch/coupling of the next car. Only required on trains with multiple cars.
Close the file with:
 </scenario>
</PropertyList>
Troubleshooting
- My trains are climbing on top of eachother
- Make sure you added the disable-hot animation to the model (see #The model).
- My framerate is low
- Make sure you have less than 10 ground vehicles active at any one time. (Each coach/wagon in a train or articulated truck counts as 1.)
