Weather
FlightGear simulates weather through one of two weather engines, that provide real weather fetch, predefined weather scenarios, 3D clouds and much more. Weather simulation is not easy, and setting up these systems for the most general needs will be explained below, as well as the features they provide.

Fundamentals


Weather is the state of the atmosphere, especially the troposphere ![]() , at a given time for a given place. Calculating the complete atmosphere or even a small part of it is extremely demanding in computing power. Hence, FlightGear calculates the state of the atmosphere only for a vertical line beginning at earth's center straight through your aircraft up to an appropriate altitude. For every point along this line, the following fundamental parameters are calculated:
, at a given time for a given place. Calculating the complete atmosphere or even a small part of it is extremely demanding in computing power. Hence, FlightGear calculates the state of the atmosphere only for a vertical line beginning at earth's center straight through your aircraft up to an appropriate altitude. For every point along this line, the following fundamental parameters are calculated:
- temperature: usually in °C.
- dew point
 : indicating at what temperature the air in that point would become a "cloud". It gives an indication of the relative humidity .
 - pressure: in inches of mercury (inHg) or hectopascals (hPa)
- density: this affects the behaviour of the aircraft.
- wind: usually in knots (kt), includes the vertical component and any turbulence.
- visibility: usually in meters or statute miles (not nautical! 1 SM is ~1600 m), tries to define how far an object can be seen, horizontally.
Atmosphere layers
Like the real atmosphere, the simulated one is divided in layers. For what concerns flight, a first distinction is made with the boundary layer and the aloft layer. The boundary layer ![]() is the thin one close to ground, where the atmosphere, mainly the wind, is affected by the earth's surface. Its thickness may vary depending on how rough the ground is (e.g. sea as opposed to Alps), but in general it's less than 600 ft AGL. The aloft layer is immediately above the boundary one, and is by definition not affected by ground, i.e. there is free to flow air.
is the thin one close to ground, where the atmosphere, mainly the wind, is affected by the earth's surface. Its thickness may vary depending on how rough the ground is (e.g. sea as opposed to Alps), but in general it's less than 600 ft AGL. The aloft layer is immediately above the boundary one, and is by definition not affected by ground, i.e. there is free to flow air.
Within these layers, there are other sub-layers that can be defined, because the atmosphere still changes a lot, especially in the aloft layer. These sub-layers in FlightGear define the state of the fundamental parameters above, and can specifically define the presence of clouds. For the points in between, the values are calculated by interpolation, e.g. if you're halfway between two, the values will be set to the average.
Clouds
Real life clouds are humidity that become visible when dew point and temperature match, that is when air is saturated. Computing this for the whole atmosphere would be very realistic, and would need, again, some supercomputers, some patience and a huge amount of real data.
Clouds are therefore simulated by specifying at what altitudes they should be, their kind (fluffy, flat, cotton balls...) and other cloud-related phenomenons (precipitations, thermals...) To make things realistic one must either know very well what to do (Basic Weather) or rely on some advanced algorithms (Advanced weather.) Or use a preset scenario.
Scenarios and METAR
Defining weather can be a tedious task, as setting all the parameters for each layer is not everybody's fun. For this reason, in the in-sim dialog Environment > Weather Conditions you can choose what is called a weather scenario. Scenarios are presets of weather conditions.
Besides scenarios, FlightGear has a built in METAR interpreter. This can read the coded weather information from a METAR and apply a more or less reasonable weather, that matches the conditions described in the METAR. Since a METAR only describes the weather at a station on the ground, many parameters, esp. for the higher atmosphere are just plain guesses which just try to be reasonable.
You can either pass a METAR string with the command line options (--metar=) or choose Live data or Manual input from the Weather Conditions drop-down menu, where you can enable live weather data or enter your own METAR. The Live data option enables a task that calculates your nearest airport and fetches the current METAR for that station from NOAA weather service.
The two weather systems
The two systems are generally referred to as:
- Basic weather (BW), the historical and default weather system (sometimes called Global weather), and
- Advanced weather (AW), formerly known as Local weather and called Detailed weather in-sim (this is probably a leftover of previous dialog designs.)
Although they model the same thing, they don't have much in common. Here's a non-exhaustive comparison:
| Basic Weather | Advanced Weather |
|---|---|
| Very simple and straightforward to setup and customize, but can lead to non-realistic conditions and doesn't integrate some advanced features. | Can be puzzling, but it treats all the variables as a whole keeping things close to reality. |
| Knows nothing about the effect of terrain on weather. | Can make clouds and wind climb up a slope and flow around a mountain peak, and generate thermals consistent with the ground and the clouds (and much more.) |
| Applies the same weather conditions for your position and for every other part of the world. | Can be set up to simulate realistic weather distribution. |
| Lets you specify visibility. | Forces visibility to be consistent with the weather. |
| Is part of the FlightGear C++ code. | Runs in Nasal space. |
To make it short, each of them has their pros and cons, but in general:
- if you plan to tweak the weather setup, be ready to read some documentation, at least this article and especially for AW;
- if you plan to simply use the weather scenarios, you should probably try AW, because out of the box it gives more realistic results.
Basic Weather

In Basic Weather most calculations are based on the International Standard Atmosphere ![]() . The default weather definition is:
. The default weather definition is:
- Boundary layer, 0ft, wind 270° at 3 kt, visib. 16093.4m, 29.92inHG (1013hPa), temp. 15°C, dewpoint 5°C
- Boundary layer, 500ft, wind 280° at 6 kt
- Aloft layer, 5000ft, wind 300° at 10 kt
- Aloft layer, 10000ft, wind 310° at 20 kt
- Aloft layer, 18000ft, wind 320° at 30 kt
- Aloft layer, 24000ft, wind 330° at 50 kt
- Aloft layer, 30000ft, wind 340° at 70 kt
All other values are derived from these parameters. The atmospheric parameters described here are defined in $FG_ROOT/Environment/environment.xml, but they can be changed in-sim by selecting Environment > Weather Conditions from the menu, enabling Manually Configure Weather and clicking the Manual Configuration... button. When you want to start FlightGear with the default weather settings mentioned above you have to take care about disabling METAR Data. You can do this by running FlightGear with the following options:
--prop:/environment/params/metar-updates-environment=false
--prop:/environment/params/metar-updates-winds-aloft=false
--prop:/environment/params/metar-updates-snow-level=false
Of course, that's not the only way to configure BW. In fact, it supports the weather scenarios and can read METAR data, be it manually inserted or fetched on-the-fly.
In any case, you have to click Apply or OK to make the choice effective.
Remember that any weather you set up, it will be applied to the whole world.
Manual configuration

The Basic Weather manual configuration dialog is mainly split in four: cloud layers, precipitations and pressure, aloft layers and boundary layers.
Clouds
Clouds are stacked in layers and for each layer the defining parameters for clouds are:
- coverage (clear, few, scattered, broken, overcast)
- the altitude of cloud base (Above Mean Sea Level)
- the thickness (distance from cloud base to cloud top)
Once again, the definition of the default cloud set is in preferences.xml.
Precipitations and pressure
Precipitation should be pretty clear, just notice that only one of snow or rain can be active at one time, and that the change is smoothed, so you have to wait some time to see the full effect of the precipitation. QNH is where to set the pressure at sea level.
Snow and rain on ground
Only the ALS pipeline can procedurally draw these deposits (September 2020). Deposits of snow and rain on the ground depend on the history of precipitation. Snow can linger for weeks. As it's impossible to know the amount deposited based on the amount falling at one time, these deposits are set from the Environment > Environment settings dialog. The snow line, snow thickness, and ground wetness (puddles) can be set manually. The "Set maximum snow level from METAR" option automatically creates a nominal snow-line based on METAR and latitude.
Aloft and boundary layers
The layers tables can be filled with information on altitude (elevation AGL for the boundary layer), wind direction and speed, visibility, temperature and dew point, turbulence. These values will be interpolated for the heights in between.
Advanced Weather


If you're in a hurry, please read at least the Quirks section, for your own good.
Advanced Weather not only tries to be more realistic than the Basic Weather, but also adds some effects and tries to keep them all bound together like they are in real life. This means, to give some examples, that clouds move with the wind, and the thermals that generated them in a sunny day will move with them and keep evolving with them, varying their own activity during the day, since when they start where it's more probable (depending on ground type) to when they die over the water or because the ground heat vanishes with the sunset.
Such convective system, and other details like the ridge lift, allow not just for a nice distribution of clouds, but even for simulating soaring with gliders. And these are just some small scale effects.
Advanced Weather scenarios
Advanced Weather can also take into account the larger scale phenomenon of the interaction of high and low pressure areas. However, this can work only with some specific "offline" scenarios and another particular setting (see tile modes below), because they allow making assumptions that the METAR (live or manual) with its limited information doesn't permit (even if live METAR can compensate this to some degree.) These scenarios are:
- Core high pressure region
- High pressure region
- Border of a high pressure region
- Border of a low pressure region
- Low pressure region
- Core low pressure region
- Warm sector
These correspond to some airmasses ![]() which are well defined areas of a map (see the picture) that simulate a classic patterns of cyclones
which are well defined areas of a map (see the picture) that simulate a classic patterns of cyclones ![]() and anticyclones
and anticyclones ![]() , as we often see them in the weather forecast maps of mid-latitude areas. So, for example, if you start flying in a low pressure region and keep flying towards E-N-E, you will eventually see how the weather changes while you move to higher pressure regions. Being a large scale phenomenon, this of course requires mid or long range flights.
, as we often see them in the weather forecast maps of mid-latitude areas. So, for example, if you start flying in a low pressure region and keep flying towards E-N-E, you will eventually see how the weather changes while you move to higher pressure regions. Being a large scale phenomenon, this of course requires mid or long range flights.
Tropical areas currently have a weather tile definition but it's not used by any scenario. Also, at the moment there's no definition for polar areas.
In any case, you have to click Apply or OK to make the choice effective.
Weather tiles
This will be just a quick peek under the hood of Advanced Weather. This weather simulation engine approaches the problem of the local weather definition by using weather tiles 40x40 km² wide. There are predefined weather tiles corresponding to certain conditions, and the way AW places them is configurable, to some extent (see below.)
With some knowledge of Nasal, it is also possible to define custom tiles which can reproduce particular, very local weather conditions or phenomena (e.g. wind shear).
In normal conditions, though, you don't have to worry about weather tiles.
Advanced configuration

Although the Advanced Weather Configuration dialog doesn't look that complex, some of the options need a good understanding of what they do. Actually, most of them affect or are affected by other options, and this requires a special care, because you might try to combine incompatible settings or spend hours in tuning one that is disabled.
General settings
Here you can set the Tile selection mode and terrain presampling options.
When Terrain presampling is enabled, AW analyzes the terrain height to consider it in its calculations of the distribution of clouds.
Once this is activated, the Terrain effects option becomes available. When checked, the type of terrain (city, crops...) is also taken into account for the distribution of clouds, and their thermals if enabled; also, the shape of terrain determines ridge lift. This option is especially recommended to glider pilots, while the faster and higher pilots won't notice it, most of the time.
However, if Terrain presampling is disabled to save some CPU time, AW will not know about ground and will put cloud layers as if at sea level. This is not bad if you are at sea level, but if you're on the Himalaya you might have clouds underground. So, you might have to set the Altitude offset conveniently.
The Temperature offset is used with scenarios. Since they come with their own pre-defined temperature, that's the only way to simulate winter using them, so if you select a high pressure tile but specify a -45 deg temperature offset, you'll end up somewhere around -10 deg and get a decent arctic airmass for the effort. It has nothing to do with terrain effects.
The Tile selection mode specifies how tiles are automatically generated once the aircraft reaches the border of the original tile. It is a good idea to leave this setting as you find it, because it's automatically set when a scenario or METAR is selected. For those who dare, here's an explanation of the options:
- single tile just won't generate any further tiles. If you go outside of that beware of dragons.
- repeat tile creates new tiles of the same type as the originally selected tile, randomized to some degree. It only works with AW scenarios (to which actually corresponds a tile definition) and is automatically selected with Thunderstorm.
- realistic weather works only with the AW scenarios, and is automatically selected with them. It simulates the realistic distribution of airmasses.
- METAR is automatically selected with Live data and Manual input and non-AW scenarios. Basically, it tries to give the best interpretation of the METAR string.
The first two are good ones if you're testing a custom tile to simulate a particular weather condition, and can't be made to work with all the scenarios. Most of the time, however, the other two options are the right choice, and they're also automatically selected, so you probably shouldn't care about this option.
Wind settings


This is the trickiest part. We'll describe each setting singularly, and in what cases they can be used/will have effect.
Wind direction and speed define the lowest aloft wind in a height convenient to the atmospheric boundary layer thickness. If terrain presampling is disabled, the boundary layer thickness is 600 feet above ground level. The definition of the wind direction and speed has no effect in METAR tile mode (because AW deduces it from the METAR itself, which reports the ground wind) and/or when the wind model is aloft interpolated or aloft waypoint (because that wind is used instead - see below). Otherwise you can use it.
Gust settings are the happiest ones: they always work, immediately, no click needed, but if a new live METAR comes in (because you moved to a new area) they'll be overwritten. Their meaning should be self-explanatory. Note that gusts are only effective in the height above ground level of 1.2 times "lowest aloft wind speed"/ 10.0 times boundary layer altitude, i.e. when close enough to the ground.
Wind model defines how the wind should change in space:
- constant sets the same wind everywhere, as specified in the dialog or derived from the METAR. This wind is the lowest aloft wind, and the boundary layer behaves consistently.
- constant in tile is like the above, but adds a wee bit of realism by introducing little changes in the wind direction and speed when crossing tiles.
- aloft interpolated allows to specify through the Wind Configuration dialog how aloft winds change with altitude, similarly to Basic Weather. Does not work in METAR mode.
- aloft waypoints is like the above, but lets you specify many positions (called here "waypoints") and AW will interpolate them in the 3D space. In METAR mode it works automatically and, instead of using the user data, it guesses the vertical distribution of winds on its own based on the reported ground wind, especially using as waypoints the live METAR stations.
Finally, the Wind Configuration dialog, reachable with the button at the bottom, is the one used by the aloft wind models. It should be self explaining, but remember to set at least one waypoint if you want to use aloft waypoints in non-METAR mode. Also, the value for level zero is not meant to be ground level, but the lowest aloft layer, i.e. the one just above the boundary layer. This dialog is especially uncomfortable with waypoints, because that mode is intended for use with live aloft wind data, that someday might become available (again.)
Note that the boundary layer is always calculated, but is less realistic without terrain effects.
Thermic and visibility settings
Generate thermals should be clear. It depends on having Terrain effects enabled, and the size and intensity of these thermals can be set with the Convective conditions slider: rough makes them very localized and entering them will give you a good shake, while low makes them larger, with less lift and little to no turbulence while entering them.
Ground haze, Air pollution and Fog properties work as you move them, so we'll let you find out what they do. However, they work only when not in Rembrandt mode and with Atmospheric light scattering enabled.
Max visibility is there to prevent that AW sets a too high visibility that could kill your framerate. Preventing a dangerously high visibility is also why you need to check Realistic visibility to get a few more kilometers, but it's still on the conservative side. More on visibility below.
Weather pattern scales
These options are active only when in realistic weather mode, and are most useful if you're a medium or long haul flyer.
Airmass controls the transition between different airmasses, that are typical for the predefined weather tiles. The airmass slider regulates the property /local-weather/config/large-scale-persistence. The values you can set through the silder vary between 0.5 (small) and 2.0 (large). It determines how long you are flying in a specific weather tile and if the weather tile will change while entering the tile border. A low value reduces the probability for staying in the same weather tile whereas a high value makes it very probably that the current weather tile does not change (see weather_tile_management.nas).
Cloud patterns is in a way bound to the previous setting. For each tile type there are some basic cloud layer definitions (patterns) that are chosen randomly. The cloud patterns slider defines how "often" spatially these patterns change. With a large scale the theme of clouds will remain similar within each airmass, a small scale allows for more variation.
Quirks & caveats

Advanced Weather and its interface are known to have some idiosyncrasies and non intuitive behavior. In general, a good way of thinking of the AW engine is that it needs to be started and that, once running, can't be widely adjusted without a restart, i.e. clicking OK again. Here are some hints:
- If you clicked OK and can't see any cloud at all, you probably set up things in a way that AW doesn't like. Incompatible settings are described above.
- If you made some changes, but you can't see any even after clicking OK, and the above case is not applicable, you probably didn't follow the working pattern that AW requires:
- select the scenario (or METAR) (this will likely overwrite some of the advanced settings)
- open the advanced settings and make a (compatible) setting, then click OK
- if needed, set the sim time
- click Apply or OK in the main weather dialog.
- If you change scenario (or METAR) while the advanced settings dialog is open, it might not be consistently updated. Better to close it before changing scenario, to avoid misunderstandings.
Again, these problems are known, and are tough enough to tackle that they managed to survive through various interface redesigns.
More quirks:
- The actual weather simulation is the weather scenarios that describe the airmasses around your starting position, like reading a weather map around a position. These are what people intuitively expect coming into a simulation, and what should be normally used.The weather changes as you move, or with time. Weather simulations are driven by terrain shape and surface materials, as well as other things like sunlight. Enable Weather > Advanced settings > Terrain presampling and terrain effects (may cause slowdown in extremely old CPUs). The results of each scenario depend on the terrain around you. Simulated scenarios: core high pressure region (fair weather), high pressure region, border of a high pressure region, border of a low pressure region, low pressure region, and warm sector. You can tell which ones these are as Weather > Advanced settings > Tile selection is automatically set to realistic weather.
- "Live data" (live METAR) is not a simulation. No live weather service is - at any location you get weather belonging to one time of day, one day, one season, one long-term weather pattern like drought. Simulate another time of day, and it's wrong. Rare weather is unlikely when you fly. METAR data is also lacking and imperfect.
- You can press "Apply" to get a new set of values for randomised properties. Atmosphere state is very complex. There are many different possibilities for scenarios that describe airmasses around you. There are way more properties than is presented in the UI, or can be presented without people accidentally making physically impossible combinations. These properties are randomised at each time AW starts.
- Use Weather > Advanced settings > Temperature offset with scenarios to simulate higher or lower temperatures. This is the only way to simulate winter. Rainy scenarios produce snow-fall as appropriate.
- Use Environment > Environment settings for rain on the ground, or adjusting snow deposits - these depend on history of weather, not weather at any instant.
Autostarting Advanced Weather
In modern FlightGear Advanced Weather can be specified at start up FlightGear Qt launcher > Settings > Environment > Advanced Weather Modelling. You may also select a start up scenario, but as of 2020.3.11 LTS, you need to use the in-sim menu for other options (Nov 2021). See command line options if you are starting from the command-line - a list of options set by the launcher is available.
In older era FlightGear: use --prop:/local-weather/autostart=1 and then check the property in the Nasal init code using getprop("/local-weather/autostart"), if it's true, invoke the same routines as the dialog's ok/apply buttons (see the corresponding bindings), and you'll end up with a fully optional autostart-feature. To retain the setting, set the userarchive attribute to true. Yes, it's not straightforward.
More on Advanced Weather
If you're interested in knowing all that the Advanced Weather engine does and can do, and its inner workings, in FlightGear's base package documentation there is $FG_ROOT/Docs/README.local_weather.html. Although outdated with respect to the user interface, the mechanisms and principles are still valid.
The original project was presented in Advanced weather.
Visibility, cloud distance and performance

Basic Weather keeps visibility and weather relatively untied: by using the z and ⇧ Shift+z keys you can set the visibility you like.
Advanced Weather does the opposite, setting visibility to what the atmosphere condition suggests. However, this could set a too high visibility that could lead to bad performance. For this reason, using z and ⇧ Shift+z doesn't work as with Basic Weather, but sets the Max visibility we've already seen.
Moreover, using live METAR data will often not give the same good visibility you have out of the window. This is because the METAR string is often reported with visibility in meters, in which case the maximum is 9999 m even if it's way more. That is because METAR is intended for airport operations, not for full weather reports. AW knows that, but does what it can.
For both these reasons you might be unsatisfied with the visibility you're presented with in AW. If realistic visibility is not enough for you, you can "artificially" increase it by using Manual input and specifying it in statute miles. This way you can bypass the limit of the 9999 meters, and the atmosphere condition is adjusted accordingly and stays coherent.
The same partially applies also to how far clouds are drawn. The system is designed to draw them as far as 80 km (at least in AW), but that would easily kill the framerate of most machines. So, the slider in the Rendering options dialog is limited to 45 km. You can set it to higher values (max 80 km) by opening the property browser and editing /sim/rendering/cloud-visibility-range. In FG 3.2, though, new rendering techniques ("impostors") will allow for larger limits.
Related content
External links
- badbadweather.com "Worst METAR reports worldwide for Flight Simulation"
- EarthWindMap Interactive World map updated every three hours.
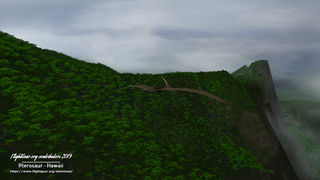
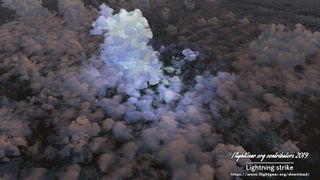
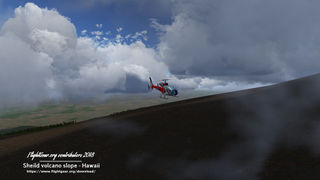
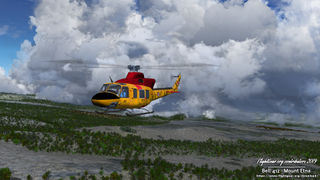
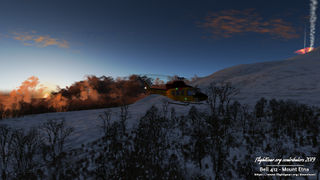
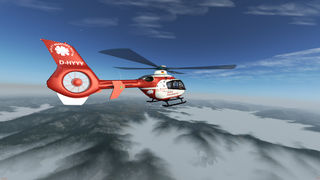
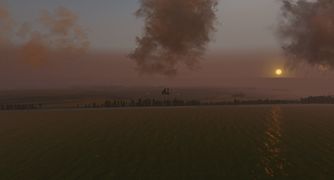
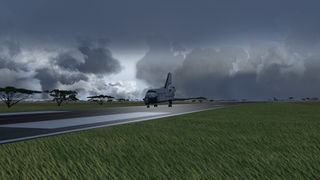
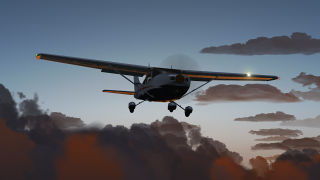
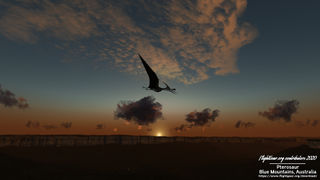
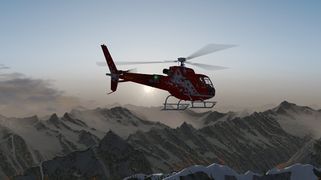
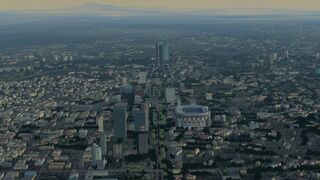
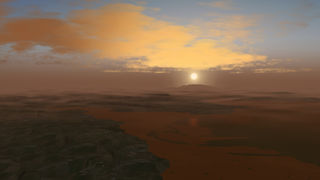
Advanced Weather Gallery (2017+)
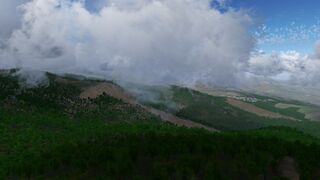
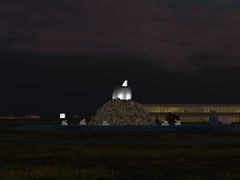
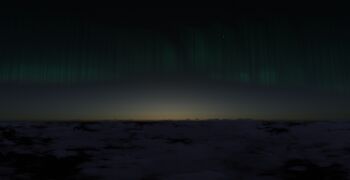
Remember the Advanced Weather options from the menubar inside the simulator, Environment > Weather > Detailed weather > Advanced settings. These screenshots have turned on things like terrain effects, terrain presampling, cloud shadows, realistic visibility, generate thermals, as well as configuring of sliders like for convection or hazes. Environment simulation options like snow-line are set from Environment > Environment settings. The View > Rendering dialog has visualisation options for the local windfield on vegetation, precipitation, visible cloud range and density etc.
Click to enlarge.

Puddles from previous rain
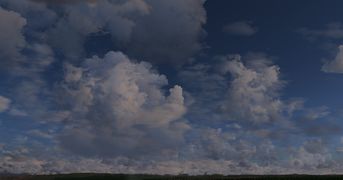
Wisps of volumetric cloud
Scattering by ice crystals
Frost from cool external temperatures
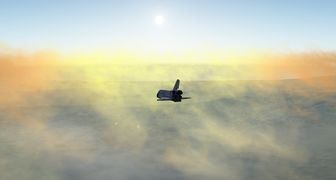
Ground fog

Lightning
Ice crystals from a 22 degree halo. The halo is red as the light reaching it is red (out-scattering)
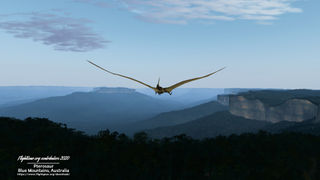
Smog particle modelling: Blue haze from organic smog released by Eucalyptus trees in the Blue Mountains of Australia
Grass swaying from the local windfield
Note layer of moisture modeled by Advanced weather
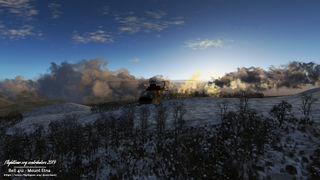
Snow accumulates more on slopes that are less steep
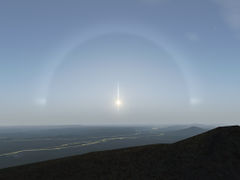
Sun halo (22 degree ring), Sun pillar (vertical line through the sun), and Sun dogs (left and right of the sun)

Aurora and Ice halo. The sun is below the horizon. The rays of the low sun are red. making the halo red

Hazy dawn. Morning fog in the distance has structure - it's patchy. There is some smog.
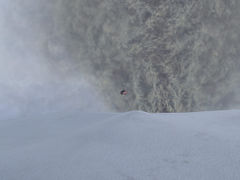
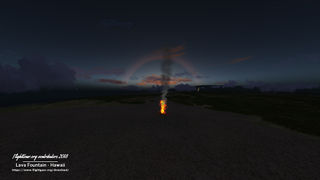
Volcanic eruptions have turbulent windfields
_01.jpg)


,_Austria_(Flightgear_2018.x).jpg)
.jpg)
.jpg)


_02.jpg)


.jpg)
.jpg)


.jpg)


.jpg)

.jpg)
.jpg)
.jpg)

_04.jpg)
.jpg)
.jpg)
_in_Iceland_(Flightgear_2020.x)_1024_04.jpg)

