IAR 80
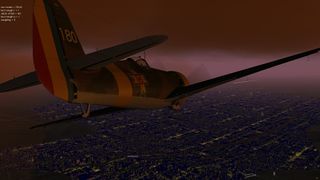
 The IAR 80 in its the default livery. | ||
 The IAR 80's cockpit as dusk | ||
| Type | Fighter aircraft | |
|---|---|---|
| Configuration | Low wing aircraft | |
| Propulsion | Propeller aircraft, Single-engine aircraft | |
| Manufacturer | Industria Aeronautică Română (IAR) | |
| Author(s) |
| |
| FDM | YASim, JSBSim | |
| --aircraft= | IAR80-YASim | |
| Status | Advanced production | |
| FDM |
| |
| Systems |
| |
| Cockpit |
| |
| Model |
| |
| Development | ||
| Repository |
| |
| Download |
| |
| License | CC-BY-NC-ND 4.0/GPLv2 | |
| ||
|
| ||
The IAR 80 was a Romanian World War II low-wing, monoplane, all-metal monocoque fighter and ground-attack aircraft. When it first flew, in 1939, it was comparable to contemporary designs such as the German Messerschmitt Bf 109B, the British Hawker Hurricane Mk.I, and the American Curtiss P-40B/Tomahawk Mk.I and superior to the Dutch Fokker D.XXI and Polish PZL P.24. Production problems and lack of available armament delayed entry of the IAR 80 into service until 1941. It remained in front-line use until 1944.
Features
Liveries
The IAR 80 has three liveries:
- Royal Romanian Air Force (default)
- Bare metal
- Romanian Air Club (fictional)
Changing livery also changes the reflectiveness of the material — the default one is rather matte, while the other two are more reflective. Livery textures are DDS files, which improves loading time when switching between liveries.
Shaders effects
The IAR 80 uses the model-combined effect shader to show a high level of detail. It uses the dirt/grit feature of this shader to add oil staining to the fuselage as engine wear increases. The aircraft also supports the normal map feature of the same shader, and uses textures in the DDS format to improve the detail and appearance.
Particle effects
- Engine smoke, changing colour and density with the thrust, mixture, and engine wear.
- Particle contrails
- Wingtip vortices when near stall AoA
- Spiral splipstream when on the ground or at low altitude
View effects
By use of Nasal scripting, the internal view shakes when rolling on the runway and simulates the buffeting experienced when approaching stall AoA.
Controls Filter
Via a Nasal script, the control input is filtered, resulting in decreased input to the control surfaces due to the airflow over them (this was necessary as the elevator has dynamic compensator tabs).
Guns
The guns are fully simulated using submodels, with particle smoke, sounds and recoil.
Advanced engine startup and management
The startup procedure is rather realistic, from a "dark and cold" state. While flying you have to take care of the engine (see the help section below).
Engine sputter
- The engine sputters when overheated/worn due to incorrect management or when low on fuel.
Aircraft help
Keyboard control
| Key | Function |
|---|---|
| Ctrl+d | Toggle canopy open/closed. |
| r | Open the cowling flaps. |
| ⇧ Shift+r | Close the cowling flaps. |
| e | Fire guns |
| Note Throttle direction is reversed. |
Cockpit reference
You'll find a quick-reference PDF file in the $FG_ROOT/Aircraft/IAR80/doc folder.
When pressing Ctrl+c to show hotspots, you will also get labels on all instruments, switches and levers that are active.
Clickable levers and sliders
All the levers and sliders in the cockpit are clickable. You use the LMB to increase value/position and the MMB to decrease the value/position. Alternately, you can use the scroll wheel to make finer adjustments.
Startup
- Turn the master switch (the big hexagonal button over the pilot's right shoulder) on.
- Set the mixture to rich (mixture lever to forward position).
- Set some throttle.
- Prime 6–9 times.
- Set propeller pitch to middle position.
- Set magnetos to both.
- Open the cowl flaps (r key).
- Engage starter button and hope it will start.
- Optional: if want you can turn the position lights on.
If the engine doesn't start and just sputters, it usually means you have not primed enough. To check if that is the case, keep an eye on the fuel-pressure gauge (left panel, right needle on gauge with two needles) — it should increase when you engage the starter. Also, when priming, make sure the lever reaches the forward end of travel, otherwise that push doesn't register.
Warm-up
- Increase the propeller pitch for minimum revs (towards the rear).
- Increase the throttle until boost pressure reaches about 400 (engine rpm will stabilize at about 1,250–1,300 rpm).
- Wait until the oil pressure gets over 1 and oil temperature reaches 60.
Taxi
- Set propeller pitch to middle position.
- Adjust the seat position to a higher setting, for better visibility.
- Use the differential brakes to steer the plane.
Takeoff
- Close canopy if you have not done so yet.
- On short runways: Set flaps to position 2 (30 degrees).
- Set propeller pitch to maximum (fully forward).
- Set throttle to have about 950 boost pressure.
- Release brakes and be prepared to correct the aircraft's tendency to yaw to the right by either braking (at low speeds) or by using opposite rudder.
- Pull forward a little on the stick until the tail lifts off the ground.
- Maintain the stick position (just enough to keep the plane level) until about 150–160 km/h when the plane should take off.
- Retract the landing gear.
- Retract the flaps at about 200 km/h.
Cruise
- Set prop pitch so that the needles of the indicator form a V around the 11:05 position.
- Set mixture lever at about the apex of the bend in the lever guard. (about 0.6–0.7 mixture).
- Cowl flaps at position 4/8.
Landing
- Reduce throttle.
- Open the cowl flaps.
- At about 300 km/h start extending full flaps.
- At about 250 km/h extend gear.
- Touchdown at about 150 km/h.
Emergency
If you lose the engine during flight the hydraulic system loses pressurization making it inoperable. Although flaps and brakes become inoperable there is an emergency landing gear deployment procedure that you can use:
- Set the gear safety knob to the safe position.
- Check the air pressure gauge.
- There needs to be enough air pressure for gear deployment (above 70).
- If air pressure is too low, pump using the manual pump on the right of the cockpit.
- Check airspeed below 250 km/h.
- Release the gear emergency lever on your left side.
- Check gear down and locked as indicated by the gear indicator.
Notes
Limits
- VFE (maximum flap extended speed): 300 km/h. If exceeded, the flaps will jam; can be reset by the failure manager.
- VLE (maximum landing gear extended speed): 250 km/h. If exceeded, the gear will jam; can be reset by the failure manager.
- VNE (never exceed speed): 750 km/h IAS. If exceeded, the ailerons/elevators/rudder will tear off, depending on their position; can be reset by the failure manager.
- Maximum positive g-force: 7 g. If exceeded, the wing(s) will bend, resulting in bad aerodynamic behavior; can be reset by the IAR 80 menu.
- Maximum negative g-force: -4 g. If exceeded, the same as above will apply.
Engine management precautions
The engine will exhibit increased wear signs and will eventually stop if you do not follow these guidelines:
- Do not exceed 950 boost (except occasionally on take-off/in emergency).
- Keep below 1,500 rpm until engine warm-up complete.
- Keep below 2,800 rpm in normal flight.
- Keep the oil temperature below 120° C.
Gunnery controls
By default, the weapons are not armed. If you desire, you might set their corresponding switches to your pleasure.
Gallery
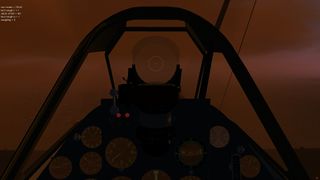
The IAR 80's cockpit as dusk
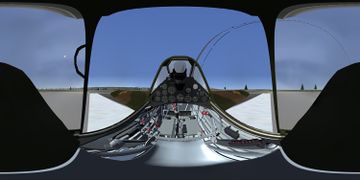
A panorama of the IAR 80's cockpit
The IAR 80 at dusk
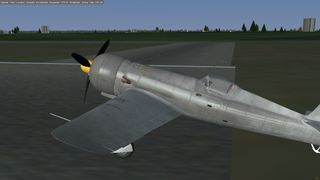
The IAR 80 in bare metal livery
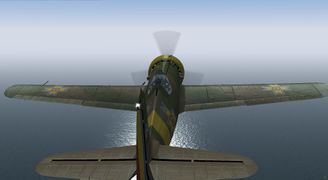
IAR 80 over the ocean

Detail of the IAR 80's wing

IAR 80 in the air
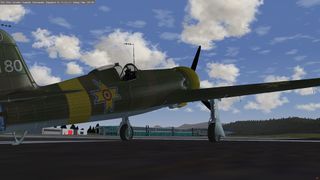
IAR 80 on the ground


