Douglas C-47 Skytrain
| PAF hangar | |
|---|---|
 | |
| Type | Airliner, Military transport aircraft |
| Configuration | Low wing aircraft |
| Propulsion | Twin-engine piston aircraft (Piston aircraft, Twin-engine aircraft) |
| Manufacturer | Douglas |
| Author(s) |
|
| FDM | YASim, JSBSim |
| --aircraft= |
dc-3-jsbsim (wheels) dc-3-yasim (wheels) dc-3A (Amphibius) dc-3-copilot dc-3-psg1 dc-3-psg2 dc-3-psg3 dc-3-psg4 |
| Status | Production |
| FDM |
|
| Systems |
|
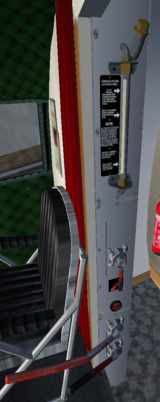
| Cockpit |
|
| Model |
|
| Supports |
|
| Development | |
| Website |
|
| Download |
|
| Liveries |
|
|
| |
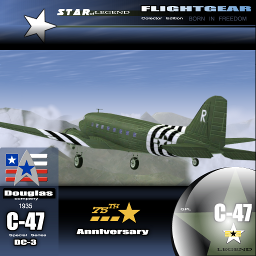
The Douglas DC3 C-47 is the military version of the famous DC3 transport aircraft. Shortly before the Allied invasion, the factories of the Douglas Aircraft Company produced two of them, every hour. At the end of World War II, over 10,000 C-47 had rolled from the factory.
With its strength and its exceptional flight characteristics, the Douglas DC-3 has transcended time and needed to be present in Flightgear. Started by Emmanuel Baranger, members of the PAF have done great work on this aircraft. Following different orientations about the aircraft development, members of the PAF have decided to continue the development of the aircraft independently of Mr. Baranger. There are currently two versions of the DC-3 and there are differences. This page is about the presentation of PAF developed version.
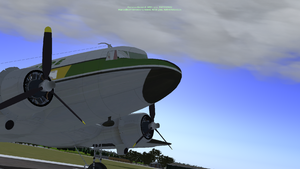
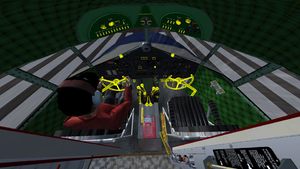
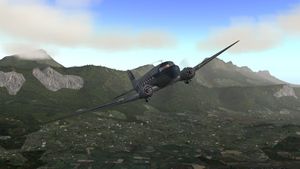
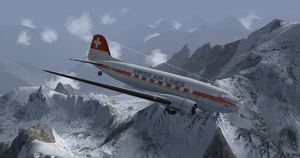
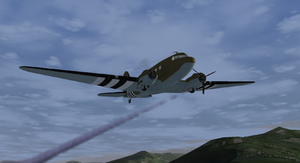
As of 22/12/2013 the version distributed through the Flightgear Aircraft download page (Douglas-Dc3_20130107.zip) crashes on at least some computers when trying to operate mixing and propeller levers using the mouse (see [1] bug report). For the version available from the download link the levers can be operated using the typical keys ('m/M' and 'n/N') and so is flyable even though I have still experienced short freezes of a few seconds when looking around too much in the area of the levers.
Features
Dual Control
With the DC-3, dual control is highly developed. It allows many users to connect to one aircraft at the same time.
There is one place for a copilot --aircraft=dc-3-copilot which allows you to control entirely the DC-3. All switches and controls are available for the copilot.
Then there are 4 places for passenger --aircraft=dc-3-psg1, --aircraft=dc-3-psg2, --aircraft=dc-3-psg3, --aircraft=dc-3-
psg4 which doesn't allows control of the DC-3. You are just onboard and can fly with him.
Hydraulic system
The hydraulic system of the DC-3 is very complete. It has been created as closely respecting the constructor documentation as possible. The hydraulic system is used for these equipments :
- Brakes
- Landing gears
- Cowl-Flaps
- Flaps
- Wipers
In order to use one of these equipment, you need to have at least one engine running in order to have an hydraulic pressure.
Fuel system
The DC-3 is equipped with 2 main tanks and two auxiliary tanks. As in reality, the two auxiliary tanks are not connected to the main tanks. So if you run out of fuel in the main you can switch to the auxiliary tanks with the fuel selector located on the pedestal. You can see the amount of fuel remaining in each tank with a fuel gauge and a switch located next to co-pilot.
Electric system
The electric system simulates the charge and discharge of the battery. When engines are running, batteries are charging. When you use electric equipment, the batteries are discharging.
Paratroopers
The DC-3 has long been used for skydiving, so it is important that they be present. To drop the paratroopers the pilot must open the cargo door Ctrl+D then engage the switch "Parachute signal" located on the driver side overhead.
Options
The DC-3 has a menu of options to customize it to your liking. To make it appear click on the "Douglas DC3/C47" menu, then "Options." Options are :
- Show Yokes = Show/hide Yokes
- Show Pilot = Show/hide pilot
- Show Copilot = Show/hide copilot
- Details High = Show/hide 3D details (curtains, engines, lights, extinguisher...)
- Glass reflection = Show/hide reflect shader of windshield
- Landing light cone = Switch between light cone and plane light about landing light
- Autostart = Setup DC-3 to start engines. Click on "Autostart" then press key s in order to start engines
- Select version = Choose interior themes
- Immatriculation = Set aircraft extinguisher
More features
- Many animation
- 3D Cabine
- Tutorials
- Real sound of DC-3
- More than 70 Liveries
Aircraft help
Startup
- Turn Master Battery ON (situated on the left of the overhead)
- Set selectors tanks on their respective main tank (rotate switch situated on the pedestal)
- Engage Boost Pump left and right (situated on the right of the overhead)
- Set magneto at "both" (situated at the middle of the overhead)
- Engage left starter switch then right starter switch (situated on the right of the overhead)
- Disengage parking brake (⇧ Shift+B)
You are now ready to align yourself on the runway.
Take-off
- Go to the runway threshold
- Make sure the flaps are retracted
- Set Cowl-Flaps valves on "Trail" (to the right of copilot)
- Release the parking brake ⇧ Shift+B
- Align yourself with the track -Make sure you're aligned face to the wind!-. You can unlock the tail wheel by flipping the lever at the bottom of the pedestal from right to left L
- Lock the tail wheel by flipping the lever at the bottom of the pedestal from left to right L
- Set the mixture on "Auto Rich"
- Increase to maximum the propeller pitch
- Set full throttle
- Gently pull the stick so that the tail of the aircraft stays on the ground a few seconds to the lead in the first few meters of acceleration.
- During taking speed you will be very focused to correct the path of the DC-3.
- Arrived at 55/60 kts release the handle, the tail will rise.
- Now the tail is lifted be extremely focussed on keeping the plane centred on the runway line. Use the rudder and, if necessary, the left and right brake. This part is very tricky but with a little practice it can be done
- Continue to take speed to 70-80 kts and then gently pull on the handle.
- You begin to leave the ground, begin immediately to increase the trim to facilitate your ascension
Speeds & limits
Speeds in KIAS (Knots indicated airspeed) : airspeed indicated
| VSO | Stall speed in landing configuration | 64 KIAS |
| VS1 | Stall speed | 68 KIAS |
| VMC | Min. control speed with Critical engine inoperative | 76 KIAS |
| V1/V2 | Take-off decision/safety speed | 84 KIAS |
| VR | Nose-wheel take off speed | 84 KIAS |
| VX | Speed with best angle of climb | 84 KIAS |
| VXse | Best angle of climb with a single op. engine | 84 KIAS |
| VY | Speed with best rate of climb | 91 KIAS |
| VYse | Best rate of climb with a single op. engine | 95 KIAS |
| VLO | Max. landing gear operating speed | 84 KIAS |
| VA | Design max. manoeuvring speed | 120 KIAS |
| VNO | Max. structural cruising speed | 158 KIAS |
| VNE | Never exceed speed | 190 KIAS |
| VLE | Maximum landing gear extended speed | 148 KIAS |
| VF | Designed flap speed with 1/4 flaps | 135 KIAS |
| VF | Designed flap speed with 1/2 flaps | 99 KIAS |
| VF | Designed flap speed with full flaps | 97 KIAS |
Links
- http://clement.delhamaide.free.fr/PAF/Douglas-Dc3.tar.gz
- This DC-3 has been forked from http://helijah.free.fr/flightgear/hangaren.htm (Instructions in this wiki page are not available in the forked version)
- Flight manual (backup)
| ||||||||

