Howto:Lightmap
| Caution
The model-combined effect shader has replaced the separate light map shader. The separate light map shader should be considered deprecated and should not be used for new development. See Howto:Multi-channel lightmap for a recent guide how to implement lightmaps. |


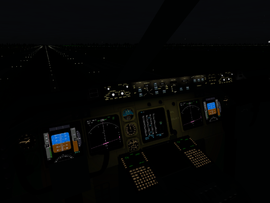
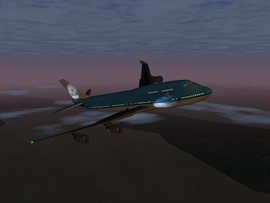
A lightmap is a texture that contains the brightness of surfaces in a computer graphic. The darker a pixel on the lightmap, the less emissive the corresponding pixel will be on the color/photo texture.
Some reasons why lightmaps are useful:
- They allow us to light surfaces without the need for creating alpha layers (like formerly used on many aircraft).
- We can edit the colors of a texture, without interfering with the lighting. Useful if you want to add some dirt to your panels, later on.
- Lights look realistic at all times of day. Unlike a textranslate animation, where you change between day/night textures (often being too dark during dawn/dusk).
- Altough a more common practice is to set illumination of faces with Rembrandt, lightmap is a good approach to create realistic illuminations when Rembrandt can not be (graphics card lower resources) or is not (--disable-rembrandt) used. Some Rembrandt enabled aircrafts replace illumination with emission animations when Rembrandt is not operable, but lightmap will be a more amenable alternative, without requiring a computer power-house.
The lightmap
You'll have to create a lightmap for every single texture that is meant to be lightmapped. This can be done by hand, or via some 3D Software, like Blender (which will be used in the example on this page).
- Open/import your model in Blender.
- Go to Add > Lamp, and select on of the lamp types. The light will be created in the model's origin.
- Lamp: spreads light in all directions. Can be used for anti-collision lights, navigation lights etc.
- Area: long/large lamp areas, like instrument panel lighting where fluorescent lamps are used.
- Spotlight: for lights in a specific area/direction. Used for landing lights.
- Move/rotate the lamp to the prefered location/orientation. Note: leave the scale tools untouched, scaling the lamp does NOT affect the lightmap.
- Select the lamp (right mouse click) and open the Shading menu (F5). This is where we can edit the lamp. Some of the more important settings:
- Dist: the distance (in meter) at which the light intensity is half as intense as at the source.
- Energy: intensity of the light.
- R/G/B: the color of the light. Yes, lightmaps support colors!
- SpotSi: width of the spotlight beam in degrees.
- SpotBl: softness of the spotlight edge. Softer edges create a more natural look for most aircraft lights.
- Select the object you'd like to create the lightmap for. Go into editing mode and then back to object mode (to load the object's texture).
- Go to the Scene menu (F10) and open the Bake tab. Select Full render and click the big Bake button. Blender will now start generating your lightmap.
- Change your mainwindow (or add an extra window) to UV/Image editor. You will see the lightmap being created bit by bit.
- When the lightmap is finished, click Image > Save as... and save the image in your aircraft's directory.
That's it! Now, you probably want to see how it looks on your aircraft, which is explained in the next sections. If you are not yet satisfied with the result, you can edit your lamp's settings (step 4) and add more lamps to see what effect that has on the result.
FlightGear 2.6.0 and onwards
/Effects/lightmap in the .xml must be replaced by /Effects/model-combined-deferred (or /Effects/Building for buildings), see $FGDATA/Docs/model-combined.eff/ for some explanations
The XML configuration
A common way to set up the lightmapping of objects in FlightGear is by creating an Effects file that contains the shader's effect, and then call that Effects file from the XML of your object. To see all possible configurable option of the Effects file read Docs/model-combined.eff. This file can be located within your aircraft Folder in Models/Effects directory, and be named, as an example, shaders.eff. It can contain the lightmap, normal map and other reflection information. Example below includes the minimal necessary to configure the lightmapping section.
Models/Effects/shaders.eff
<?xml version="1.0" encoding="utf-8"?>
<PropertyList>
  <name>shaders</name>
  <inherits-from>/Effects/model-combined-deferred</inherits-from>
  <parameters>
    <lightmap-enabled type="int">1</lightmap-enabled>
    <texture n="3">
      <image>../../Models/Instruments/InstrumentDir/Lightmap.png</image>
    </texture>
  </parameters>
</PropertyList>
Here, name tag includes a name for the effect, then inherits, as expected from /Effects/model-combined-deferred.
The tag lightmap-enable needs to be switched to 1 (use), because by default is set to 0 (not use).
The texture slot for lightmaps is texture n="3". Other slots had been specified for different effects as indicated in the Docs file. Image tag points to the location of the lightmap file. The use of relative paths here, allows this code to be embedded in any Aircraft with some ease. The light-map file will be RGB color-space. the tag lightmap-multi will allow information of the light map to be stored separately in the Red Green and blue channels. By default is set to 0 (no), and the information used will be that stored in the Red channel.
Other important tag that can be modified is lightmap-factor, and this allows changing the intensity multiplying it from a factor between 0 to 1, and thus dim or intensify the light, or even use it as an on-off switch.
Finally, we introduce the Effect in the XML configuration file, located, let's say in Models/Instruments/InstrumentDir subdirectory within your aircraft. This file will typically also contain the path to the 3d model (the ac. file), and other animations applied to it. The effect is applied to each object in the 3d model, that requires it. Several objects can be applied to the same effect. The section of the XML file that applies the effect will read as follow:
Models/Instruments/InstrumentDir/file.xml
  <!-- Lightmap -->
  <effect>
    <inherits-from>../../../Models/Effects/shaders</inherits-from>
    <object-name>Object1</object-name>
    <object-name>Object2</object-name>
    ...
    <object-name>ObjectN</object-name>
   </effect>
Now, the tag inherits-from has a relative path to the shaders.eff file, created/edited in the previous step. Then every object within the 3d model that the effect will be applied to will be listed, one object per line.
Known problems
- Animation tags can be used to create collective names for a set of objects within the 3d model, and allows animations to be applied to the collective object instead. It is noteworthy that although this strategy will work O.K. with animations (such as an emission animation), it does not execute properly with the lightmap effect.
Therefore, avoid the following in your xml configuration while applying a lightmap effect.
<animation>
     <name>Collection-Object</name>
    <object-name>Object1</object-name>
    <object-name>Object2</object-name>
    ...
    <object-name>ObjectN</object-name>
</animation>

  <!-- Lightmap -->
  <effect>
    <inherits-from>../../../Models/Effects/reflect</inherits-from>
    <object-name>Collection-Object<object-name>
  </effect>
FlightGear 2.4.0
| Note Material shaders must be enabled in the View > Rendering options dialog for lightmaps to work. |
The xml configuration
In your model's .xml file, add the following block of code:
<effect>
    <inherits-from>/Effects/lightmap</inherits-from>
    <parameters>
        <texture n="1">
            <image>Aircraft/747-400/Models/Effects/lightmap.png</image>
        </texture>
        <condition><use>/controls/lighting/logo-lights</use></condition>
        <factor><use>/controls/lighting/panel-norm</use></factor>
    </parameters>
     <object-name>fuselage</object-name>
</effect>
In which:
- image: the lightmap itself
- condition: when this property is greater than or equal to 1, the
lightmap will be enabled.
- factor: can be used to control the intensity of the light, on a
0-1 scale.
Remember that such a block is required for each single texture that you want to lightmap. You can have multiple objects per effect, but not multiple effects per object.
Known problems
- FlightGear does not support multiple shaders per object. Therefore, you'll have to choose between the reflection or normalmap shaders and the lightmap.
- There is no flexible way to (de)select lightmaps on a per-object base. Currently it only listens to one per-object definable property.