Howto:Step-by-step Scenery
Jump to navigation
Jump to search
| This article is a stub. You can help the wiki by expanding it. |
Status: TeXnicer 05:50, 29 February 2012 (EST)
Scenery Development: Step by Step
Aspects of Modelling and Simulation
- Terrain Data and Texture (Landclass?)
- Usable Surface (e.g. Runways, Taxiways, Parking areas)
- 3D-Models (e.g. different LOD, day/dusk|dawn/night)
- Navigation data (e.g. ILS/VOR/NDB/TACAN, radio, tower, ground)
- Interaction (e.g. reaction of models to environment like wind, weather, radio requests)
- AI (automatic, semi-automatic, interactive behaviour of NPC/NPV)
Usable Surface
'WED'
- Program (current suggestion: 1.1beta) http://wiki.x-plane.com/Scenery_Tools
- Documentation http://wiki.x-plane.com/Airport_Customization#Importing_airport_data
- fake x-Plane folder [ROOT] needs:
- Sub-Folder: 'Custom Scenery'
- dummy files: 'X-Plane-i686' and 'X-Plane-i686'

Creating "fake" X-Plane-Folder for WED
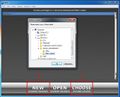
Selecting X-Plane-Folder at WED startup


3D Modelling
'Blender'
- Use the older version: 2.49b, since 2.6 throws errors using outputs with FlightGear, further 2.6 has not an proper .ac export yet.
- python needs to be installed
- Keep the amount of faces low, better use textures.
- Textures are in 2^n x 2^m size (e.g. 512px x 256px) and .png format. Recommended programs: inkscape, The GIMP.
- LOD should not be created by animation/distance feature but in OSB itself.
- Still only Trigs and Quads are allowed faces. CTRL+R "loop cut" might help to control the faces' shape then.
- Merge existing Objects into one
Issues/Todo
- yellow lines flicker
- some power pylons stand in groups too close together
some airports:
- tower view location wrong and/or too low
- objects(windsock, beacon) on runways
- airports flooded with water or terrain
- incorrect location of runway and reference point
- better layout availible on gateway.x-plane.com
'OSM'