Kyushu J7W
 | |
|---|---|
 | |
| Type | Fighter aircraft, Military aircraft, Historical aircraft |
| Configuration | Canard aircraft, Pusher aircraft, Low wing aircraft |
| Propulsion | Propeller aircraft |
| Manufacturer | Kyūshū Hikōki K.K. |
| Author(s) | Tat Nishioka |
| FDM | YASim |
| --aircraft= |
j7w j7w2 |
| Status | Development |
| Development | |
| Website |
|
| Repository |
|
| Download |
|
| License | GPLv2+ |
|
| |
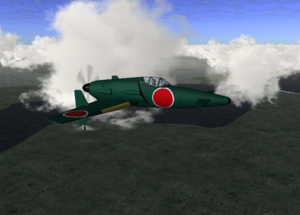
The Kyūshū J7W1 Shinden (震電, "Magnificent Lightning") fighter was a World War II Japanese propeller driven aircraft prototype that was built in a canard design. The wings were attached to the tail section and stabilizers were on the front. The propeller was also in the rear, in a pusher configuration. It was expected to be a highly maneuverable interceptor, but only two were finished before the end of war. Plans were also drawn up for a jet-powered version (J7W2 Shinden Kai), but this never left the drawing board.
The J7W was developed for the Imperial Japanese Navy as a specific response to the B-29 Superfortress raids on the Japanese homeland. It was to be operated from land bases. The canard concept was tested first by building a number of gliders with this layout, designated MXY6.
The first prototype, the only one to have flown, is currently in storage at the National Air and Space Museum.
Aircraft help
Flaps makes the aircraft nose-down (Remember this is a canard-type aircraft). Rapid control will get the aircraft stalled and spinned - Careful and gentle control is a "must." The use of autopilot is not recommended since some autopilot functions such as "Vertical Speed" actuate elevators rapidly, which makes the aircraft stall.
| Key | Function |
|---|---|
| ⇧ Shift+d | Decrease hydraulic torque converter pressure (decrease boost) |
| d | Increase hydraulic torque converter pressure (increase boost) |
| ⇧ Shift+e | Trim aileron right |
| e | Trim aileron left |
| ⇧ Shift+f | Decrease water methanol injection |
| f | Increase water methanol injection |
| ⇧ Shift+n | Coarse propeller pitch |
| n | Fine propeller pitch |
Takeoff
Start the aircraft with +300mmHg or higher, actuating rudder to keep it on the center line. Pull the stick when the speed reaches at 100 kt, and you will take off at about 110 kt. As the torque of the engine makes the airplane spin clockwise, use aileron and/or rudder to keep it stable.
Climb
Adjust the clumb angle within 15 degree and keep the speed higher than 120 kt with full throttle. Do not actuate the elevator rapidly, or the airplane spins like a gyro.
Cruise
Trim and cruise at about 2300 rpm. No rapid controls, or you get spinned like a gyro. When you sense a sign of stall, move the elevator (or other control) back a bit to stablize the aircraft.
Landing
Slow down to 250 kt and make a long sweeping turn. Put the flaps down, adjusting the elevator trim so the nose doesn't fall too much. Put the gears down and make flaps full-down at 140 kt. Touch down at 100 to 120 kt pulling the nose up a bit. Making flaps up at the time of touch-down will ease nose go up a bit.