User:PTMN/Tutorial 777 Quickstart
| This tutorial is a draft.
Please do not pay much attention to it yet. |
This tutorial is aimed at people who simply want to go from A to B with the Boeing 777 and are new to jet flying in FlightGear.
Here, we will cut corners, a lot of corners. But hopefully, getting the Boeing safely off the ground and back down where you want it will be a good starting point to learn more in depth.
There will be things done here which are not realistic or correct. The goal of this tutorial is not to teach you how to fly a real 777, rather it's to teach you how to do it in FlightGear.
Prerequisites
- An hour of your time
- Basic installation of FlightGear 3.4
- We will only use things that are installed by default
- You have to know the basic FlightGear controls to fly an airplane manually
- If you haven't even been able to take off with a cessna, take a look at the FlightGear Manual first
Briefing
The flight for this tutorial will be short for a 777-200, but it doesn't have to be pointless.
Our mission will be to fly the large but empty 777-200 airliner from San Fransico International Airport (KSFO) to Sacramento International Airport (KSMF). The day before, the 777-200, which was headed for KSMF, was diverted to KSFO because all runways at KSMF were shut-down. The reason for this shut-down was not disclosed, but everything is back to normal now.
Step 1: Launch FlightGear
- Start the FlightGear launcher
- Select the Boeing 777-200 as your aircraft
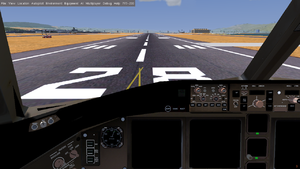
- Select KSFO (default runway) as your departure location
- Launch FlightGear
Step 2: Start The Engines
We'll skip the entire checklist and start-up procedure.
- In the menu, click on 777-200 > Autostart
- Set the flaps to 5 (press ] twice).
That's it.
Note: If you want the full manual procedure, have a look at the Start Procedure.
Step 3: Set the Route
We're going to fly from KSFO (San Francisco International Airport) to KSMF (Sacramento International Airport) A very short flight. It's so short we take a little detour in our route.
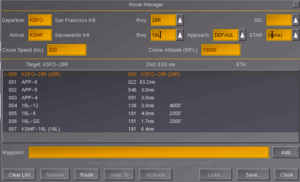
- Open the Route Manager (Autopilot > Route Manager)
- In the destination airport, fill in KSMF and choose runway 16L
- Click "Activate"
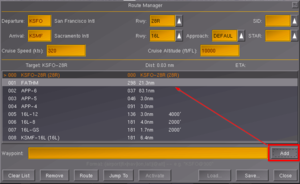
- Add a waypoint "FATHM"
- Select KSFO in the list of waypoints
- At the bottom, type FATHM
- Click "Add"
- The waypoint should be added right under KSFO itself, if not, move it up there (you can just drag and drop)
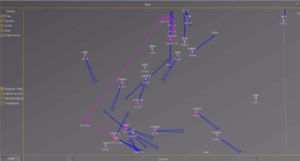
- Open Equipment > Map to view the generated route
- You'll notice it already has some waypoints to set you up for the final approach
If the route in the map looks sensible. You can close both screens.
Step 4: Configure the Autopilot
Our aim is really to let the autopilot fly the route we configured in the Route Manager.
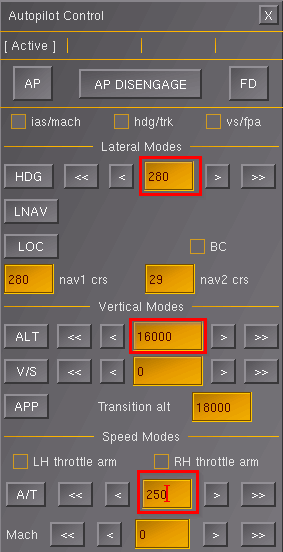
You can configure it via the cockpit by clicking on the appropriate buttons and rotating the various wheels, but I find it easier to use the autopilot dialog window for some of the settings.
- Open Autopilot > Autopilot Settings
- Set HDG to 280 (runway heading)
- Set altitude to 16000 ft
- Set speed to 250 kt
- Close the Autopilot Settings
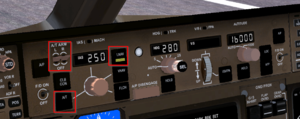
Now, in the cockpit itself:
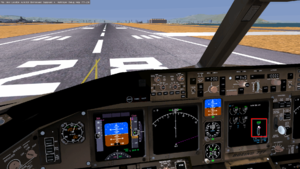
- Switch to FD (flight director) mode
- Click the "LNAV" button
- This will ensure the autopilot follows your Route
- Switch on the "Left" and "Right" throttle controls
- Click on "A/T" (nothing will happen)
That should be about it, now, when you are above 400 ft after take off, you'll be able to click the "AP" button to activate the autopilot.
Step 5: Take-off
To take off:
- Unlock the handbrake (Shift + B)
- Move the Yoke a little bit forward (so the nose pushes down a little bit while you gain speed)
- Move the throttle up to at least 80%
- Keep your airplane on the runway while it speeds up
- At about 160 kt and 180 kt you can move the Yoke backwards which should lift you off the ground
- As soon as you're in the air and the aircraft is climbing, retract the gear (G)
- Move the flaps back to 0 (click [ twice)
- Keep your vertical speed to about 3000 fpm
- When above 400 ft, angage the autopilot
- Make sure you also engage the Autothrottle (A/T)
Step 6: Climb
The climb should just be happening now with the autopilot, but what I like to do, even though it's probably incorrect is click on the autopilot's "FLCH" (flight level change) button. Which will then automatically move you up to the set altitude (16000 ft).
This should all happen automatically, once we hit our Waypoint ... (see Equipment > Map, and your cockpit display as well) you'll notice the plane banks and sets you on course for the next waypoint.
Here comes a screenshot to see the waypoints in the cockpit, the distance, GS, ...
Radio
In order to land, we need to configure our radio (NAV1) to listen to the ILS frequency of the landing runway (16L).
- Open Equipment > Radio
- For NAV1 fill set the frequency to 111.75
Step 8: Descend
When at about 50 nm of the next waypoint, in your autopilot set the altitude to 2500 ft.
You'll notice nothing happens.
Click on "FLCH" to actually start the descend.
At around 10000 ft I like to reduce my speed to 230 kt.
Step 9: Final Approach
When you reach 2500 ft at 230 kts the plane will level off and will stick to this altitude as long as we don't get into our glideslope. We can use this level flight to lose more speed.
Gradually lower the autopilot's speed until you are at about 170 kt. You'll have to move your flaps down to about 15 (todo: some more details on this).
One thing you can also do now is set the autobreaks, I usually set them to 2 (todo: screenshot)
Step 10: ILS Intercept
When you hit the waypoint APP-4, click on "APP" on the autopilot. not much should happen but this will tell the autopilot to LOC to the ILS localiser.
After capturing the ILS LOC you can:
- Extend your gear
- Lower your speed to about 140 kt
- Make sure you always have enough flaps (25)
- Ensure the nose is pointing up ( ~ 5 degrees)
- If not, try lowering your speed a little bit but make sure you're not stalling, at this point, it's kind of hard to recover from that.
At some point, you will intercept the vertical glideslope. When this happens the plane starts to descend to the runway. Here, if you notice you're ending up above the glideslope, lower your speed some more to make it easier to follow the slope.
Note: If your plane gets a bit wobbly while flying level at low speeds, try switching off the Autothrottle and control the throttle manually to maintain your desired airspeed. When you are stable again, switch Autothtrottle back on. Or you can just let it wobble :) This usually is only a problem on leveled flight, once the glideslope is being followed, the plane usually becomes stable.
Step 11: Landing
You'll want to be ready to take control, but normally the plane is pretty good at landing itself. As soon as the wheels touch the ground, move your flaps up again to reduce lift. Once the nose wheel touches the ground, apply some break (and reverse thrust using the "del" key) to slow the plane down.
Debriefing
So, really, to get from A to B with the 777 using automated flight, you hardly have to do anything. But this is only an ideal scenario.
Again, this is not a realistic flight. There is much more involved in a real flight. We haven't covered:
- All Checklists
- Manual Landings
- Navigation via radio
- Full understanding of the autopilot (climb / descend using V/S, NAV, ...)
- Procedures (alternative airports, go-around, System Failures, ...)
- Flight Rules
- ATC Communication
- And all the rest that is involved in a real pilot training
- Much more ...
In FlightGear, when in multiplayer mode, you can encounter ATC's (Air Traffic Controllers) run by a real person. You will have to be able to follow their requests in order to approach the airport, instead of a pre-programmed route. You'll get instructions for headings, speed, following "VOR", ... So before you do that, practice your maneuvres by controlling your autopilot to make sure you can follow the ATC requests.
The 777 is a pretty complete plane. There are some other large jets for FlightGear which are very complete: the Boeing 747 and the Airbus 380. But these are not in a standard 3.4 installation. They also seem to be even more realistic, making them a bit harder to fly for novice users (at least that is my experience).
Other Resources
Youtube:
FlightGear 3.2 (HD) / Tutorial on the New 777 / Full Flight EGKK-EDDL *Commented*
