User:Massima: Difference between revisions
(Created page with "<big><big><big>'''HATIRE HEADTRACK (a little guide)'''</big></big></big> I write this guide to help anyone to use hathire in any sim/game. Let’s start with hw and sw requir...") |
No edit summary |
||
| Line 13: | Line 13: | ||
Obviously this is not the only way to connect it, see http://edtracker.org.uk/ you could use a breadboard or a PCB. I use wires because i can disassemble it if needed. | Obviously this is not the only way to connect it, see http://edtracker.org.uk/ you could use a breadboard or a PCB. I use wires because i can disassemble it if needed. | ||
<big>'''SOFTWARE'''</big> | |||
<big>'''''WINDOWS:'''''</big> | |||
1. install arduino IDE and drivers for your board; | |||
2. connect your board and open device manager as amministrator→ ports (right click) → properties → port setting: | |||
[[File:Win setup.png|thumb|Win setup1]][[File:Win setup2.png|thumb|Win setup2]] | |||
<big>'''''LINUX:'''''</big> | |||
1. download the arduino IDE, unpack somewhere; | |||
2. connect your arduino, open a terminal and type: “lsusb”. You get something like this: | |||
''“Bus 003 Device 008: ID 2341:8037 Arduino SA Arduino Micro”. Yours will be different;'' | |||
3. as root create a file in “/etc/udev/rules.d”. Call it “52-arduino.rules”, inside put: | |||
''SUBSYSTEM=="usb", ATTR{idVendor}=="2341", ATTR{idProduct}=="8037", MODE="0666", GROUP="plugdev", SYMLINK+="arduino arduino_micro"'' | |||
4. IdVendor and idProduct could be different for your board. | |||
5. Restart udev as root with ''“service udev restart”''; | |||
<big>'''TRICKS:'''</big>you could have problem flashing the code on board try, while you press load, to reset the board connecting for a while RST with GND (windows and linux), remove modemmanager (linux). Perhaps if arduino IDE doesn’t start you need to make the main binary executable with ''“chmod +x /path/filename”''(linux). | |||
Revision as of 17:01, 26 March 2020
HATIRE HEADTRACK (a little guide)
I write this guide to help anyone to use hathire in any sim/game. Let’s start with hw and sw requirements.
HARDWARE:
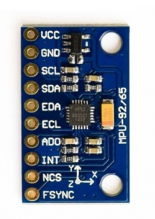
1. a MPU9250 device preferring a 5V tolerant device, i did not test a 9255;
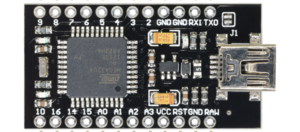
2. an arduino board, you can choose any kind but if your MPU works at 3.3V, you need a board with a 3.3V pin. I use this pro micro board 3.3V and 5V (it runs at 4.68V);
3. a push button; 4. i used classic Dupont wires and some Dupont core plus and DuPont plastic shell plug chief.
Obviously this is not the only way to connect it, see http://edtracker.org.uk/ you could use a breadboard or a PCB. I use wires because i can disassemble it if needed.
SOFTWARE
WINDOWS:
1. install arduino IDE and drivers for your board;
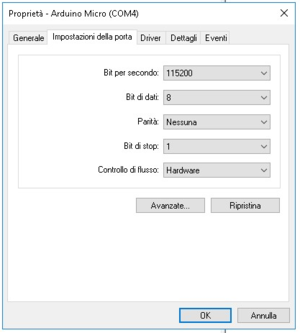
2. connect your board and open device manager as amministrator→ ports (right click) → properties → port setting:
LINUX:
1. download the arduino IDE, unpack somewhere;
2. connect your arduino, open a terminal and type: “lsusb”. You get something like this: “Bus 003 Device 008: ID 2341:8037 Arduino SA Arduino Micro”. Yours will be different;
3. as root create a file in “/etc/udev/rules.d”. Call it “52-arduino.rules”, inside put:
SUBSYSTEM=="usb", ATTR{idVendor}=="2341", ATTR{idProduct}=="8037", MODE="0666", GROUP="plugdev", SYMLINK+="arduino arduino_micro"
4. IdVendor and idProduct could be different for your board.
5. Restart udev as root with “service udev restart”;
TRICKS:you could have problem flashing the code on board try, while you press load, to reset the board connecting for a while RST with GND (windows and linux), remove modemmanager (linux). Perhaps if arduino IDE doesn’t start you need to make the main binary executable with “chmod +x /path/filename”(linux).


