Howto:Modelling clouds
Thorsten
Status: Apr. 2010
Clouds are a major part of the experience in flight - often they are the only visible objects from the cruise altitude of an aircraft. Yet natural-looking realistic clouds are notoriously difficult to render. This article collects a number of different techniques to model different types of clouds, along with a discussion of their advantages, limitations and problems. These principles are illustrated with model-based, textured clouds in AI scenarios controlled by Nasal scripts, but they apply as well for shader-generated clouds from within the C++ code.
True 3-d clouds vs. perceived 3-d clouds
Calculating and rendering true 3-d clouds
A real cloud is a 3-dimensional distribution of water droplets or ice crystals in the air. Each small volume element inside this distribution has a given density of droplets, from which the capacity of the volume element to reflect and absorb light follows. Dependent on droplet size, reflection and absorption may depend on the light wavelength and on the angle between incoming and reflected light. The distribution of water droplets in turn is caused by fluid dynamical and thermodynamical processes - possibly turbulent rising air currents within the cloud, the balance between condensation and evaporation, diffusion of droplets and similar phenomena.
It is certainly possible to model the physics of clouds to get realistic 3-d droplet density distributions, although this is a fairly tough problem. Given such distributions, raytracing codes can then render the cloud from any given perspective with any illumination. However, neither the cloud physics simulation nor the rendering can be done in anything approaching real-time, so these techniques are not applicable to cloud modelling in a flight simulator without significant advances in computing power.
Real-time rendering on the other hand relies mainly on the concepts of surfaces with given textures. Thus, modelling clouds is less a problem of getting the science right, it is rather comparable to the art of a stage magician - the problem is to create the illusion of a 3-d cloud from suitable arrangements of textured surfaces.
Concepts for gauging the usefulness of 3-d cloud illusions
As with any stage illusion, there is always a direction from which it is clealy apparent that it is not 'the real thing' - the task of the magician is just never to let the observer assume this perspective. 3-d cloud models follow a similar rule - they can be made to appear very realistic and natural if the perspecive from which they are observed is limited, on the other hand, if they are to be observed from any perspecive, some compromise as to their natural appearance has to be made.
Thus, the first thing to consider when designing a cloud model is the anticipated view (AP) of the observer. To give a few examples: The visibility from an airliner cockpit when the plane is flown in normal operations is severely limited. While one can see well what is in front and to the side of the plane, there is no visibility coverage directly above or below the cockpit or to the rear. Since airliners don't do steep dives or climbs, there is no situation in which one would get to see a cloud directly from above or in the rear of the plane. Thus, when designing a cloud model for this situation, it does not matter if the illusion becomes apparent if the cloud is seen directly from above or to the rear - which gives considerable freedom that can be exploited to let the cloud appear natural. As a different example, consider thermal cap clouds which are usually used with gliders - gliders can't climb above the thermal cap cloud, so again it does not matter how the model looks from above.
On the other hand, in military planes with a wide-angle view glass canopy like the F-16 which are also capable of steep dives and climbs, the AP is much wider which narrows the possibilities for cloud illusions. Finally, if clouds are supposed to work with any external view or an 'unrealistic' aircraft like the ufo, then the range of cloud illusions that can be employed is very limited, and it is always possible to expose the illusion from some perspective.
The concept that complements the AP then from the model side is the range of illusion (RoI), i.e. the angular region around the cloud model in which the cloud looks natural. Basically, a cloud model works whenever the AP falls into the RoI and it fails when the AP is outside the RoI.
Cloud textures
As seen above, clouds are usually modelled by arrangements of surfaces which also may be rotated or otherwise transformed to contribute to the illusion. But an equally important part of a cloud model is that which is found on these surfaces - the cloud textures.
Since real clouds show an amazing variety of structures at different scales --- from diffuse misty patches to weel-defined, Cauliflower-like surfaces of Cumulus clouds, and it is a very difficult task to get these right when designing a cloud texture. Therefore, a good way to obtain cloud textures is to let nature do the work of creating the structures, and use good resolution cloud photographs to extract textures.
There are nevertheless a few things to consider in order to extract a texture from a photograph. First of all, the photograph never shows only the cloud, but always the cloud on the background sky. On the other hand, the texture should show only the cloud, and in particular it should be semi-transparent. Thus, the background sky must be carefully removed and must be converted into semi-transparent sections. This may involve various filtering processes in an image manipulation program. Second, the photograph always shows the cloud with a given lighting - but that may be unwanted in a texture. A photograph of a thunderstorm cloud in sunset may be very impressive, but its colors are entirely unsuited to be used for a thunderstorm cloud at noon. Strong shading of one side of the cloud may look impressive, but is again unsuitable if the cloud texture is to appear later in a different position with respect to the sun. Thus, in a next step, strong colors and shades must be carefully removed from the image.
Finally, cloud photographs are taken from a given angle. However, many types of clouds do not look the same from all angles. A texture of a side view of a Cumulonimbus (thunderstorm) cloud is entirely unsuitable for a top or bottom view of such a cloud. For some clouds, it is enough to acquire a photograph from a single angle, but for others, more angles are needed for a proper texture. However, textures do not need to be all from the same cloud - clouds are sufficiently diffuse objects such that combining cloud textures from similar clouds does not create an unrealistic effect.
Thus, a good texture is characterized by good resolution, the absence of strong colors or shades; it is semi-transparent and fading to full transparency towards the edges, and it it is valid for a certain set of viewing angles.
For anyone planning to get into cloud modelling, it is a good idea to acquire a large collection of possibly suitable textures. The choice of the texture can make a lot of difference in the final outcome, and it is a good idea to try a variety of different textures with a given background model for the best effect.
Cloud Textures - Sources
For starters, some public domain images featuring various different types of clouds are available on line:
- http://finallycreative.com/gallery/category/nature/landscape/clouds-landscape-nature
- http://public-photo.net/nature/clouds-in-blue-sky/
- http://www.publicdomainpictures.net/hledej.php?hleda=clouds
- http://www.public-domain-photos.com/landscapes/sky
- http://www.pdphoto.org/PictureDetail.php?pg=5173&mat=pdef
- http://www.bencloward.com/textures_clouds.shtml
- http://webdesignfan.com/free-cloud-textures/
- http://www.texturise.com/?cat=175
- http://www.littleboxofideas.com/blog/freebies/13-free-high-res-cloud-textures
- http://www.texturise.com/?page_id=2112&px=%2Fclouds%2F
- http://tutorialfreakz.com/free-clouds-textures/
Shading
Besides the cloud texture, a second important aspect is the way a cloud is shaded when rendered. This dynamical shading must be distiguished from any permanent shading which is already part of the texture, for example a texture that is darker on the cloud bottom than on the top. The dynamical and permanent shading should never conflict in a cloud model, otherwise clouds do not appear realistic.
The dynamical shading is determined by the MATERIAL definitions inside the *.ac file of the cloud model. The first triple of numbers here (following rgb) should be 1 1 1 - clouds are usually white (for smoke, one may chose other values though). The second triple following amb is more interesting. The numbers should all three be the same (this leads to a greyshade rather than a color), but they do not need to remain at 1 1 1 - in fact, basically this property determines how dark clouds can become when they are between sun and observer.
Chosing 0 0 0 here leads to very dark clouds, chosing 1 1 1 leads to clouds which look the same regardless if they are in direct sunlight or if they are between observer and sun. What is appropriate depends on the type of cloud and the water droplet density. Cumulonimbus clouds are very thick and opaque and therefore appear very dark when they hide the sun - Cirrus clouds on the other hand are very thin and never show any pronounced shades. A bit of try and error is required to optimize the darkness of the dynamical shading.
The next property, emis, determines the emissivity of the cloud - since clouds do not usually generate any light, this should usually be 0 0 0 to avoid bright clouds at night, but changing the values may be of some use for night textures of thunderstorm clouds to be displayed briefly to simulate lightning. spec finally has to do with the reflexivity - this may be a useful property to fine-tune the appearance of icy clouds.
Modelling Cumulus-like clouds
Please also see Howto:Cumulus cloud texture extraction for a tutorial on texture extraction.
While in modelling a closed cloud layer one can exploit the fact that the layer can only be seen from above and from below, but never from the side, Cumulus-like clouds pose the problem that there is no direction from which the cloud is not visible. Roughly such clouds have equal length, width and height and can be observed from an aircraft above, below or level with the cloud from any direction. Typically, Cumulus-like clouds also exist in altitudes where an aircraft might fly through the cloud, thus also the close-up view of the cloud model must at least be acceptable. An additional complication is that the shape of Cumulus clouds is quite characteristic: Seen from below, they are relatively flat and have a diffuse surface (reflecting the onset of droplet condensation) whereas from above their surface is well-defined and shows a Cauliflower-like pattern (reflecting the turbulent rise of hot and moist air currents). Thus, one can tell from a picture of a Cumulus cloud if the cloud is upside down without any external reference.
A common approach to modelling such clouds is to create a model which looks believable from one direction within a limited angular range and to rotate this model dynamically such as to hide any other direction from the observer. Due to the characteristic shape of Cumulus clouds, the applicability of upward or downward rotations of textures is limited.
Monolayered cloud models
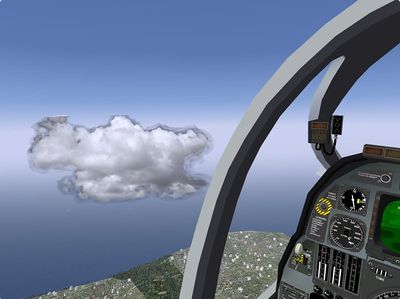
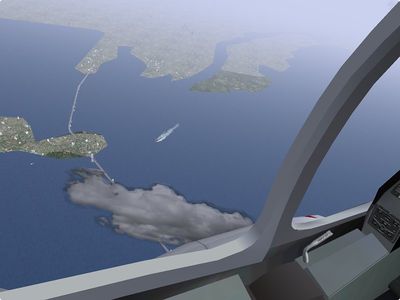
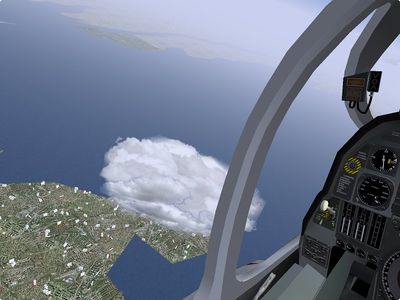
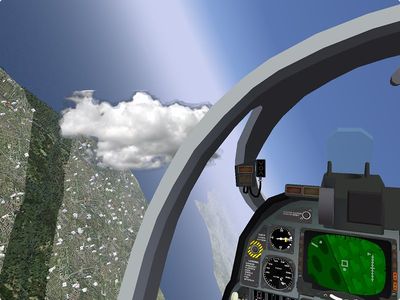
The simplest possible cloud model is to project a 2-d image of a cloud onto a flat surface which is then rotated in some way to face the viewer. Such a cloud model is in Flightgear (as of version 1.9.1) implemented for the thermal cap clouds in thermal AI scenarios. When seen from a reasonable distance, such clouds look quite reasonable. When the underlying texture is based on a photograph, the appearance of the cloud from afar actually recreates this impression, especially when the cloud texture shows shading effects such as the darker bottom of the cloud. If the cloud is rotated, the standard shading due to the angle with the sunlight will then darken clouds appropriately. An example shown below.
However, cloud textures which include any shading or have a realistic cumulus shape cannot be rotated up- or downward, since then the dark bottom part of the texture will no longer appear on the bottom of the cloud. This means that one is restricted to single-axis rotations (two types of which are discussed below), and consequently there are viewing positions, especially above and below the cloud, from which the nature of the illusion is readily apparent.
Multilayered cloud models
A significant improvement in cloud appearance is to stack several layers (ideally with size increasing from first to last) in a row. Seen from a limited direction, when using semi-transparent layers this is actually pretty close to what a real 3-d cloud is, i.e. a distribution of layers with varying density and reflection.
In practice, this gives a very nice 3-d appearance, and even from above or below the illusion is much less prominent as the rear layers become simply more visible and maintain the image of 3-d cloud.
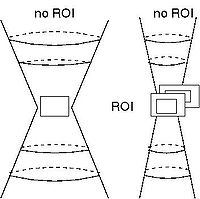
If rotated around a single axis, the RoI of monolayered vs. multilayered clouds can be compared as follows:
Essentially, the illusion breaks from directly above and below, but the angular region in which this happens is much reduced when multiple layers are used.
Single-axis rotations - view-direction vs. relative position alignment
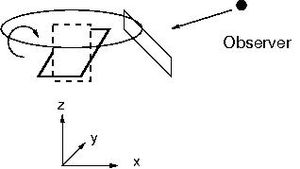
It is clear that neither a single layer nor a multilayer cloud look anything real when seen from the side. Therefore they need to be rotated in such a way as to make this impossible. The simplest rotations are just around the vertical (z-) axis. Such rotations preserve the shape of the cloud - the cloud top can still look different from the cloud bottom - but the clouds look the same (apart from shading) from all compass directions. Moreover, the RoI does not usually directly above and below the cloud.
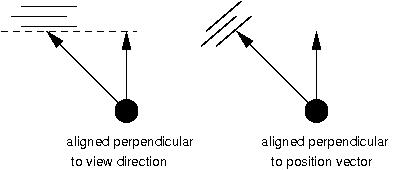
There are two philosophies how to rotate the cloud. One can rotate it such that it is always perpendicular to the view direction, or such that it is perpendicular to the relative position (the two schemes always coincide when looking directly at the cloud, but not when the cloud is in the periphery of the view). The difference is illustrated in the following figure, where the view is indicated by the straight line upward:
The alignment perpendicular to the view axis has an obvious disadvantage - the cloud is rotated when one moves the view direction. Since usually objects do not rotate just because we happen to turn the head, this may look very unnatural! This problem is fixed when a rotation based on the relative position is chosen, since here the cloud is not rotated when the view moves. However, this scheme does not handle flyby correctly - here the cloud appears to rotate as a plane passes it in close proximity, which doesn't look realistic either. The flyby is on the other hand correctly dealt with in the rotation relative to the view direction.
Flightgear has the view-axis based rotation implemented as an animation xml-tag. Assuming we want to control the thermal cap cloud of an AI thermal scenario, the xml-wrapper of the cloud model thermalcap.xml should contain:
<animation>
 <type>billboard</type>
 <spherical>false</spherical>
</animation>
Implementing the relative-position based rotation is at present more involved and requires a Nasal script. The cloud model xml should then contain the tag:
<animation>
 <type>rotate</type>
 <property>orientation/rotation-deg</property>
 <factor>1.0</factor>
 <axis>
  <x>0</x>
  <y>0</y>
  <z>1</z>
 </axis>
</animation>
which describes a rotation around the z-axis that is controlled by a property rotation-deg. The following nasal script is then used to set this property based on the relative position of aircraft and cloud:
var cloud_turning_loop = func {
# get the heading of the thermal
var heading = getprop("ai/models/thermal/orientation/true-heading-deg");
# get the aircraft position
var clat = getprop("position/latitude-deg");
var clong = getprop("position/longitude-deg");
# get the thermal position
var slat = getprop("ai/models/thermal/position/latitude-deg");
var slong = getprop("ai/models/thermal/position/longitude-deg");
# compute the angle from aircraft to thermal
var angle = math.mod(math.atan2(math.sin(slong-clong) * math.cos(slat),
math.cos(clat) * math.sin(slat)- math.sin(clat) * math.cos(slat) *
math.cos(slong-clong)), 2 * math.pi) * R2D;
# set the rotation property i
# offset is the angle of the cloud layer inside the *.ac file
# heading is necessary here since Flightgear automatically turns
# objects into the direction they move (which is reasonable for aircraft)
# so it must be compensated
setprop("ai/models/thermal/orientation/rotation-deg",offset-angle-heading);
# and close the loop with a 20 frames/second timing
   settimer(cloud_turning_loop, 0.05);
}
# start the loop
cloud_turning_loop();
In principle, one can implement more complex solutions. For example, a gradual distance-controlled transition from position-based (long distance)to view-based (short distance) rotation would not usually move clouds when turning the head, but would handle the flyby correctly - however at the expense of needing more computations. There is no single perfect transformation, just transformations which handle a particular situation better than others.
Two- and three-axis rotations
Rotations around more than one axis allow to completely close the RoI above and below the cloud by simply rotating the model also up and downward, i.e. there is never any position from which the cloud model could be seen as being composed of different textured layers. There is, however, a price to pay for this property. If a typcial Cumulus texture is rotated upward, the cloud looks nothing like a normal Cumulus cloud from above, as the shape of such clouds is very different from above, from below and from the side. Similarly, also shaded textures show the wrong shading when they are rotated upward. This in turn means that one is restricted to rather monochromatic textures with no pronounced cloud structure which are credible clouds both seen from the side and from above. While such textures can still lead to natural looking clouds, they can never generate very characteristic clouds. Furthermore, the darker bottom shades of the clouds must be generated elsewhere for a natural appearance. For the current shader-generated 3-d clouds from within the C++ code, such extra shading is provided, but for textured model based clouds it cannot easily be done at present.
The easiest multi-axis rotation to implement is the spherical billboard animation. This can be accessed with the xml-tag
<animation>
 <type>billboard</type>
 <spherical>true</spherical>
</animation>
and rotates the model such that it always faced the viewer straight. In particular, the transformation also rolls the cloud with the view - which looks very unsatisfactory, therefore the transformation can really only be used with an almost spherical cloud model where this roll is invisible.
A better transformation is a rotation around the x-axis to tilt the view to account for the altitude difference of observer and cloud, followed by a rotation around the z-axis to face the observer (or to align the cloud perpendicular to the observer's view axis, for the differences see above).
This is in effect similar to the spherical billboard transformation, but does not roll the cloud. Note that this is a rotation around two axes in a fixed reference system - in a coordinate system rotating with the model, a three axis rotation is in general necessary for the same effect. Note also the subsequent rotations do not commute - it makes a difference if the first rotation is around the x axis and the second around the z-axis or vice versa. Currently, the shader-generated 3-d clouds use this transformation with the reference being the view axis rather than the relative position.
Flying through clouds
Cloud models based on the above principles may or may not look reasonable when one flies through the cloud. If the layered textures are individually rather featureless, transparent and not strongly shaded, if the cloud is reasonably small and if the textured layers are close together, then the impression is reasonably realistic. If not, a good solution is to never let the observer see the cloud model up close by reducing the visibility.
This can be implemented via a Nasal script which calculates distance to the cloud and sets the visibility to a low value once a minimal distance has been reached. Tempting though it may be, simply settig environment/visibility-m does not work as this is continuously overwritten. The following Nasal code (which must be part of a loop running in the background) computes the distance to an AI thunderstorm and sets the visibility of all layers to 100 m whenever the distance to the cloud is less than 500 m.
# get position of airplane and convert to Cartesian coordinates
var clat = getprop("position/latitude-deg");
var clong = getprop("position/longitude-deg");
var ccart = geodtocart(clat,clong ,1000);
var cx = ccart[0];
var cy = ccart[1];
# get position of thunderstorm and convert to Cartesian coordinates
var slat = getprop("ai/models/thunderstorm[0]/position/latitude-deg");
var slong = getprop("ai/models/thunderstorm[0]/position/longitude-deg");
var scart = geodtocart(slat,slong ,1000);
var sx=scart[0];
var sy=scart[1];
# calculate the distance
var sdistance = math.sqrt((cx-sx)*(cx-sx) + (cy-sy)*(cy-sy));
# check distance criterion
if (distance < 500) {
# access the weather layer definitions and overwrite the settings
var econfig_aloftNode = props.globals.getNode("environment/config/aloft", 1);
var entries_aloft = econfig_aloftNode.getChildren("entry");
foreach (var e; entries_aloft) {
var v = e.getNode("visibility-m");
v.setValue(100);
}
#  get FlightGear to restart the environment with the new visibilities
fgcommand("reinit", props.Node.new({subsystem:"environment"}));
}
Of course, a more complete program should save the original setting of the visibilities when entering the cloud and restore them when leaving the cloud, and one might also implement a gradual transition from the visibility outside the cloud to the value inside the cloud instead of the sudden jump from outside visibility to 100 m as implemented above.
The above solution still leaves the textures of the model, and they will be noticeable as a sequence sharp transitions of lighting when flying through the clouds even in reduced visibility. To prevent this, the cloud model can get an xml-tag like
<animation>
 <type>select</type>
 <object-name>main cloud layer</object-name>
 <object-name>background cloud layer</object-name>
 <object-name>foreground cloud layer</object-name>
 <condition>
   <not>
     <property>in-cloud</property>
   </not>
 </condition>
</animation>
where the various object names need to refer to object definitions in the 3-d model of the cloud. Inside the nasal script, the property in-cloud can then set to be 'true' whenever the distance to the cloud falls below the threshold. This makes all textured layers invisible, and the cloud from the inside is then only represented by the reduced visibility with no unrealistic transitions through textured layers.
Cirrus-like clouds
Cirrus clouds are formed from ice crystals at high-altitudes above 23.000 ft. They appear as thin, wisp-like strands, often trailed by hairlike filaments from heavier ice crystals falling from the main cloud layer. When they extend across boundary layers of air masses with windshear between the layers, the strands can be distorted into complex patterns, as small ice crystals fall much slower than raindrops and can be distorted. Although Cirrus clouds appear to be thin layers from the ground, in reality they are not - their average layer thickness is as much as 1.5 km. Still, this is much less than their typical lateral size, which may be rather of the order of 10 km and more. However, the clouds are very transparent, so the shading of cloud layers reflecting sunlight and transmitting sunlight should not be very different - Cirrus clouds do not appear grey when they are between observer and sun.
This means that one may think of modelling Cirrus clouds for two different situations:
- Many aircraft will never reach the altitude of a high-altitude Cirrus layer. Under this assumption, Cirrus clouds can be simulated by placing textures on a single, flat high-lying layer.
- For aircraft which reach the altitude of the Cirrus layer, a proper cloud model should show the thickness of the cloud layer when it is crossed.
Rotated surfaces
Due to their thin appearance, Cirrus textures can be projected on a single surface. However, due to the different cloud size in length, width and height, one cannot use two-axis rotations - Cirrus layers with 10 km extension in vertical direction which would be generated by a two axis rotation of a layer appear unrealistic. However, a curved surface, for example in a wavy form, rotated around the z-axis in such a way that the observer never gets to see it from the side may work just fine. The obvious problem with rotations is that many Cirrus clouds have structure - the hairlike wispy strands indicate the direction of high-altitude winds. A real Cirrus sky has therefore all these structures aligned in the same direction. If now individual clouds are rotated around the z-axis, their structures will in general not be aligned, thus creating a realistic appearance of a single cloud, but not of the whole sky. For such structured Cirrus textures, a non-rotating solution needs to be found.
Non-rotated surfaces
While essentially every reasonable rotation of cloud models looks fine with still images, the cloud movement observed in flight may not. For Cirrus clouds, there is a viable static model solution which never rotates the cloud - a Cirrus texture projected onto a surface with non-vanishing curvature, for example a surface with bumps and dips or a negatively curved saddle surface. Such surfaces must be smoothly curved to avoid unrealistically strong changes in shading. The saddle for example has a few attractive features:
- there is no view direction from which the surface appears flat
- its wavy structure goes along well with the shear waves between air layers often seen for real Cirrus clouds
- it shows the original cirrus texture undistorted from directly below and above the model
- seen from a small viewing angle, the cloud does not look unnaturally flat.
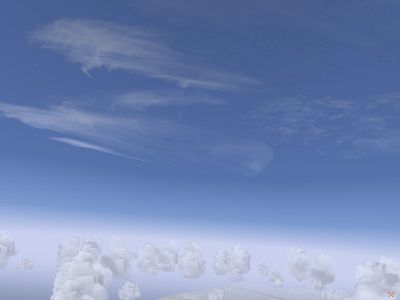
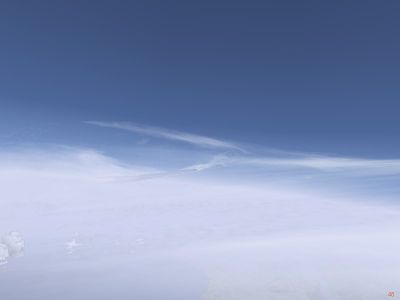
Such a static cirrus cloud can have a reasonable appearance both from below
and from the cloud layer altitude.
although from close-up, the view is still problematic, and unlike for Cumulus clouds, Cirrus clouds are nowhere near opaque enough to justify replacing the cloud texture by a reduction in visibility.
Cirrocumulus clouds
Cirrocumulus clouds and other thin translucent cloud types can be modelled quite easily using static cloud models based on the principles outlined above. Due to the small vertical thickness of such clouds, the base model can be a mesh which is gently deformed using a series of ridges and bumps which agree with the visible cloud structure. In this way, the cloud is also visible from the side with its actual thickness, and the results both from below
and even relatively close-up from above
are quite reasonable.
Layered clouds
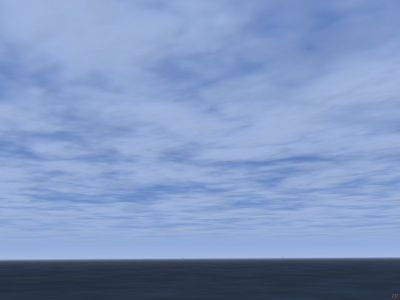
The simplest way to model layered clouds is a 2-dim sheet which is simply placed at given altitude. Placing two sheets with reduced visibility between sheets is an extension of the idea providing a finite cloud thickness. If the shading of the sheets is good, the results are actually quite reasonable both from the ground
and from above the layer.
However, the real visual impression of flying over or below layered clouds is that of a fuzzy, wavy boundary region rather than a flat surface. This requires the placement of textures perpendicular to the layer, so one has to go beyond 2-dim sheets to rotated cloud models.
A more realistic-looking solution is to fill the volume of the layer with many cloudlets which are individually transformed using a 2-axis rotation. This is expensive in terms of CPU-time since the number of cloudlets needed is huge. For a 20x20 km layer (not very large by layered cloud standards), as more than 400 cloudlets are needed even if a single cloudlet has a typical size of 1 km. Very large cloudlets become eventually a bad solution, as the texture resolution is not very good any more. Moreover, with a naive 2-axis rotation, the cloudlet size also determines the minimal layer thickness - rotated cloudlets with 2 km diameter cannot for a layer with less than 2 km thickness.
The solution to this is to add a scaling transformation of the vertical coordinate to the rotation, so that the model is compressed in altitude. This allows in principle to achieve any layer thickness. With this technique, mixing both diffuse and structured cloudlets, quite good results for the layer boundary can be achieved.
Availability of cloud models
The following table shows what types of clouds can currently modelled using what types of models.
| cloud type | typical altitude | shape | model | picture of model |
|---|---|---|---|---|
| Cirrus | above 23.000 ft | thick layer, filamented | static | 
|
| Cirrostratus | above 20.000 ft | thick layer, amorphous | - | - |
| Cirrocumulus | above 20.000 ft | thin layer, patched | static | 
|
| Altocumulus | 6.500 - 20.000 ft | thin layer, patched | rotated | 
|
| Altostratus | 6.500 - 20.000 ft | thick layer, diffuse | - | - |
| Stratocumulus | below 8.000 ft | structured layer | merging cumulus models | - |
| Cumulus | below 6.500 ft | puffy heaps | rotated | 
|
| Stratus | below 6.000 ft | medium layer, diffuse | cloudlet-filled layer | 
|
| Nimbostratus | below 8.000 ft | thick layer, diffuse, precipitation | cloudlet-filled layer | 
|
| Cumulonimbus | 6.500-60.000 ft | huge cloud towers, anvil | rotated | 
|
'static' denotes a model which does not need to be rotated or transformed in any way, 'rotated' denotes a model which must be transformed to always face the viewer, '2-d layer' denotes a layer with vanishing thickness that is simply projected at a given altitude and is not a 3-d model, nor visible from the side.
Cloud model packages
Local weather package (Thorsten) (currently contains Cirrus, Cirrostratus, Cirrocumulus, Altocumulus, Cumulus, Cumulonimbus, Stratus and Nimbostratus clouds)
