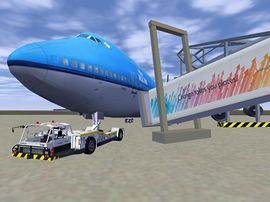
Howto:Implement pushback
Currently, pushback is only used on JSBSim planes. It should be possible with YASim aswell, but it has never be done yet.
Systems/pushback.xml
Create the following directory, if not present:
- $FG_ROOT/Aircraft/.../Systems
<system name="pushback">
 <channel name="Pushback">

  <switch name="systems/pushback/linked">
   <default value="0"/>
   <test  logic="AND" value="1">
      /sim/model/pushback/position-norm == 1
      /gear/gear/wow == 1
   </test>
  </switch>

  <switch name="systems/pushback/force">
   <default value="0"/>
   <test  logic="AND" value="/sim/model/pushback/magnitude">
      systems/pushback/linked == 1
      gear/unit[0]/wheel-speed-fps lt 500
   </test>
   <output>external_reactions/pushback/magnitude</output>
  </switch>
 </channel>
</system>
.xml
In the FDM file we have to add the pushback engine. You add it like every other engine, with the exception that the location should be somewhere near the nose wheel of the aircraft (where the pushback truck is connected).
<engine file="pushback">
...
After the </propulsion> tag we add a reference to the pushback system:
<system file="pushback"/>
And at the end of the FDM, the following is needed to attach the forces of the pushback to the aircraft. The location should be somewhere near the nose wheel of the aircraft (where the pushback truck is connected).
<external_reactions>

 <force name="pushback" frame="BODY">
  <location unit="IN">
   <x>  -139 </x>
   <y>    0.0 </y>
   <z>  -71.0 </z>
  </location>
  <direction>
   <x>1</x>
   <y>0</y>
   <z>0</z>
  </direction>
 </force>

</external_reactions>
-set.xml
Between the <model> tags in the -set.xml file we set three properties to false (0). Note: if the model tags are already there, you do no need to add them again. Just place the stuff between them. If you want the truck to be connected on startup, set linked and position-norm to 1.
<model>

 <pushback>
  <magnitude>0</magnitude>
  <linked>0</linked>
  <position-norm>0</position-norm>
 </pushback>

</model>
Then below the </sim> tag, we add our menu dialog. A generic one is available as $FG_ROOT/gui/Dialogs/pushback.xml. Add the following lines to include it in the Equipment menu of the aircraft. Note: if the menubar and default tags are already there, you do no need to add them again. Just place the stuff between them.
<menubar>
 <default>

  <menu n="5">
   <item n="10">
    <label>Pushback</label>
    <name>pushback</name>
    <binding>
     <command>dialog-show</command>
     <dialog-name>pushback</dialog-name>
    </binding>
   </item>
  </menu>

 </default>
</menubar>
And at the end of the file we add an(other) nasal file. Note: if the nasal tags are already there, you do no need to add them again. Just place the pushback stuff between them.
<nasal>

 <pushback>
  <file>Nasal/pushback.nas</file>
 </pushback>

</nasal>
Models/ .xml
In your planes model file, we add a reference to one of the generic pushback models, or a custom made truck, shipped with your plane. Edit the offsets to fit your plane. The nosegear of the aircraft should be between the rear gear of the pushback, when it is connected.
<model>
 <name>Pushback</name>
 <path>Models\Airport\Pushback\Goldhofert.xml</path>
 <offsets>
  <x-m>-25.0</x-m>
  <y-m>0</y-m>
  <z-m>-4.0</z-m>
 </offsets>
</model>
