Howto:Animated jetways: Difference between revisions
No edit summary |
|||
| Line 36: | Line 36: | ||
PLEASE NOTE: The videos weren't made by the same person or people that created the Animated Jetways for FlightGear or the same person or people that created this page. The videos were created by Vin, a different user. | PLEASE NOTE: The videos weren't made by the same person or people that created the Animated Jetways for FlightGear or the same person or people that created this page. The videos were created by Vin, a different user. | ||
You should use the properties window when setting up this; | |||
--prop:/sim/paths/use-custom-scenery-data=true | |||
Part 1; | Part 1; | ||
Revision as of 02:37, 27 March 2011
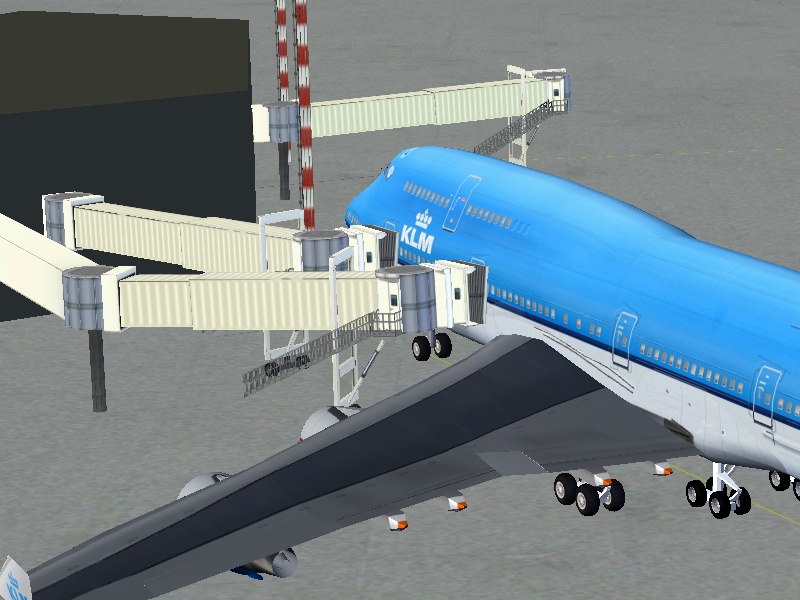
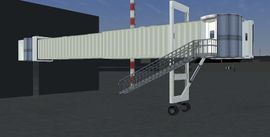
This article describes the animated jetway system by Skyop, how to use it, and how to implement it.
Usage
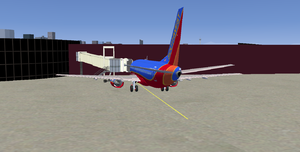
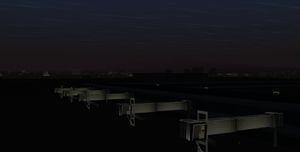
Currently, the following airports implement animated jetways in their scenery:
- Ted Stevens Anchorage International Airport (PANC) (TerraSync-only)
- Las Vegas McCarran International Airport (KLAS) (TerraSync-only)
- Reno International Airport (KRNO) (TerraSync-only)
Note that when TerraSyncing an airport, you have to tell FlightGear to load the new jetway models. To do this, set the /sim/paths/use-custom-scenery-data property to "true" in FGRun. Command-line users, use the --prop:/sim/paths/use-custom-scenery-data=true switch.
The following aircraft are animated-jetway capable (a package of updated -set.xml files for the A380, 733, 744, and 772ER can be downloaded here):
- Airbus A320
- Airbus A380
- Boeing 737-300 (separate download)
- Boeing 747-400 (separate download)
- Boeing 757-200
- Boeing 777-200ER (separate download)
- Boeing 787-8 (second jetway disabled, it goes through an engine)
- Bombardier CRJ-200LR
First determine if the jetway is clickable and is animated. To do this, press Ctrl-C. If the polygons of the jetway are outlined in yellow, then it is indeed animated.
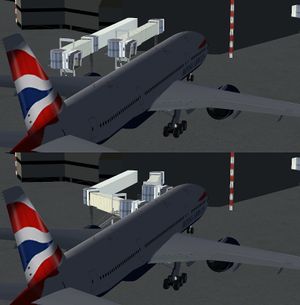
Now align your airliner so that the nosegear is centered on the marking line and is directly over the "T" at the end of it. Click the jetway; if your aircraft does not include the required positioning information, you'll get a tooltip informing you that the jetway cannot be extended. Otherwise, the jetway should begin to position itself and eventually connect to your aircraft. Congratulations!
Video
Here is a tutorial made by Vin on how to use the Animated Jetways;
PLEASE NOTE: The videos weren't made by the same person or people that created the Animated Jetways for FlightGear or the same person or people that created this page. The videos were created by Vin, a different user.
You should use the properties window when setting up this;
--prop:/sim/paths/use-custom-scenery-data=true
Part 1;
Part 2;
Implementation
For aircraft developers
WARNING: The author has since learned trigonometry and revamped the system to be easier to use. An animated jetway update has been sent off to the Scenery Database and is awaiting inclusion. Please wait until I update this section.
To make your aircraft animated jetway-capable, you'll need to specify the following in your aircraft's -set.xml:
- The amount at which to extend the jetway (x-tra)
- The amount at which to lower/raise the jetway by rotating it along its Y axis (y-rot)
- The amount at which to rotate the jetway along its Z axis (z-rot)
- The amount at which to rotate the hood to extend it to the aircraft (hood-rot)
They should be added within the <aircraft> tag in the root of your XML file (but still within <PropertyList> of course!).
For instance, here's the jetway positioning information for the Boeing 737-300.
<aircraft>
 <jetway-pos>
  <x-tra>-1</x-tra>
  <y-rot>-4</y-rot>
  <z-rot>21</z-rot>
  <hood-rot>5</hood-rot>
 </jetway-pos>
</aircraft>
Here's the positioning information for the Boeing 777-200ER. Note the <jetway2-pos>, which describes positioning information for the second jetway.
<aircraft>
 <jetway-pos>
  <x-tra>-1</x-tra>
  <y-rot>4</y-rot>
  <z-rot>16</z-rot>
  <hood-rot>2</hood-rot>
 </jetway-pos>
 <jetway2-pos>
  <x-tra>2.5</x-tra>
  <y-rot>5</y-rot>
  <z-rot>46</z-rot>
  <hood-rot>2</hood-rot>
 </jetway2-pos>
</aircraft>
Last but certainly not least, the A380:
<aircraft>
 <jetway-pos>
  <x-tra>-2</x-tra>
  <y-rot>2</y-rot>
  <z-rot>18</z-rot>
  <hood-rot>0</hood-rot>
 </jetway-pos>
 <jetway2-pos>
  <x-tra>2.5</x-tra>
  <y-rot>2.5</y-rot>
  <z-rot>45</z-rot>
  <hood-rot>0</hood-rot>
 </jetway2-pos>
 <jetway3-pos>
  <x-tra>4</x-tra>
  <y-rot>5</y-rot>
  <z-rot>47</z-rot>
  <hood-rot>3</hood-rot>
 </jetway3-pos>
</aircraft>
The following will describe how to get these values. I will be using Blender for this purpose, but any 3D modeling program that can read AC3D files will suffice.
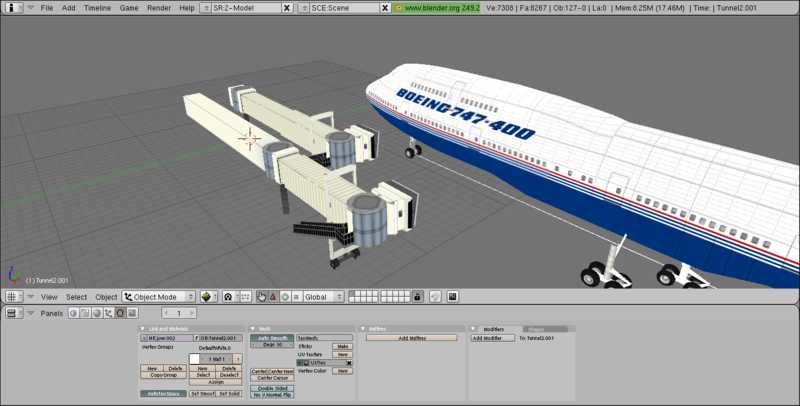
First, open up your 3D modeling suite and import one of the jetway models. They are located at (TerraSync directory)/Models/Airport, and are available through TerraSync or the Airport section of the FlightGear Scenery Database model directory (look for "jetway-movable.xml," "jetway-movable-2.xml," or "jetway-movable-3.xml").
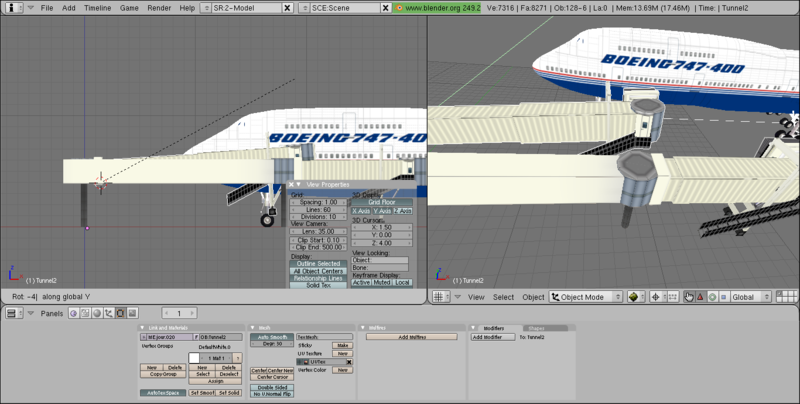
Now import your aircraft model (in this case, I am using Gijs' Boeing 747-400). Align it with the marking line as if you were piloting it.
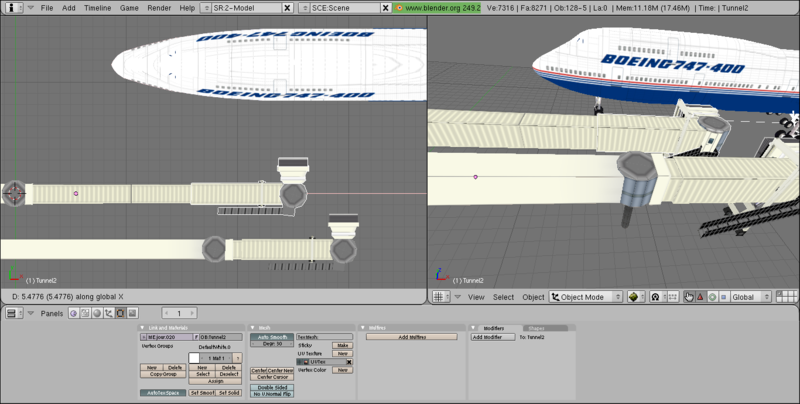
Now select the following objects: Tunnel2, Tunnel3, Rotunda2, Entrance, and Hood. Move them along their X axis until you think you have the correct length to extend the jetway. (Hint: You can always "retract" the jetway by moving these objects by a negative value!)
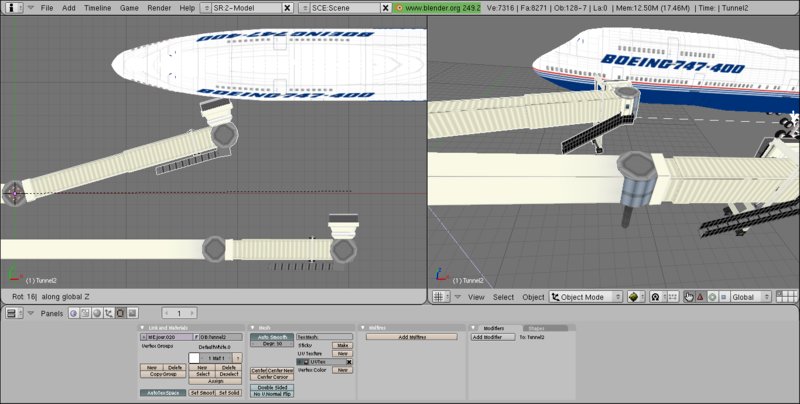
Now select the following objects: Tunnel1Rotunda, Tunnel1, Tunnel2, Tunnel3, Rotunda2, Entrance, and Hood. Rotate them along the Z axis with the center of axis being at 0,0,0 (X,Y,Z) until the jetway's movable rotunda is a couple meters or so away from the aircraft. In Blender, I could simply move my cursor to 0,0,0 and set the rotation pivot to cursor mode. The procedure will be different depending on what 3D modeling software you are using, of course. You may have to undo this step if you find that you extended the jetway too much or too little in the previous step.
Once you are happy with the jetway's extension/rotation, use the amount you extended the jetway along its X axis as your <x-tra> value and the amount you rotated the jetway along its Z axis as your <z-rot> value.
In-game, the jetway's entrance will automatically rotate itself to compensate for the rest of the jetway's rotation, so there is no need to manipulate the entrance.
Now, undo all transformations you have done to the jetway until it is in the same state as it was when you imported it. Select the following objects: Tunnel1, Tunnel2, Rotunda2, Entrance, and Hood. Rotate them along the Y axis with the center of axis being at 1.5,0,4 until the entrance of the jetway aligns with the door of the aircraft vertically. Use the value you rotated the jetway at as your <y-rot> value (note: the values should be inverted, so if you rotated the jetway along its Y axis -2 degrees to get it 2 degrees up, you should use 2 instead of -2).
Finally, we have one last value to fill in: <hood-rot>. It simply specifies how much the jetway's hood should extend itself by rotation. You can simply use some common sense here: obviously, this would be something along the lines of 0 for jumbo jets and 5 for a Boeing 737-like aircraft. Be careful not to set this value to something too high, otherwise the hood will appear to detach itself from the jetway!
Eventually, you should end up with an <aircraft> tree that resembles the examples above. Load up your aircraft in-game and taxi to an animated jetway. Click it, and hope everything works well!
The procedure for utilizing a second or third jetway is essentially the same. The only difference is that some center of axis coordinates need to be changed (i.e., rotating the entire jetway by its Z axis from point 18,-5,0 instead of 0,0,0.
For scenery developers
Simply place a Models/Airport/jetway-movable.xml wherever you want- note that the origin of the jetway models are always at the terminal rotunda of the first jetway. You can download the movable jetway models through TerraSync or from the Airport section of the FlightGear Scenery Database model directory (look for "jetway-movable.xml," "jetway-movable-2.xml," or "jetway-movable-3.xml").
For scenery modelers
The default animated jetway design is very common throughout the world, and found in practically all major United States airports. If you wish to create your own style though (i.e. glass jetways), then the simplest method would be to retexture one of the default animated jetways and copy the contents of its XML file (but change the <path>, of course).
You could create an entirely different jetway model, but you must keep the object names the same, and everything in the exact same location. Copy the contents of the XML file for one of the default animated jetways (but change the <path>, of course).
