Canvas snippets: Difference between revisions
Jump to navigation
Jump to search
(→Adding GUI Labels: Adding minimalistic example.) |
|||
| Line 69: | Line 69: | ||
== Adding GUI Labels == | == Adding GUI Labels == | ||
{| class="wikitable" | |||
|- | |||
! Screenshot !! Code !! | |||
|- | |||
| please upload ...|| | |||
| | |||
{{Note|This assumes that you already have a top-level root group set up, and named it '''root''', just change this variable if you want it to be rendered elsewhere. It also assumes you have a Layout item setup and called '''myLayoutItem'''. You must also have either setup a layout called '''style''' or be calling this from inside a dialog showed using canvas.loadDialog(dialog), which will define it for you.}} | |||
<syntaxhighlight lang="nasal" enclose="div"> | |||
var label = gui.widgets.Label.new(root, style, {wordWrap: 0}); # wordwrap: 0 will disable wordwrapping, to enable it use 1 instead | |||
label.setText("Hello world."); | |||
myLayoutItem.addItem(label); | |||
</syntaxhighlight> | |||
|- | |||
|} | |||
== Adding GUI Buttons == | == Adding GUI Buttons == | ||
Revision as of 18:18, 20 September 2014
| This article is a stub. You can help the wiki by expanding it. |
| Work in progress This article or section will be worked on in the upcoming hours or days. See history for the latest developments. |
| The FlightGear forum has a subforum related to: Canvas |
Creating a standalone Canvas
| Screenshot | Code | |
|---|---|---|
| please upload ... |
# Create a standalone Canvas (not attached to any GUI dialog/aircraft etc)
var myCanvas = canvas.new({
  "name": "Livery Test",   # The name is optional but allow for easier identification
  "size": [512, 512], # Size of the underlying texture (should be a power of 2, required) [Resolution]
  "view": [512, 512],  # Virtual resolution (Defines the coordinate system of the canvas [Dimensions]
                        # which will be stretched the size of the texture, required)
  "mipmapping": 1       # Enable mipmapping (optional)
});

# set background color
myCanvas.set("background", canvas.style.getColor("bg_color"));

# creating the top-level/root group which will contain all other elements/group
var root = myCanvas.createGroup();

# OPTIONAL: Create a Canvas dialog window to hold the canvas and show that it's working
# the Canvas is now standalone, i.e. continues to live once the dialog is closed!
var window = canvas.Window.new([512,512],"dialog");
window.setCanvas(myCanvas); |
Creating a Canvas GUI Window
| Screenshot | Code | |
|---|---|---|
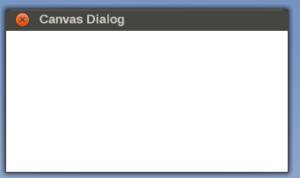
 This is what the Nasal/Canvas snippet will look like once you pasted it into the Nasal Console and click "Execute". |
# create a new window, dimensions are 320 x 160, using the dialog decoration (i.e. titlebar)
var window = canvas.Window.new([320,160],"dialog");

# adding a canvas to the new window and setting up background colors/transparency
var myCanvas = window.createCanvas().set("background", canvas.style.getColor("bg_color"));

# Using specific css colors would also be possible:
# myCanvas.set("background", "#ffaac0");

# creating the top-level/root group which will contain all other elements/group
var root = myCanvas.createGroup(); |
Adding Raster Images
Adding OpenVG Paths
Adding Vector Images
Adding Text Elements
Adding GUI Labels
| Screenshot | Code | ||
|---|---|---|---|
| please upload ... |
    var label = gui.widgets.Label.new(root, style, {wordWrap: 0}); # wordwrap: 0 will disable wordwrapping, to enable it use 1 instead
    label.setText("Hello world.");
myLayoutItem.addItem(label); |
Adding GUI Buttons
Using Layouts
Using Styling
Adding a MapStructure map to a Canvas
| Screenshot | Code | |
|---|---|---|
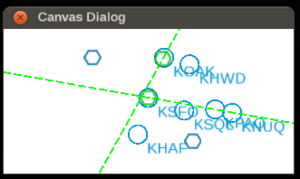
 MapStructure layers shown in a Canvas GUI dialog |
var TestMap = root.createChild("map");
TestMap.setController("Aircraft position");
TestMap.setRange(25);

TestMap.setTranslation(    myCanvas.get("view[0]")/2,
                           myCanvas.get("view[1]")/2
                        );
var r = func(name,vis=1,zindex=nil) return caller(0)[0];

foreach(var type; [r('APT'), r('VOR') ] )
TestMap.addLayer(factory: canvas.SymbolLayer, type_arg: type.name, visible: type.vis, priority: type.zindex,); |
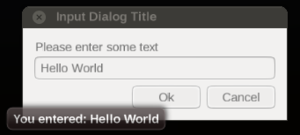
Canvas Input Dialog
| Screenshot | Code | |
|---|---|---|
# create a new InputDialog with a title, label, and a callback
canvas.InputDialog.getText("Input Dialog Title", "Please enter some text", func(btn,value) {
    if (value) gui.popupTip("You entered: "~value);
}); |
