ATC tutorial: Difference between revisions
(This article is not ready. I'm bussy with it, so please don't change anything till I'm done. Thank you.) |
(Linking to the main ATC phraseology article; - Moving link to English guide from Slovenian CAA to ATC phraseology) |
||
| (55 intermediate revisions by 17 users not shown) | |||
| Line 1: | Line 1: | ||
{{ATC-navbar}} | |||
{{Main article|Air traffic control}} | |||
== | [[Air traffic control|Air Traffic Control]] is an agreed procedure and process which keeps the [[aircraft]] separated to ensure that they don't crash into each other or are affected by turbulence when passing through the same air space. This article, probably more directly useful for pilots, will teach you that procedure and will hopefully help you to enjoy controlled areas and airports on the FlightGear multiplayer servers. | ||
{| class=" | |||
! | == Controller roles == | ||
! | The roles a controller can assume mirror the ones that a pilot can encounter in "real life" aviation: | ||
! | {| class="wikitable" | ||
! scope="col"| Position suffix | |||
! scope="col"| Name | |||
! scope="col"| Description | |||
|- | |||
| xxxx_DL | |||
| Clearance Delivery | |||
| Checks flight plans submitted by pilots (or creates them) to make sure no aircraft intersects the route of another one at the same time and that visibility conditions and cruise altitude are adequate. Revokes or amends the flight plans as necessary. Assigns squawk (transponder) codes. Gives aircraft clearances (authorizations to fly to a destination airport via a certain route). | |||
|- | |- | ||
| | | xxxx_GN | ||
|Ground | | Ground | ||
|Controls the movement of aircraft on the ground at an airport, | | Controls the movement of aircraft on the ground at an airport (stands, apron, taxiways). Issues taxi clearances, assisting pilots if needed. Controls the ''inactive'' runways, but does not control the ''active'' ones; thus, a pilot generally needs to contact Tower to enter or cross them (at some fields, Ground coordinates with Tower and is able to issue runway crossing clearances). | ||
|- | |||
| xxxx_TW | |||
| Tower | |||
| Controls the ''active'' runways and the airspace up to 10 NM (nautical miles) from the airport; chooses the runways to use; clears planes for takeoff and landing, making sure that they are at least 10 NM or three minutes apart. | |||
|- | |||
| xxxx_AP | |||
| Approach | |||
| Controls the airspace up to 30 NM away from the airport, up to 18,000 ft (usually). Handles all aircraft leaving or arriving at an airport, until they are established on the ILS/have the runway in sight (then gives the plane to TWR) or are leaving their airspace to continue their flight (then hands them off to CTR). Ensures that aircraft is adequately separated. | |||
|- | |- | ||
| | | xxxx_DE | ||
| | | Departure | ||
| | | This position is rarely used, except at busy airports; it handles all the departures and hands them off to CTR, leaving the approach controller free to handle only arrivals. Coordinates closely with the approach controller to prevent collisions. | ||
|- | |- | ||
| | | xxxx_CT | ||
| | | Center | ||
| | | Center (sector) controllers own all airspace not controlled by APP/DEP or TWR. They control the plane while en route, and get it from X to Y safely, until it can be instructed to descend and given to the approach controller.<ref>In some areas (e.g. France) Center controllers are supplemented by Flight Service Stations (FSS), which provide useful information (weather, frequencies...) to pilots and do ''not'' offer air traffic control.</ref> | ||
|} | |||
* The "xxxx" in the table replace a code used to identify the area that controller is using; these are known as ''ICAO codes'' and can be found on the [http://www.airport-technology.com/icao-codes/ Airport Codes list]. For example, London Gatwick is "EGKK" so a Gatwick Tower Controller would log-in as ''EGKK_TW''. | |||
* Center controllers also have ICAO identifiers, but they are not for one airport, but for a larger area. For example, ''LFFF_CT'' is France Center, and ''LFFF_FS'' is the France Flight Service Station. | |||
* At large airports, multiple controllers may man the same positions. | |||
=== Controller roles in FlightGear === | |||
Since there are not many ATCs in FlightGear, often a single controller fills more than one position. Generally speaking: | |||
* a controller filling a particular position also fills the positions below him/her (the one listed before in the table above) if no one else is covering it; for example, if ''EGKK_TW'' (a Gatwick Tower Controller) is online, but there is no ''EGKK_GN'', the Tower controller acts also as Ground controller; | |||
* as an exception to the rule above, Tower controllers often act also as Approach controllers for the respective airports. | |||
=== Handoffs === | |||
If more than one controller is manning an area, the first controller should tell the pilot to contact the second controller when the airplane is about to enter the airspace of the latter. This is usually done with the phrase: "callsign, ''contact'' station ''on'' frequency". | |||
== IFR vs VFR flights == | |||
{{Main article|Flight rules}} | |||
A distinction you should know for flying in controlled areas is the one between IFR and VFR flights, as flight planning and some phraseology are different. | |||
* VFR (Visual Flight Rules) can apply when a pilot is able to orientate and recognize other aircraft and obstacles visually (that means, for example, the sky should be clear of clouds at low altitudes near the airport when taking off and landing, light must be sufficient, and there must be little or no fog at all); they are used mainly in general aviation; | |||
* IFR (Instrument Flight Rules) apply in all other cases. | |||
== Getting and reading charts == | |||
{{Main article|Getting aeronautical charts}} | |||
You should [[Getting aeronautical charts|get aeronautical charts]] for the airports you intend to fly from/to, specifically: | |||
{| class="wikitable" | |||
! scope="col"| Chart type | |||
! scope="col"| Description | |||
|- | |- | ||
| | | Airport information | ||
| | | Describes the characteristics of the airport and provides a list of radio frequencies. | ||
|- | |- | ||
| | | Ground (aerodrome chart/airport diagram) | ||
| Depicts the taxiways and runways of a specific airport; used while taxiing from and to the terminal. | |||
| | |||
|- | |- | ||
| | | SID/STAR | ||
| | | Used for instrument departures and arrivals. | ||
|- | |- | ||
| | | VFR | ||
| | | Those charts are used for VFR flights and usually depict minimum safe altitudes for each area, as well as reporting points (you must report your position to ATC when flying over them). | ||
|} | |} | ||
== Phraseology == | |||
{{main article|ATC phraseology}} | |||
=== A sample IFR flight === | |||
We will teach the phraseology through an IFR sample flight from LEBL (Barcelona) to EDDF (Frankfurt am Main). For simplicity, we assume that all controller positions (delivery, ground, tower, approach/departure and center) are manned; also, we assume our callsign is ''BAW1542'' (to be read as ''Speedbird one five four two''). | |||
==== Planning the flight ==== | |||
{{Main article|Flight planning}} | |||
It's a good practice to file a flight plan on [http://flightgear-atc.alwaysdata.net/ Lenny's website] so that the controllers will be able to know your departure/destination airports, cruising altitude and route without asking you about that every time. | |||
Follow the instructions on the [[Flight planning]] article to file a flightplan from LEBL to EDDF with a cruising altitude of FL250. | |||
==== Getting the departure clearance ==== | |||
We start on the airport apron at terminal T1, stand 221. | |||
The first thing we need to do is to check the current air pressure and which runway is being used; as a general rule, planes should be heading into the wind for takeoff and landing. To accomplish this, we need to listen to the ''ATIS'' (Automatic Terminal Information Service), a prerecorded message describing weather information, the runways in use and other important information for pilots; it's transmitted continuously on a dedicated radio channel. The frequency to use is written in the Airport information chart and can also be found by clicking on ''AI -> ATC Services in Range -> LEBL'': in our case, it's 121.970 MHz. | |||
We open the Radio panel, set the COM1 frequency to 121.97 and listen to the ATIS message: | |||
* '''LEBL ATIS:''' ''This is El Prat information Alpha. Landing runway two five right. Departure runway two five left. Transition level five zero. Wind two zero zero degrees, one zero knots. Visibility one zero km or more, few two thousand five hundred feet. Temperature two two, dewpoint one zero. QNH one zero one eight. No significant change. On initial contact advise controller you have information Alpha.'' | |||
This tells us that: | |||
# We're going to depart from runway 25L. | |||
# We need to set the altimeter to 1018 hPa<ref>European airports generally use hPa (hectopascals) for the QNH while American ones use inHg (inches of mercury). Some airplanes allow you to enter QNH values using both units; if that is not the case, you will need to use a converter.</ref> and set it back to standard pressure (STD) at the transition level (FL050, or 5000 feet). | |||
# Every ATIS broadcast is identified by a progressive letter of the [http://en.wikipedia.org/wiki/NATO_phonetic_alphabet NATO phonetic alphabet]; we'll need to tell the delivery controller that we have information "Alpha" so that (s)he can check whether we have the latest information or not. | |||
Note also that numbers are spelled out for clarity - this will be done in all further communication. | |||
We now get the clearance (authorization to fly to a destination airport) from the delivery controller. The process is as follows. | |||
# We get the Delivery frequency from the Airport information chart or the ATC Services in Range window (in this case, the frequency is 121.800 MHz) and tune COM1 to it (or connect on Mumble and join the delivery channel, or just talk on the Multiplayer chat).<ref>Each controller is free to use FGCom, Mumble or just the text chat as (s)he wishes; generally speaking, everyone accepts ATC via chat and, if voice communication is offered, that is announced on initial contact. Prefer voice communication if possible as it enhances realism and because speaking is quicker than typing.</ref> | |||
# We contact the controller and ask for the clearance. (It is the pilot who needs to initiate contact with ATC, not the opposite). ''Tip: note down the clearance on a piece of paper as it's difficult (and risky) to memorize it.'' | |||
# The Delivery controller gives us the clearance including: | |||
#* our callsign; | |||
#* whether we've got the latest ("current") ATIS information or not; | |||
#* our destination airport; | |||
#* the departure SID/waypoints; | |||
#* the route we'll need to follow (if it is not mentioned, we'll follow the route we wrote in our flight plan); | |||
#* the initial and cruising altitude; | |||
#* the squawk ([[transponder]]) code we'll need to set. | |||
# We read back (repeat) the clearance to confirm we understood it correctly. | |||
# The controller corrects any mistakes we've made and then hands us off to the Ground controller. | |||
* '''BAW1542:''' El Prat Delivery, this is Speedbird one five four two, requesting delivery to Frankfurt, flight level two five zero, we have information Alpha. | |||
* '''El Prat Delivery:''' Speedbird one five four two, Alpha is current, cleared to Frankfurt via OKABI three Whiskey, initial altitude five hundred feet, expect flight level two five zero after ten minutes, squawk four zero zero zero. | |||
* '''BAW1542:''' Cleared to Frankfurt via OKABI three Whiskey, initial altitude five hundred feet, expect flight level two five zero after ten minutes, squawk four zero zero zero, Speedbird one five four two. | |||
* '''El Prat Delivery:''' Speedbird one five four two, readback correct, contact El Prat Ground on one two one decimal six five zero. | |||
* '''BAW1542:''' Contact El Prat Ground on one two one decimal six five zero, Speedbird one five four two. | |||
The controller asked us to follow the OKABI3W SID after departure - get the SID charts, find it and look at the chart or read the text route descriptions. In this case, the SID prescribes pilots to climb to 500 ft, turn left to intercept radial 199 PRA and be at least at 2500 ft at 8 NM from PRA; intercept radial 287 VNV and pass VNV at 5000 ft; turn right to KARDO, pass KARDO at FL120 and proceed direct OKABI. If you've got the Level-D files from [http://www.navigraph.com/ Navigraph], select the SID in the [[Route Manager]] dialog for the route to be automatically entered; otherwise, use the Route Manager to input the VORs and waypoints manually. | |||
We also set the transponder code and switch the transponder to Ground mode (if the aircraft we're using supports this functionality). | |||
==== Pushing back and starting up ==== | |||
Before pushing back (being pushed away from the stand with a tug) and starting up, we need to get appropriate clearances from the Ground controller. This ensures we won't block taxiways unnecessarily. | |||
* '''BAW1542:''' El Prat Ground, Speedbird one five four two at stand two two one, request pushback. | |||
* '''El Prat Ground:''' Speedbird one five four two, El Prat Ground, pushback approved, facing south. | |||
* '''BAW1542:''' Pushback approved, facing south, Speedbird one five four two. | |||
We then push back, making sure the aircraft is turned towards ("facing") south at the end of the maneuver, and ask for permission to start our engines. | |||
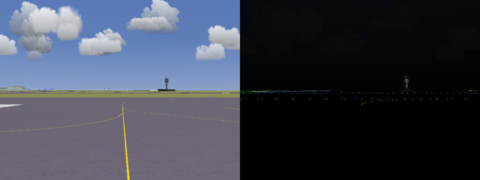
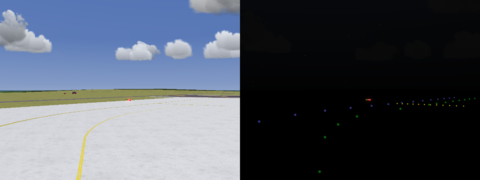
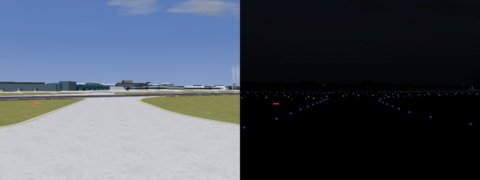
[[File:LEBL-stand220-pushback.png|center|thumb|800px|Our aircraft's position after pushback (noon and night view). Note that the taxiway centerlines are not lit in proximity of stands.]] | |||
* '''BAW1542:''' Speedbird one five four two, request startup. | |||
* '''El Prat Ground:''' Speedbird one five four two, startup approved. | |||
* '''BAW1542:''' Startup approved, Speedbird one five four two. | |||
After that, we start our engines and complete our checklists as quickly as possible. | |||
=== | ==== Taxiing to the runway ==== | ||
We ask for clearance to taxi to the departure runway. | |||
* '''BAW1542:''' Speedbird one five four two is ready to taxi. | |||
* '''El Prat Ground:''' Speedbird one five four two, taxi to holding point Echo two via Lima and Echo, QNH one zero one eight. | |||
* '''BAW1542:''' Taxi to holding point Echo two via Lima and Echo, QNH one zero one eight, Speedbird one five four two. | |||
The current QNH may be repeated by the ground controller, even if we have just heard it on the ATIS, as a reminder to set it to the correct value - so check it. After that, open the ground chart and check your taxi route before starting, as in some cases taxi signs will not be present at all intersections. You will notice that the controller cleared us only to holding point E2, so, once there, we'll need to report our position and await further instructions. The holding point is marked by a ''stop bar'' (a dotted/continuous yellow line: the dotted one faces the runway while the continuous line faces the taxiway, to remind you that you need a clearance to cross the runway, and it is lit at night by means of pulsing yellow lights). | |||
Taxi to E2 as instructed at a maximum speed of 30 knots and ''hold short'' (stop) just before the stop bar. Remember that, while the controller may instruct you to ''hold position'' (stop) and ''give way'' to another plane, it's still your responsibility not to collide with buildings, vehicles or other aircraft; also, should you at any point become unsure of your position, stop at once and ask the ground controller. | |||
<gallery widths=400px mode=packed> | |||
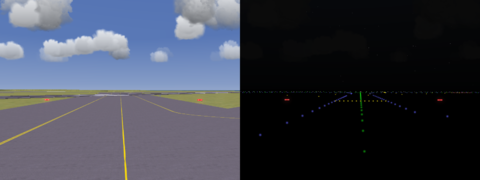
File:LEBL-E3.png|Taxiing to intersection E3 - no ground signs are present, so you should use the ground chart as a reference. | |||
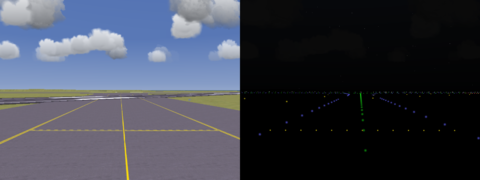
File:LEBL-E2.png|Approaching holding point E2. | |||
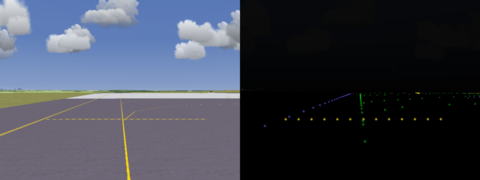
File:LEBL-E2-stopbar.png|Close up of the E2 stop bar. | |||
</gallery> | |||
We contact the ground controller to tell him/her we're at E2. | |||
* '''BAW1542:''' Speedbird one five four two, we're holding short Echo two. | |||
'' | * '''El Prat Ground:''' Speedbird one five four two, cleared to cross runway zero two, taxi to holding point Golf one via Echo one and Kilo. | ||
* '''BAW1542:''' Cleared to cross runway zero two and taxi to holding point Golf one via Echo one and Kilo, Speedbird one five four two. | |||
We then cross the runway without delay and turn left on K. Near K2 you can notice a ''CAT II/III holding point'' (marked by an empty yellow rectangle with vertical lines, equipped with ''fixed'' lights) - that's where we would stop if visibility was reduced or if another aircraft was landing using ILS; since that's not the case and we were cleared to G1, just proceed. | |||
<gallery widths=400px mode=packed> | |||
File:LEBL-K2.png|The CAT II/III K2 stop bar. | |||
File:LEBL-G1.png|Approaching the G1 stop bar. | |||
</gallery> | |||
We stop at G1 while the ground controller instructs us to contact the tower: | |||
* '''El Prat Ground:''' Speedbird one five four two, contact El Prat Tower on one one eight decimal three two zero, goodbye! | |||
* '''BAW1542:''' Contact El Prat Tower on one one eight decimal three two zero, Speedbird one five four two, bye! | |||
==== Lining up and taking off ==== | |||
We contact Tower on text chat, FGCom or Mumble (depending on the tools the controller is using) to get our takeoff clearance. It will include, in that order: | |||
# the wind direction and speed; | |||
# wind gusts, if any; | |||
# warnings (like wake turbulence, rain...), if any; | |||
# the runway number; | |||
# the words ''cleared for takeoff''. | |||
* '''BAW1542:''' El Prat Tower, Speedbird one five four two, holding short Golf one. | |||
* '''El Prat Tower:''' Speedbird one five four two, wind is two one zero at five, runway two five left, cleared for takeoff. | |||
* '''BAW1542:''' Cleared for takeoff two five left, Speedbird one five four two. | |||
{{note|If a tower controller clears an aircraft for takeoff while it is still on a taxiway, the pilot is also cleared to enter the runway – there is no need to issue a separate ''line up and wait'' instruction.}} | |||
We set the transponder to ''On'' so that the controllers and other aircraft will be able to see us on radar screens and the [[Traffic alert and collision avoidance system|TCAS]], line up, take off and follow the SID. After the takeoff, the tower controller will hand us off to the departure controller: | |||
* '''El Prat Tower:''' Speedbird one five four two, contact Departure on one two six decimal five zero zero, goodbye! | |||
* '''BAW1542:''' Contact Departure on one two six decimal five zero zero, Speedbird one five four two. | |||
We switch to the departure frequency and contact the controller: | |||
* '''BAW1542:''' El Prat Departure, Speedbird one five four two passing ''current altitude'', OKABI three Whiskey departure. | |||
* '''El Prat Departure:''' Speedbird one five four two, radar contact, climb and maintain flight level two five zero. | |||
* '''BAW1542:''' Climb and maintain flight level two five zero, Speedbird one five four two. | |||
We climb to FL250 and continue following the SID waypoints. When we're approaching the final fix (OKABI) the controller will tell us to follow our flightplan: | |||
* '''El Prat Departure:''' Speedbird one five four two, resume your own navigation, frequency change approved, goodbye! | |||
* '''BAW1542:''' Resuming our own navigation, frequency change approved, Speedbird one five four two, bye! | |||
We're now free to follow our flightplan - it's a good practice to keep an eye on the multiplayer map to check for traffic and to announce altitude changes/turns on text chat if other pilots are nearby.<ref>In real world flying, we would be handed off to center controllers and we would report our position over special points, marked as black triangles in the charts. Since center controllers are not common in FlightGear, this is not usually done.</ref> | |||
''' | ==== Approaching the destination airport ==== | ||
We start descending on our own so as to reach FL150 approximately 100 NM from the destination airport. When we're about 80 NM from EDDF we check the ATIS for the destination airport, just like we did at LEBL - in this case the frequency is 118.02. We tune in the COM1 radio to that frequency and listen: | |||
* '''EDDF ATIS:''' ''This is Frankfurt information Echo. Landing runway zero seven right. Departure runway zero seven center. Transition level five zero. Wind zero two zero degrees, four knots. Visibility one zero km or more, few four thousand eight hundred feet. Temperature one niner<ref>"Niner" is used instead of "nine" to avoid confusion between the similarly sounding "nine" and "nein", the German word for "no".</ref>, dewpoint zero seven. QNH one zero one eight. No significant change. On initial contact advise controller you have information Echo.'' | |||
We then contact the approach controller (in this case Langen Radar, 118.45 MHz): | |||
* '''BAW1542:''' Langen Radar, Speedbird one five four two at flight level one five zero, we have information Echo. | |||
* '''Langen Radar:''' Speedbird one five four two, radar contact, Echo is current, descend and maintain five thousand feet, proceed direct UNOKO. | |||
* '''BAW1542:''' Descend and maintain five thousand feet, proceed direct UNOKO, Speedbird one five four two. | |||
We proceed to the UNOKO waypoint and descend to 5000 ft, as instructed. At 5000 ft we set the altimeter to the local QNH (1018 hPa). | |||
When we're near UNOKO the approach controller will contact us and assign us a STAR (standard arrival route): | |||
* '''Langen Radar:''' Speedbird one five four two, cleared UNOKO one Mike arrival. | |||
* '''BAW1542:''' Cleared UNOKO one Mike arrival, Speedbird one five four two. | |||
Now we follow the altitudes and route in the STAR – in this case, we fly over UNOKO, IBVIL, MANUV, RAMOB and proceed to TAU. | |||
''' | We hold (circle) over TAU until the controller instructs us to continue the approach: | ||
* '''Langen Radar:''' Speedbird one five four two, turn right heading one four zero, descend and maintain three thousand feet, reduce speed to two five zero knots. | |||
* '''BAW1542:''' Turn right heading one four zero, descend and maintain three thousand feet, reducing speed to two five zero knots, Speedbird one five four two. | |||
We now engage the autopilot's heading select mode, fly the given heading, reduce our speed and continue our descent as cleared. After a couple of minutes, the controller calls us and instructs us to use the [[Instrument Landing System]] to get towards the runway: | |||
* '''Langen Radar:''' Speedbird one five four two, cleared ILS approach runway zero seven right. | |||
* '''BAW1542:''' Cleared ILS approach runway zero seven right, Speedbird one five four two. | |||
' | As soon as the localizer is alive we engage the autopilot's localizer mode and, as soon as the glideslope is alive, we switch to approach mode and descend on the glide. The controller will call us one last time to hand us over to Frankfurt Tower: | ||
* '''Langen Radar:''' Speedbird one five four two, contact Frankfurt Tower on one one niner decimal niner zero. | |||
* '''BAW1542:''' Contact Frankfurt Tower on one one niner decimal niner zero, Speedbird one five four two. | |||
==== Landing ==== | |||
We switch to 119.90 MHz and/or join the Frankfurt Tower channel on Mumble, then contact the tower controller to get the landing clearance. It will include: | |||
# the wind direction and speed; | |||
# wind gusts, if any; | |||
# warnings (like wake turbulence, rain...), if any; | |||
# the runway number; | |||
# the words ''cleared to land''. | |||
* '''BAW1542:''' Frankfurt Tower, Speedbird one five four two, ILS approach runway zero niner right. | |||
* '''Frankfurt Tower:''' Speedbird one five four two, Frankfurt Tower, wind zero one zero degrees, five knots, runway zero seven right, cleared to land. | |||
* '''BAW1542:''' Cleared to land, runway zero seven right, Speedbird one five four two. | |||
<gallery widths=400px mode=packed> | |||
File:EDDF-finalapproach.png|Short final to runway 07R. | |||
File:EDDF-landing-07R.png|Landing on 07R. | |||
</gallery> | |||
We land on 07R and ''vacate'' (exit) the runway at the earliest opportunity, making sure not to block other aircraft and not to enter a taxiway marked with a ''NO ENTRY'' sign; in this case, we vacate on the left, since the terminal is on the left. (On occasion, the controller will ask us to vacate on a specific side or to use a specific exit). We are now asked to switch to Ground: | |||
* '''Frankfurt Tower:''' Speedbird one five four two, contact Frankfurt Ground on one two one decimal eight zero. | |||
* '''BAW1542:''' Contact Frankfurt Ground on one two one decimal eight zero, Speedbird one five four two. | |||
''' | ==== Taxiing to the stand and shutting down ==== | ||
We switch the transponder to ground mode and check the ground chart to get the name of the taxiway we are on; in our case, we have vacated the runway on taxiway M15. We then contact the ground controller: | |||
* '''BAW1542:''' Frankfurt Ground, Speedbird one five four two on Mike one five, runway zero seven right vacated. | |||
* '''Frankfurt Ground:''' Speedbird one five four two, Frankfurt Ground, taxi to holding point Mike one four via Mike, hold short of Mike one four. | |||
* '''BAW1542:''' Taxi to holding point Mike one four via Mike, hold short of Mike one four, Speedbird one five four two. | |||
We taxi to holding point M14, stop and report our position to the controller, so that (s)he can coordinate with Tower and clear us to cross the active runway 07C. | |||
* '''BAW1542:''' Speedbird one five four two, holding short Mike one four. | |||
* '''Frankfurt Ground:''' Speedbird one five four two, standby. ''(The controller will ask Tower for crossing clearance – it might take a bit.)'' | |||
* '''Frankfurt Ground:''' Speedbird one five four two, cleared to cross zero seven center, taxi to Lima via Lima niner. | |||
* '''BAW1542:''' Cleared to cross zero seven center, taxi to Lima via Lima niner, Speedbird one five four two. | |||
At this point, we resume taxiing, making sure to cross the runway expeditiously. | |||
''' | Since the taxiways and the apron are managed by two different controllers, the ground controller will hand us off to the apron controller: | ||
* '''Frankfurt Ground:''' Speedbird one five four two, contact Apron East on one two one decimal niner five. | |||
* '''BAW1542:''' Contact Apron East on one two one decimal niner five, Speedbird one five four two. | |||
We switch to the new frequency and report: | |||
* '''BAW1542:''' Apron East, Speedbird one five four two on Lima nine, request taxi to the stand. | |||
* '''Apron South:''' Speedbird one five four two, Apron East, taxi to stand Delta five via Lima and November one. | |||
* '''BAW1542:''' Taxi to stand Delta five via Lima and November one, Speedbird one five four two. | |||
<gallery widths=400px mode=packed> | |||
File:EDDF-M15.png|Taxiing on M15. | |||
File:EDDF-crossing-07C.png|Approaching holding point M14 and preparing to cross runway 07C. Note that the stop bar is not lit, only the ground sign tells you to hold short of the runway – so be careful. | |||
File:EDDF-L.png|Taxiing on L. | |||
</gallery> | |||
We taxi to the stand and shut down, also switching the transponder off – there's no need to ask a clearance for that. Our flight is now finished. | |||
==== This tutorial in video format ==== | |||
The departure and arrival presented in this tutorial have also been recorded. Some interactions were simplified, the result should however be more close to what you usually experience on the multiplayer network. Closed captions are available. | |||
{{#ev:youtube|dA-UXATCHuI|400}} | |||
{{#ev:youtube|E3yfeWjlyic|400}} | |||
''' | === A sample VFR flight === | ||
* [http://forum.flightgear.org/memberlist.php?mode=viewprofile&u=12953 de profundis] has written a VFR tutorial that takes you for a sample flight from KRNO (Reno Tahoe) to KBIH (Eastern Sierra Regional) and covers VFR flight planning, phraseology and tips in great detail. You can get his ''Cross Country Tutorial'' from the [http://forum.flightgear.org/viewtopic.php?f=72&t=19600 dedicated forum thread]. | |||
== Tips == | |||
* This tutorial, for the sake of simplicity and brevity, assumed no other aircraft was present. On multiplayer servers you might be instructed to hold your position, give way to other aircraft or hold (make circles) over a point to remain separate from other aircraft; check the [[ATC phraseology]] page for the specific phraseology used in those situations. | |||
* Follow the guidelines detailed in [[ATC best practices]] to make the experience enjoyable for everyone. | |||
* When practicing controlled flying, make sure you know your aircraft well (you should be able to maintain an assigned speed, altitude and heading), go to a less trafficked airport and tell the controller it's your first time interacting via ATC. | |||
* '''Remember to read back (repeat) the clearances; it is the only way for the controller to know whether you received them correctly or not.''' | |||
* Execute the clearances while reading them back. | |||
== Notes == | |||
<references /> | |||
[[Category:Air Traffic Control]] | |||
Latest revision as of 18:42, 2 September 2021
| Air traffic control |
|---|
|
|
Air Traffic Control is an agreed procedure and process which keeps the aircraft separated to ensure that they don't crash into each other or are affected by turbulence when passing through the same air space. This article, probably more directly useful for pilots, will teach you that procedure and will hopefully help you to enjoy controlled areas and airports on the FlightGear multiplayer servers.
Controller roles
The roles a controller can assume mirror the ones that a pilot can encounter in "real life" aviation:
| Position suffix | Name | Description |
|---|---|---|
| xxxx_DL | Clearance Delivery | Checks flight plans submitted by pilots (or creates them) to make sure no aircraft intersects the route of another one at the same time and that visibility conditions and cruise altitude are adequate. Revokes or amends the flight plans as necessary. Assigns squawk (transponder) codes. Gives aircraft clearances (authorizations to fly to a destination airport via a certain route). |
| xxxx_GN | Ground | Controls the movement of aircraft on the ground at an airport (stands, apron, taxiways). Issues taxi clearances, assisting pilots if needed. Controls the inactive runways, but does not control the active ones; thus, a pilot generally needs to contact Tower to enter or cross them (at some fields, Ground coordinates with Tower and is able to issue runway crossing clearances). |
| xxxx_TW | Tower | Controls the active runways and the airspace up to 10 NM (nautical miles) from the airport; chooses the runways to use; clears planes for takeoff and landing, making sure that they are at least 10 NM or three minutes apart. |
| xxxx_AP | Approach | Controls the airspace up to 30 NM away from the airport, up to 18,000 ft (usually). Handles all aircraft leaving or arriving at an airport, until they are established on the ILS/have the runway in sight (then gives the plane to TWR) or are leaving their airspace to continue their flight (then hands them off to CTR). Ensures that aircraft is adequately separated. |
| xxxx_DE | Departure | This position is rarely used, except at busy airports; it handles all the departures and hands them off to CTR, leaving the approach controller free to handle only arrivals. Coordinates closely with the approach controller to prevent collisions. |
| xxxx_CT | Center | Center (sector) controllers own all airspace not controlled by APP/DEP or TWR. They control the plane while en route, and get it from X to Y safely, until it can be instructed to descend and given to the approach controller.[1] |
- The "xxxx" in the table replace a code used to identify the area that controller is using; these are known as ICAO codes and can be found on the Airport Codes list. For example, London Gatwick is "EGKK" so a Gatwick Tower Controller would log-in as EGKK_TW.
- Center controllers also have ICAO identifiers, but they are not for one airport, but for a larger area. For example, LFFF_CT is France Center, and LFFF_FS is the France Flight Service Station.
- At large airports, multiple controllers may man the same positions.
Controller roles in FlightGear
Since there are not many ATCs in FlightGear, often a single controller fills more than one position. Generally speaking:
- a controller filling a particular position also fills the positions below him/her (the one listed before in the table above) if no one else is covering it; for example, if EGKK_TW (a Gatwick Tower Controller) is online, but there is no EGKK_GN, the Tower controller acts also as Ground controller;
- as an exception to the rule above, Tower controllers often act also as Approach controllers for the respective airports.
Handoffs
If more than one controller is manning an area, the first controller should tell the pilot to contact the second controller when the airplane is about to enter the airspace of the latter. This is usually done with the phrase: "callsign, contact station on frequency".
IFR vs VFR flights
|
|
A distinction you should know for flying in controlled areas is the one between IFR and VFR flights, as flight planning and some phraseology are different.
- VFR (Visual Flight Rules) can apply when a pilot is able to orientate and recognize other aircraft and obstacles visually (that means, for example, the sky should be clear of clouds at low altitudes near the airport when taking off and landing, light must be sufficient, and there must be little or no fog at all); they are used mainly in general aviation;
- IFR (Instrument Flight Rules) apply in all other cases.
Getting and reading charts
|
|
You should get aeronautical charts for the airports you intend to fly from/to, specifically:
| Chart type | Description |
|---|---|
| Airport information | Describes the characteristics of the airport and provides a list of radio frequencies. |
| Ground (aerodrome chart/airport diagram) | Depicts the taxiways and runways of a specific airport; used while taxiing from and to the terminal. |
| SID/STAR | Used for instrument departures and arrivals. |
| VFR | Those charts are used for VFR flights and usually depict minimum safe altitudes for each area, as well as reporting points (you must report your position to ATC when flying over them). |
Phraseology
|
|
A sample IFR flight
We will teach the phraseology through an IFR sample flight from LEBL (Barcelona) to EDDF (Frankfurt am Main). For simplicity, we assume that all controller positions (delivery, ground, tower, approach/departure and center) are manned; also, we assume our callsign is BAW1542 (to be read as Speedbird one five four two).
Planning the flight
|
|
It's a good practice to file a flight plan on Lenny's website so that the controllers will be able to know your departure/destination airports, cruising altitude and route without asking you about that every time.
Follow the instructions on the Flight planning article to file a flightplan from LEBL to EDDF with a cruising altitude of FL250.
Getting the departure clearance
We start on the airport apron at terminal T1, stand 221.
The first thing we need to do is to check the current air pressure and which runway is being used; as a general rule, planes should be heading into the wind for takeoff and landing. To accomplish this, we need to listen to the ATIS (Automatic Terminal Information Service), a prerecorded message describing weather information, the runways in use and other important information for pilots; it's transmitted continuously on a dedicated radio channel. The frequency to use is written in the Airport information chart and can also be found by clicking on AI -> ATC Services in Range -> LEBL: in our case, it's 121.970 MHz.
We open the Radio panel, set the COM1 frequency to 121.97 and listen to the ATIS message:
- LEBL ATIS: This is El Prat information Alpha. Landing runway two five right. Departure runway two five left. Transition level five zero. Wind two zero zero degrees, one zero knots. Visibility one zero km or more, few two thousand five hundred feet. Temperature two two, dewpoint one zero. QNH one zero one eight. No significant change. On initial contact advise controller you have information Alpha.
This tells us that:
- We're going to depart from runway 25L.
- We need to set the altimeter to 1018 hPa[2] and set it back to standard pressure (STD) at the transition level (FL050, or 5000 feet).
- Every ATIS broadcast is identified by a progressive letter of the NATO phonetic alphabet; we'll need to tell the delivery controller that we have information "Alpha" so that (s)he can check whether we have the latest information or not.
Note also that numbers are spelled out for clarity - this will be done in all further communication.
We now get the clearance (authorization to fly to a destination airport) from the delivery controller. The process is as follows.
- We get the Delivery frequency from the Airport information chart or the ATC Services in Range window (in this case, the frequency is 121.800 MHz) and tune COM1 to it (or connect on Mumble and join the delivery channel, or just talk on the Multiplayer chat).[3]
- We contact the controller and ask for the clearance. (It is the pilot who needs to initiate contact with ATC, not the opposite). Tip: note down the clearance on a piece of paper as it's difficult (and risky) to memorize it.
- The Delivery controller gives us the clearance including:
- our callsign;
- whether we've got the latest ("current") ATIS information or not;
- our destination airport;
- the departure SID/waypoints;
- the route we'll need to follow (if it is not mentioned, we'll follow the route we wrote in our flight plan);
- the initial and cruising altitude;
- the squawk (transponder) code we'll need to set.
- We read back (repeat) the clearance to confirm we understood it correctly.
- The controller corrects any mistakes we've made and then hands us off to the Ground controller.
- BAW1542: El Prat Delivery, this is Speedbird one five four two, requesting delivery to Frankfurt, flight level two five zero, we have information Alpha.
- El Prat Delivery: Speedbird one five four two, Alpha is current, cleared to Frankfurt via OKABI three Whiskey, initial altitude five hundred feet, expect flight level two five zero after ten minutes, squawk four zero zero zero.
- BAW1542: Cleared to Frankfurt via OKABI three Whiskey, initial altitude five hundred feet, expect flight level two five zero after ten minutes, squawk four zero zero zero, Speedbird one five four two.
- El Prat Delivery: Speedbird one five four two, readback correct, contact El Prat Ground on one two one decimal six five zero.
- BAW1542: Contact El Prat Ground on one two one decimal six five zero, Speedbird one five four two.
The controller asked us to follow the OKABI3W SID after departure - get the SID charts, find it and look at the chart or read the text route descriptions. In this case, the SID prescribes pilots to climb to 500 ft, turn left to intercept radial 199 PRA and be at least at 2500 ft at 8 NM from PRA; intercept radial 287 VNV and pass VNV at 5000 ft; turn right to KARDO, pass KARDO at FL120 and proceed direct OKABI. If you've got the Level-D files from Navigraph, select the SID in the Route Manager dialog for the route to be automatically entered; otherwise, use the Route Manager to input the VORs and waypoints manually.
We also set the transponder code and switch the transponder to Ground mode (if the aircraft we're using supports this functionality).
Pushing back and starting up
Before pushing back (being pushed away from the stand with a tug) and starting up, we need to get appropriate clearances from the Ground controller. This ensures we won't block taxiways unnecessarily.
- BAW1542: El Prat Ground, Speedbird one five four two at stand two two one, request pushback.
- El Prat Ground: Speedbird one five four two, El Prat Ground, pushback approved, facing south.
- BAW1542: Pushback approved, facing south, Speedbird one five four two.
We then push back, making sure the aircraft is turned towards ("facing") south at the end of the maneuver, and ask for permission to start our engines.

- BAW1542: Speedbird one five four two, request startup.
- El Prat Ground: Speedbird one five four two, startup approved.
- BAW1542: Startup approved, Speedbird one five four two.
After that, we start our engines and complete our checklists as quickly as possible.
Taxiing to the runway
We ask for clearance to taxi to the departure runway.
- BAW1542: Speedbird one five four two is ready to taxi.
- El Prat Ground: Speedbird one five four two, taxi to holding point Echo two via Lima and Echo, QNH one zero one eight.
- BAW1542: Taxi to holding point Echo two via Lima and Echo, QNH one zero one eight, Speedbird one five four two.
The current QNH may be repeated by the ground controller, even if we have just heard it on the ATIS, as a reminder to set it to the correct value - so check it. After that, open the ground chart and check your taxi route before starting, as in some cases taxi signs will not be present at all intersections. You will notice that the controller cleared us only to holding point E2, so, once there, we'll need to report our position and await further instructions. The holding point is marked by a stop bar (a dotted/continuous yellow line: the dotted one faces the runway while the continuous line faces the taxiway, to remind you that you need a clearance to cross the runway, and it is lit at night by means of pulsing yellow lights).
Taxi to E2 as instructed at a maximum speed of 30 knots and hold short (stop) just before the stop bar. Remember that, while the controller may instruct you to hold position (stop) and give way to another plane, it's still your responsibility not to collide with buildings, vehicles or other aircraft; also, should you at any point become unsure of your position, stop at once and ask the ground controller.
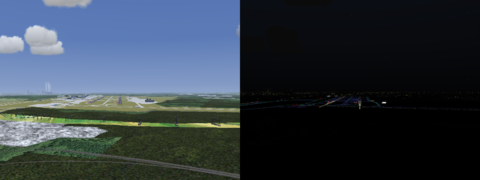
Taxiing to intersection E3 - no ground signs are present, so you should use the ground chart as a reference.
Approaching holding point E2.
Close up of the E2 stop bar.


We contact the ground controller to tell him/her we're at E2.
- BAW1542: Speedbird one five four two, we're holding short Echo two.
- El Prat Ground: Speedbird one five four two, cleared to cross runway zero two, taxi to holding point Golf one via Echo one and Kilo.
- BAW1542: Cleared to cross runway zero two and taxi to holding point Golf one via Echo one and Kilo, Speedbird one five four two.
We then cross the runway without delay and turn left on K. Near K2 you can notice a CAT II/III holding point (marked by an empty yellow rectangle with vertical lines, equipped with fixed lights) - that's where we would stop if visibility was reduced or if another aircraft was landing using ILS; since that's not the case and we were cleared to G1, just proceed.
The CAT II/III K2 stop bar.
Approaching the G1 stop bar.


We stop at G1 while the ground controller instructs us to contact the tower:
- El Prat Ground: Speedbird one five four two, contact El Prat Tower on one one eight decimal three two zero, goodbye!
- BAW1542: Contact El Prat Tower on one one eight decimal three two zero, Speedbird one five four two, bye!
Lining up and taking off
We contact Tower on text chat, FGCom or Mumble (depending on the tools the controller is using) to get our takeoff clearance. It will include, in that order:
- the wind direction and speed;
- wind gusts, if any;
- warnings (like wake turbulence, rain...), if any;
- the runway number;
- the words cleared for takeoff.
- BAW1542: El Prat Tower, Speedbird one five four two, holding short Golf one.
- El Prat Tower: Speedbird one five four two, wind is two one zero at five, runway two five left, cleared for takeoff.
- BAW1542: Cleared for takeoff two five left, Speedbird one five four two.
| Note If a tower controller clears an aircraft for takeoff while it is still on a taxiway, the pilot is also cleared to enter the runway – there is no need to issue a separate line up and wait instruction. |
We set the transponder to On so that the controllers and other aircraft will be able to see us on radar screens and the TCAS, line up, take off and follow the SID. After the takeoff, the tower controller will hand us off to the departure controller:
- El Prat Tower: Speedbird one five four two, contact Departure on one two six decimal five zero zero, goodbye!
- BAW1542: Contact Departure on one two six decimal five zero zero, Speedbird one five four two.
We switch to the departure frequency and contact the controller:
- BAW1542: El Prat Departure, Speedbird one five four two passing current altitude, OKABI three Whiskey departure.
- El Prat Departure: Speedbird one five four two, radar contact, climb and maintain flight level two five zero.
- BAW1542: Climb and maintain flight level two five zero, Speedbird one five four two.
We climb to FL250 and continue following the SID waypoints. When we're approaching the final fix (OKABI) the controller will tell us to follow our flightplan:
- El Prat Departure: Speedbird one five four two, resume your own navigation, frequency change approved, goodbye!
- BAW1542: Resuming our own navigation, frequency change approved, Speedbird one five four two, bye!
We're now free to follow our flightplan - it's a good practice to keep an eye on the multiplayer map to check for traffic and to announce altitude changes/turns on text chat if other pilots are nearby.[4]
Approaching the destination airport
We start descending on our own so as to reach FL150 approximately 100 NM from the destination airport. When we're about 80 NM from EDDF we check the ATIS for the destination airport, just like we did at LEBL - in this case the frequency is 118.02. We tune in the COM1 radio to that frequency and listen:
- EDDF ATIS: This is Frankfurt information Echo. Landing runway zero seven right. Departure runway zero seven center. Transition level five zero. Wind zero two zero degrees, four knots. Visibility one zero km or more, few four thousand eight hundred feet. Temperature one niner[5], dewpoint zero seven. QNH one zero one eight. No significant change. On initial contact advise controller you have information Echo.
We then contact the approach controller (in this case Langen Radar, 118.45 MHz):
- BAW1542: Langen Radar, Speedbird one five four two at flight level one five zero, we have information Echo.
- Langen Radar: Speedbird one five four two, radar contact, Echo is current, descend and maintain five thousand feet, proceed direct UNOKO.
- BAW1542: Descend and maintain five thousand feet, proceed direct UNOKO, Speedbird one five four two.
We proceed to the UNOKO waypoint and descend to 5000 ft, as instructed. At 5000 ft we set the altimeter to the local QNH (1018 hPa).
When we're near UNOKO the approach controller will contact us and assign us a STAR (standard arrival route):
- Langen Radar: Speedbird one five four two, cleared UNOKO one Mike arrival.
- BAW1542: Cleared UNOKO one Mike arrival, Speedbird one five four two.
Now we follow the altitudes and route in the STAR – in this case, we fly over UNOKO, IBVIL, MANUV, RAMOB and proceed to TAU.
We hold (circle) over TAU until the controller instructs us to continue the approach:
- Langen Radar: Speedbird one five four two, turn right heading one four zero, descend and maintain three thousand feet, reduce speed to two five zero knots.
- BAW1542: Turn right heading one four zero, descend and maintain three thousand feet, reducing speed to two five zero knots, Speedbird one five four two.
We now engage the autopilot's heading select mode, fly the given heading, reduce our speed and continue our descent as cleared. After a couple of minutes, the controller calls us and instructs us to use the Instrument Landing System to get towards the runway:
- Langen Radar: Speedbird one five four two, cleared ILS approach runway zero seven right.
- BAW1542: Cleared ILS approach runway zero seven right, Speedbird one five four two.
As soon as the localizer is alive we engage the autopilot's localizer mode and, as soon as the glideslope is alive, we switch to approach mode and descend on the glide. The controller will call us one last time to hand us over to Frankfurt Tower:
- Langen Radar: Speedbird one five four two, contact Frankfurt Tower on one one niner decimal niner zero.
- BAW1542: Contact Frankfurt Tower on one one niner decimal niner zero, Speedbird one five four two.
Landing
We switch to 119.90 MHz and/or join the Frankfurt Tower channel on Mumble, then contact the tower controller to get the landing clearance. It will include:
- the wind direction and speed;
- wind gusts, if any;
- warnings (like wake turbulence, rain...), if any;
- the runway number;
- the words cleared to land.
- BAW1542: Frankfurt Tower, Speedbird one five four two, ILS approach runway zero niner right.
- Frankfurt Tower: Speedbird one five four two, Frankfurt Tower, wind zero one zero degrees, five knots, runway zero seven right, cleared to land.
- BAW1542: Cleared to land, runway zero seven right, Speedbird one five four two.
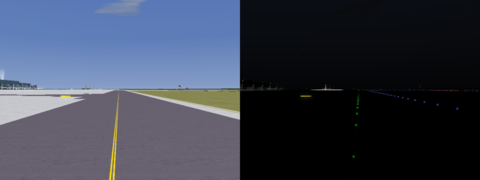
Short final to runway 07R.
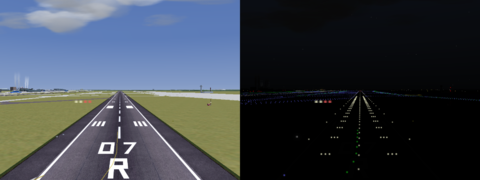
Landing on 07R.


We land on 07R and vacate (exit) the runway at the earliest opportunity, making sure not to block other aircraft and not to enter a taxiway marked with a NO ENTRY sign; in this case, we vacate on the left, since the terminal is on the left. (On occasion, the controller will ask us to vacate on a specific side or to use a specific exit). We are now asked to switch to Ground:
- Frankfurt Tower: Speedbird one five four two, contact Frankfurt Ground on one two one decimal eight zero.
- BAW1542: Contact Frankfurt Ground on one two one decimal eight zero, Speedbird one five four two.
Taxiing to the stand and shutting down
We switch the transponder to ground mode and check the ground chart to get the name of the taxiway we are on; in our case, we have vacated the runway on taxiway M15. We then contact the ground controller:
- BAW1542: Frankfurt Ground, Speedbird one five four two on Mike one five, runway zero seven right vacated.
- Frankfurt Ground: Speedbird one five four two, Frankfurt Ground, taxi to holding point Mike one four via Mike, hold short of Mike one four.
- BAW1542: Taxi to holding point Mike one four via Mike, hold short of Mike one four, Speedbird one five four two.
We taxi to holding point M14, stop and report our position to the controller, so that (s)he can coordinate with Tower and clear us to cross the active runway 07C.
- BAW1542: Speedbird one five four two, holding short Mike one four.
- Frankfurt Ground: Speedbird one five four two, standby. (The controller will ask Tower for crossing clearance – it might take a bit.)
- Frankfurt Ground: Speedbird one five four two, cleared to cross zero seven center, taxi to Lima via Lima niner.
- BAW1542: Cleared to cross zero seven center, taxi to Lima via Lima niner, Speedbird one five four two.
At this point, we resume taxiing, making sure to cross the runway expeditiously.
Since the taxiways and the apron are managed by two different controllers, the ground controller will hand us off to the apron controller:
- Frankfurt Ground: Speedbird one five four two, contact Apron East on one two one decimal niner five.
- BAW1542: Contact Apron East on one two one decimal niner five, Speedbird one five four two.
We switch to the new frequency and report:
- BAW1542: Apron East, Speedbird one five four two on Lima nine, request taxi to the stand.
- Apron South: Speedbird one five four two, Apron East, taxi to stand Delta five via Lima and November one.
- BAW1542: Taxi to stand Delta five via Lima and November one, Speedbird one five four two.
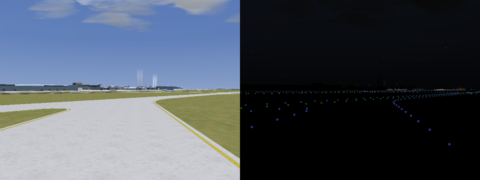
Taxiing on M15.
Approaching holding point M14 and preparing to cross runway 07C. Note that the stop bar is not lit, only the ground sign tells you to hold short of the runway – so be careful.
Taxiing on L.


We taxi to the stand and shut down, also switching the transponder off – there's no need to ask a clearance for that. Our flight is now finished.
This tutorial in video format
The departure and arrival presented in this tutorial have also been recorded. Some interactions were simplified, the result should however be more close to what you usually experience on the multiplayer network. Closed captions are available.
A sample VFR flight
- de profundis has written a VFR tutorial that takes you for a sample flight from KRNO (Reno Tahoe) to KBIH (Eastern Sierra Regional) and covers VFR flight planning, phraseology and tips in great detail. You can get his Cross Country Tutorial from the dedicated forum thread.
Tips
- This tutorial, for the sake of simplicity and brevity, assumed no other aircraft was present. On multiplayer servers you might be instructed to hold your position, give way to other aircraft or hold (make circles) over a point to remain separate from other aircraft; check the ATC phraseology page for the specific phraseology used in those situations.
- Follow the guidelines detailed in ATC best practices to make the experience enjoyable for everyone.
- When practicing controlled flying, make sure you know your aircraft well (you should be able to maintain an assigned speed, altitude and heading), go to a less trafficked airport and tell the controller it's your first time interacting via ATC.
- Remember to read back (repeat) the clearances; it is the only way for the controller to know whether you received them correctly or not.
- Execute the clearances while reading them back.
Notes
- ↑ In some areas (e.g. France) Center controllers are supplemented by Flight Service Stations (FSS), which provide useful information (weather, frequencies...) to pilots and do not offer air traffic control.
- ↑ European airports generally use hPa (hectopascals) for the QNH while American ones use inHg (inches of mercury). Some airplanes allow you to enter QNH values using both units; if that is not the case, you will need to use a converter.
- ↑ Each controller is free to use FGCom, Mumble or just the text chat as (s)he wishes; generally speaking, everyone accepts ATC via chat and, if voice communication is offered, that is announced on initial contact. Prefer voice communication if possible as it enhances realism and because speaking is quicker than typing.
- ↑ In real world flying, we would be handed off to center controllers and we would report our position over special points, marked as black triangles in the charts. Since center controllers are not common in FlightGear, this is not usually done.
- ↑ "Niner" is used instead of "nine" to avoid confusion between the similarly sounding "nine" and "nein", the German word for "no".