ALS technical notes: Difference between revisions
(Separated glass and interior effects) |
|||
| Line 124: | Line 124: | ||
== ALS glass effect == | == ALS glass effect == | ||
As of version 3.5, ALS supports a glass effect with | As of FlightGear version 3.5, ALS supports a glass effect with dynamic response to the environment which can render, for instance, the splashes of raindrops on the canopy, frost or fogging. | ||
[[File:Glass01.jpg|400px|Frost effect]] | [[File:Glass01.jpg|400px|Frost effect]] | ||
| Line 156: | Line 156: | ||
<reflection-strength type="float">1.0</reflection-strength> | <reflection-strength type="float">1.0</reflection-strength> | ||
</syntaxhighlight> | </syntaxhighlight> | ||
=== Rain === | === Rain === | ||
| Line 306: | Line 234: | ||
Examples for the result of a fog mask and a damage mask are shown below: | Examples for the result of a fog mask and a damage mask are shown below: | ||
[[File:Glass12.jpg|400px|Crack pattern using a damage mask]] | |||
[[File:Glass11.jpg|400px|Partial fogging using a mask texture]] | [[File:Glass11.jpg|400px|Partial fogging using a mask texture]] | ||
=== Mie scattering === | === Mie scattering === | ||
| Line 315: | Line 243: | ||
[[File:Glass08.jpg|400px|Mie scattering of low light on frost]] | [[File:Glass08.jpg|400px|Mie scattering of low light on frost]] | ||
[[File:Glass13.jpg|400px|Morning sun Mie scattering on fog]] | [[File:Glass13.jpg|400px|Morning sun Mie scattering on fog]] | ||
== Interior shading == | |||
With FlightGear version 3.5 and above, ALS now supports interior shading; i.e. the sun shining through the windows and casting shadows on the panel. | |||
This is typically created in an effect file such as | |||
c172-interior.eff | |||
which is called by inheritance in the model.xml file. | |||
ie: | |||
<syntaxhighlight lang="xml"> | |||
<effect> | |||
<inherits-from>Aircraft/c172p/Models/Effects/c172p-interior</inherits-from> | |||
<object-name>Plane.010_0</object-name> | |||
<object-name>Plane.010_1</object-name> | |||
<object-name>PilotSeat</object-name> | |||
<object-name>CopilotSeat</object-name> | |||
<object-name>panel_1_1</object-name> | |||
<object-name>InstrumentCover.001</object-name> | |||
<object-name>doorint_right</object-name> | |||
<object-name>doorint_left</object-name> | |||
<object-name>doorhandleint_right</object-name> | |||
<object-name>doorhandleint_left</object-name> | |||
<object-name>Panel_0</object-name> | |||
<object-name>Throttle</object-name> | |||
<object-name>Mixture</object-name> | |||
<object-name>Pedestal</object-name> | |||
<object-name>TrimWheel</object-name> | |||
<object-name>ParkingBrake</object-name> | |||
<object-name>BackSeat</object-name> | |||
<object-name>FuelSelectorFace</object-name> | |||
</effect> | |||
</syntaxhighlight> | |||
Each object that you want the shadow effect to fall on must be included in the inheritance. | |||
Unless you supply a path, the cube_.png's need to reside in the same directory as the model.xml where you added the <effect> tag pair that calls c172-interior.eff, not where you put the aircraft_interior.eff. | |||
The orientation of the faces of each cube have to be adjusted based on the positive and negative axis of the model. | |||
For example, using the c172p model as a reference. | |||
The tail, right wing and top on the model are positive inside Blender. So the cube faces are laid out as follows. | |||
Note: depending on the image's orientation when photographed the rotation direction will vary. Using compass headings to describe how to rotate the images. | |||
px (tail) rotate 90 deg from N or S to W | |||
nx (nose) rotate 90 deg from N or S to E | |||
py (starboard/right) from N do not rotate | |||
ny (port/left) from N rotate 180 deg to S | |||
pz (top) rotate 90 deg from N or S to W | |||
nz (bottom) Aircraft with solid bottom n/a. Aircraft with light penetrating bottoms, tbd. | |||
[[File:C172p-cube.jpg|640px|Cube map layout of the c172p]] | |||
With Blender, it's pretty easy to create the cubemap. | |||
1. Add a camera where the cubemap will be. Set the FOV to 90 degrees. | |||
2. Set the resolution to 1024x1024 (or any other square, power-of-two size). | |||
3. Hide all lights and windows; disable ambient lighting (set it to black) and turn off ambient occlusion. | |||
4. Set the world color to white. | |||
5. Enable the compositor and add an invert node. | |||
6. Render and save the six views as you would normally. | |||
This process depends on the model setup but it should work for most aircraft with a few tweaks. | |||
== ALS fuselage shadow effect == | == ALS fuselage shadow effect == | ||
Revision as of 04:35, 18 March 2015
Quality level mapping
The rendering quality of ALS effects is controlled by two main sliders, landmass effects and transition effects. Transition effects regulate overlay texturing quality whereas landmass effects regulate all other aspects of procedural texturing like pixel color postprocessing (dust, snow or wet terrain effects) and apparent terrain roughness (bump and parallax mapping).
In addition, specific effects for certain terrain types (water, urban, forest, agriculture...) and models in the scene can be switched on separately. In some cases this may be needed for a consistent visual impression: If a dust effect is used on the terrain, water needs to be rendered using a separate water shader, otherwise it will appear dusty as well. Likewise, if the Rayleigh haze is used in the highest quality terrain effect, then the highest quality water effect needs to be used to see the same Rayleigh scattering effect on the water.
For technical reasons (landmass and transition control the same shader code) the settings are sometimes mutually dependent, i.e. transition quality level 6 won't have any effect unless landmass quality is also level 6.
Transition
The mapping of quality to visuals of the transition slider is
1:
- Base texture scheme
2:
- Alternative hires airport keep effect
3:
- Base and overlay texture, runway effect (if landmass > 4)
- Supports secondary lights on runway and airport keep
4:
- Base, overlay and hires texture
6:
- Base, overlay, hires, detail, grain, dot and rock texture (if landmass > 6)
Landmass
(Quality levels 1 and 2 are reserved to represent fixed pipeline rendering and the classic FG default renderer in an eventually merged rendering GUI, currently however ALS is switched on per checkbox and not by quality level, so they do not have a function).
3:
- ALS-rendered position-differential haze and light, moonlight
4:
- Procedural snow cover on terrain
- Procedural dust and vegetation effects
- Wet terrain effect with approximate reflection half vector
- Patchy fog distribution
5:
- Noise bump-mapping and parallax mapping of terrain
6: (requires transition 6 as well)
- Wet terrain effect with correct reflection half vector
- Hires bump mapping and snow patchiness
- Variable upper haze layer surface
- Rayleigh haze
- Secondary lights on all terrain types
- Slope line and strata effects
ALS secondary lights
The ALS framework supports a generic implementation of landing lights and a searchlight which are based on a framerate friendly computation in screen coordinates, i.e. the lights project correctly only if the light is close to the viewer (typically, that'd be from cockpit view). In other words, this is not a full (rather expensive) computation of light volumes as Rembrandt does it but a much faster test of illuminated screen areas.
Two landing lights and a searchlight are supported. The landing lights have a fixed position with respect to the aircraft axis (technically, with respect to the default view axis as defined in the respective view), whereas the searchlight follows any offset of the view axis in view mode, i.e. when using the mouse to look around, the searchlight will follow the motion, the landing lights will not. The lights require ALS to run above basic quality level and work on runway and airport keep above transition setting 3 and everywhere else only at highest quality setting. All lights are controlled via properties in /sim/rendering/als-secondary-lights/.
The names of the properties should be self-explanatory, if for instance if use-searchlight=true then the searchlight (which always follows the current view axis) is used.
The properties landing-light1-offset-deg and landing-light2-offset-deg allow to specify angular offsets for the landing light which are then not centered on the view axis. This can be used to simulate one or two landing lights set in the wings.
The lights can be switched on and off from the property browser for any aircraft without any modifications to the aircraft definition. Implementing them correctly aircraft side thus just involves linking the landing light switches to the ALS control properties and setting the correct angular offsets. Additionally, it is recommended to switch the lights off unless in a cockpit view, as they don't project correctly for any external view.
Range, color, light cone opening angle or intensity of the lights can currently not be configured, and there are no plans to support such a feature in the near future.
All three lights will illuminate fog (if dense enough) and precipitation.
The grain texture and the rain effect
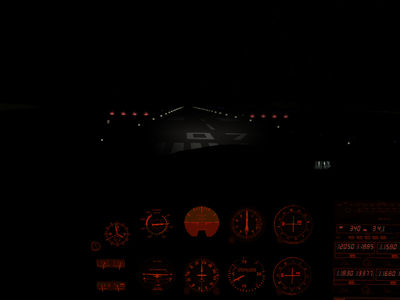
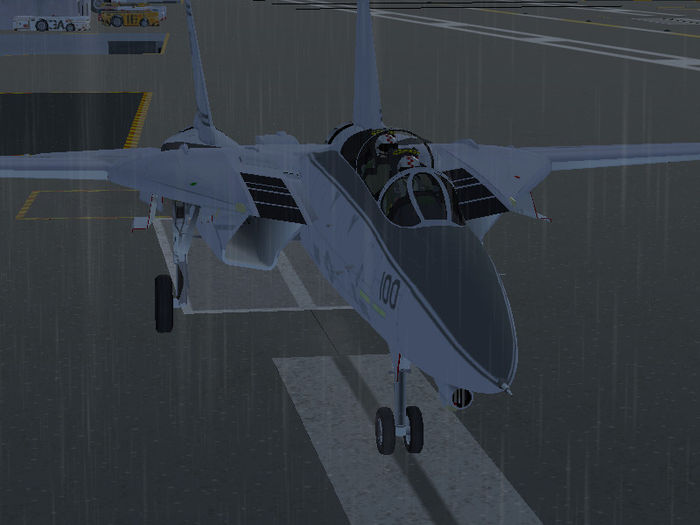
ALS supports a grain texture for models. This is a semi-transparent overlay texture that works just as its equivalent for terrain texturing and provides the option of generating cm-scale details such as rust or discoloration on a surface without having to use huge textures. An example of a surface rendered with grain texture is the Vinson flightdeck below:
This is done using the following effect declaration inheriting from model-combined-deferred.eff as
<?xml version="1.0" encoding="utf-8"?>
<PropertyList>
    <name>flightdeck</name>
    <inherits-from>Effects/model-combined-deferred</inherits-from>
    <parameters>
        <grain-texture-enabled type="int">2</grain-texture-enabled>
        <grain-magnification type="float">0.1</grain-magnification>
        <rain-enabled type="int">2</rain-enabled>
        <texture n="7">
            <image>Models/Geometry/Nimitz/rust_texture.png</image>
            <type>2d</type>
            <filter>linear-mipmap-linear</filter>
            <wrap-s>repeat</wrap-s>
            <wrap-t>repeat</wrap-t>
            <internal-format>normalized</internal-format>
        </texture>
    </parameters>
</PropertyList>
The grain texture has the number 7 and needs to be enabled by
<grain-texture-enabled type="int">2</grain-texture-enabled>
If the value is set to 1, the grain texture uses the uv-mapping of the underlying surface. If that is very irregular (as in the case of the Vinson flightdeck), alternatively the grain can be mapped in xy-model coordinates if the parameter is set to 2, the uv-mapping of the base texture layer is then discarded.
The resolution of the grain texture with respect to the base coordinate layer is specified by
<grain-magnification type="float">0.1</grain-magnification>
If the number is < 0, the grain resolution is lower than the base layer, if the parameter is > 0, it is higher (note that in the above case, the grain is mapped to (xy) rather than (uv), hence the base size is 1 m, so the grain texture is mapped on a 10x10 m patch on the flightdeck), for which a 1024x1024 pixel texture provides ~1 cm sized details).
Finally, any number greater than 0 passed to
<rain-enabled type="int">2</rain-enabled>
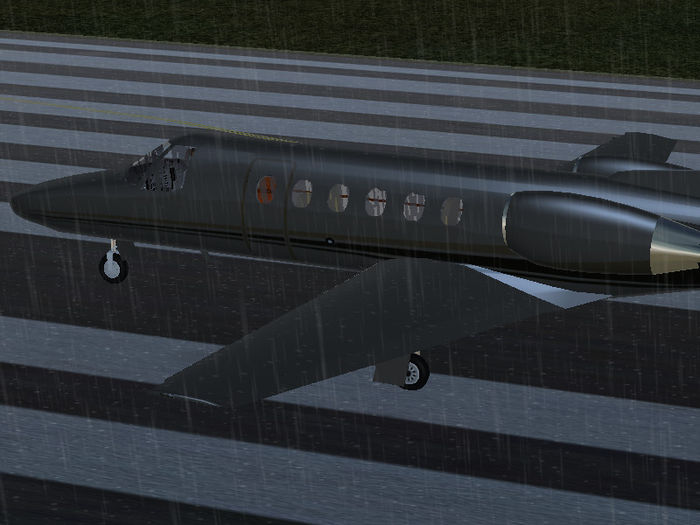
enables the splash effect of raindrops on the surface if it points upward. The surface does not have to be flat for this to work, the effect checks for the surface normal automatically, see the rain enabled for the Citation Bravo.
Thorsten noted about rain splashes: "Works fine here - runway needs to get really wet though before you see them (put the environment slider to max to achieve this quickly, it will take some waiting with just rain on)."
ALS glass effect
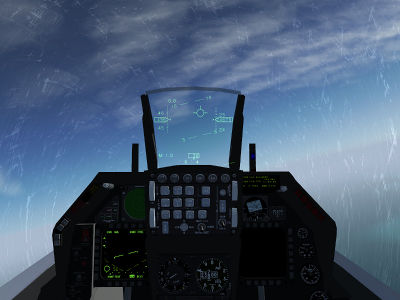
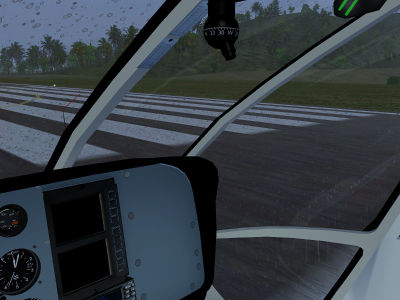
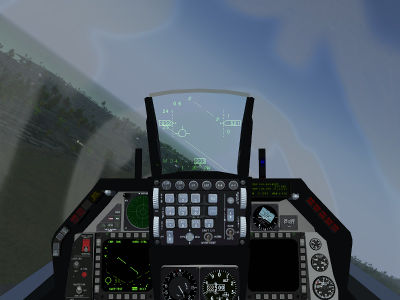
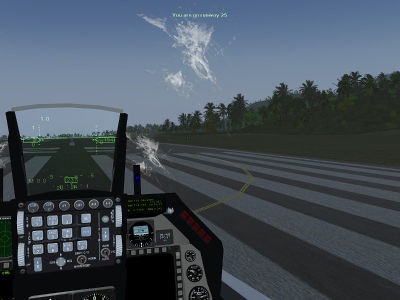
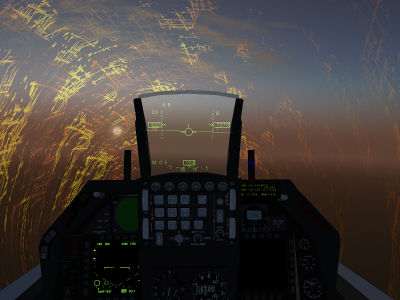
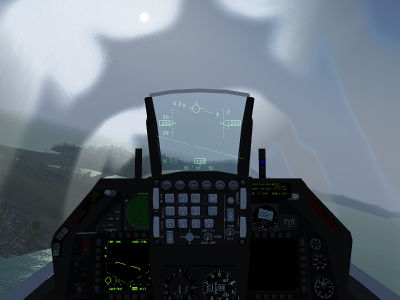
As of FlightGear version 3.5, ALS supports a glass effect with dynamic response to the environment which can render, for instance, the splashes of raindrops on the canopy, frost or fogging.
The base effect properties are controlled via inheritance and the environment response run-time via properties residing in Environment/aircraft-effects. Derived effects should inherit from Effects/glass.
The glass effect is primarily intended for interior views. In particular, no external fog or haze is rendered for the glass, i.e. if the effect is used in an outside view, it is the responsibility of the aircraft modeler to take care (e.g. with LOD settings or range animations) that no problems in bad visibility occur.
Internal cockpit reflection
There is support for a reflection of the cockpit interior. This needs to be provided as a cubemap specific for the airplane and switched on via the flag <use-reflection> set to 1. The relative strength of the reflection can be optionally via <reflection-strength>. The strength of the reflection in the cockpit is dynamically adjusted for a number of factors, among them balance of direct to indirect light, the approximate amount of light falling on the surface seen in the reflection and the amount of direct sunlight falling into the eye.
If the six cubemap faces are called my_cube_map_??.png, then the xml to use for the inheritance looks like this:
	<texture n="3">
		<type>cubemap</type>
		<images>
			<positive-x>my_cube_map_px.png</positive-x>
			<negative-x>my_cube_map_nx.png</negative-x>
			<positive-y>my_cube_map_py.png</positive-y>
			<negative-y>my_cube_map_ny.png</negative-y>
			<positive-z>my_cube_map_pz.png</positive-z>
			<negative-z>my_cube_map_nz.png</negative-z>
		</images>
		</texture>
               <use-reflection type="int">1</use-reflection>
               <reflection-strength type="float">1.0</reflection-strength>
Rain
Rain splashes will render automatically when the weather system reports rain via environment/rain-norm. In addition, the user can set rain splashes to render via environment/aircraft-effects/ground-splash-norm (this is intended to allow splashes to be rendered e.g. for water landings of aircraft equipped with floats).
By default, the rain splashes impact from above (more precisely the +z direction in model coordinates). This may be inadequate if the aircraft is moving. However, the shader can not know what the airstream at the glass will be, so the impact vector of rain splashes has to be modeled aircraft-side and set via environment/aircraft-effects/splash-vector-x (splash-vector-y, splash-vector-z). These are likewise in model coordinates.
As long as the length of the splash vector is <1, just the impact angle will change, as the length of the vector increases to 2, droplets will also be visibly moving. This allows fine control of the visuals dependent on any number of factors desired. A simple Nasal snipped varying the splash vector with airspeed for the F-16 is given below (do not mindlessly copy and expect to work for any aircraft - it won't!)
var splash_vec_loop = func {

var airspeed = getprop("/velocities/airspeed-kt");

# f16
var airspeed_max = 120;

if (airspeed > airspeed_max) {airspeed = airspeed_max;}

airspeed = math.sqrt(airspeed/airspeed_max);

var splash_x = -0.1 - 2.0 * airspeed;
var splash_y = 0.0;
var splash_z = 1.0 - 1.35 * airspeed;


setprop("/environment/aircraft-effects/splash-vector-x", splash_x);
setprop("/environment/aircraft-effects/splash-vector-y", splash_y);
setprop("/environment/aircraft-effects/splash-vector-z", splash_z);

settimer( func {splash_vec_loop() },1.0);
}
Note the timing constant of the loop - running the update per-frame leads to a spurious movement of the coordinate system in which rain is rendered and spoils the effect.
Frost and fogging
Frost on the canopy is rendered when environment/aircraft-effects/frost-level is set in the range from 0 to 1. Again, it is up to the aircraft developer to decide at what exterior conditions frosting should happen and whether the aircraft is equipped with heating to remove the frost again.
Fogging is controlled by environment/aircraft-effects/fog-level in the range 0 to 1. Unless a mask is used, fogging is homogeneous across the whole surface (it is really intended to be used with a mask).
Tint
Tinted glass can be easily created by changing
<glass-tint type="vec4d" n="0"> 1.0 1.0 1.0 1.0</glass-tint>
to any value desired. This will affect all effects assumed outside of the glass layer (frost and rain splashes) but not fogging inside the glass. Use primarily for development and quick tests, don't misuse the alpha value available here, it has odd side effects.
Functional masks
If the glass surface is uv-mapped and textured, it is possible to switch on a mask functionality in the inheritance via
<texture n="2">
	<image>my_mask.png</image>
	<type>2d</type>
	<filter>linear-mipmap-linear</filter>
	<wrap-s>clamp</wrap-s>
	<wrap-t>clamp</wrap-t>
	<internal-format>normalized</internal-format>
</texture>
<use-mask type="int">1</use-mask>
<overlay-color type="vec3d" n="0">1.0 1.0 1.0</overlay-color>
The red channel in my_mask.png controls the strength of fogging, full red corresponds to maximal fogging, no red to zero fogging. This allows to selectively model the position of heaters in the cockpit.
The green channel of my_mask.png is the amount of reduction of rain in an area. This is intended for airplanes equipped with windshield wipers to partially clear the wiped area of the rain. Whether the windshield wiper is actually on or not is controlled runtime via /environent/aircraft-effects/use-wipers.
The blue channel of my_mask.png is reserved for an overlay pattern which will be drawn in an optionally specified <overlay-color> vector (white in the example xml above) - the primary function is to render damage on the glass, but with a different color, also dirt or an alternative more finely controlled frost pattern can be used. The strength of the pattern can be adjusted runtime via /environment/aircraft-effects/overlay-alpha, allowing dynamical accumulation of dirt or sudden appearance of damage.
Examples for the result of a fog mask and a damage mask are shown below:
Mie scattering
Most glass effects show prominent Mie forward scattering as in reality, i.e. frost patterns or fogging will appear much more prominent when looking almost towards the sun than under any other angle. While the frost pattern is normally not very prominent and one is able to look through unhindered, this changes substantially when looking into the sun, at which point it almost obscures the view.
Interior shading
With FlightGear version 3.5 and above, ALS now supports interior shading; i.e. the sun shining through the windows and casting shadows on the panel. This is typically created in an effect file such as
c172-interior.eff
which is called by inheritance in the model.xml file.
ie:
<effect>
   <inherits-from>Aircraft/c172p/Models/Effects/c172p-interior</inherits-from>
   <object-name>Plane.010_0</object-name>
   <object-name>Plane.010_1</object-name>
   <object-name>PilotSeat</object-name>
   <object-name>CopilotSeat</object-name>
   <object-name>panel_1_1</object-name>
   <object-name>InstrumentCover.001</object-name>
   <object-name>doorint_right</object-name>
   <object-name>doorint_left</object-name>
   <object-name>doorhandleint_right</object-name>
   <object-name>doorhandleint_left</object-name>
   <object-name>Panel_0</object-name>
   <object-name>Throttle</object-name>
   <object-name>Mixture</object-name>
   <object-name>Pedestal</object-name>
   <object-name>TrimWheel</object-name>
   <object-name>ParkingBrake</object-name>
   <object-name>BackSeat</object-name>
   <object-name>FuelSelectorFace</object-name>
 </effect>
Each object that you want the shadow effect to fall on must be included in the inheritance.
Unless you supply a path, the cube_.png's need to reside in the same directory as the model.xml where you added the <effect> tag pair that calls c172-interior.eff, not where you put the aircraft_interior.eff.
The orientation of the faces of each cube have to be adjusted based on the positive and negative axis of the model.
For example, using the c172p model as a reference.
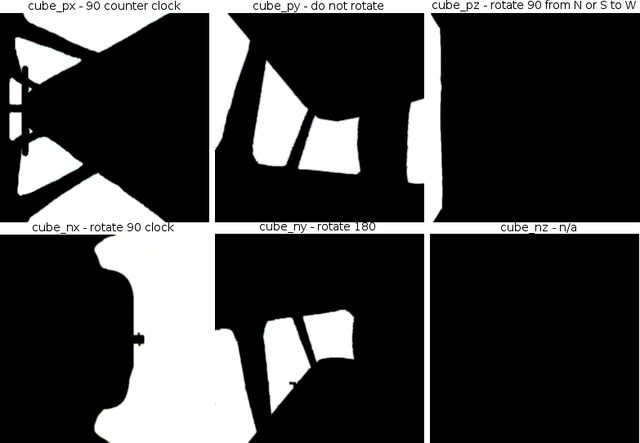
The tail, right wing and top on the model are positive inside Blender. So the cube faces are laid out as follows.
Note: depending on the image's orientation when photographed the rotation direction will vary. Using compass headings to describe how to rotate the images.
px (tail) rotate 90 deg from N or S to W
nx (nose) rotate 90 deg from N or S to E
py (starboard/right) from N do not rotate
ny (port/left) from N rotate 180 deg to S
pz (top) rotate 90 deg from N or S to W
nz (bottom) Aircraft with solid bottom n/a. Aircraft with light penetrating bottoms, tbd.
With Blender, it's pretty easy to create the cubemap.
1. Add a camera where the cubemap will be. Set the FOV to 90 degrees. 2. Set the resolution to 1024x1024 (or any other square, power-of-two size). 3. Hide all lights and windows; disable ambient lighting (set it to black) and turn off ambient occlusion. 4. Set the world color to white. 5. Enable the compositor and add an invert node. 6. Render and save the six views as you would normally.
This process depends on the model setup but it should work for most aircraft with a few tweaks.
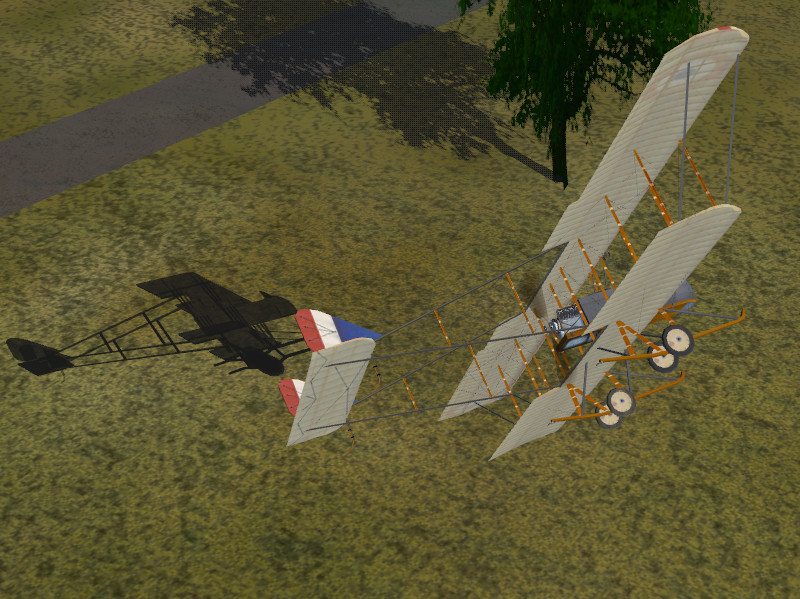
ALS fuselage shadow effect
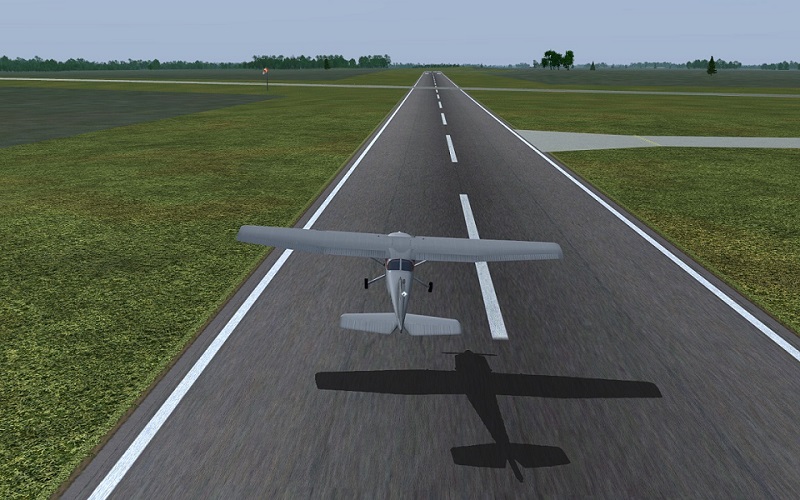
ALS supports the manipulation of a (simplified) ground shadow. This effect uses an existing simplified shadow animation configuration and by default uses the gear-agl-m property to calculate the ground placement of that simplified shadow.
The effect can be applied easily in any aircraft that report the gear-agl-m property by simply adding a declaration inheriting from shadow.eff.
If the aircraft does not support the gear-agl-m property, (notably JSBSim), you need to create a Property Rule to pass a supported AGL data to the gear-agl-m property. In this case we use altitude-agl-ft converted to meters using a property rule configuration file.
For the first example we'll use the "supported gear-agl-m" method for aircraft that don't require a property rule.
Simply add the following inheritance declaration after you declare your shadow animation statement.
<effect>
    <inherits-from>Effects/shadow</inherits-from>
    <object-name>name_of_the_shadow_object</object-name>
</effect>
In the non-ALS simplified shadow code you normally use a "translate" animation to position the shadow on the ground. When using the ALS method you must either remove, comment out, or apply a condition to restrict its use to non ALS shadow applications, because ALS is responsible for computing the shadows ground position.
Here is how we apply a condition to the translation to limit it effect to non-ALS application only.
<!--Translate to ground level  -->
  <animation>
   <type>translate</type>
   <object-name>shadow</object-name>
   <condition>
    <not>
      <property>/sim/rendering/shaders/skydome</property>
    </not>
   </condition>
   <property>/position/altitude-agl-ft</property>
   <factor>-0.3048</factor>
   <center>
     <x-m>0</x-m>
     <y-m>0</y-m>
     <z-m>0</z-m>
   </center>
   <axis>
     <x>0</x>
     <y>0</y>
     <z>1</z>
   </axis>
 </animation>
A complete shadow animation block looks like this.
<PropertyList>

  <animation>
    <!-- opaque objects -->
    <!-- transparent objects -->
    <object-name>shadow</object-name>
    <type>select</type>
    <condition>
      <not>
        <property>/sim/rendering/rembrandt/enabled</property>
      </not>
    </condition>
  </animation>

  <effect>
    <inherits-from>Effects/shadow</inherits-from>
    <object-name>shadow</object-name>
  </effect>

  <animation>
    <type>noshadow</type>
    <object-name>shadow</object-name>
  </animation>

  <!-- pitch -->
  <animation>
    <type>rotate</type>
    <object-name>shadow</object-name>
    <property>/orientation/pitch-deg</property>
    <factor>-1.0</factor>
    <center>
      <x-m>0</x-m>
      <y-m>0</y-m>
      <z-m>0</z-m>
    </center>
    <axis>
      <x>0</x>
      <y>1</y>
      <z>0</z>
    </axis>
  </animation>

  <!-- roll -->
  <animation>
    <type>rotate</type>
    <object-name>shadow</object-name>
    <property>/orientation/roll-deg</property>
    <factor>1.0</factor>
    <center>
      <x-m>0</x-m>
      <y-m>0</y-m>
      <z-m>0</z-m>
    </center>
    <axis>
      <x>1</x>
      <y>0</y>
      <z>0</z>
    </axis>
  </animation>

  <!--Translate to ground level  -->
  <animation>
   <type>translate</type>
   <object-name>shadow</object-name>
   <condition>
    <not>
      <property>/sim/rendering/shaders/skydome</property>
    </not>
   </condition>
   <property>/position/altitude-agl-ft</property>
   <factor>-0.3048</factor>
   <center>
     <x-m>0</x-m>
     <y-m>0</y-m>
     <z-m>0</z-m>
   </center>
   <axis>
     <x>0</x>
     <y>0</y>
     <z>1</z>
   </axis>
  </animation>

</PropertyList>
For aircraft requiring a Property Rule there are a couple extra steps.
In aircraft-set.xml you add the property rule call to the "configuration file" in between the PropertyList/sim/systems tag pairs.
<property-rule n="101">
  <name>gear_agl-m</name>
  <path>Aircraft/c172p/Systems/gearAGL.xml</path>
</property-rule>
Note: the n="101" needs to be =+100 as -100 is reserved for system wide property rules. In the above example 101 was used because 100 was already being used by a previous property rule definition.
The "configuration file" normally goes in /Systems. In this example we named the configuration file /Systems/gearAGL.xml.
Here is the complete /Systems/gearAGL.xml configuration file.
<?xml version="1.0"?>

<PropertyList>
  <filter>
    <type>gain</type>
    <gain>0.3048</gain>
    <input>/position/altitude-agl-ft</input>
    <reference>6</reference>
    <output>/position/gear-agl-m</output>
  </filter>
</PropertyList>
What the configuration file does is convert the input of altitude-agl-ft to the output of (((altitude-agl-ft)-6)*0.3048) or (convert ft-6 to m) and pass it to /position/gear-agl-m.
See Input and reference properties or values <input> and <reference>.
General comments from forum discussion
| It works with anything that sets a property how far the gear is off the ground - it works with your home-made Nasal FDM if you like... |
ALS 3d shadow volume effect
What might be considered the next level of realism using a relatively "cheap" shadow effect is to use a 3d volume shadow.
The procedure to implement the ALS shadow volume is similar to the ALS-shadow above with a few modifications.
First you have to have a 3d shadow volume model of the aircraft you are applying the effect to. This model should be a low poly model that is optimized to be as little of a footprint as possible.
A property rule is required, same as above. This is used to generate the above ground altitude in meters, (altitude-agl-m). The "altitude-agl-m" is used to place the shadow close to the ground in real time at an FDM rate of execution. NOTE: Do not confuse "altitude-agl-m" with the other type of non-3d ALS-shadow property of "gear-agl-m". The shaders involved use these two different properties respectively for the two different effect. They are not interchangeable.
<?xml version="1.0"?>
<PropertyList>
   <filter>
      <type>gain</type>
      <gain>0.3048</gain>
      <input>/position/altitude-agl-ft</input>
      <reference>1.0</reference>
      <output>/position/altitude-agl-m</output>
   </filter>
</PropertyList>
The other difference from the ALS-shadow above is that it uses a different inherited effect. Instead of
<effect>
    <inherits-from>Effects/shadow</inherits-from>
    <object-name>shadow</object-name>
 </effect>
you use
<effect>
    <inherits-from>Effects/shadow-vol</inherits-from>
    <object-name>shadow</object-name>
  </effect>
