AC3D file format: Difference between revisions
m (wiki links + images lifted, to remove long empty space at bottom of article | Great article D-79!!) |
No edit summary |
||
| Line 35: | Line 35: | ||
<tt>trans 0</tt> | <tt>trans 0</tt> | ||
: With transparency it get really interesting again. Make things transparent, even without using a [[Textures & Texture Maps in SketchUp|texture]]. | : With transparency it get really interesting again. Make things transparent, even without using a [[Textures & Texture Maps in SketchUp|texture]]. | ||
===Textures=== | |||
Texture lines are found anywhere throughout the AC file and look like this: | |||
<tt>texture "livery.rgb"</tt> | |||
: If you have defined this texture and now you are unhappy with it, simply change the file name and the model will use the new texture. For example, if you now want to use a PNG version of this texture, change the line into <tt>texture "livery.png"</tt>. If you want to use a different texture altogether, give it the respective name like <tt>texture "thenewtexture.rgb"</tt>. See also [[SketchUp to AC3D exporter#PNG adaption|here]]. | |||
[[Category:Howto|AC files: Understanding and changing .ac code]] | |||
[[Category:Scenery enhancement|AC files: Understanding and changing .ac code]] | |||
[[Category:Howto|AC files: Understanding and changing .ac code]] | [[Category:Howto|AC files: Understanding and changing .ac code]] | ||
[[Category:Scenery enhancement|AC files: Understanding and changing .ac code]] | [[Category:Scenery enhancement|AC files: Understanding and changing .ac code]] | ||
Revision as of 19:47, 14 July 2009
Ac files (extension .ac) are the basis of all scenery and aircraft models in FlightGear. Knowing how to read and change an AC file can be useful sometimes, e.g. when you quickly want to change a color or use another texture. This article shows you how to modify the material and texture entries.
Materials
When you open an AC file in a text editor, you will see a number of material lines like this:
MATERIAL "default" rgb 0.5 0.5 0.5 amb 0.4 0.4 0.4 emis 0 0 0 spec 0.2 0.2 0.2 shi 128 trans 0
This line defines the material default for all poly structures that use this material. It is the default color of .ac files produced by the SketchUp to AC3D exporter.
We will now go through that line bit by bit:
rgb 0.5 0.5 0.5
- Color: This material is medium grey. Red Green Blue (of which the color is composed) are all medium strong. rgb 0 0 0 is black, rgb 1 1 1 is white. Mix to your needs. In the example to the right, red and green make yellow.
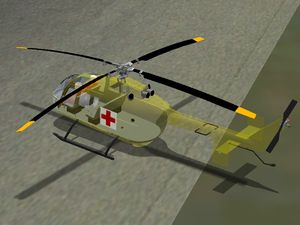
- The examples have been made with the Bo105 material dialog (when using the model, press Ctrl-Y to open it). Of course you can make them in the AC file as well: Open, edit, save, done.
- Most common rgb setting for textures is 1 1 1, which shows the colors on the texture excactly as they were drawn.
amb 0.4 0.4 0.4
- Ambient: The ambient is the color of the light that falls indirectly onto the material, i.e. the reflection of sunlight is (almost) not affected. In the example to the right, I have changed the ambient (not the color) to full blue.
- As of FlightGear CVS, the amb setting should duplicate the rgb one.
emis 0 0 0
- Emission makes things glow. Here, I have set the emission to full red and nothing else. In total dark, the model shines red only, in light it is yellow and red.
spec 0.2 0.2 0.2
- Specular means the reflection of light that comes from the viewer, i.e. the color of light that comes from you and goes back to you. In other wprds, here you set the color for mirror-like reflections. In the example, specular is set to full green.
shi 128
- Shi seems to stand for shininess, but with that I'm not sure, sorry. Try yourself (no example, of course).
trans 0
- With transparency it get really interesting again. Make things transparent, even without using a texture.
Textures
Texture lines are found anywhere throughout the AC file and look like this:
texture "livery.rgb"
- If you have defined this texture and now you are unhappy with it, simply change the file name and the model will use the new texture. For example, if you now want to use a PNG version of this texture, change the line into texture "livery.png". If you want to use a different texture altogether, give it the respective name like texture "thenewtexture.rgb". See also here.


