Howto:Add smooth ("Ambient Occlusion") shadows in Blender
Normally, when we think of shadows, we mean the projection of an object caused by light (e.g. sun) beams being obstructed by that object. But in fact we also get shadows where less ambient light hits a surface, that is: light that doesn't come just from one direction, but from multiple directions due to reflection and dispersion. Because these smooth shadows are largely independent of any particular light source and direction, the effect can be pre-rendered to the texture. The technique usually used for this is called Ambient Occlusion (AO).
As an example, we'll add ambient shadows to Emmanuel Baranger's Couzinet 70. Our Blender version will be 2.46.
Importing the aircraft
Go to directory $FG_ROOT/Aircraft/couzinet70/Models/ and start blender from there. Import the model via menu: "File -> Import -> AC3D (*.ac) ..."
Setting up a "world"
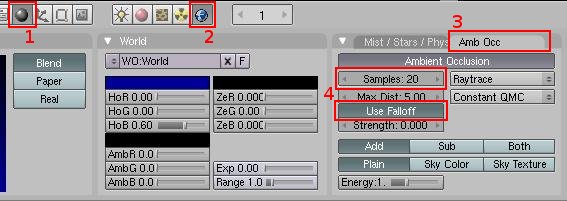
First we need a "world". Switch to "Shading Mode" by pressing the sphere button or the F5 key:
and switch to the "World Buttons" view by pressing the globe button:
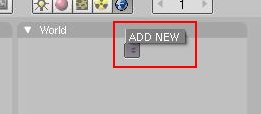
In the "World" tab press the arrow button and select "ADD NEW" from the popup dialog:
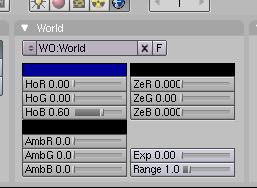
The tab is now populated with adjustment controls, which you can safely ignore. The defaults are just fine. Play with that later if you are out for an adventure.
Setting up the AO baking tab
Switch the button panel to "Scene" view by pressing the landscape button or the F10 key:
Activate the "Bake" tab:
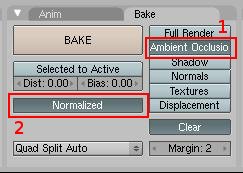
And in it activate the "Ambient Occlusion" button, and then the appearing "Normalized" button. It will make sure that the AO texture makes use of the full range from white to black. Leave the rest as it is:
Setting up the UV/Image Editor view
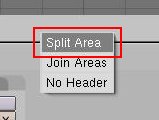
Now right-click on the 3D-View's lower border, and from the popup select "Split Area", then move the split line to the middle.
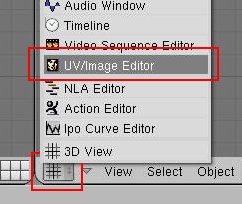
Switch the right view to "UV/Image Editor" view:
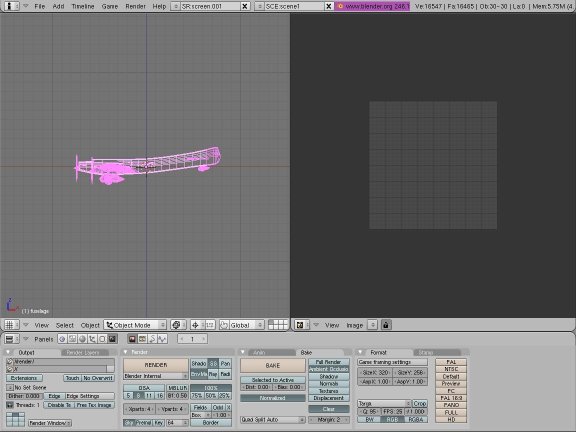
Your Blender window should now look something like this:
Baking the AO texture
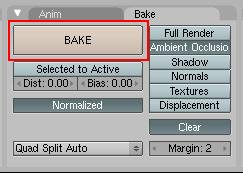
We can now start with rendering the AO texture. In the "Bake" tab that we've set up before, press the "BAKE" button:
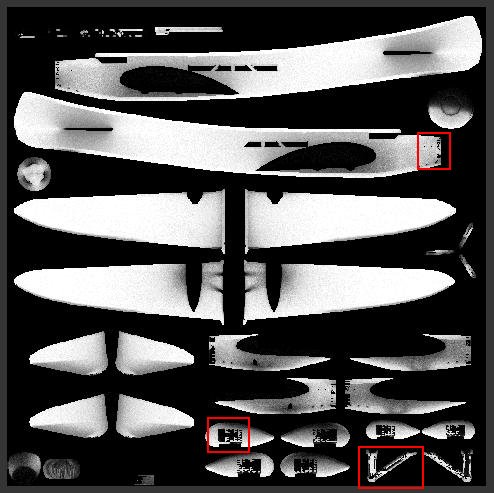
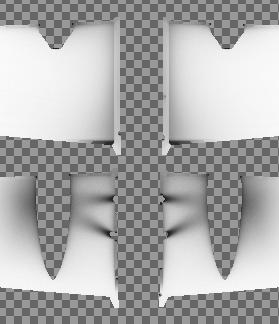
You can now watch in the "UV/Image" view how the Ambient Occlusion texture gets drawn, piece by piece. This can take a while, as it's done after a ray-tracing principle. You may have to adjust the zoom level of the UV/Image view. When finished, the texture will look like this (without the red rectangles):
We can work around a few of the problems, indicated by red rectangles. Others we have to fix by retouching the final texture. One of the causes of rendering artifacts are the couzinet70's wheel wells -- the inner part of the gear housing. We can just select all of their faces and remove them (x-key -> "Faces"). Remember: we are only going to export the finished texture, but we won't export the model, so we can manipulate the model as much as we want. We will also deselect all objects that shouldn't really take part in the AO rendering, such as propeller disks or glass. Doing the opposite works well, too: deselect all objects and select one fuselage object, followed by "Select -> Linked -> Material", then one wing object and again "Select -> Linked -> Material", etc.
Tweak the model and render an AO texture as often as necessary until you are happy. After these quick but low-quality passes turn up the quality level for the final texture. Switch again to "Shading" (F5) and "World Buttons", and select the "Amb Occ" tab. Increase the "Samples" value and "Use Falloff". Now "RENDER" again. This time it will take much longer, but the quality of the generated texture will be very high. It won't be grainy at all!
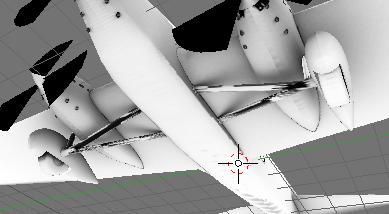
You can see the result in the "3D View" when you press Alt-z:
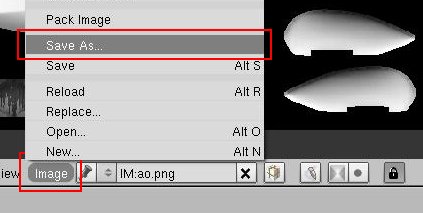
Unfortunately, the gear struts don't look too good. That happens when you have multiple faces assigned to the same part of the texture. You can fix it in the model, or you can fix it in some image editing program when editing the texture. Finally, save the texture to the disk, let's say under name ao.png:
Note, how we fixed the gear housing artifacts by removing the interior of the wheel wells!
Merging the AO texture as layer into the master texture, and post-processing
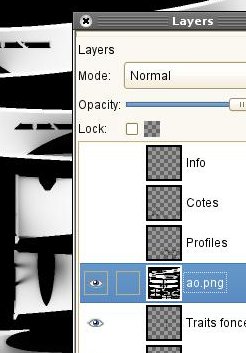
Now we continue with The Gimp (The Gimp). Open the compressed master texture "texture.xcf.gz" with it. (You don't have to uncompress it first.) In the menu select "File -> Open as layers ..." and load the ao.png texture that we just saved from Blender. Open the "Layers" window with Ctrl-L.
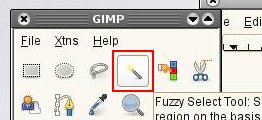
We have to do two things: remove the black areas, and make everything white transparent. For that, select the "Fuzzy Select" tool and click on any black spot on the AO texture.
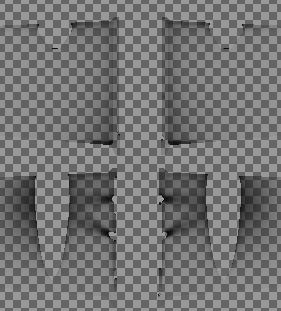
Then press Ctrl-x to remove all black parts. We get something like this:
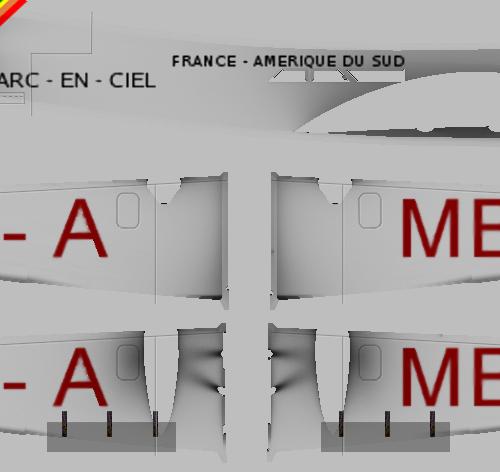
Now select white color and choose from the menu "Layer -> Transparency -> Color to alpha ...". You get this:
After doing some retouching and enabling the interesting layers, you get something like this:
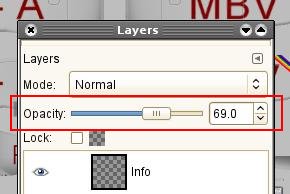
If the AO parts happen to be too dark, reduce the layer opacity in the "Layers" dialog:
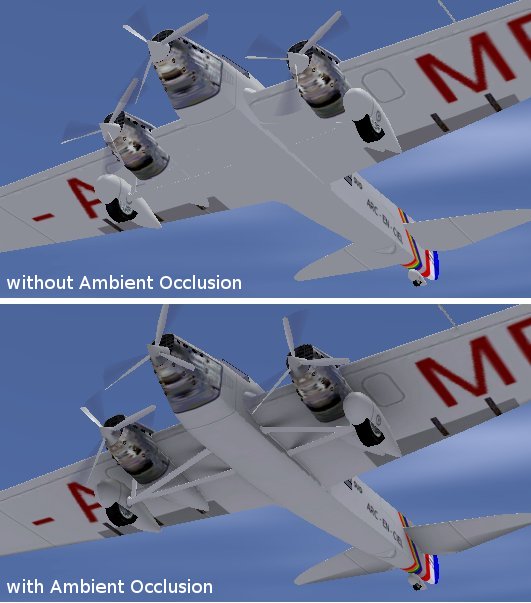
Finally export all interesting layers to a PNG image. Let's look at our result in FlightGear:
You may recognize the upper part as the traditional FlightGear look. You can't even see the gear struts here, while in the "Ambient Occlusion" enhanced lower part you actually see details.
Caveats
Moving parts
An ambient occlusion texture is a (static) snapshot of an object. One has to consider in which position moving objects should be during rendering. A retractable landing gear might be good in extended position, but its door should probably be in closed position. It may be necessary to render several textures, and to pick parts of all. Also consider a drop tank: once dropped it shouldn't leave its shadow behind, so better avoid that shadow on the aircraft.
Ideal UV-map organization
Generating AO textures is easiest if all painted parts of an aircraft are on only one texture. This also makes livery switching easier. Only symmetrical parts of objects can share a region on the texture. It's recommended to avoid even that, as this makes livery contributions easier. Think of irregular camouflage pattern, which shouldn't come out symmetrically.
AO shadows and "real" shadows
These are two separate effects and can really exist at the same time. But if the sun shines directly on an "ambient occluded" region, then we'd still expect that the ambient shadow fades out. The light is then so much more intensive that the eye pupil closes and, thus, compresses the dynamic range of the ambient shadows. We can't compensate for that in FlightGear at the moment. It's therefore recommended to not make the AO shadows too dark. The example in this tutorial is rather dark for demonstration.
| ||||||||||||||||||||


